Love this? Save it for later!
Share the inspiration with your friends
I wasn’t expecting baking advice from my accountant, but there I was, sitting in his cluttered office during tax season, watching him sketch a turkey on a napkin. “You make cookies, right?” he asked, sliding the napkin across his desk. It was mid-April—months before Thanksgiving—and I was buried in receipts, not recipe ideas. But the drawing was unmistakable: a round cookie body, candy corn feathers fanning out like a peacock’s tail, and little candy eyes staring up at me. Honestly, I laughed out loud. My accountant, Mr. Patterson, a man who speaks exclusively in spreadsheets and tax deductions, had just handed me the most adorable cookie idea I’d ever seen.
“My wife makes them for the kids every year,” he said, shrugging like it was no big deal. “They disappear in about five minutes.” I folded that napkin carefully into my bag, and let me tell you, I thought about those turkey cookies all the way home. I mean, who expects baking inspiration from someone whose job involves auditing? But that’s the thing about recipes—they show up in the strangest places. You know that feeling when something so simple and clever hits you out of nowhere? That was this cookie.
A few weeks later, I finally tried making them. My first batch? A total mess. The candy corn kept sliding off the frosting, and one turkey looked like it had been through a windstorm. But I kept tweaking, and now these turkey cookies are my go-to Thanksgiving treat. They’re the kind of thing that makes people stop mid-conversation and say, “Wait, you made those?” And honestly, that never gets old. Maybe you’ve been there—looking for a holiday project that’s fun, not fussy. These cookies are exactly that.
Why You’ll Love This Recipe
Let me tell you why these turkey cookies have earned a permanent spot in my Thanksgiving rotation. After testing this recipe about six times (and eating way too many test batches), I can confidently say this is the version you’ll want to make.
- Quick & Easy: These come together in under 45 minutes, start to finish. Perfect for last-minute Thanksgiving prep or when the kids suddenly announce they want to “help bake something.”
- Simple Ingredients: No fancy grocery trips needed. You likely already have sugar cookies, frosting, and candy corn in your pantry. If you’re like me, you bought extra candy corn “just in case” back in October.
- Perfect for Thanksgiving: These are great for classroom parties, Friendsgiving gatherings, or as a fun activity while the turkey roasts. Kids and adults both get a kick out of them.
- Crowd-Pleaser: I’ve brought these to three different gatherings now, and they always get rave reviews. People take pictures before they eat them—that’s how you know you’ve got a winner.
- Unbelievably Adorable: The texture and flavor combo is next-level comfort food. Soft cookie, creamy frosting, and that sweet crunch of candy corn. It’s a texture party in your mouth.
What makes this recipe different from the rest? It’s the technique I figured out after my early failures. Instead of trying to stick candy corn directly onto frosting, I use a small dab of melted chocolate as “glue.” It holds everything in place perfectly, even when you’re transporting these cookies to a party. This isn’t just another turkey cookie recipe—it’s my best version, tested and approved by a room full of skeptical adults at a potluck.
This recipe is the kind that makes you close your eyes after the first bite. It’s comfort food reimagined—cute enough for kids, but tasty enough that adults sneak seconds. Perfect for impressing guests without stress, or turning a simple afternoon into something memorable.
What Ingredients You Will Need
This recipe uses simple, store-bought ingredients to deliver maximum cuteness and flavor without the fuss. I’ve tested these with different brands, so I’ll share what works best.
- For the Cookie Base:
- 1 package (16 oz) refrigerated sugar cookie dough (I prefer Pillsbury for consistent texture)
- Or 1 batch of your favorite homemade sugar cookie recipe (about 2 dozen cookies)
- All-purpose flour (for dusting, if making from scratch)
- For the Frosting:
- 1 can (16 oz) vanilla frosting (store-bought is fine, or make your own)
- 2-3 tablespoons milk (adds spreadability, use dairy-free if needed)
- Brown food coloring (for that turkey body color)
- Orange food coloring (for the beak and feet, optional)
- For the Turkey Decorations:
- 1 bag (about 1 cup) candy corn (the classic fall candy, look for fresh bags for best color)
- 1 bag (about 1 cup) candy eyes (found in baking aisle, or use mini chocolate chips)
- 1/4 cup melted chocolate chips or melting wafers (I use Ghirardelli for smooth melting)
- Red candy melts or red frosting (for the wattle—that red dangly bit under the beak)
- Orange candy melts or orange frosting (for the beak)
- Optional Add-ins:
- 1/2 cup mini chocolate chips (for speckled turkey texture, adds visual interest)
- 1/4 cup sprinkles (fall colors like orange, brown, and gold for extra sparkle)
- Pretzel sticks (broken in half, for turkey legs—super cute!)
Ingredient Selection Tips: Look for candy corn that’s fresh—older bags tend to be dry and crumbly. I’ve found that Brach’s candy corn holds up best for decorating. For the cookies, I actually prefer using store-bought dough for this recipe because it’s consistent and saves time. If you’re making homemade dough, chill it for at least 30 minutes before rolling to prevent spreading.
Substitution Guidance: Use gluten-free sugar cookie dough if needed—I’ve tested this with Sweet Loren’s brand and it works great. Swap vanilla frosting with dairy-free coconut frosting for a vegan option. No candy eyes? Use mini chocolate chips or black icing dots instead. The recipe is forgiving, so don’t stress if you’re missing something.
Equipment Needed
You don’t need fancy equipment for these turkey cookies, which is part of why I love this recipe. Here’s what you’ll need:
- Baking sheets (2, if possible, to speed up the process)
- Parchment paper or silicone baking mats (I prefer silicone mats—they’re reusable and prevent sticking perfectly)
- Round cookie cutter (2.5 to 3 inches in diameter, or use a drinking glass rim)
- Cooling rack (wire rack works best for even cooling)
- Spatula (offset spatula is ideal for moving warm cookies)
- Small piping bags or zip-top bags (for precise frosting application)
- Toothpicks (for placing tiny decorations)
- Small microwave-safe bowl (for melting chocolate)
- Plate or tray (for arranging finished turkeys)
If you don’t have a round cookie cutter, don’t worry. I’ve used the rim of a drinking glass plenty of times—just dip it in flour first to prevent sticking. For the piping bags, I actually prefer using small zip-top bags with a tiny corner snipped off. They’re cheaper and easier to clean up. And here’s a tip I learned the hard way: use a plate that fits in your refrigerator for setting the decorated cookies. It makes a huge difference when the frosting needs to firm up.
Preparation Method
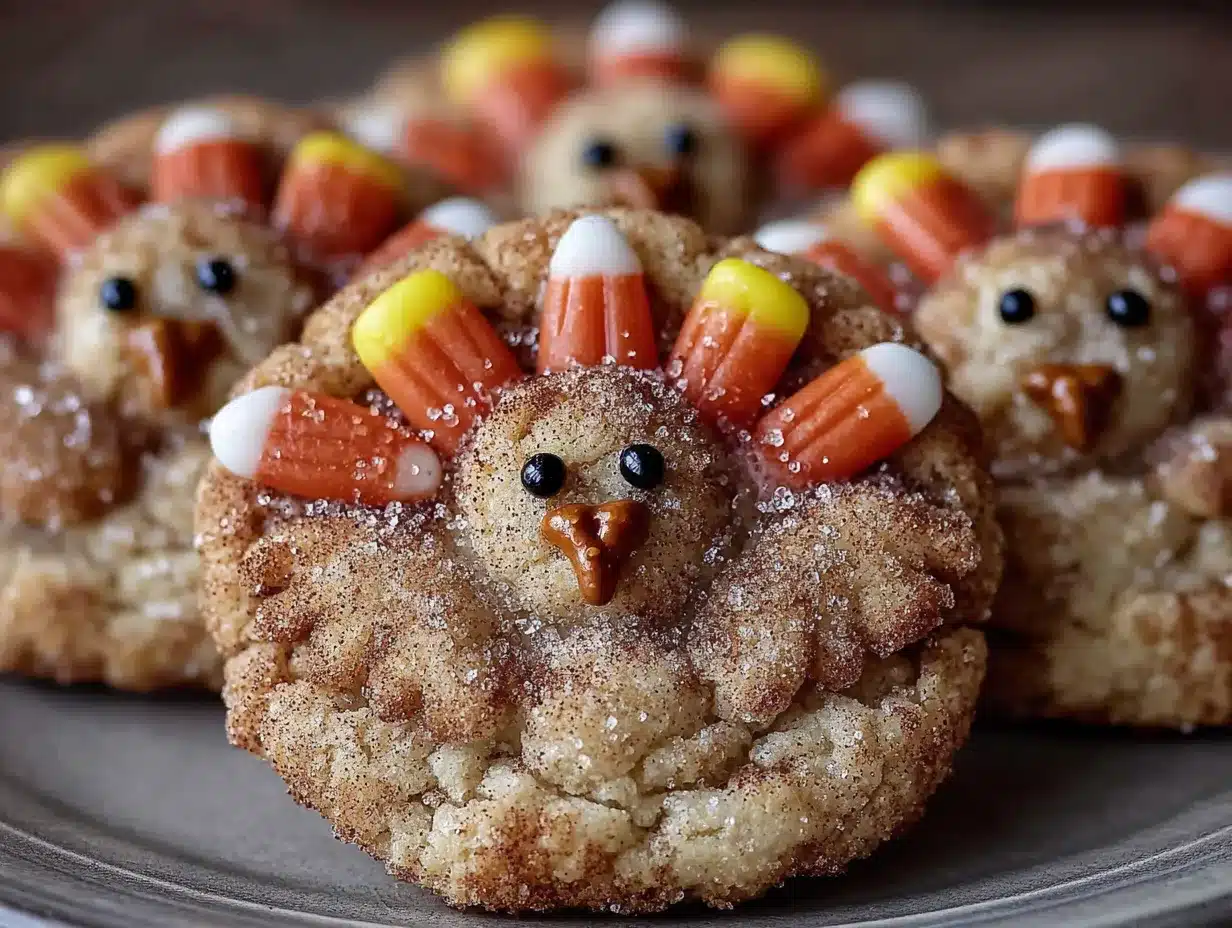
Let me walk you through this step by step. I’ve included all the little details that make the difference between “cute” and “oh my gosh, did you really make those?”
- Preheat and Prep (5 minutes): Preheat your oven to 350°F (175°C). Line two baking sheets with parchment paper or silicone mats. If you’re using store-bought dough, let it sit at room temperature for about 5 minutes to soften slightly—it makes rolling easier.
- Make the Cookie Base (15 minutes): Roll out your sugar cookie dough to about 1/4-inch thickness on a lightly floured surface. Use your round cookie cutter to cut out circles. Place them about 2 inches apart on the prepared baking sheets. Pro tip: if the dough gets too soft, pop it in the fridge for 5 minutes. I learned this after my first batch spread into weird oval shapes.
- Bake the Cookies (8-10 minutes): Bake for 8-10 minutes, or until the edges are just barely golden. The centers should look set but not brown. Let them cool on the baking sheet for 3 minutes, then transfer to a wire rack to cool completely. Don’t skip this cooling step—warm cookies will melt your frosting into a sad puddle. I speak from experience.
- Prepare the Frosting (5 minutes): While cookies cool, mix your vanilla frosting with 2 tablespoons of milk until smooth and spreadable. Add brown food coloring drop by drop until you get a nice, warm turkey-brown color. I usually add about 8-10 drops. If you’re making multiple colors, divide the frosting into separate bowls.
- Frost the Cookies (10 minutes): Once cookies are completely cool, spread a thin layer of brown frosting on each one. Don’t go too thick—you want the candy corn to sit on top, not sink in. Leave a small space at the bottom for the turkey’s face area.
- Create the Candy Corn Feathers (10 minutes): Here’s the trick that changed everything. Melt your chocolate chips in a small bowl (microwave in 20-second bursts, stirring between each). Dip the tip of each candy corn piece into the melted chocolate, then press it onto the frosted cookie in a fan pattern. Start from the back and work forward, overlapping slightly. Use about 5-7 candy corn pieces per cookie for a full fan.
- Add the Face Details (10 minutes): Use the melted chocolate as glue for the candy eyes—just dab a tiny amount on the back of each eye and press gently onto the cookie. For the beak, use orange frosting or a small triangle cut from orange candy melt. For the wattle (that red dangly bit), pipe a tiny red teardrop shape below the beak. I use a toothpick to position everything—it’s much easier than using your fingers.
- Set the Decorations (15 minutes): Place the decorated cookies in the refrigerator for at least 15 minutes to let the chocolate set. This is crucial if you’re planning to transport them. I once skipped this step and ended up with candy corn sliding everywhere in the car.
- Add Final Touches (5 minutes): Once set, you can add extra details like pretzel stick legs (insert two broken pretzel halves into the frosting at the bottom) or a little frosting smile. Let your creativity run wild!
Sensory Cues: When the cookies are done baking, they should smell warm and buttery, and the edges should look just barely golden. When you press the center gently, it should spring back. The frosting should be smooth and spreadable—if it’s too thick, add milk a teaspoon at a time. When you dip candy corn into melted chocolate, you should hear a tiny “click” as it sets on the cookie.
Cooking Tips & Techniques
After making these turkey cookies more times than I care to admit, I’ve collected some hard-won wisdom. Let me share the good stuff.
The Chocolate Glue Trick: This is the single most important technique in this recipe. If you try to stick candy corn directly onto frosting, gravity wins every time. The candy corn slides off, especially if you’re transporting the cookies. Using melted chocolate as “glue” creates a bond that holds firm. I use about 1/4 teaspoon per candy corn piece—enough to stick, not so much that it drips down the cookie.
Temperature Matters: Work with completely cooled cookies. I cannot stress this enough. My first batch was a disaster because I was impatient. Warm cookies + frosting = a melty mess. Also, keep your candy corn at room temperature. Cold candy corn can cause the chocolate to seize up and become grainy.
Batch Assembly Line: Here’s how I do it efficiently. Frost all your cookies first. Then, arrange all the candy corn pieces on a plate. Melt your chocolate. Then go through each cookie one at a time—dip, place, move on. This assembly line approach saves so much time compared to doing each cookie completely from start to finish.
Common Mistake to Avoid: Don’t overcrowd the candy corn feathers. I know it’s tempting to make them super full and fluffy, but too many pieces make the cookie top-heavy. Five to seven pieces arranged in a fan pattern looks perfect. Also, don’t press too hard when placing the candy corn—you’ll squish the frosting and create a mess.
Timing Strategy: If you’re making these for a party, bake the cookies up to two days ahead and store them in an airtight container. Do the decorating the day before or the morning of. The decorated cookies need about 30 minutes to set fully, so plan accordingly. I usually make the cookies on Wednesday, decorate on Thursday morning, and they’re perfect for Thanksgiving afternoon.
Variations & Adaptations
One of the best things about this recipe is how customizable it is. Here are some variations I’ve tried and loved.
Chocolate Turkey Cookies: Use chocolate sugar cookie dough instead of vanilla. The dark cookie base makes the candy corn colors pop even more. I tried this for a friend who “doesn’t do vanilla,” and they were a huge hit. Just reduce the baking time by about 2 minutes since chocolate dough tends to bake faster.
Gluten-Free Version: Substitute gluten-free sugar cookie dough. I’ve tested this with Sweet Loren’s brand and it works perfectly. The cookies might spread a tiny bit more, so chill the dough for 10 minutes before cutting. Everything else stays the same—candy corn is naturally gluten-free, which is a win.
Mini Turkey Bites: Use a 1.5-inch cookie cutter to make mini turkeys. These are perfect for kids’ parties or as Thanksgiving appetizers. You’ll need smaller candy corn pieces (look for “Indian corn” or cut regular candy corn in half). These little guys are dangerously snackable.
Spiced Pumpkin Variation: Add 1 teaspoon pumpkin pie spice to your sugar cookie dough for a fall twist. The warm spices complement the candy corn sweetness beautifully. I made these for a Friendsgiving and they were gone before the main course.
Vegan Adaptation: Use vegan sugar cookie dough (Sweet Loren’s makes a good one), dairy-free vanilla frosting, and dairy-free chocolate chips. Candy corn is typically vegan-friendly, but check the label to be sure. The taste is nearly identical—I’ve served these to mixed crowds and nobody noticed the difference.
Personal Favorite Variation: My personal twist involves adding a pinch of cinnamon to the frosting. It sounds weird, but trust me—the subtle warmth makes the candy corn taste even better. I also like to add a tiny dab of orange frosting to the center of each candy corn for an extra pop of color. It’s a small detail that makes people say, “Wait, these look even cuter than the picture.”
Serving & Storage Suggestions
These turkey cookies are best served at room temperature, which is convenient because they look their best that way too. Arrange them on a platter in a fan pattern (ironic, I know) to show off those candy corn feathers. They’re perfect on a Thanksgiving dessert table alongside pumpkin pie and apple crisp.
Presentation Tips: For maximum visual impact, arrange the cookies so the turkey faces are all pointing outward. I like to use a round platter and create a circle of turkeys facing the edges—it looks like they’re all looking at your guests. Add some fall leaves or mini pumpkins around the platter for extra seasonal flair.
Complementary Dishes: These cookies pair beautifully with warm apple cider, hot chocolate, or a pumpkin spice latte. For a dessert spread, serve them alongside classic pumpkin pie, cranberry orange scones, or brown butter cookies. They also make a fun addition to a Thanksgiving brunch table.
Storage Instructions: Store decorated turkey cookies in an airtight container at room temperature for up to 3 days. If you need to stack them, place a layer of parchment paper between each layer to protect the candy corn feathers. Do not refrigerate after the chocolate has set—condensation can make the frosting sticky.
Freezer Tips: You can freeze the undecorated baked cookies for up to 2 months. Wrap them tightly in plastic wrap, then place in a freezer bag. When ready to decorate, thaw at room temperature for about 30 minutes, then proceed with frosting and decorating. I do this all the time for holiday prep.
Flavor Development: These cookies actually taste better the next day. The flavors meld together, and the cookie softens slightly from the frosting. If you can resist eating them all immediately, you’ll be rewarded with an even better texture. The candy corn stays pleasantly chewy, and the chocolate sets to a nice firm snap.
Nutritional Information & Benefits
Let’s be real—these are treat cookies, not health food. But here’s what you should know if you’re keeping track.
Estimated Nutritional Values (per cookie):
| Nutrient | Amount |
|---|---|
| Calories | 180-220 |
| Total Fat | 8-10g |
| Saturated Fat | 3-4g |
| Carbohydrates | 28-32g |
| Sugar | 18-22g |
| Protein | 2-3g |
Health Benefits of Key Ingredients: Candy corn is made primarily from sugar and corn syrup, so it’s purely a treat. However, the sugar cookies provide small amounts of iron and B vitamins from enriched flour. If you use dark chocolate for the “glue,” you get a tiny dose of antioxidants. The frosting contains calcium from milk products. Honestly, these are about joy and celebration, not nutrition.
Dietary Considerations: This recipe can be made gluten-free with substitutions. It’s not suitable for low-carb or keto diets due to the high sugar content. For nut allergies, check your candy corn label—most brands are nut-free, but some facilities process nuts. The cookies contain dairy unless you use vegan alternatives. Always check labels if you’re serving to someone with allergies.
My Wellness Perspective: I believe in balance. These cookies are a once-a-year treat that brings people together. The joy of making them with kids or sharing them at a party is worth every calorie. I pair them with a walk around the block after Thanksgiving dinner—problem solved!
Conclusion
These adorable turkey cookies started as a napkin sketch from the most unlikely source—my accountant, of all people. But that’s the beauty of recipe inspiration, isn’t it? It comes from the places you least expect. These cookies have become my signature Thanksgiving contribution, and I honestly look forward to making them every year now.
What I love most about this recipe is how it brings people together. Kids love decorating them, adults love eating them, and everyone loves taking pictures of them. They’re simple enough for a beginner baker but impressive enough to steal the show at any holiday gathering. And let’s face it—anything with candy corn feathers is automatically more fun.
I encourage you to make these your own. Maybe add a different candy, try a new frosting color, or arrange the feathers in a different pattern. The best recipes are the ones you tweak and make personal. So grab some candy corn, preheat that oven, and get ready to make the cutest turkeys on the block. And when you do, I’d love to hear about it—drop a comment below and tell me how your turkeys turned out. Happy Thanksgiving, friends!
Frequently Asked Questions
Can I make these turkey cookies ahead of time?
Yes! You can bake the cookies up to 2 days ahead and store them in an airtight container. Decorate them the day before serving for best results. The decorated cookies stay fresh for up to 3 days at room temperature.
My candy corn keeps falling off. What am I doing wrong?
You’re probably not using enough “glue.” Dip the tip of each candy corn piece into melted chocolate before placing it on the frosted cookie. Let the chocolate set in the refrigerator for at least 15 minutes before moving the cookies.
Can I use homemade sugar cookie dough instead of store-bought?
Absolutely! Just make sure to chill the dough for at least 30 minutes before rolling and cutting. Homemade dough tends to spread more than store-bought, so keep that in mind. My favorite recipe uses 1 cup butter, 1 cup sugar, 1 egg, and 2 1/2 cups flour.
Are these cookies safe for kids with nut allergies?
Most candy corn brands are nut-free, but always check the label. The sugar cookie dough and frosting should also be checked for nut content. When in doubt, make everything from scratch using certified nut-free ingredients.
How do I transport these cookies without ruining them?
Let the chocolate set completely (refrigerate for 30 minutes), then place the cookies in a single layer in a container with a tight-fitting lid. Put a piece of parchment paper between layers if you need to stack them. Drive carefully—I speak from experience!
Pin This Recipe!
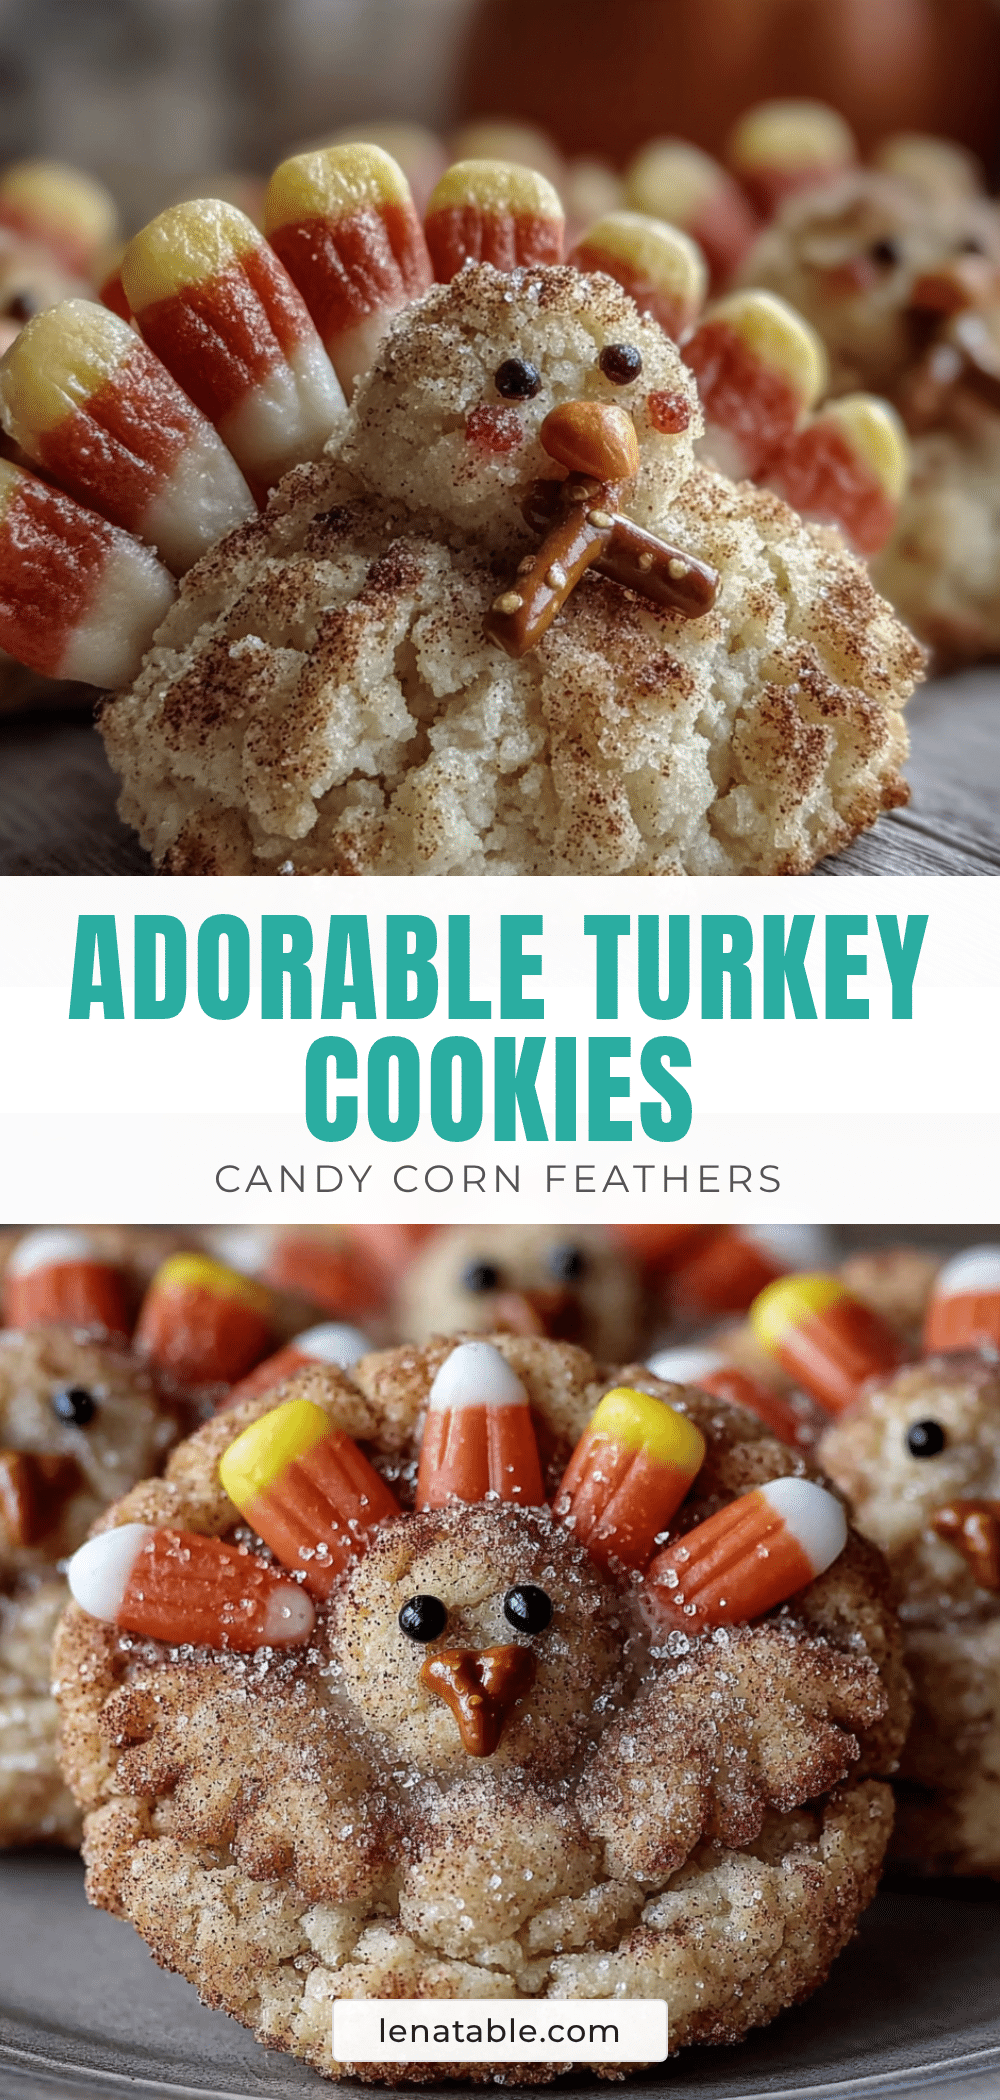
Adorable Turkey Cookies Perfect for Thanksgiving Treats

These adorable turkey cookies are a fun and easy Thanksgiving treat made with sugar cookies, frosting, and candy corn. Perfect for holiday parties, they come together in under 45 minutes and are sure to impress both kids and adults.
- Prep Time: 20 minutes
- Cook Time: 10 minutes
- Total Time: 45 minutes
- Yield: 24 servings 1x
- Category: Dessert
- Cuisine: American
Ingredients
- 1 package (16 oz) refrigerated sugar cookie dough (or 1 batch homemade sugar cookie dough, about 2 dozen cookies)
- All-purpose flour (for dusting, if making from scratch)
- 1 can (16 oz) vanilla frosting
- 2–3 tablespoons milk
- Brown food coloring
- Orange food coloring (optional)
- 1 bag (about 1 cup) candy corn
- 1 bag (about 1 cup) candy eyes (or mini chocolate chips)
- 1/4 cup melted chocolate chips or melting wafers
- Red candy melts or red frosting (for wattle)
- Orange candy melts or orange frosting (for beak)
- 1/2 cup mini chocolate chips (optional, for speckled texture)
- 1/4 cup sprinkles (fall colors, optional)
- Pretzel sticks (broken in half, optional, for turkey legs)
Instructions
- Preheat oven to 350°F (175°C). Line two baking sheets with parchment paper or silicone mats.
- Roll out sugar cookie dough to 1/4-inch thickness on a lightly floured surface. Cut out circles using a 2.5 to 3-inch round cookie cutter. Place 2 inches apart on prepared baking sheets.
- Bake for 8-10 minutes, until edges are just barely golden. Cool on baking sheet for 3 minutes, then transfer to a wire rack to cool completely.
- Mix vanilla frosting with 2 tablespoons milk until smooth. Add brown food coloring drop by drop until desired turkey-brown color is achieved.
- Once cookies are completely cool, spread a thin layer of brown frosting on each, leaving a small space at the bottom for the face.
- Melt chocolate chips in a small bowl (microwave in 20-second bursts, stirring between each). Dip the tip of each candy corn piece into melted chocolate and press onto frosted cookie in a fan pattern, starting from the back and working forward. Use 5-7 pieces per cookie.
- Use melted chocolate as glue to attach candy eyes. Pipe or place a small orange triangle for the beak and a red teardrop shape for the wattle below the beak.
- Place decorated cookies in the refrigerator for at least 15 minutes to set the chocolate.
- Optional: Add pretzel stick legs or other decorations. Let cookies come to room temperature before serving.
Notes
Use melted chocolate as ‘glue’ for candy corn to prevent sliding. Work with completely cooled cookies. For best results, bake cookies up to 2 days ahead and decorate the day before serving. Store decorated cookies in an airtight container at room temperature for up to 3 days.
Nutrition
- Serving Size: 1 cookie
- Calories: 200
- Sugar: 20
- Sodium: 120
- Fat: 9
- Saturated Fat: 3.5
- Carbohydrates: 30
- Protein: 2.5
Keywords: turkey cookies, Thanksgiving cookies, candy corn cookies, sugar cookie turkey, holiday cookies, easy Thanksgiving dessert