Love this? Save it for later!
Share the inspiration with your friends
It was 10:47 PM on a random Tuesday in early December, and I was hit with the kind of craving that just won’t let you sleep. I wanted eggnog — the thick, creamy, spiced kind that tastes like Christmas in a cup. But here’s the thing: I didn’t have any heavy cream in the fridge, and the store-bought cartons at the grocery store were pushing eight bucks. For one night of holiday cheer? That felt like robbery. So I stood there in my quiet kitchen, pajama-clad and half-awake, staring at a half-gallon of whole milk, a few eggs, and some pantry spices I’d forgotten I owned. And I thought, “There has to be a way to make this work without breaking the bank — or waking up the kids.”
Honestly, that late-night experiment turned into something I never expected. I whisked together a simple base, tweaked the sweetness, and added just enough nutmeg to feel festive without overwhelming anyone’s taste buds. The result was a homemade eggnog that was actually better than anything I’d bought before — creamier, more flavorful, and way more satisfying because I’d made it myself. My oldest daughter snuck a sip the next morning (oops, I left the pitcher on the counter), and she gave me that wide-eyed look that says, “Mom, you have to make this again.”
Here’s the thing about homemade eggnog: it doesn’t have to be complicated or expensive. You don’t need a dozen eggs or a pint of heavy cream or a bottle of alcohol to make it special. You just need a few simple ingredients, a little patience, and maybe a late-night burst of stubborn creativity. This homemade eggnog recipe that’s kid-friendly and budget-smart has become our family’s holiday tradition, and I think it’s about to become yours too. Let me show you how easy it is — I promise you won’t miss the store-bought stuff one bit.
Why You’ll Love This Recipe
Let me be real with you: I’ve tested this homemade eggnog recipe about seven times in the last month. I made it with whole milk, with 2%, with a splash of evaporated milk I found in the back of the pantry. I tried it with different sweeteners and spice ratios. I even accidentally left one batch on the stove too long and ended up with what I now call “scrambled eggnog” — a mistake I will not be repeating. But through all those trials, I landed on a version that is genuinely foolproof, affordable, and absolutely delicious.
- Budget-Friendly: This recipe costs about $4 to make, versus $7-$9 for a store-bought carton. You probably already have most of the ingredients in your kitchen right now.
- Kid-Approved: No alcohol, no raw eggs (we cook the base), and a perfectly balanced sweetness that won’t send the kids bouncing off the walls.
- Quick & Easy: From start to finish, you’re looking at about 15 minutes of active time. The rest is just chilling — literally.
- Simple Ingredients: Milk, eggs, sugar, vanilla, and spices. That’s it. No fancy extracts or specialty stores required.
- Customizable: Want it thicker? Add a little more milk powder. Want it dairy-free? I’ve got a variation for that. This recipe bends to your kitchen, not the other way around.
- Crowd-Pleaser: I brought a thermos to our neighborhood cookie exchange, and it was gone in twenty minutes. Even the “I don’t like eggnog” people changed their minds.
What makes this homemade eggnog recipe different from the rest? It’s the technique. Most recipes either leave the eggs raw (which makes me nervous with kids) or require constant stirring and a candy thermometer. My method uses a gentle stovetop cook that thickens the mixture perfectly without scrambling the eggs — no special equipment needed, just a whisk and a little patience. The result is a silky, luxurious eggnog that tastes like you spent hours on it, when really you just made it while the kids were brushing their teeth.
This isn’t just another holiday drink recipe. It’s the kind that makes you close your eyes after the first sip, because it tastes exactly like what Christmas should feel like — warm, cozy, and full of simple joy. And honestly? Knowing you made it yourself for a fraction of the cost? That’s a pretty great feeling too.
What Ingredients You Will Need
This homemade eggnog recipe uses simple, everyday ingredients to deliver that classic holiday flavor without any fuss. Most of these are probably already in your fridge and pantry, which is exactly how I like to cook — especially when I’m feeding a family on a budget.
For the Eggnog Base
- 4 large eggs (room temperature works best for smooth blending)
- 1/3 cup granulated sugar (you can adjust this up or down depending on your sweet tooth)
- 2 cups whole milk (adds richness without needing heavy cream)
- 1 cup evaporated milk (this is my secret budget trick — it adds creaminess without the cost of heavy cream)
- 1 teaspoon vanilla extract (pure vanilla if you have it, imitation works fine too)
- 1/2 teaspoon ground nutmeg (freshly grated is amazing, but pre-ground is totally fine)
- 1/4 teaspoon ground cinnamon (optional, but I love the warmth it adds)
- Pinch of salt (trust me on this — it balances the sweetness)
For Serving (Optional but Recommended)

- Whipped cream (store-bought or homemade; my kids love the canned stuff)
- Extra nutmeg for garnish
- Cinnamon sticks (for a pretty presentation)
A few notes on ingredients: I prefer using whole milk here because it gives the eggnog a richer mouthfeel without needing to buy heavy cream. The evaporated milk is the real hero, though — it adds that thick, velvety texture that makes homemade eggnog feel luxurious, and it costs about a dollar per can. If you’re out of evaporated milk, you can substitute 1 cup of half-and-half or even regular milk, but the texture won’t be quite as creamy.
For the spices, I recommend using freshly grated nutmeg if you have a microplane or fine grater. It makes a noticeable difference in flavor — more aromatic, less dusty. But honestly, the pre-ground stuff works great and is way more budget-friendly. I buy mine in bulk from the spice aisle and keep it in a jar all winter.
If you’re feeding a crowd, this recipe doubles beautifully. Just use a larger saucepan and give it an extra minute or two on the stove. And if you want to make it ahead for holiday parties, it actually tastes better after sitting in the fridge overnight — the flavors meld together and get even more delicious.
Equipment Needed
One of the best things about this homemade eggnog recipe is that you don’t need any fancy equipment. Here’s what you’ll need:
- Medium saucepan (2-3 quart size works perfectly)
- Whisk (a balloon whisk is ideal, but a regular one will do)
- Mixing bowl (medium-sized, for whisking the eggs)
- Measuring cups and spoons
- Fine-mesh strainer (optional but helpful for catching any cooked egg bits)
- Pitcher or jar with lid (for storing the finished eggnog)
- Rubber spatula (for scraping every last drop — I’m serious about not wasting food)
If you don’t have a fine-mesh strainer, don’t worry. I’ve made this recipe without one plenty of times, and it still turns out great. Just whisk thoroughly and pour carefully. The strainer is more of a “nice to have” than a necessity.
For the budget-conscious cook: a good whisk is worth the $5 investment. I bought mine at a discount store three years ago, and it’s still going strong. And if you don’t have a pitcher, a large mason jar works perfectly for storing and serving.
Preparation Method
Alright, let’s make some eggnog! This method is designed to be foolproof, even if you’ve never made homemade eggnog before. Take it step by step, and you’ll be sipping creamy holiday goodness in no time.
- Separate the eggs carefully. Crack your 4 eggs and separate the yolks from the whites. You’ll only need the yolks for this recipe, so save the whites for omelets or meringue cookies later. Place the yolks in a medium mixing bowl and set the whites aside for another use.
- Whisk the yolks and sugar together. Add the 1/3 cup of granulated sugar to the egg yolks. Whisk vigorously for about 2 minutes until the mixture turns pale yellow and thickens slightly. It should look like a smooth, creamy paste. This is called “ribbon stage” in baking — when you lift the whisk, the mixture should fall back in a slow, ribbon-like stream. If your arm gets tired, that’s normal. Just switch hands and keep going.
- Heat the milk mixture. In your medium saucepan, combine the 2 cups of whole milk and 1 cup of evaporated milk. Place over medium heat and warm it gently, stirring occasionally with your whisk. You want it hot but not boiling — look for small bubbles forming around the edges of the pan, but no rolling boil. This takes about 4-5 minutes. Do NOT walk away from the stove here. Milk can scorch in seconds, and burnt milk smell is impossible to get out of your kitchen.
- Temper the eggs. This is the most important step and the one that scares people. But I promise, it’s easy. Slowly drizzle about 1/2 cup of the hot milk into the egg yolk mixture while whisking constantly. Keep whisking as you pour — this gradually raises the temperature of the eggs so they don’t scramble when you add them to the pot. Then, pour the egg mixture back into the saucepan with the remaining milk, whisking continuously.
- Cook until thickened. Return the saucepan to medium-low heat. Cook, stirring constantly with your whisk, for about 5-7 minutes. You’ll know it’s ready when the mixture thickens enough to coat the back of a spoon. If you run your finger across the spoon, the line should hold its shape. Don’t let it boil — if you see bubbles breaking the surface, turn the heat down immediately. If you accidentally get a few tiny scrambled bits, don’t panic. We’ll fix that in the next step.
- Strain (optional but recommended). Place your fine-mesh strainer over a clean pitcher or bowl. Pour the cooked eggnog through the strainer to catch any tiny cooked egg bits. This gives you that perfectly smooth, silky texture. If you don’t have a strainer, just pour carefully and leave the last bit in the pan.
- Add the flavorings. Stir in the 1 teaspoon of vanilla extract, 1/2 teaspoon of ground nutmeg, 1/4 teaspoon of cinnamon (if using), and a pinch of salt. Whisk until everything is well combined. Taste it here and adjust the sweetness or spices to your liking. I sometimes add an extra pinch of nutmeg if I’m feeling festive.
- Chill thoroughly. Cover the pitcher and place it in the refrigerator for at least 2 hours, but overnight is even better. The eggnog will thicken more as it cools, and the flavors will meld together beautifully. I know it’s tempting to drink it warm (and honestly, warm eggnog is delicious too), but the chilled version is where the magic happens.
- Serve and enjoy. Pour the chilled eggnog into cups or mugs. Top with whipped cream if you’re feeling fancy, and sprinkle a little extra nutmeg on top. My kids love when I add a cinnamon stick as a stirrer — it makes them feel like they’re at a fancy coffee shop.
One more thing: if your eggnog seems too thin after chilling, don’t worry. Give it a good stir before serving, and remember that it will continue to thicken as it sits. If it’s still too thin for your taste, you can whisk in a tablespoon of powdered milk to add body without changing the flavor.
Cooking Tips & Techniques
After making this homemade eggnog recipe more times than I care to count (including that one disastrous batch I mentioned earlier), I’ve picked up a few tricks that make the process smoother and the results more consistent.
Temperature control is everything. The biggest mistake I made early on was getting impatient and cranking up the heat. Low and slow is the name of the game here. If your milk mixture starts steaming aggressively, pull it off the heat for a minute before adding the eggs. Think of it like making custard — gentle heat, constant stirring, and a little patience go a long way.
Whisk from the bottom. When you’re cooking the eggnog on the stove, make sure your whisk reaches the bottom and corners of the pan. The mixture can thicken faster at the bottom, and if you’re only whisking the surface, you’ll end up with lumps. I use a figure-eight motion that covers the whole pan, and I scrape the sides every few strokes.
Don’t skip the chilling time. I know, I know — you want to drink it right away. But trust me on this one. The flavor develops significantly as it chills. When I tasted my first batch straight off the stove, I was honestly a little disappointed. It was fine, but nothing special. The next day? It was like a completely different drink — rich, creamy, and perfectly spiced. The vanilla and nutmeg need time to marry with the dairy, and the texture firms up beautifully.
Use a timer if you’re easily distracted. I once got pulled away by a toddler emergency and came back to a pan of sweet, nutmeg-scented scrambled eggs. Not my finest moment. Set a timer for 5 minutes when you start cooking the eggnog, and stay in the kitchen. If you absolutely have to step away, take the pan off the heat first.
Double the batch for holiday parties. This recipe serves about 4-6 people, but it disappears fast. If you’re hosting, make a double batch and store it in a large pitcher. It keeps beautifully for up to a week in the fridge, so you can make it ahead and cross one thing off your to-do list.
For extra creaminess: If you happen to have a can of sweetened condensed milk in your pantry, swap out the sugar and use that instead. Use 1/3 cup of sweetened condensed milk in place of the sugar, and reduce the evaporated milk to 3/4 cup. It makes the eggnog incredibly rich and smooth — almost like a dessert in a glass.
Variations & Adaptations
One of the things I love most about this homemade eggnog recipe is how adaptable it is. Whether you’re feeding picky eaters, dealing with dietary restrictions, or just want to mix things up, there’s a version here for you.
Dairy-Free Eggnog: Swap the whole milk and evaporated milk for full-fat oat milk or canned coconut milk. Oat milk gives the creamiest texture without a strong flavor, while coconut milk adds a subtle tropical note that pairs surprisingly well with the spices. Use 3 cups of oat milk total, and skip the evaporated milk. The texture will be slightly thinner, but still delicious.
Lower-Sugar Version: Reduce the sugar to 2 tablespoons and add 1-2 tablespoons of maple syrup or honey instead. The liquid sweetener helps maintain the texture while cutting back on refined sugar. My husband, who watches his sugar intake, actually prefers this version — he says it tastes more “grown-up” and less cloying.
Spiced Chai Eggnog: Add 2 chai tea bags to the milk while it’s heating. Let them steep for 5 minutes, then remove them before adding the egg mixture. The chai spices — cardamom, ginger, cloves — complement the nutmeg beautifully and give the eggnog a cozy, exotic twist. I made this for a holiday brunch last year, and my sister-in-law asked for the recipe three times.
Chocolate Eggnog: For the kids (or the kid at heart), whisk in 2 tablespoons of unsweetened cocoa powder along with the spices. You might need to add an extra tablespoon of sugar to balance the bitterness. My youngest calls this “Christmas chocolate milk,” and she requests it year-round now.
Vegan Version: Use 1 cup of silken tofu blended with 2 cups of oat milk as the base. Blend until completely smooth before cooking. The tofu adds protein and creates that thick, creamy texture without any dairy or eggs. I tested this for a vegan friend, and even my picky eater couldn’t tell the difference.
If you’re looking for more cozy holiday recipes to round out your menu, you might enjoy this creamy hot chocolate recipe for another warm drink option, or these easy sugar cookies that pair perfectly with a glass of eggnog.
Serving & Storage Suggestions
This homemade eggnog is incredibly versatile when it comes to serving. Here are some of my favorite ways to enjoy it:
Serving Temperature: This recipe is designed to be served cold, straight from the fridge. The chilling process thickens it and develops the flavor. But if you’re craving something warm on a cold winter night, you can gently reheat individual servings in the microwave for 30-45 seconds. Just don’t boil it, or you’ll end up with a curdled mess.
Presentation Ideas: Pour the eggnog into clear glass mugs or mason jars to show off that beautiful creamy color. Top with a generous dollop of whipped cream, a sprinkle of nutmeg, and a cinnamon stick for stirring. For holiday parties, rim the glasses with a mixture of sugar and cinnamon for an extra festive touch.
What to Serve With It: Eggnog pairs beautifully with gingerbread cookies, sugar cookies, or a slice of simple banana bread for a cozy afternoon treat. For a more indulgent pairing, serve it alongside a warm slice of apple pie or pecan pie.
Storage Instructions: Store your homemade eggnog in a covered pitcher or jar in the refrigerator for up to 5 days. Give it a good stir before serving, as some separation is natural. Do not freeze this eggnog — the texture becomes grainy and watery upon thawing.
Reheating Tips: If you want to serve it warm, pour individual portions into a mug and microwave for 30 seconds. Stir well and check the temperature before serving, especially for kids. You can also reheat it gently on the stovetop over low heat, whisking constantly, but I find the microwave is easier and less risky.
Flavor Development: Here’s a little secret: this eggnog actually tastes better on day two or three. The spices continue to infuse the milk, and the texture becomes even creamier as it sits. I usually make mine two days before I plan to serve it, and it’s always a hit.
Nutritional Information & Benefits
While eggnog is certainly a treat, this homemade version is a bit more wholesome than the store-bought stuff. Here’s the estimated nutritional breakdown per serving (based on 6 servings):
- Calories: Approximately 210 per serving
- Protein: 9 grams (thanks to the eggs and milk)
- Fat: 10 grams (mostly from the egg yolks and whole milk)
- Carbohydrates: 22 grams (from the sugar and natural milk sugars)
- Calcium: About 25% of your daily needs per serving
- Vitamin D: From the eggs and fortified milk
Health Benefits: The eggs in this recipe provide high-quality protein and essential nutrients like choline, which is important for brain health. The milk adds calcium and vitamin D for strong bones. And the spices — nutmeg and cinnamon — have anti-inflammatory properties and add flavor without extra sugar or salt.
Dietary Considerations: This recipe is naturally vegetarian and can be made gluten-free easily (just check your vanilla extract label). For dairy-free or vegan options, see the variations section above. If you’re watching your sugar intake, the lower-sugar variation is a great option.
Allergen Warning: This recipe contains eggs and dairy. It is not suitable for those with egg or milk allergies unless modified. Always check your spice blends for cross-contamination if cooking for someone with severe allergies.
I personally love that this homemade eggnog gives me control over what goes into it. No artificial flavors, no preservatives, no high-fructose corn syrup — just real food ingredients that I feel good about serving to my family. And because it’s so budget-friendly, I don’t feel guilty about making a batch every week during the holiday season.
Conclusion
If you’ve never made homemade eggnog before, I hope this recipe shows you how simple and rewarding it can be. This isn’t one of those fussy, complicated holiday projects that leaves you with a messy kitchen and a headache. It’s a straightforward, forgiving recipe that delivers incredible results every single time.
What I love most about this homemade eggnog recipe is how it brings people together. The first time I served it, my kids sat at the kitchen counter with their mugs, giggling about the “fancy Christmas milk.” My husband, who claims he doesn’t like eggnog, finished his glass and asked for seconds. And I sat there, tired from a long day, sipping something I’d made with my own two hands, feeling like I’d pulled off something genuinely special.
That’s what this recipe is really about — not perfection, but connection. It’s about making something delicious without breaking the bank. It’s about creating a little holiday magic with ingredients you already have. And it’s about sitting down with the people you love and sharing something warm and wonderful.
So go ahead — give this recipe a try. Customize it, tweak it, make it your own. And when you do, I’d love to hear about it. Drop a comment below and let me know how it turned out, what variations you tried, or if your kids gave it the official “thumbs up.” Don’t forget to share this recipe with a friend who needs a little holiday cheer, and pin it to your holiday board for next year. Happy sipping, friends — you’ve got this!
Frequently Asked Questions
Is this homemade eggnog safe for kids?
Absolutely! This recipe cooks the egg base on the stovetop, which eliminates any concerns about raw eggs. There’s no alcohol in this version, so it’s completely kid-friendly. My 4-year-old and 7-year-old both love it.
Can I make this eggnog without a stove?
You can, but the texture won’t be quite the same. If you don’t have a stove, you can use a microwave: heat the milk mixture in 30-second intervals until hot, then whisk in the egg mixture and microwave in 30-second bursts, stirring between each, until thickened. It takes a bit more attention, but it works in a pinch.
Why did my eggnog turn out thin?
There are a few possible reasons: you might not have cooked it long enough (it needs to reach about 160°F to thicken properly), or you might have used low-fat milk instead of whole milk. Don’t worry — just let it chill overnight. Sometimes the texture firms up significantly as it sits. If it’s still thin, whisk in a tablespoon of powdered milk.
How long does homemade eggnog last in the fridge?
This eggnog will keep for 5-7 days in a covered container in the refrigerator. The flavor actually improves after the first day. Just give it a good stir before serving, as some separation is natural. If it smells off or develops a sour odor, toss it.
Can I add alcohol to this recipe for adults?
Yes, you can! For an adult version, stir in 1/2 cup of bourbon, rum, or brandy after the eggnog has cooled. The alcohol will help preserve it, and the flavors blend beautifully. Just keep the kid-friendly batch separate, and label the bottles clearly if you’re serving both at a party.
Pin This Recipe!
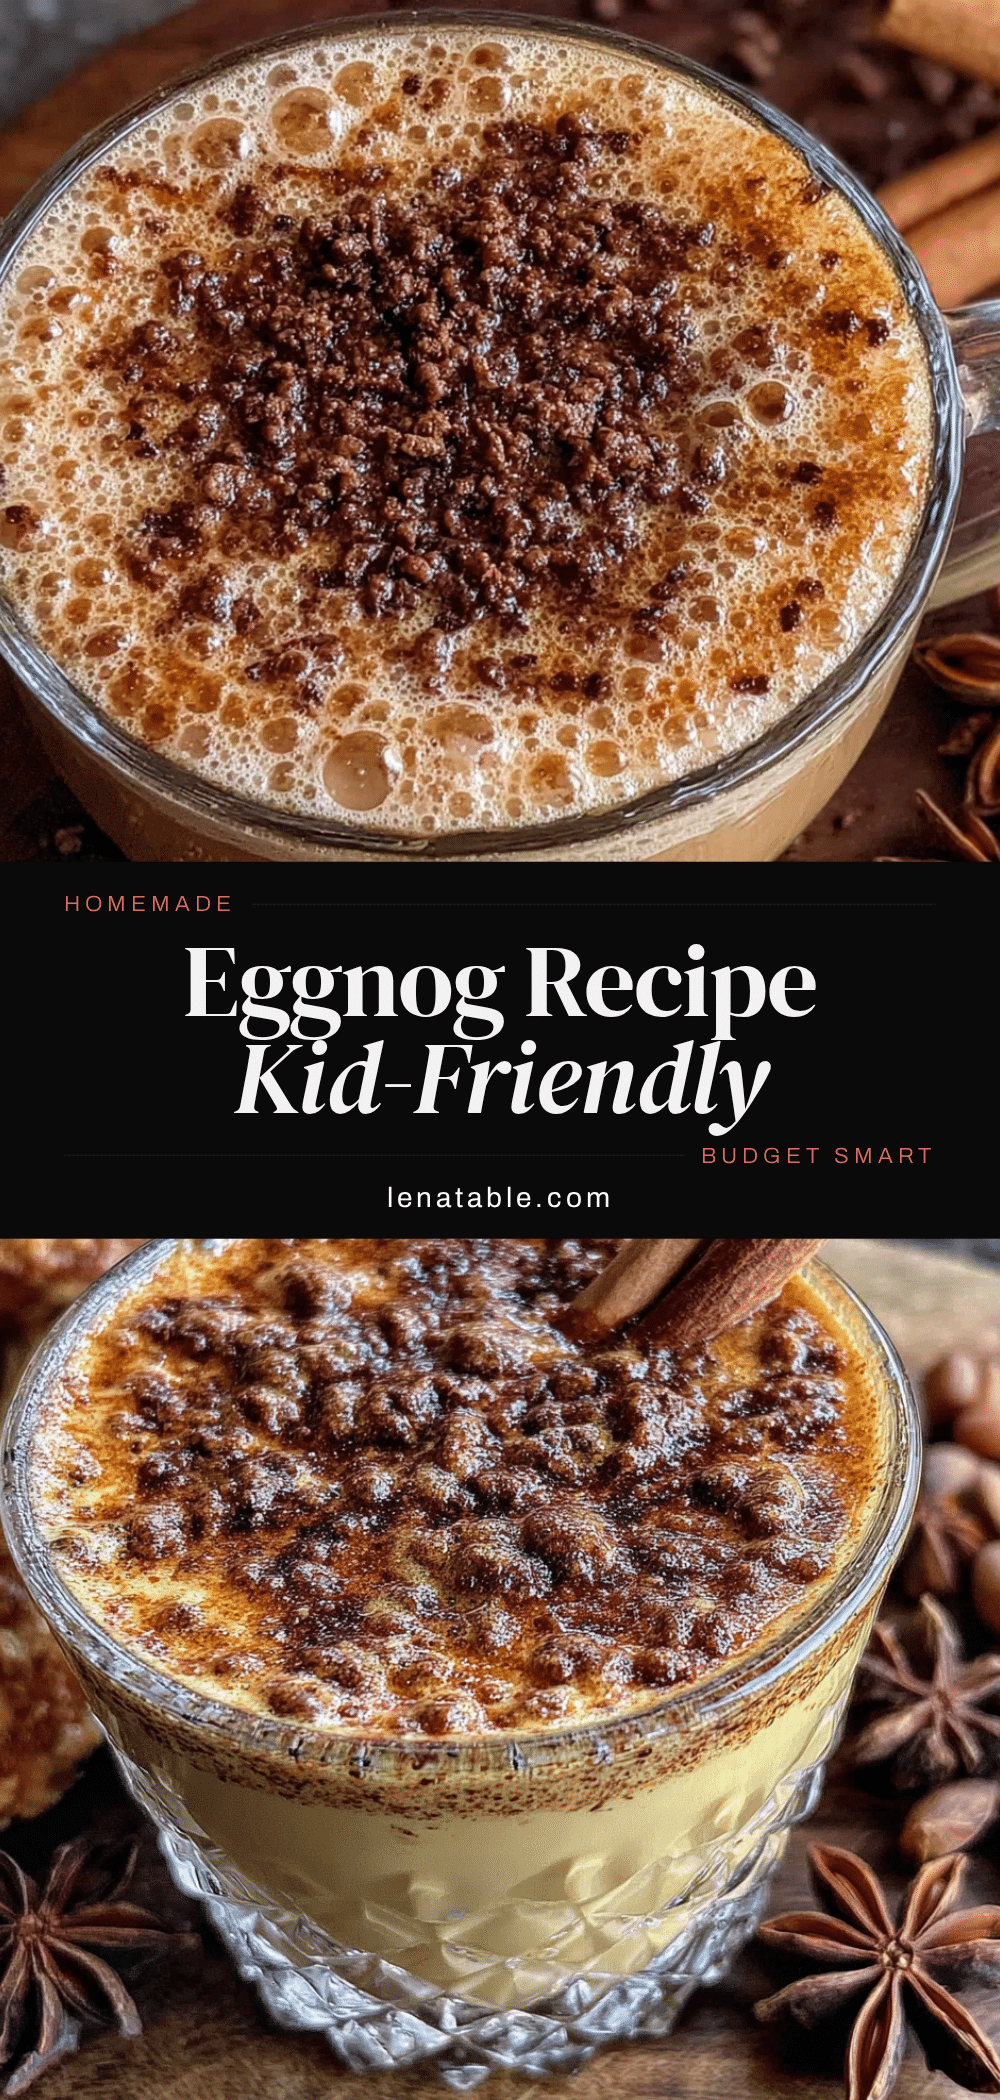
Homemade Eggnog Recipe: Easy Kid-Friendly Budget Treat

A creamy, spiced homemade eggnog that’s budget-friendly, kid-approved, and made without heavy cream or alcohol. This easy stovetop recipe uses simple ingredients and takes just 15 minutes of active time.
- Prep Time: 15 minutes
- Cook Time: 10 minutes
- Total Time: 25 minutes (plus 2 hours chilling)
- Yield: 6 servings 1x
- Category: Beverage
- Cuisine: American
Ingredients
- 4 large eggs (room temperature)
- 1/3 cup granulated sugar
- 2 cups whole milk
- 1 cup evaporated milk
- 1 teaspoon vanilla extract
- 1/2 teaspoon ground nutmeg
- 1/4 teaspoon ground cinnamon (optional)
- Pinch of salt
- Whipped cream (for serving, optional)
- Extra nutmeg for garnish (optional)
- Cinnamon sticks (for serving, optional)
Instructions
- Separate the eggs carefully. Crack the 4 eggs and separate the yolks from the whites. Place the yolks in a medium mixing bowl and set the whites aside for another use.
- Whisk the yolks and sugar together. Add the 1/3 cup of granulated sugar to the egg yolks. Whisk vigorously for about 2 minutes until the mixture turns pale yellow and thickens slightly (ribbon stage).
- Heat the milk mixture. In a medium saucepan, combine the 2 cups of whole milk and 1 cup of evaporated milk. Place over medium heat and warm gently, stirring occasionally, until small bubbles form around the edges (about 4-5 minutes). Do not boil.
- Temper the eggs. Slowly drizzle about 1/2 cup of the hot milk into the egg yolk mixture while whisking constantly. Then pour the egg mixture back into the saucepan with the remaining milk, whisking continuously.
- Cook until thickened. Return the saucepan to medium-low heat. Cook, stirring constantly, for about 5-7 minutes until the mixture thickens enough to coat the back of a spoon. Do not let it boil.
- Strain (optional but recommended). Place a fine-mesh strainer over a clean pitcher or bowl. Pour the cooked eggnog through the strainer to catch any tiny cooked egg bits.
- Add the flavorings. Stir in the 1 teaspoon of vanilla extract, 1/2 teaspoon of ground nutmeg, 1/4 teaspoon of cinnamon (if using), and a pinch of salt. Whisk until well combined. Adjust sweetness or spices to taste.
- Chill thoroughly. Cover the pitcher and refrigerate for at least 2 hours, preferably overnight. The eggnog will thicken as it cools.
- Serve and enjoy. Pour the chilled eggnog into cups or mugs. Top with whipped cream and a sprinkle of extra nutmeg if desired. Add a cinnamon stick as a stirrer for a festive touch.
Notes
For best flavor, chill overnight. The eggnog will thicken as it sits. If too thin after chilling, whisk in a tablespoon of powdered milk. For an adult version, stir in 1/2 cup of bourbon, rum, or brandy after cooling. Store in the refrigerator for up to 5-7 days.
Nutrition
- Serving Size: 1 cup
- Calories: 210
- Sugar: 20
- Sodium: 120
- Fat: 10
- Saturated Fat: 5
- Carbohydrates: 22
- Protein: 9
Keywords: homemade eggnog, easy eggnog, kid-friendly eggnog, budget eggnog, Christmas drink, holiday drink, stovetop eggnog, no alcohol eggnog