Love this? Save it for later!
Share the inspiration with your friends
Introduction
“You know that moment when a simple, familiar flavor just takes you back?” That’s exactly what happened to me one humid Saturday afternoon last summer. I was rummaging through a dusty box of kitchen gadgets in my grandmother’s attic when I stumbled upon an old, slightly cracked ice cream maker bowl. Honestly, I hadn’t planned on making ice cream that day — the power flickered, and I almost gave up. But then I remembered my neighbor, Mrs. Jenkins, telling me about her grandmother’s old vanilla ice cream recipe. She swore it was the creamiest, most straightforward treat that needed no fancy ingredients or machines.
So, there I was, mixing up a batch of what I call my creamy old-fashioned vanilla ice cream recipe — the kind that tastes like summer evenings and porch swings. It’s not the newest, flashiest dessert, but it’s got that perfect balance of rich vanilla flavor and melt-in-your-mouth texture that makes you want to close your eyes and savor every spoonful. Maybe you’ve been there, craving that classic vanilla ice cream that reminds you of simpler times, the kind homemade with love and a pinch of patience.
Let me tell you, this recipe stuck around because it’s easy, it’s delicious, and it’s a treat that anyone can make—no fancy kitchen tools, no long ingredient lists. Just pure, creamy vanilla bliss.
Why You’ll Love This Recipe
After trying countless ice cream recipes over the years, my creamy old-fashioned vanilla ice cream recipe stands out because it’s honest and reliable. Whether you’re an experienced cook or someone who’s just starting to experiment in the kitchen, this recipe is a gem.
- Quick & Easy: Ready in under 45 minutes of active prep time, plus chilling. Perfect for those surprise dessert cravings.
- Simple Ingredients: No need for hard-to-find extracts or stabilizers — all pantry staples you probably already have.
- Perfect for Any Occasion: From casual family dinners to weekend gatherings, this creamy vanilla ice cream fits right in.
- Crowd-Pleaser: Kids adore it, and adults can’t get enough of the smooth, rich texture.
- Unbelievably Delicious: The slow-cooked custard base makes the texture extra creamy and the vanilla flavor fully rounded.
This recipe isn’t just another vanilla ice cream — it’s my own take on a classic, with a gentle whisking technique that keeps the custard silky. I swapped in real vanilla beans for the extract to bring that deep, fragrant aroma that reminds me of those quiet nights spent chatting on the porch. Honestly, it’s the kind of treat that makes you pause and enjoy the moment, the kind of dessert you’ll want to make again and again.
What Ingredients You Will Need
This recipe uses simple, wholesome ingredients to deliver bold vanilla flavor and that satisfyingly creamy texture without fuss. Everything is easy to find at your local grocery store, and many are pantry staples.
- Whole Milk (2 cups / 480 ml) – Provides a creamy base with the right amount of fat.
- Heavy Cream (1 cup / 240 ml) – Adds richness and smoothness to the ice cream texture.
- Granulated Sugar (3/4 cup / 150 g) – Balances the creaminess and enhances flavor.
- Large Egg Yolks (5) – These thicken the custard and give that classic old-fashioned creaminess.
- Vanilla Bean (1 whole, split and scraped) – For authentic, deep vanilla flavor. If you don’t have one, good-quality pure vanilla extract (1 tablespoon) works in a pinch.
- Salt (a pinch) – Just a touch to balance the sweetness.
Ingredient tips: I prefer using Organic Valley heavy cream for the best consistency, but any high-quality cream works. If you want to try a dairy-free version, swap the milk and cream with full-fat coconut milk—it’s a game-changer! And when choosing your vanilla bean, look for plump, moist pods to get the best aroma.
Equipment Needed
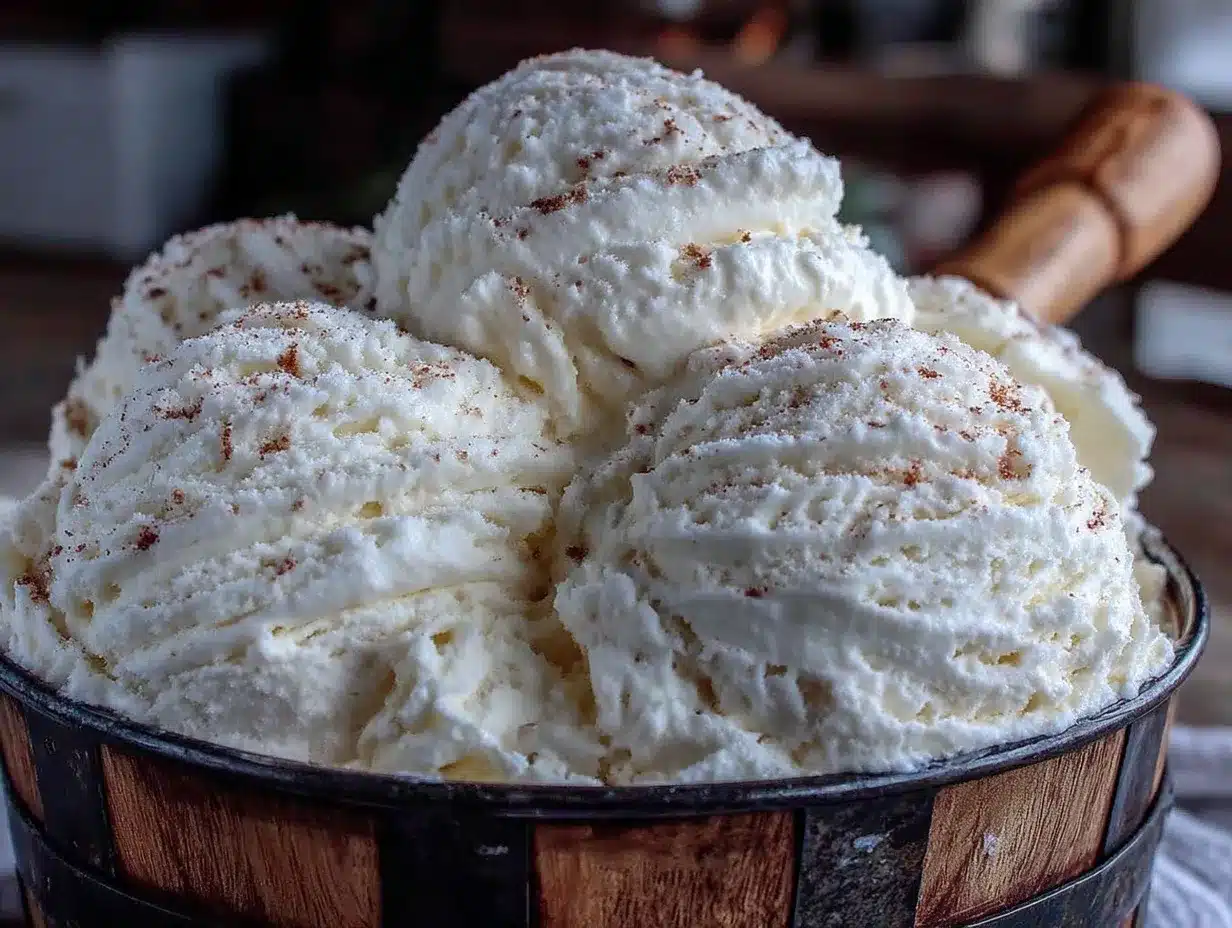
- Ice Cream Maker: A traditional churn or electric ice cream maker works fine. I used a vintage-style hand-crank machine, which makes the whole process feel nostalgic and fun.
- Mixing Bowls: At least two — one for whisking egg yolks and sugar, another for combining milk and cream.
- Whisk: For beating the egg yolks until smooth and creamy.
- Medium Saucepan: To gently heat the milk and cream without scorching.
- Fine Mesh Strainer: To strain the custard for ultra-smooth texture.
- Thermometer: Optional but helpful to monitor custard temperature (aim for about 170°F / 77°C).
If you don’t have an ice cream maker, no worries. I’ve included a no-churn variation below that uses just a freezer-safe container and a spatula. For budget-friendly options, some hand mixers and plastic bowls work just fine; just be patient with the mixing!
Preparation Method
- Split and scrape the vanilla bean: Using a sharp knife, split the vanilla bean lengthwise and scrape out the tiny seeds with the back of the knife. Set both seeds and pod aside.
- Heat the milk and cream: In a medium saucepan, combine the whole milk, heavy cream, vanilla bean seeds, and pod. Warm over medium heat until just about to simmer (around 180°F / 82°C). Don’t let it boil! This should take about 5-7 minutes. Remove from heat and let the vanilla infuse for 15 minutes.
- Whisk egg yolks and sugar: In a separate bowl, vigorously whisk the egg yolks with granulated sugar until pale and thick—about 3-4 minutes. This step is crucial for that creamy custard texture.
- Temper the eggs: Slowly pour about 1/2 cup (120 ml) of the warm milk mixture into the yolks while whisking constantly to avoid scrambling. Then pour the yolk mixture back into the saucepan with the remaining milk.
- Cook the custard: Return the saucepan to medium-low heat. Stir constantly with a wooden spoon or heatproof spatula, scraping the bottom to prevent sticking. The custard will thicken after 5-8 minutes and coat the back of the spoon. Use your thermometer to watch for 170°F (77°C)—don’t overheat or you’ll get scrambled eggs!
- Strain the custard: Pour the custard through a fine mesh strainer into a clean bowl to remove the vanilla pod and any cooked egg bits. Stir in a pinch of salt.
- Cool the custard: Let the custard cool at room temperature for about 20 minutes, then cover with plastic wrap pressed directly on the surface to prevent a skin from forming. Chill in the refrigerator for at least 4 hours, preferably overnight.
- Churn the ice cream: Pour the chilled custard into your ice cream maker and churn according to the manufacturer’s instructions, usually about 20-25 minutes. The mixture will thicken and become creamy.
- Freeze to firm up: Transfer the churned ice cream to a freezer-safe container, cover tightly, and freeze for at least 4 hours before serving for that perfect scoopable texture.
Pro tip: If the custard seems a little thin after chilling, don’t worry—churning works its magic! Also, I once forgot to cover the custard before chilling, and it developed a tough skin on top. Lesson learned: pressing plastic wrap right on the surface is a must!
Cooking Tips & Techniques
Making old-fashioned vanilla ice cream is as much about patience as it is about ingredients. Here are some tips to get it just right:
- Don’t rush the custard: Gently heating the milk and cream with the vanilla slows down flavor extraction and prevents curdling.
- Whisk the yolks well: This aerates the mixture and helps the custard thicken beautifully.
- Temper eggs carefully: Pouring hot milk slowly into eggs is key to avoid scrambled eggs—always whisk while adding.
- Use a thermometer: It takes the guesswork out of knowing when the custard is thick enough but not overcooked.
- Chill thoroughly: Cold custard churns better and creates smaller ice crystals, making the ice cream smoother.
- Don’t skip straining: It removes any lumps and makes your ice cream ultra smooth.
- Keep your ice cream maker bowl frozen: If using an electric machine, freeze the bowl for at least 24 hours before churning.
I’ve made the mistake of rushing the chill time once or twice, and the texture suffered—so trust the process. Also, stirring the custard constantly while cooking feels tedious, but it really pays off in the final creaminess.
Variations & Adaptations
The beauty of this creamy old-fashioned vanilla ice cream recipe is that it’s a perfect blank canvas. Here are a few ways to twist it:
- Chocolate Swirl: Add a homemade chocolate fudge swirl during the last 5 minutes of churning for a classic combo.
- Berry Infusion: Swap the vanilla bean for a cup of fresh mashed berries (strawberries, raspberries) to make a fruity version.
- Dairy-Free: Use full-fat coconut milk and coconut cream instead of dairy for a luscious vegan option.
- Spiced Vanilla: Add a cinnamon stick and a few cardamom pods to the milk mixture for a warm, spiced twist.
- No-Churn Option: Whip 2 cups of heavy cream, fold in sweetened condensed milk and vanilla, then freeze. Less hands-on but still tasty!
Personally, I once added a handful of toasted pecans and a drizzle of caramel sauce for a special family treat—totally worth the extra effort. These adaptations keep the creamy base intact but add a new flavor dimension.
Serving & Storage Suggestions
This creamy old-fashioned vanilla ice cream is best served cold but not rock hard. Let it sit at room temperature for 5 minutes before scooping for perfect softness. It pairs wonderfully with warm fruit pies, chocolate brownies, or just a simple drizzle of honey.
Store the ice cream in an airtight container in the freezer to prevent ice crystals from forming. It’s best enjoyed within two weeks, but if kept well sealed, it can last up to a month.
To re-soften slightly after freezing, place the container in the fridge for 10-15 minutes or microwave the scoop briefly (about 10 seconds) on low power. Flavors tend to deepen after a day or two in the freezer, so sometimes I make it a day ahead for that mellow richness.
Nutritional Information & Benefits
This classic vanilla ice cream is rich and creamy, with an estimated 250-300 calories per 1/2 cup (125 ml) serving. The whole milk and cream provide calcium and vitamin D, while the eggs contribute protein and essential nutrients.
While not a low-calorie treat, this ice cream is made with real ingredients and no artificial additives or preservatives, making it a wholesome indulgence. For those watching sugar intake, you can reduce the granulated sugar slightly or try a natural sweetener like honey or maple syrup, though this will change texture slightly.
The recipe is naturally gluten-free and can be adapted to dairy-free as mentioned. Just be aware of egg allergies, which are central to the custard base.
Conclusion
If you’re looking for a dessert that’s both nostalgic and reliably delicious, this creamy old-fashioned vanilla ice cream recipe is a winner. It’s simple enough for a casual afternoon project but special enough to impress family and friends. I love that it reminds me of slower days and joyful moments spent with neighbors and friends, sharing stories over a scoop (or three).
Give it a try, and don’t be afraid to make it your own with the variations I shared. I’d love to hear how your batch turns out or if you added your own twist—drop a comment below! Remember, homemade ice cream is as much about the process as the treat, so enjoy every step and every bite.
Happy scooping!
FAQs About Creamy Old-Fashioned Vanilla Ice Cream
Can I make this ice cream without an ice cream maker?
Yes! Try the no-churn method by whipping heavy cream and folding in sweetened condensed milk and vanilla. Freeze in a container, stirring every 30 minutes until firm for a smoother texture.
How long should I chill the custard before churning?
At least 4 hours, ideally overnight. A thoroughly chilled custard churns better and produces creamier ice cream.
Can I use vanilla extract instead of a vanilla bean?
Absolutely. Use 1 tablespoon of high-quality pure vanilla extract. The flavor won’t be quite as intense, but still delicious.
What if my custard curdles during cooking?
This usually happens if the heat is too high. Lower the heat immediately and whisk vigorously. Strain the custard to remove any lumps before chilling.
How do I prevent ice crystals in homemade ice cream?
Churn the ice cream thoroughly and freeze it in an airtight container. Press plastic wrap directly on the surface before sealing to reduce ice crystal formation.
Pin This Recipe!
Creamy Old-Fashioned Vanilla Ice Cream
A nostalgic, easy-to-make homemade vanilla ice cream recipe with a rich custard base and deep vanilla flavor, perfect for any occasion.
- Prep Time: 30 minutes
- Cook Time: 15 minutes
- Total Time: 5 hours 45 minutes
- Yield: 8 servings 1x
- Category: Dessert
- Cuisine: American
Ingredients
- 2 cups whole milk (480 ml)
- 1 cup heavy cream (240 ml)
- 3/4 cup granulated sugar (150 g)
- 5 large egg yolks
- 1 whole vanilla bean, split and scraped (or 1 tablespoon pure vanilla extract)
- Pinch of salt
Instructions
- Split the vanilla bean lengthwise and scrape out the seeds. Set seeds and pod aside.
- In a medium saucepan, combine whole milk, heavy cream, vanilla bean seeds, and pod. Warm over medium heat until just about to simmer (around 180°F / 82°C), about 5-7 minutes. Remove from heat and let vanilla infuse for 15 minutes.
- In a separate bowl, whisk egg yolks and granulated sugar vigorously until pale and thick, about 3-4 minutes.
- Slowly pour about 1/2 cup (120 ml) of the warm milk mixture into the yolks while whisking constantly to temper the eggs. Then pour the yolk mixture back into the saucepan with the remaining milk.
- Return saucepan to medium-low heat. Stir constantly with a wooden spoon or heatproof spatula, scraping the bottom to prevent sticking. Cook until custard thickens and coats the back of the spoon, about 5-8 minutes, reaching 170°F (77°C). Do not overheat.
- Strain the custard through a fine mesh strainer into a clean bowl to remove vanilla pod and any cooked egg bits. Stir in a pinch of salt.
- Let custard cool at room temperature for 20 minutes, then cover with plastic wrap pressed directly on the surface. Chill in refrigerator for at least 4 hours or overnight.
- Pour chilled custard into ice cream maker and churn according to manufacturer’s instructions, about 20-25 minutes, until thick and creamy.
- Transfer churned ice cream to a freezer-safe container, cover tightly, and freeze for at least 4 hours before serving.
Notes
Press plastic wrap directly on custard surface before chilling to prevent skin formation. Use a thermometer to avoid overheating custard. Chill custard thoroughly for best texture. If no ice cream maker is available, use the no-churn method by whipping heavy cream and folding in sweetened condensed milk and vanilla, then freeze.
Nutrition
- Serving Size: 1/2 cup (125 ml)
- Calories: 275
- Sugar: 20
- Sodium: 50
- Fat: 18
- Saturated Fat: 11
- Carbohydrates: 22
- Protein: 5
Keywords: vanilla ice cream, homemade ice cream, old-fashioned ice cream, creamy vanilla, custard ice cream, easy dessert


