Love this? Save it for later!
Share the inspiration with your friends
Introduction
“You won’t believe this cake actually started with a firecracker mishap,” my friend Lisa told me one summer evening as we prepped for the neighborhood barbecue. It was the Fourth of July weekend, and she was known for her dazzling desserts, but that year, things didn’t go quite as planned. She was juggling sparklers and a cake pan, and — well, let’s just say a little batter flew where it shouldn’t have!
That unexpected mess turned into the best red velvet cake I’ve ever tasted. I mean, who knew that a few tweaks to a classic recipe could make it perfect for a star-spangled celebration? It wasn’t just the vibrant red or the velvety crumb; it was the way the cream cheese frosting clung just right, sweet but tangy, making every bite feel like a party.
Maybe you’ve been there too — scrambling late on a holiday, wondering if you’ll pull off a dessert that’s both festive and fuss-free. Honestly, this red velvet celebration cake is the answer. It’s got that iconic deep red color that pops on any picnic table, and the cream cheese frosting is smooth enough to spread with a butter knife, no fancy piping needed.
Lisa’s kitchen was a little chaotic that day, with kids running around and the sound of fireworks in the background, but somehow that perfect cake emerged. It’s stuck with me ever since, honestly — I keep making it for every 4th of July, and sometimes just because I miss that nostalgic, messy, joyful vibe of summer nights. Let me tell you, this cake isn’t just dessert; it’s a celebration in every bite.
Why You’ll Love This Recipe
After testing countless red velvet recipes over the years, this one stands out for so many reasons. Whether you’re a seasoned baker or just looking for a straightforward dessert to wow your guests, this cake has your back. Here’s why it’s become my go-to for the 4th of July and beyond:
- Quick & Easy: Ready in under 90 minutes from start to finish, so you’re not stuck in the kitchen all day.
- Simple Ingredients: No need for hard-to-find items; most are pantry staples you probably already have, like cocoa powder and buttermilk.
- Perfect for Celebrations: Its rich red color and classic cream cheese frosting make it ideal for holiday gatherings, birthday parties, or any time you want to impress without stress.
- Crowd-Pleaser: Kids and adults alike can’t get enough of the moist texture and balanced sweetness.
- Unbelievably Delicious: The subtle cocoa flavor combined with that tangy frosting hits just the right note — not too sweet, never dry.
What really sets this red velvet cake apart is the little secret ingredient I learned from Lisa: a splash of espresso powder in the batter. It’s just enough to deepen the cocoa flavor without tasting like coffee at all. Plus, the frosting is whipped just right, giving it a light, airy feel that’s easier to spread and less heavy than many cream cheese frostings.
This isn’t your average red velvet — it’s the kind that makes you close your eyes after the first bite, savoring the celebration. Honestly, it’s perfect for turning a simple summer gathering into something memorable and sweet.
What Ingredients You Will Need
This red velvet cake recipe calls for straightforward, wholesome ingredients that come together beautifully to create that classic flavor and texture. Most are kitchen staples, so you won’t need a special trip to the store.
- For the Cake Batter:
- All-purpose flour, 2 ½ cups (310 g) — sifted for a light crumb
- Granulated sugar, 1 ½ cups (300 g)
- Cocoa powder, 2 tablespoons (unsweetened, preferably Dutch-processed for a richer flavor)
- Baking soda, 1 teaspoon
- Salt, ½ teaspoon
- Buttermilk, 1 cup (240 ml), room temperature (adds moisture and tang)
- Vegetable oil, 1 cup (240 ml) — I like using canola for its neutral taste
- Large eggs, 2, room temperature
- Vanilla extract, 2 teaspoons (pure vanilla extract makes all the difference)
- Red food coloring, 2 tablespoons (gel food coloring works best for vibrant color without thinning the batter)
- Espresso powder, 1 teaspoon (secret ingredient to boost cocoa flavor)
- White vinegar, 1 teaspoon (helps activate the baking soda for a tender crumb)
- For the Cream Cheese Frosting:
- Cream cheese, 8 ounces (225 g), softened (I recommend Philadelphia brand for reliable creaminess)
- Unsalted butter, ½ cup (115 g), softened (adds richness)
- Powdered sugar, 4 cups (480 g), sifted to avoid lumps
- Vanilla extract, 1 teaspoon
- Pinch of salt (balances sweetness)
If you want to make a dairy-free version, you can substitute the cream cheese and butter with plant-based alternatives, and swap regular milk for almond or oat milk instead of buttermilk (just add a teaspoon of lemon juice to sour it slightly). For a gluten-free twist, try using a gluten-free all-purpose blend that measures cup-for-cup.
Equipment Needed
- Two 9-inch (23 cm) round cake pans – non-stick or lined with parchment paper for easy release
- Mixing bowls – one large and one medium-sized
- Electric mixer or stand mixer – helps whip the frosting smoothly and mix the batter evenly
- Measuring cups and spoons – for precise measurements
- Rubber spatula – to scrape down the sides of the bowl and fold ingredients gently
- Cooling racks – allows the cakes to cool completely before frosting
- Offset spatula or butter knife – for spreading the frosting evenly
If you don’t have a stand mixer, a hand mixer works just fine. For the pans, if you only have one, bake the cakes one at a time and keep the first cooled layer wrapped in plastic wrap. I’ve also used silicone cake pans with good results, but just watch the baking time as it might vary slightly.
Preparation Method
- Preheat your oven to 350°F (175°C). Grease and flour two 9-inch round pans or line them with parchment paper. This ensures your cakes come out cleanly.
- Mix dry ingredients: In a large bowl, sift together the flour, cocoa powder, baking soda, and salt. Sifting helps prevent lumps and keeps the batter light.
- Combine wet ingredients: In another bowl, whisk the buttermilk, vegetable oil, eggs, vanilla extract, red food coloring, espresso powder, and white vinegar until smooth. The vinegar will react with the baking soda to give you that tender texture.
- Blend wet and dry: Slowly add the dry ingredients to the wet mixture, stirring gently with a spatula or mixer on low speed. Don’t overmix — stop as soon as the batter is smooth and uniform to avoid a dense cake.
- Pour and bake: Divide the batter evenly between the two pans (about 2 cups/480 ml each). Bake for 25-30 minutes, or until a toothpick inserted in the center comes out clean. Keep an eye around 25 minutes — ovens vary, and you don’t want to overbake.
- Cool completely: Let the cakes cool in the pans for 10 minutes, then turn them out onto wire racks. Cooling fully before frosting is key to prevent melting.
- Make the frosting: Beat the softened cream cheese and butter together until creamy and smooth, about 2-3 minutes. Gradually add the powdered sugar, then the vanilla and salt. Beat on medium-high speed until light and fluffy—this usually takes about 4-5 minutes. If the frosting is too soft, chill it for 10-15 minutes to firm up.
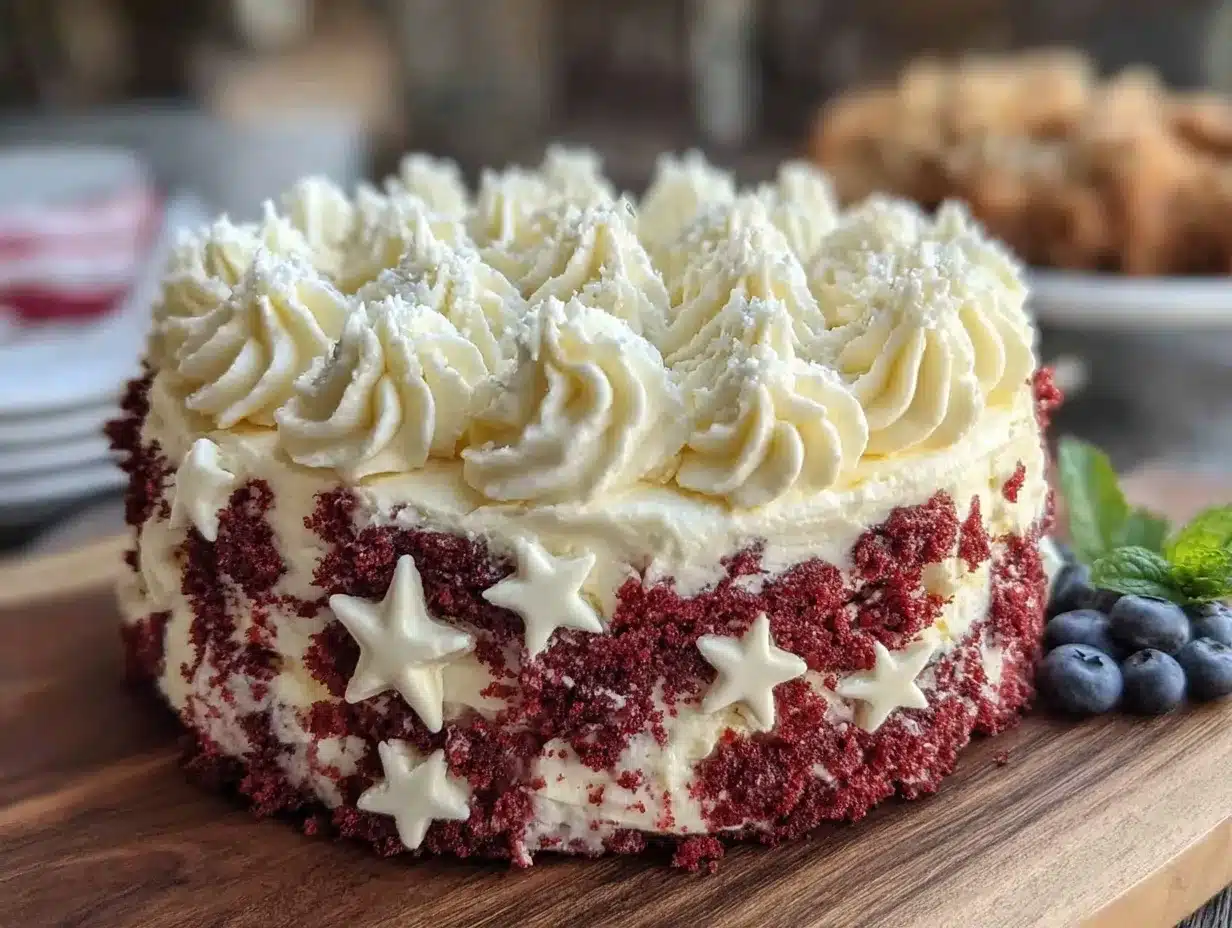
- Assemble the cake: Place one cake layer on your serving plate. Spread a generous amount of cream cheese frosting evenly on top. Add the second layer and frost the top and sides smoothly. For a festive touch, consider piping small rosettes or stars with any leftover frosting.
Pro tip: If you accidentally forget to let the cake layers cool completely, the frosting will melt and slide off — trust me, I learned this the hard way one busy July 4th! Patience here pays off big time.
Cooking Tips & Techniques
Getting the perfect red velvet cake isn’t just about following steps; it’s about those small details that make a big difference. Here are some tips I’ve picked up along the way:
- Use room temperature ingredients: Eggs and buttermilk at room temp help the batter mix more evenly, preventing lumps and dense spots.
- Gel food coloring over liquid: It gives a more vibrant color without thinning your batter. If you like a deeper red, a little extra won’t hurt, but don’t go overboard or you might taste the dye.
- Don’t skip the espresso powder: It’s subtle but crucial. It boosts the cocoa flavor without adding coffee taste, making the cake richer.
- Measure flour correctly: Spoon it lightly into your measuring cup rather than scooping, to avoid packing it in and ending with a dry cake.
- Watch your bake time carefully: Red velvet can dry out if overbaked. Start checking at 25 minutes.
- For frosting consistency: Beat the cream cheese and butter thoroughly before adding sugar, and sift your powdered sugar to avoid lumps.
- Chill the frosting slightly if it feels too soft. It makes spreading much easier.
One of my early attempts had the frosting too runny and the cake layers sliding all over the place — a bit of a disaster but a funny memory now. I learned that chilling the frosting and cooling the cake fully are non-negotiable.
Variations & Adaptations
This red velvet celebration cake is flexible enough to suit different tastes and dietary needs. Here are some variations I’ve tried or recommend:
- Gluten-Free Version: Swap the all-purpose flour for a 1:1 gluten-free baking flour. Just make sure it contains xanthan gum for structure.
- Vegan Adaptation: Use flax eggs (1 tablespoon ground flaxseed + 3 tablespoons water per egg), dairy-free cream cheese and butter substitutes, and a plant-based milk soured with lemon juice in place of buttermilk.
- Blueberry Red Velvet: Add ½ cup fresh or frozen blueberries folded gently into the batter before baking. It adds a fun twist and a pop of flavor for summer.
- Layered Flag Cake: After frosting, decorate the top with fresh blueberries and sliced strawberries arranged like the American flag. It’s a showstopper for July 4th!
- Spiced Red Velvet: Add ½ teaspoon cinnamon and ¼ teaspoon nutmeg to the dry ingredients for a warm, cozy undertone—great for fall celebrations.
I once made a version with coconut cream frosting for a tropical twist — not traditional, but surprisingly good if you like a lighter, less tangy finish.
Serving & Storage Suggestions
This cake tastes best served at room temperature, letting the flavors and textures shine through. I like to slice it about 30 minutes before serving to take the chill off the frosting.
For a festive presentation, pair it with fresh berries or a scoop of vanilla bean ice cream. A cup of iced tea or lemonade complements the richness perfectly on a hot summer day.
Store leftovers covered tightly in the refrigerator for up to 4 days. Before serving again, bring slices to room temp for about 20 minutes to soften the frosting. You can also freeze the unfrosted cake layers wrapped well in plastic wrap and foil for up to 3 months. Thaw in the refrigerator overnight, then frost as usual.
Reheating frosted slices isn’t recommended, but if you want a warm bite, gently microwave just the cake portion for 10-15 seconds, avoiding the frosting melting.
Flavors meld nicely after a day, so if you can wait, the next-day cake is often even tastier.
Nutritional Information & Benefits
Per serving (based on 12 slices): Approximately 320 calories, 16g fat, 38g carbohydrates, 3g protein.
This cake offers some nutritional perks thanks to ingredients like buttermilk, which provides calcium and vitamin B12, and cocoa powder, rich in antioxidants. The cream cheese adds protein and calcium, though it also contributes to the fat content, so moderation is key.
It’s naturally gluten-containing but easily adapted for gluten-free diets by swapping flours as noted.
This dessert is a treat, but I appreciate that it uses real ingredients without artificial fillers or processed mixes — which is a plus for a homemade celebration cake.
Conclusion
This Perfect 4th of July Red Velvet Celebration Cake with Cream Cheese Frosting isn’t just a dessert; it’s a joyful tradition that brings people together. Whether you’re hosting a big barbecue or just craving a slice to celebrate in your own way, this recipe has your back with its classic flavor, festive look, and friendly prep.
Feel free to tweak it to your liking — add your favorite fruit, swap ingredients, or get creative with decorations. I love how this cake always brings a little extra sparkle to the holiday table, and I hope it becomes a favorite at your gatherings too.
Give it a try, and when you do, drop a comment below sharing your experience or any fun twists you’ve made. Let’s keep the celebration going, one slice at a time!
FAQs
Can I make this red velvet cake ahead of time?
Absolutely! You can bake the cake layers a day ahead and keep them wrapped tightly at room temperature or refrigerated. Frost just before serving for the best texture.
What if I don’t have buttermilk?
No worries! Mix 1 tablespoon of white vinegar or lemon juice with 1 cup of milk and let it sit for 5 minutes to sour. This works perfectly as a buttermilk substitute.
How do I get the red color without food coloring?
Traditional red velvet relies on food coloring, but you can try natural options like beet juice or pomegranate juice. Keep in mind the color may be less vibrant and can affect the flavor slightly.
Can I use a different frosting?
Yes! While cream cheese frosting is classic, you could try a whipped mascarpone frosting or even a simple vanilla buttercream if you prefer a less tangy option.
Why is my cake dense or dry?
Common causes include overmixing the batter, overbaking, or using cold ingredients. Make sure to measure flour properly and test for doneness starting at 25 minutes.
For a fun twist on classic celebrations, you might enjoy trying my crispy garlic chicken or a refreshing summer berry pavlova to round out your holiday feast.
Pin This Recipe!
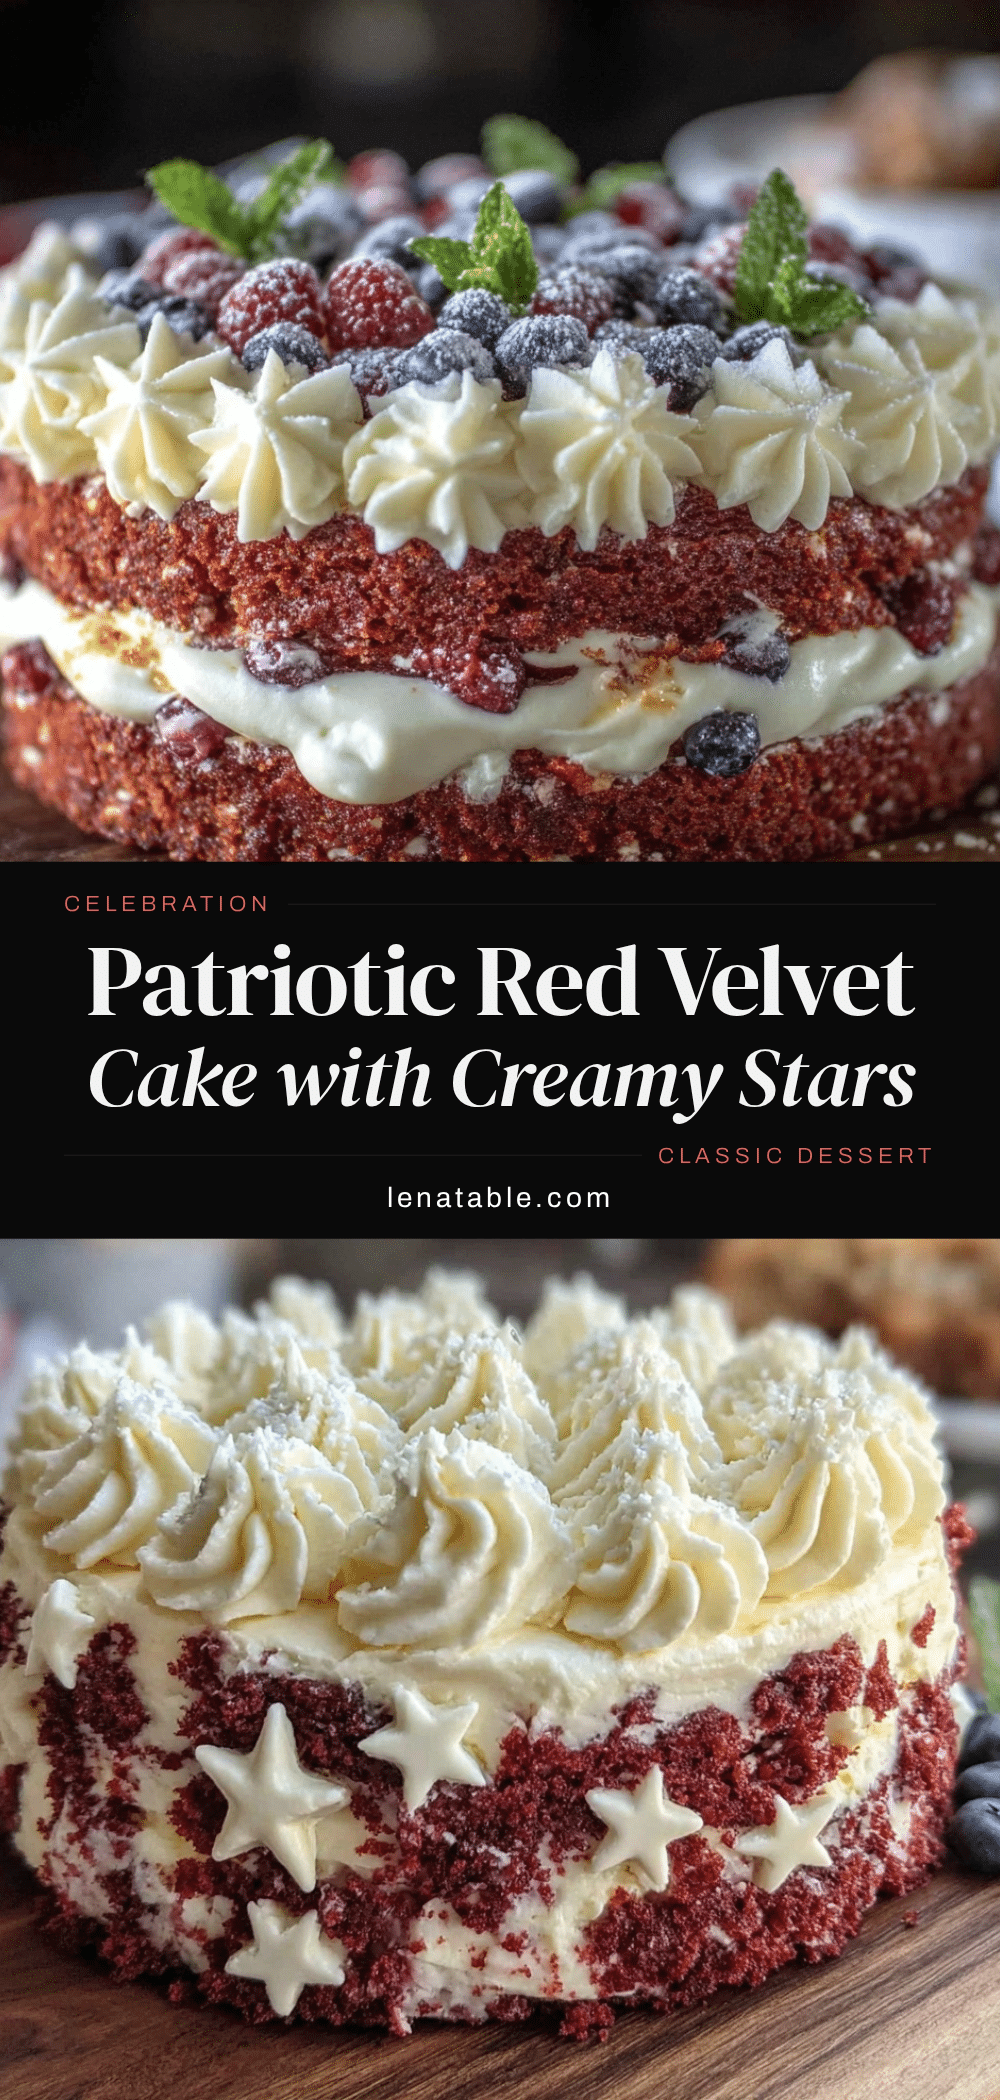
Red Velvet Celebration Cake
A moist and vibrant red velvet cake with a light, tangy cream cheese frosting, perfect for 4th of July celebrations and other festive occasions.
- Prep Time: 20 minutes
- Cook Time: 30 minutes
- Total Time: 50 minutes
- Yield: 12 servings 1x
- Category: Dessert
- Cuisine: American
Ingredients
- 2 ½ cups all-purpose flour (310 g), sifted
- 1 ½ cups granulated sugar (300 g)
- 2 tablespoons unsweetened cocoa powder (preferably Dutch-processed)
- 1 teaspoon baking soda
- ½ teaspoon salt
- 1 cup buttermilk (240 ml), room temperature
- 1 cup vegetable oil (240 ml), canola preferred
- 2 large eggs, room temperature
- 2 teaspoons pure vanilla extract
- 2 tablespoons red gel food coloring
- 1 teaspoon espresso powder
- 1 teaspoon white vinegar
- 8 ounces cream cheese (225 g), softened
- ½ cup unsalted butter (115 g), softened
- 4 cups powdered sugar (480 g), sifted
- 1 teaspoon vanilla extract
- Pinch of salt
Instructions
- Preheat your oven to 350°F (175°C). Grease and flour two 9-inch round pans or line them with parchment paper.
- In a large bowl, sift together the flour, cocoa powder, baking soda, and salt.
- In another bowl, whisk the buttermilk, vegetable oil, eggs, vanilla extract, red food coloring, espresso powder, and white vinegar until smooth.
- Slowly add the dry ingredients to the wet mixture, stirring gently with a spatula or mixer on low speed. Stop as soon as the batter is smooth and uniform to avoid a dense cake.
- Divide the batter evenly between the two pans (about 2 cups/480 ml each). Bake for 25-30 minutes, or until a toothpick inserted in the center comes out clean.
- Let the cakes cool in the pans for 10 minutes, then turn them out onto wire racks to cool completely.
- Beat the softened cream cheese and butter together until creamy and smooth, about 2-3 minutes. Gradually add the powdered sugar, then the vanilla and salt. Beat on medium-high speed until light and fluffy, about 4-5 minutes. Chill for 10-15 minutes if frosting is too soft.
- Place one cake layer on your serving plate. Spread a generous amount of cream cheese frosting evenly on top. Add the second layer and frost the top and sides smoothly. Optionally, pipe decorative rosettes or stars with leftover frosting.
Notes
Use room temperature ingredients for best results. Gel food coloring provides vibrant color without thinning the batter. Do not overmix the batter to avoid a dense cake. Chill frosting if too soft before spreading. Cool cake layers completely before frosting to prevent melting.
Nutrition
- Serving Size: 1 slice (1/12 of cak
- Calories: 320
- Sugar: 30
- Sodium: 250
- Fat: 16
- Saturated Fat: 6
- Carbohydrates: 38
- Fiber: 1
- Protein: 3
Keywords: red velvet cake, 4th of July dessert, cream cheese frosting, celebration cake, easy red velvet, patriotic dessert


