Love this? Save it for later!
Share the inspiration with your friends
“You know, I never thought a bar could capture the magic of campfire s’mores until that one rainy Saturday afternoon last fall,” I told my friend as we sat in my tiny kitchen, the smell of toasted marshmallows filling the air. Honestly, it all started when I was craving that nostalgic campfire treat but didn’t have the luxury of a fire pit or even the right weather to roast marshmallows outdoors. So, I grabbed whatever I had on hand, threw together a batch of gooey s’mores bars, and let me tell you, it was a total game-changer. The chocolate melted just right, the marshmallows were perfectly toasted under the broiler, and the graham cracker base gave that classic crunch we all remember.
Maybe you’ve been there—longing for that childhood campfire taste but stuck inside with only a stove and an oven to work with. That afternoon, my kitchen looked like a disaster zone (I dropped a bowl, forgot to preheat the oven on time, and my dog was very interested in every ingredient), but the end result? Pure comfort in every bite. These bars have become my go-to whenever I need a little warm, nostalgic hug in dessert form.
What makes these Ultimate Gooey S’mores Bars special isn’t just the gooey texture or the melty chocolate; it’s the way they take you back to those crackling campfires, the sticky fingers, and the laughter around the fire. I keep making them because every time I do, it feels like a tiny trip down memory lane—without the smoke in my eyes or the bugs buzzing around. So, if you love that classic s’mores combo but want something easy and homemade, let me tell you why you’ll fall head over heels for this recipe.
Why You’ll Love This Recipe
After many attempts and plenty of taste tests (yes, I volunteered for that!), I’ve crafted these Ultimate Gooey S’mores Bars to hit every note that makes campfire s’mores so irresistible. Here’s why you’ll want to bake them ASAP:
- Quick & Easy: Ready in under 40 minutes, these bars are perfect for those last-minute dessert cravings or a cozy weekend treat.
- Simple Ingredients: No fancy shopping trips required—just pantry staples like graham crackers, chocolate, and marshmallows you probably already have.
- Perfect for Any Occasion: Whether it’s a family gathering, potluck, or just a sweet snack while binge-watching your favorite show, these bars fit right in.
- Crowd-Pleaser: Kids, adults, and even picky eaters can’t resist the gooey, chocolatey goodness.
- Unbelievably Delicious: The contrast of crunchy base, melty chocolate, and toasted marshmallows is downright addictive.
What sets this recipe apart is the careful balance between gooey and sturdy. The graham cracker crust isn’t soggy, thanks to a little butter magic, and the chocolate layer melts to silky perfection without turning into a puddle. Plus, I’ve found that broiling the marshmallows just right gives that authentic toasted flavor you’d expect from a campfire without any fuss or fire hazards. Honestly, it’s the best homemade campfire treat you’ll make this year—and probably the easiest.
What Ingredients You Will Need
This recipe uses simple, wholesome ingredients to deliver bold flavor and satisfying texture without the fuss. Most of these are pantry staples, and many have flexible substitutions—so no stress if you’re missing one or two.
- Graham cracker crumbs (about 1 1/2 cups) – the crunchy base that reminds you of that classic campfire snack.
- Unsalted butter (1/2 cup, melted) – helps bind the crumbs and adds richness. I usually go for Land O Lakes for consistent results.
- Granulated sugar (1/4 cup) – just enough sweetness to balance the buttery crust.
- Mini marshmallows (3 cups) – the star of the show. If you want a twist, try using large marshmallows cut in halves.
- Milk chocolate chips (1 1/2 cups) – melts beautifully for that luscious chocolate layer. I recommend Ghirardelli for smooth melting and rich flavor.
- Vanilla extract (1 teaspoon) – enhances the sweetness and adds depth.
- Salt (a pinch) – balances flavors and brings out the sweetness.
Substitution tips:
- Use dark chocolate chips for a richer, less sweet version.
- Swap almond flour for graham cracker crumbs if you need a gluten-free base.
- Try dairy-free butter and coconut milk chocolate chips for a vegan-friendly treat.
When choosing your marshmallows, I’ve learned that small-curd marshmallows can sometimes melt too fast and get gooey beyond control—mini marshmallows keep things just right.
Equipment Needed
- Baking pan: An 8×8-inch (20×20 cm) square pan works perfectly for these bars. If you don’t have one, a 9×9-inch pan is fine but expect slightly thinner bars.
- Mixing bowls: One medium bowl for the crust mixture and another for melting chocolate. Glass or metal bowls are ideal for melting chocolate without overheating.
- Microwave or double boiler: For melting the butter and chocolate gently. I personally like the microwave method with 20-second bursts to avoid scorching.
- Spatula or wooden spoon: For mixing ingredients and spreading layers evenly.
- Measuring cups and spoons: Accuracy matters here to keep the gooey-to-crisp balance just right.
- Broiler or oven: For toasting the marshmallows perfectly. Keep a close eye—marshmallows toast fast!
If you’re on a budget, you can swap a glass pan for a disposable aluminum one, but the bars might cook a bit faster. Also, a silicone spatula makes spreading the chocolate layer hassle-free.
Preparation Method
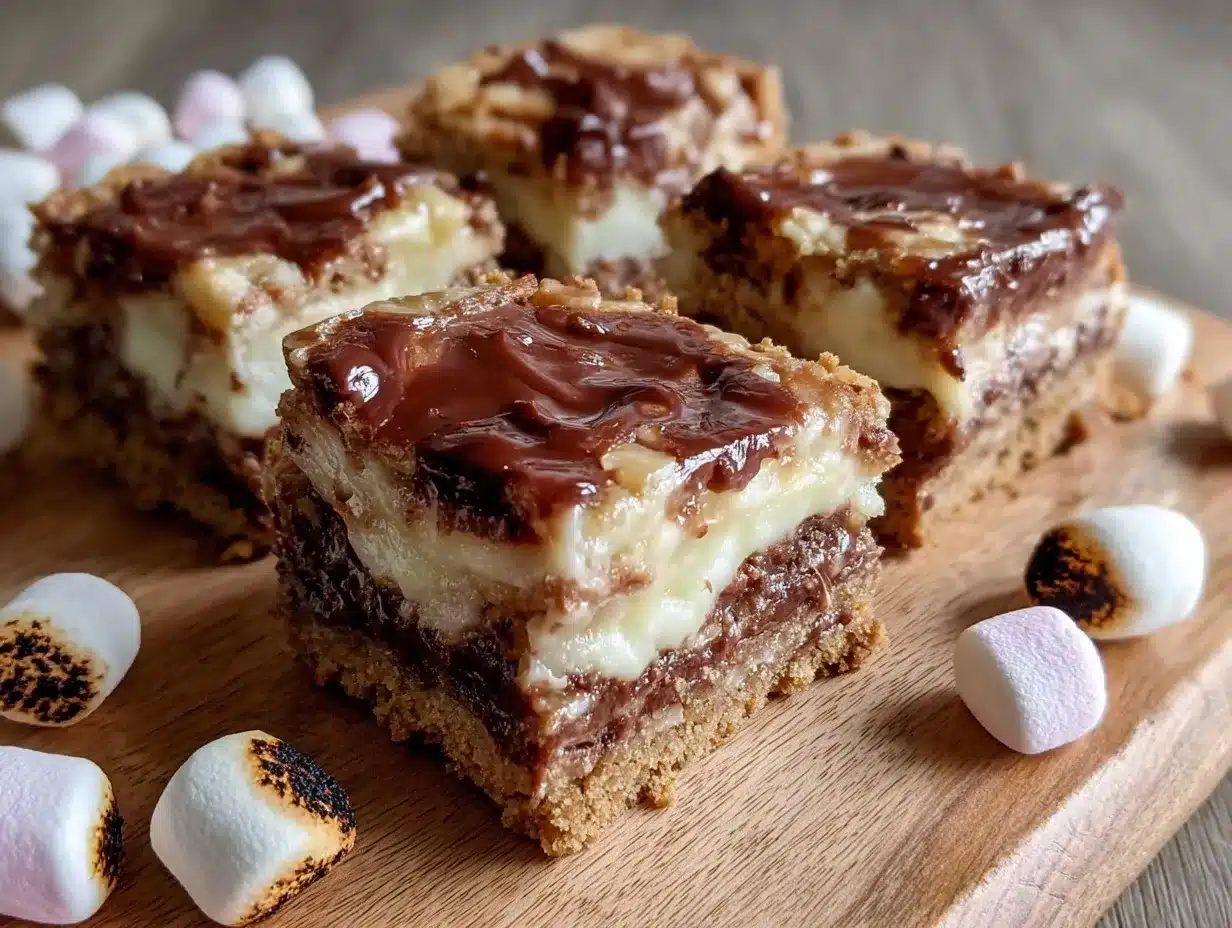
- Preheat your oven to 350°F (175°C). Line your 8×8-inch baking pan with parchment paper, letting the edges hang over for easy removal later. (Pro tip: lightly grease the parchment to keep it from sliding.)
This step takes about 10 minutes including prep. - Make the graham cracker crust: In a medium bowl, combine 1 1/2 cups graham cracker crumbs, 1/4 cup granulated sugar, and a pinch of salt. Pour in 1/2 cup melted unsalted butter and 1 teaspoon vanilla extract. Stir everything until the mixture looks evenly moistened and crumbly but holds together when pressed.
Tip: If it feels too dry, add a tablespoon more melted butter. - Press the crust firmly into the bottom of your prepared pan, creating an even layer. Use the flat bottom of a glass or measuring cup for smooth compaction. Bake for 10-12 minutes until golden and fragrant but not burnt.
Watch the edges closely—graham crumbs can brown quickly. - Prepare the chocolate layer: While the crust bakes, melt 1 1/2 cups milk chocolate chips in a microwave-safe bowl in 20-second intervals, stirring between each until smooth. Alternatively, melt over a double boiler.
Be patient—overheated chocolate can seize up. - Spread the chocolate evenly over the warm crust as soon as it’s out of the oven. The residual heat helps the chocolate spread and stick better.
Work quickly but gently to avoid breaking the crust. - Top with mini marshmallows: Sprinkle 3 cups evenly over the chocolate layer, covering the surface with a fluffy white blanket of sweetness.
- Toast the marshmallows: Place the pan under the broiler on high for 1-2 minutes. Keep the oven door slightly ajar and watch carefully—marshmallows go from golden to burnt in seconds! Remove when tops are puffed and golden brown.
If you don’t have a broiler, you can bake at 350°F (175°C) for about 5-7 minutes but the texture will be softer, less toasted. - Cool and slice: Let the bars cool completely in the pan on a wire rack for at least 30 minutes. This helps the chocolate set and makes slicing less messy. Use the parchment edges to lift the whole slab out, then cut into squares.
If you want neater slices, chill in the fridge for 15 minutes before cutting.
Remember, every oven is a little different, so adjust broiling times as you get to know your setup. Personally, I learned the hard way not to wander off during broiling—mid-toast marshmallows are tricky little devils!
Cooking Tips & Techniques
To get these Ultimate Gooey S’mores Bars just right, here are some tips from my kitchen trials:
- Don’t skip the parchment paper: It’s a lifesaver for lifting the bars out cleanly and stopping them from sticking or breaking apart.
- Press the crust firmly: A well-compacted crust means your bars won’t crumble when you slice them—trust me, loose crusts are frustrating.
- Gently melt chocolate: Avoid rushing the melting process. Stir often to prevent scorching, which can give a bitter taste.
- Broil marshmallows carefully: Marshmallows can go from golden to burnt in less than 30 seconds. Stand close, keep the oven door open a crack, and set a timer.
- Cool completely before slicing: Patience pays off here. Cutting too soon leads to sticky, gooey messes that don’t hold shape.
- Multitask smartly: While the crust bakes, prep the chocolate and marshmallows so you’re ready to assemble right away—this keeps everything warm and melty.
One personal mishap: I once tried cutting the bars hot and ended up with a chocolatey blob on the cutting board. Lesson learned—cool first, slice second!
Variations & Adaptations
This recipe is great as-is but also super flexible for different tastes and dietary needs.
- Peanut Butter Twist: Swirl in 1/4 cup creamy peanut butter into the melted chocolate layer before spreading. It adds a rich, nutty flavor that pairs beautifully with the marshmallows.
- Gluten-Free Option: Use almond flour or a gluten-free graham cracker alternative for the crust. Just make sure to adjust butter amounts slightly for texture.
- Vegan S’mores Bars: Swap dairy butter for coconut oil or vegan butter, use dairy-free chocolate chips, and replace marshmallows with vegan-friendly ones like Dandies.
- Seasonal Berries: Add a handful of fresh raspberries or sliced strawberries on top of the chocolate before adding marshmallows for a fruity surprise.
- Salted Caramel: Drizzle homemade or store-bought salted caramel sauce over the bars after broiling for an extra indulgent treat.
I once tried adding crushed pretzels on the crust for extra crunch and salty contrast—totally worth the mess it made!
Serving & Storage Suggestions
These gooey bars are best enjoyed at room temperature when the chocolate is silky and marshmallows are soft but not cold. Serve them alongside a glass of cold milk, hot cocoa, or even a scoop of vanilla ice cream for ultimate indulgence.
To store, keep the bars in an airtight container at room temperature for up to 2 days. If your kitchen is warm, refrigerate but note the marshmallows might harden slightly. For longer storage, freeze in a sealed container for up to 1 month—thaw at room temp before serving.
Reheating tips: Warm briefly in a microwave (about 10 seconds) to soften the chocolate and marshmallows again. Be careful not to overheat or they’ll melt too much.
Fun fact: The flavors actually deepen after a day or two as the chocolate and marshmallows meld together, making leftovers even better!
Nutritional Information & Benefits
Each serving (1 bar, assuming 12 bars total) contains approximately:
| Calories | 220 kcal |
|---|---|
| Fat | 12 g |
| Carbohydrates | 28 g |
| Sugar | 19 g |
| Protein | 2 g |
While these bars are definitely a treat, they do include some beneficial ingredients: butter adds vitamin A and calcium, and the graham cracker base offers a bit of fiber. For a slightly healthier spin, try swapping in dark chocolate for antioxidants and reduce the sugar slightly.
Note: Contains gluten and dairy; marshmallows typically contain gelatin (not vegan). Always check labels if you have specific dietary restrictions or allergies.
Conclusion
If you’re craving that classic campfire s’mores taste but want an easy, mess-free way to enjoy it anytime, these Ultimate Gooey S’mores Bars are exactly what you need. They capture the nostalgia, the flavors, and the gooey delight of childhood campfire nights—without the smoke or the bugs. The balance of crunchy crust, melty chocolate, and toasted marshmallows is one I keep coming back to, and I hope you will too.
Feel free to make this recipe your own—swap ingredients, add toppings, or tweak the sweetness to suit your taste. And hey, if you try it out, I’d love to hear how your batch turned out or any fun twists you added!
So go on, treat yourself to a little campfire magic in your own kitchen. Happy baking!
Frequently Asked Questions
Can I use jumbo marshmallows instead of mini marshmallows?
Yes, but cut them in halves or quarters so they toast evenly and don’t overwhelm the bars. Mini marshmallows work best for a balanced texture.
How do I prevent the graham cracker crust from getting soggy?
Make sure to press it firmly and bake it before adding chocolate and marshmallows. This helps create a sturdy base that holds up well.
Can I make these bars ahead of time?
Absolutely! They keep well at room temperature for a couple of days or can be frozen for up to a month. Just thaw before serving.
What’s the best way to toast marshmallows without a broiler?
If you don’t have a broiler, bake the bars in a 350°F (175°C) oven for 5-7 minutes until marshmallows are soft and slightly browned, though the texture will be less toasted.
Are these bars gluten-free?
Not with traditional graham cracker crumbs, but you can substitute almond flour or gluten-free graham cracker crumbs to make them gluten-free.
Also, if you enjoy nostalgic treats, you might appreciate the rich flavors in my crispy garlic chicken recipe—comfort food done right!
And for another sweet snack, the chewy oatmeal cookies bring a cozy vibe that pairs perfectly with these s’mores bars.
Pin This Recipe!
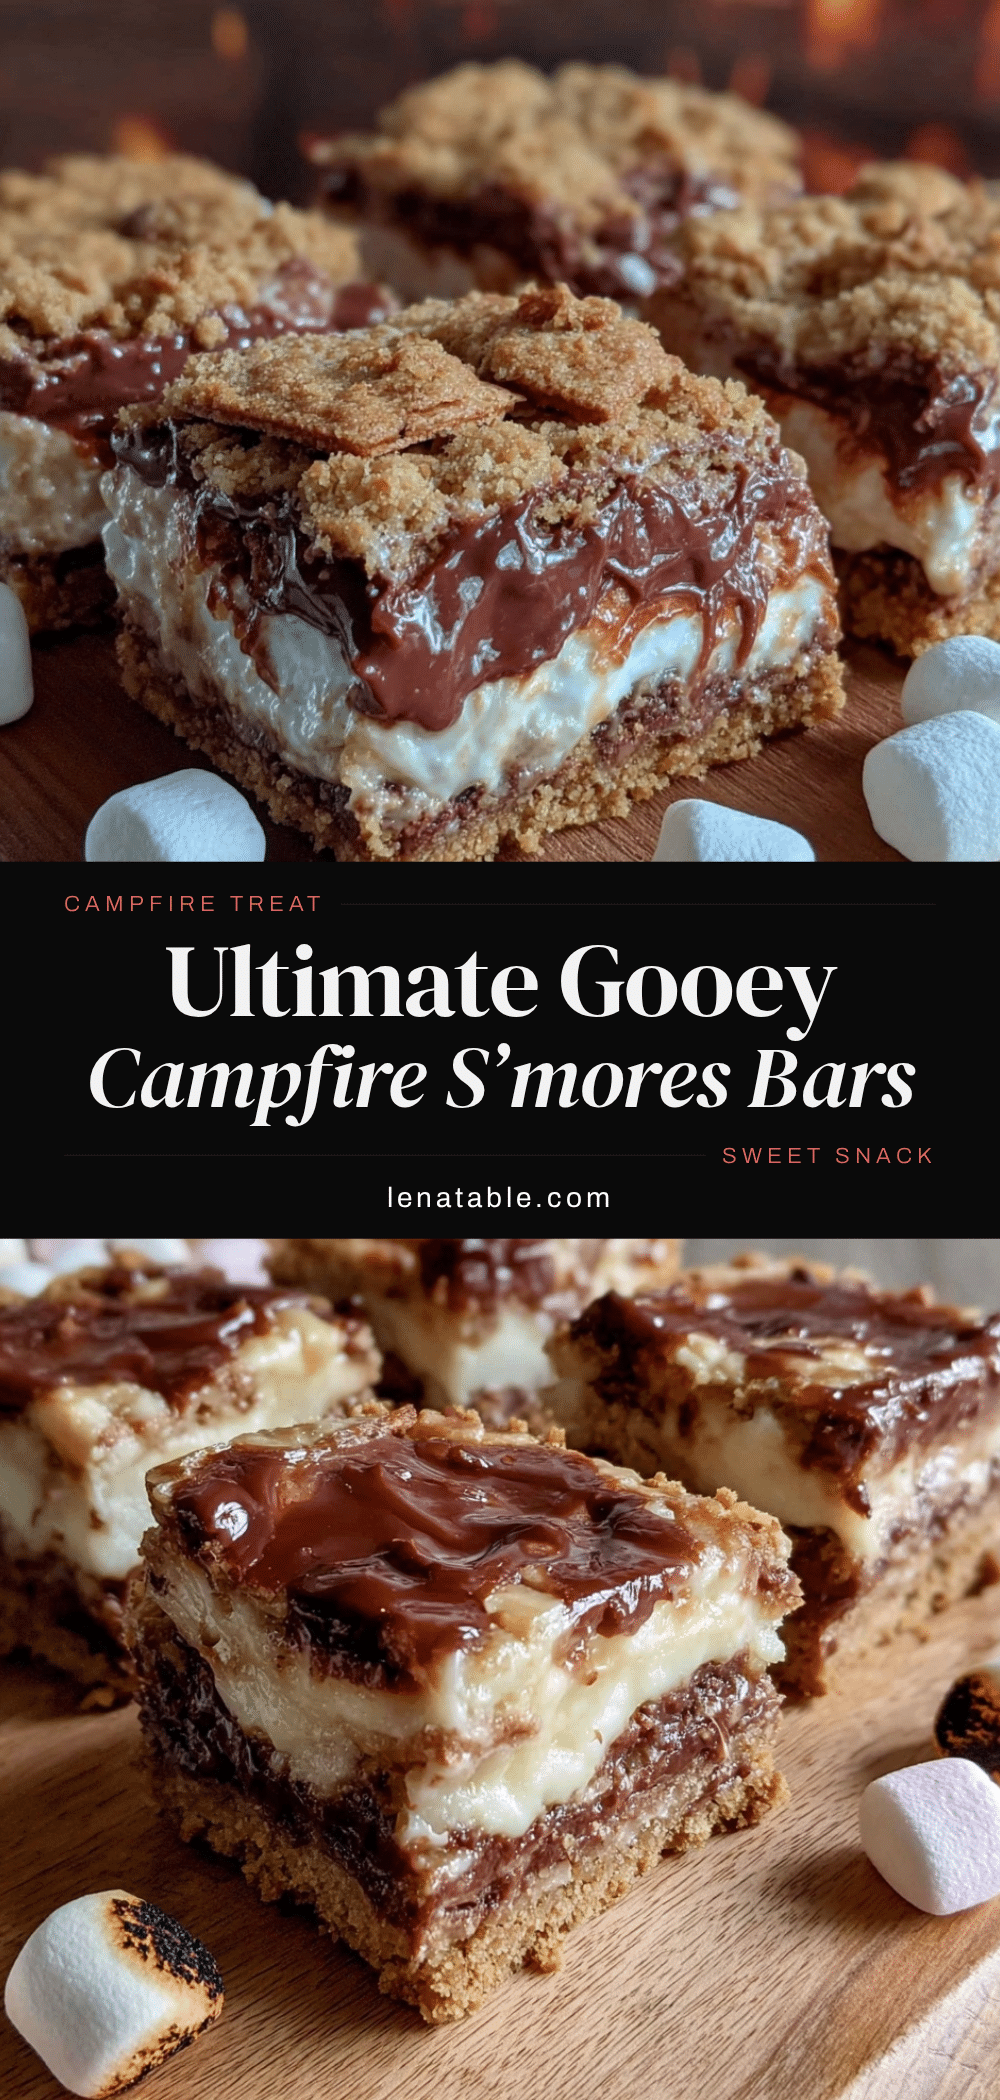
Ultimate Gooey S’mores Bars
These Ultimate Gooey S’mores Bars capture the nostalgic campfire s’mores flavor with a crunchy graham cracker crust, melty chocolate layer, and toasted marshmallows, perfect for an easy homemade treat.
- Prep Time: 10 minutes
- Cook Time: 25 minutes
- Total Time: 35 minutes
- Yield: 12 bars 1x
- Category: Dessert
- Cuisine: American
Ingredients
- 1 1/2 cups graham cracker crumbs
- 1/2 cup unsalted butter, melted
- 1/4 cup granulated sugar
- 3 cups mini marshmallows
- 1 1/2 cups milk chocolate chips
- 1 teaspoon vanilla extract
- Pinch of salt
Instructions
- Preheat your oven to 350°F (175°C). Line an 8×8-inch baking pan with parchment paper, letting the edges hang over for easy removal. Lightly grease the parchment to prevent sliding.
- In a medium bowl, combine graham cracker crumbs, granulated sugar, and a pinch of salt. Pour in melted butter and vanilla extract. Stir until the mixture is evenly moistened and crumbly but holds together when pressed. Add more melted butter if too dry.
- Press the crust firmly into the bottom of the prepared pan to create an even layer. Use the flat bottom of a glass or measuring cup for smooth compaction. Bake for 10-12 minutes until golden and fragrant but not burnt.
- While the crust bakes, melt the milk chocolate chips in a microwave-safe bowl in 20-second intervals, stirring between each until smooth, or melt over a double boiler.
- Spread the melted chocolate evenly over the warm crust as soon as it’s out of the oven. Work quickly but gently to avoid breaking the crust.
- Sprinkle mini marshmallows evenly over the chocolate layer, covering the surface.
- Place the pan under the broiler on high for 1-2 minutes with the oven door slightly ajar. Watch carefully and remove when marshmallows are puffed and golden brown. Alternatively, bake at 350°F for 5-7 minutes for softer marshmallows.
- Let the bars cool completely in the pan on a wire rack for at least 30 minutes to allow the chocolate to set. Use parchment edges to lift the slab out and cut into squares. For neater slices, chill in the fridge for 15 minutes before cutting.
Notes
Do not skip parchment paper for easy removal. Press crust firmly to avoid crumbling. Melt chocolate gently to prevent scorching. Watch marshmallows closely under broiler to avoid burning. Cool bars completely before slicing to prevent mess.
Nutrition
- Serving Size: 1 bar
- Calories: 220
- Sugar: 19
- Fat: 12
- Carbohydrates: 28
- Protein: 2
Keywords: s'mores bars, gooey s'mores, campfire treats, easy dessert, chocolate marshmallow bars, homemade s'mores


