Love this? Save it for later!
Share the inspiration with your friends
“You wouldn’t think a quick grocery run on a blazing July afternoon could turn into a recipe revelation, but that’s exactly what happened,” I said to my friend Mark as we stood in the checkout line. He was holding a bag of graham crackers, and I was eyeing a tub of cream cheese with a guilty grin. It all started when I realized I hadn’t planned a dessert for the neighborhood 4th of July block party. The idea of a complicated, oven-roasted cake was out of the question with the heatwave making the kitchen feel like a sauna.
Honestly, the inspiration hit me when I spotted a tiny American flag stuck in a berry basket at the farmer’s market earlier that morning. That vibrant red, white, and blue color combo sparked something. I knew I wanted a dessert that was festive, simple, and didn’t require turning on the oven. So, I grabbed the essentials and improvised this easy, no-bake mini cheesecake recipe that looks like a slice of patriotic heaven.
Maybe you’ve been there—scrambling last minute for something sweet, wondering if you can pull it off without stress or a mess. This recipe came with a few hiccups (Mark accidentally dropped the container of blueberries, but hey, that’s part of the charm). What matters is it turned out perfect: creamy, fresh, and bursting with those classic American flag colors. It’s become my go-to for every summer gathering since—simple, impressive, and honestly, a little bit fun to make.
Why You’ll Love This Recipe
Let me tell you why these Perfect Mini American Flag Cheesecakes have earned a permanent spot in my festive dessert lineup:
- Quick & Easy: Comes together in under 30 minutes, making it perfect for busy weeknights or last-minute celebrations.
- Simple Ingredients: No fancy or hard-to-find items—just pantry staples and fresh berries you probably already have on hand.
- Ideal for Patriotic Occasions: Whether it’s the 4th of July, Memorial Day, or Veterans Day, these mini cheesecakes steal the show.
- Crowd-Pleaser: Kids adore the colorful presentation, and adults rave about the creamy, light texture.
- Unbelievably Delicious: The combination of smooth cheesecake filling, crunchy crust, and fresh berries creates a delightful balance of flavors and textures.
This isn’t just another no-bake cheesecake. The trick is in the perfectly balanced sweetness and the fresh berries arranged in a way that truly mimics the American flag, making it more than just a dessert—it’s a statement on your party table. Plus, swapping traditional heavy cream for a lighter version keeps it feeling fresh and summery.
Honestly, each bite feels like a little celebration on your tongue. It’s the kind of treat that gets everyone asking for the recipe, and I’m excited for you to experience that with your friends and family.
What Ingredients You Will Need
This no-bake cheesecake recipe is built on simple, wholesome ingredients that come together to create a mouthwatering patriotic treat. Most of these are pantry staples or easy-to-find fresh items, perfect for quick prep.
- For the Crust:
- Graham cracker crumbs – about 1 ½ cups (150g), finely crushed (I like using Honey Maid for the best texture)
- Unsalted butter – 6 tablespoons (85g), melted (adds richness and holds the crust together)
- Granulated sugar – 2 tablespoons (for a touch of sweetness)
- For the Cheesecake Filling:
- Cream cheese – 16 ounces (450g), softened to room temperature (makes the filling creamy and smooth)
- Powdered sugar – ¾ cup (90g), sifted (for a silky sweetness that blends without grit)
- Vanilla extract – 1 teaspoon (adds depth to the flavor)
- Heavy whipping cream – 1 cup (240ml), cold (helps achieve that perfect fluffy texture)
- For the Topping:
- Fresh strawberries – 1 cup (sliced, for the red stripes)
- Fresh blueberries – 1 cup (for the blue field)
- Whipped cream or additional whipped topping – for the white stripes and garnish (optional)
If you’re looking for a dairy-free option, swapping cream cheese with a plant-based alternative like Tofutti works well, and coconut cream can substitute the heavy cream. For gluten-free crusts, try almond flour mixed with melted coconut oil as a tasty alternative. In summer, I love using freshly picked berries from local farms instead of store-bought—just a little tip for that extra burst of flavor!
Equipment Needed
- Mixing bowls – a large one for the crust and another for the filling
- Electric hand mixer or stand mixer – to whip the cream cheese and heavy cream until smooth and fluffy
- Measuring cups and spoons – for precise ingredient amounts
- Mini cheesecake pans or silicone muffin molds – 12-cup capacity (silicone makes releasing the cheesecakes easier without damaging the shape)
- Spoon or small offset spatula – to smooth the cheesecake filling evenly
- Refrigerator space – for chilling the cheesecakes
If you don’t have a mini cheesecake pan, small ramekins or even sturdy paper baking cups placed inside a muffin tin will do just fine. I’ve tried silicone molds and metal pans, and honestly, silicone is my favorite because it’s gentle on the crust and filling. Don’t forget to have a sharp knife handy for slicing the strawberries thinly for those crisp red stripes!
Preparation Method
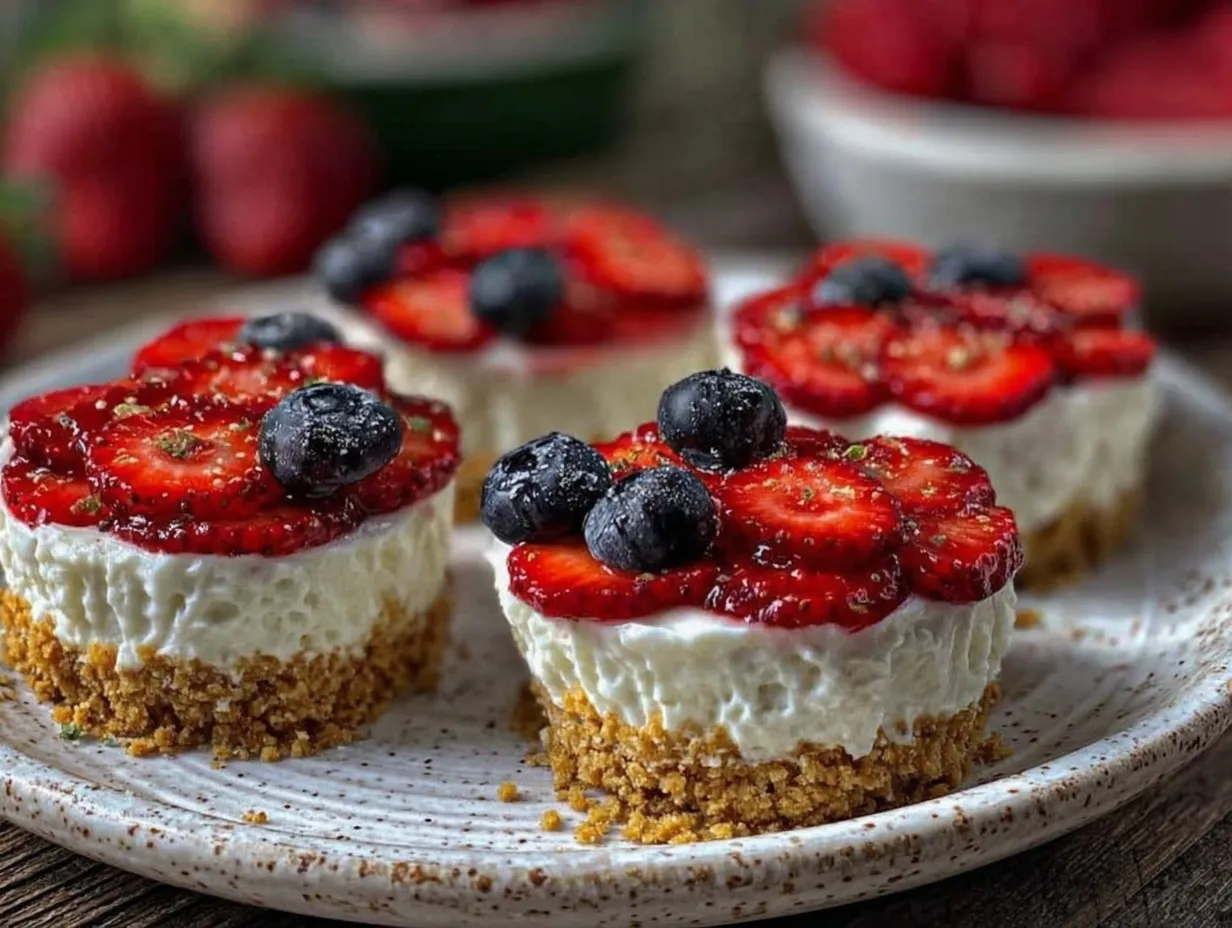
- Prepare the crust: In a medium bowl, combine 1 ½ cups (150g) of finely crushed graham cracker crumbs, 6 tablespoons (85g) of melted unsalted butter, and 2 tablespoons of granulated sugar. Mix until the crumbs are evenly coated and resemble wet sand. This should take about 3 minutes. Tip: If your crumb mixture feels too dry, add a tiny splash of melted butter.
- Press the crust: Spoon about 2 tablespoons of the crust mixture into each mini cheesecake cup. Press firmly with the back of a spoon or your fingers to form a compact, even layer. This step takes roughly 5 minutes. Don’t rush; a well-packed crust holds everything together.
- Chill the crust: Place the crust-lined pans in the fridge for at least 10 minutes to set while you prepare the filling. This helps prevent sogginess later on.
- Make the cheesecake filling: In a large bowl, beat 16 ounces (450g) of softened cream cheese with ¾ cup (90g) powdered sugar and 1 teaspoon vanilla extract until smooth and creamy. This takes about 3-5 minutes with an electric mixer on medium speed.
- Whip the cream: In a separate chilled bowl, whip 1 cup (240ml) of cold heavy cream until stiff peaks form. This usually takes 4-6 minutes. Be careful not to overwhip or you’ll end up with butter!
- Combine filling and cream: Gently fold the whipped cream into the cream cheese mixture with a spatula, using slow, sweeping motions to keep it light and airy. It should take 2-3 minutes to combine everything evenly.
- Fill the cheesecake cups: Carefully spoon the cheesecake filling over the chilled crusts, filling each cup about ¾ full. Smooth the tops with a small spatula or back of a spoon for an even surface.
- Chill the cheesecakes: Refrigerate the mini cheesecakes for at least 4 hours, preferably overnight. This chilling time is key for the filling to set properly and develop that luscious texture.
- Assemble the American flag design: Once chilled, arrange sliced strawberries in neat horizontal stripes across each cheesecake to mimic the flag’s red stripes. Use small clusters of blueberries in the top left corner to represent the blue field with stars. Add dollops or thin stripes of whipped cream for the white stripes. This step may take 10-15 minutes depending on your precision.
- Serve and enjoy: These mini cheesecakes are best served chilled. Let them sit for 5 minutes at room temperature before serving for the perfect balance of creamy and cool.
Cooking Tips & Techniques
When you’re making these no-bake cheesecakes, a few things can make your life easier and your results more consistent. First, make sure your cream cheese is truly softened. I’ve learned the hard way that cold cream cheese leads to lumps and a rough texture—patience here is worth it. You can leave it out on the counter for about an hour, or zap it in the microwave for 10-second bursts, but watch carefully.
Another tip is folding the whipped cream gently into the cream cheese mixture. I used to stir too vigorously and lost all the airiness. The secret is slow, careful folding with a spatula, almost like you’re tucking in a delicate blanket.
Pressing the crust solidly into the mini pans is crucial. If it’s too loose, it crumbles when you try to eat it. I usually wet my fingers a bit to get a nice, even press without sticking.
Finally, timing your chilling is key. I once tried to skip the chill and ended up with a sloppy filling that wouldn’t hold its shape. Four hours minimum is the golden rule for a firm but creamy cheesecake.
Multitasking tip: While the mini cheesecakes chill, prep your berries and clean up the kitchen. Saves time and keeps your workspace manageable!
Variations & Adaptations
If you want to mix things up or cater to different diets, these mini cheesecakes are surprisingly adaptable. Here are a few variations I’ve tried and loved:
- Berry swap: Use raspberries or blackberries instead of strawberries for a slightly tart twist that still keeps the patriotic color scheme.
- Chocolate crust: Swap the graham cracker crumbs for crushed chocolate cookies (like Oreos) for a richer base that pairs beautifully with the creamy filling.
- Dairy-free version: Use vegan cream cheese and coconut cream whipped to stiff peaks for a dairy-free, allergy-friendly option that doesn’t skimp on flavor.
- Mini cheesecake parfaits: Layer crushed graham crackers, cheesecake filling, and berries in small clear cups instead of making individual cheesecakes—great for grab-and-go parties.
- Gluten-free crust: Almond flour mixed with a little honey and coconut oil makes a tasty, gluten-free crust alternative.
For a fun twist, I once added a splash of lemon zest to the filling, which gave a subtle brightness and made the berries pop even more. Honestly, that one got rave reviews at the picnic!
Serving & Storage Suggestions
These mini cheesecakes are best served chilled, straight from the fridge, but let them sit out for about 5 minutes before serving to soften slightly for the perfect creamy texture. They make a cheerful centerpiece for any patriotic celebration, paired nicely with iced tea or sparkling lemonade.
If you’re planning ahead, store them covered in the refrigerator for up to 3 days. To freeze, wrap each cheesecake tightly in plastic wrap and place them in an airtight container for up to 1 month. Thaw overnight in the fridge before serving.
When reheating, just let them sit at room temperature rather than using heat—since they are no-bake, reheating isn’t necessary and can ruin the texture. Flavors actually meld beautifully after a day or two, so making them a day ahead can deepen the taste.
Nutritional Information & Benefits
Each mini cheesecake contains roughly 250-300 calories, depending on the exact portion size. They provide a good balance of protein and fat from the cream cheese and heavy cream, with natural vitamins and antioxidants from the fresh berries.
The berries bring vitamin C and fiber, supporting digestion and immune health, while the graham cracker crust adds a touch of whole grain goodness. This recipe can be adjusted to be gluten-free or dairy-free, making it quite inclusive.
For those mindful of sugar, reducing the powdered sugar slightly or swapping with a natural sweetener like erythritol works fine without sacrificing texture.
Conclusion
These Perfect Mini American Flag Cheesecakes are an easy, festive way to celebrate with style and taste. I love how they bring a little bit of joy and creativity to any gathering, without the stress of complicated baking. Whether you’re a seasoned dessert maker or just starting out, this recipe is forgiving, fun, and sure to impress.
Try customizing the toppings or crust to suit your preferences—you might find your new favorite spin on this patriotic classic. I hope you enjoy making and sharing these as much as I do. Don’t forget to leave a comment sharing your own twists or how they went for you!
Now, go grab those berries and make your kitchen a little more festive!
FAQs
Can I make these cheesecakes ahead of time?
Absolutely! They taste even better after chilling overnight, making them perfect for prepping a day or two in advance.
What if I don’t have mini cheesecake pans?
You can use silicone muffin molds, small ramekins, or sturdy paper baking cups placed inside a muffin tin as alternatives.
How do I prevent the crust from getting soggy?
Press the crust firmly and chill it before adding the filling. This helps it set and keeps it from becoming soggy once filled.
Can I use frozen berries for the topping?
Fresh berries are best for presentation and texture, but thawed frozen berries can work if fresh aren’t available—just drain excess liquid to avoid sogginess.
Is there a way to make these cheesecakes gluten-free?
Yes! Substitute the graham cracker crumbs with almond flour or gluten-free cookie crumbs for a tasty gluten-free crust option.
Pin This Recipe!
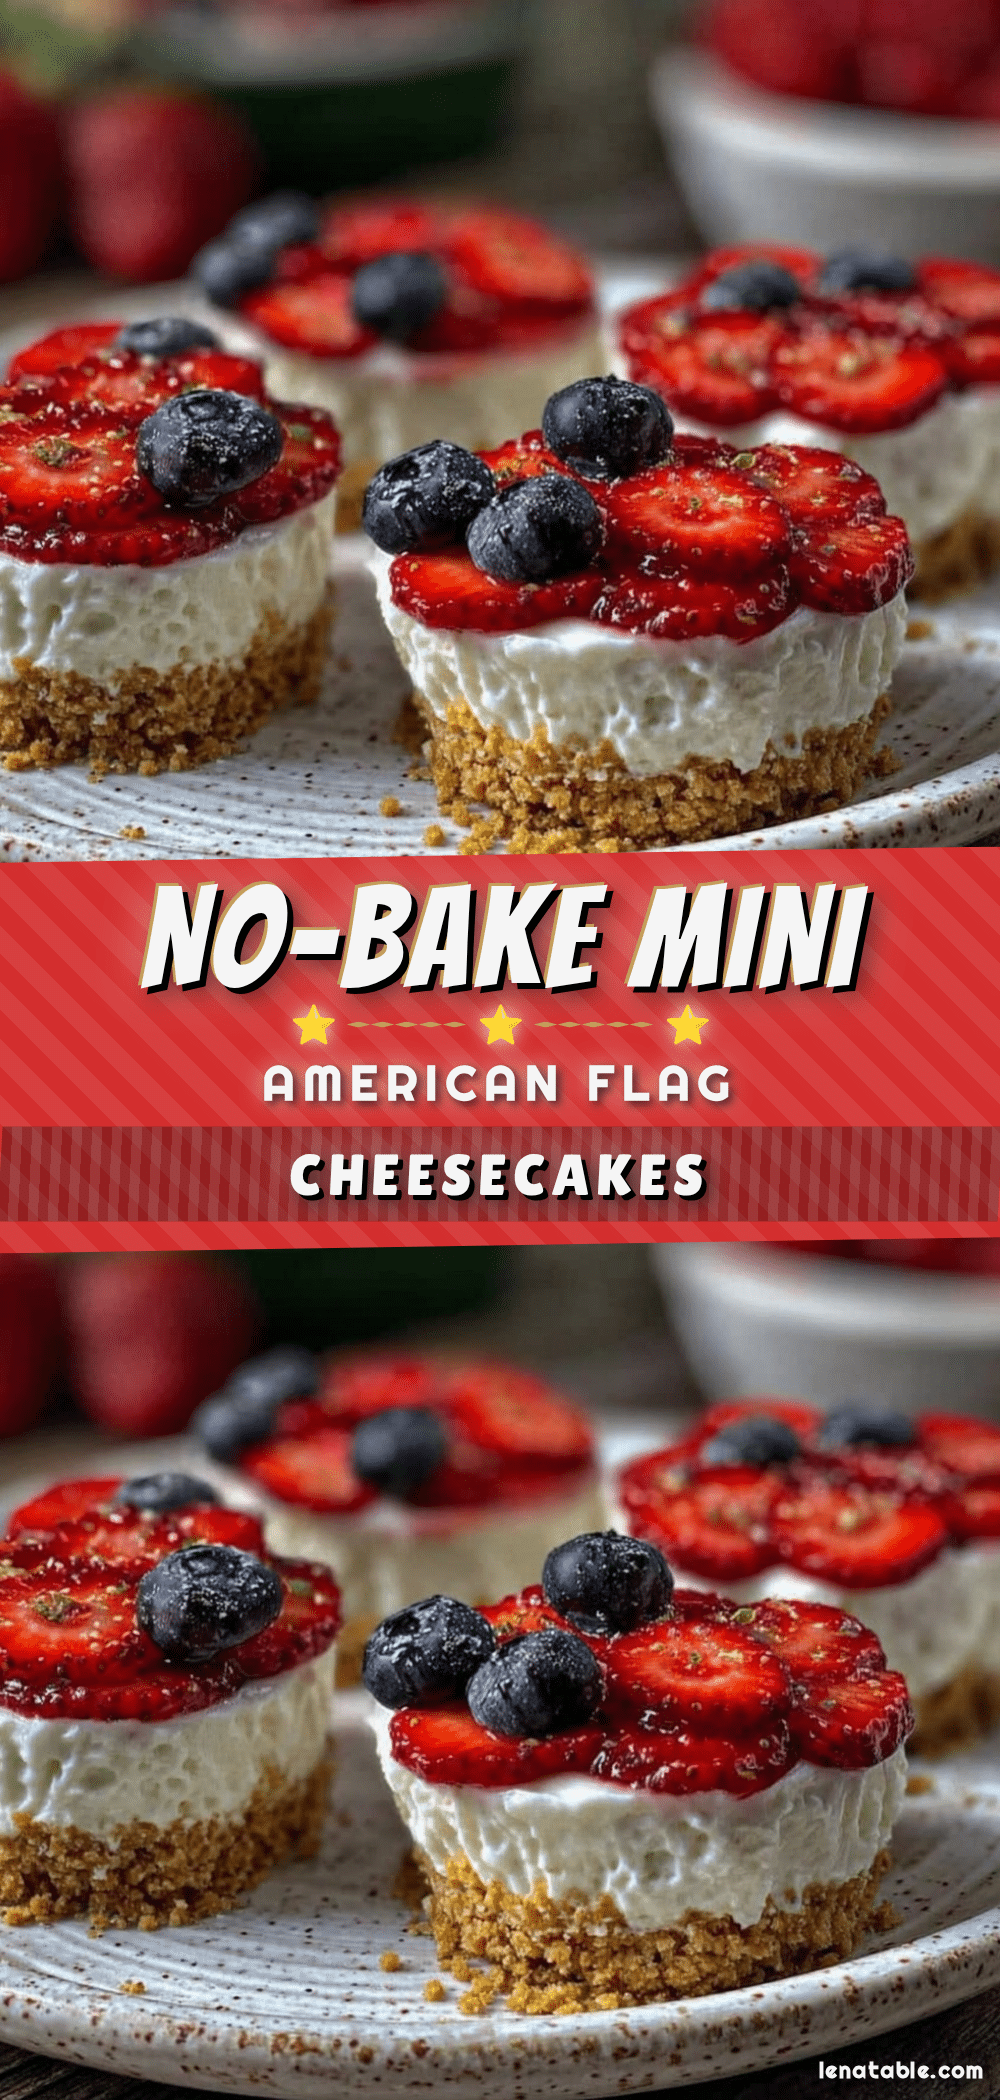
Perfect Mini American Flag Cheesecakes
Easy no-bake mini cheesecakes decorated to look like the American flag, perfect for patriotic celebrations and summer gatherings.
- Prep Time: 20 minutes
- Cook Time: 0 minutes
- Total Time: 4 hours 20 minutes
- Yield: 12 mini cheesecakes 1x
- Category: Dessert
- Cuisine: American
Ingredients
- 1 ½ cups (150g) graham cracker crumbs, finely crushed
- 6 tablespoons (85g) unsalted butter, melted
- 2 tablespoons granulated sugar
- 16 ounces (450g) cream cheese, softened to room temperature
- ¾ cup (90g) powdered sugar, sifted
- 1 teaspoon vanilla extract
- 1 cup (240ml) heavy whipping cream, cold
- 1 cup fresh strawberries, sliced
- 1 cup fresh blueberries
- Whipped cream or additional whipped topping (optional)
Instructions
- In a medium bowl, combine graham cracker crumbs, melted unsalted butter, and granulated sugar. Mix until crumbs are evenly coated and resemble wet sand (about 3 minutes).
- Spoon about 2 tablespoons of the crust mixture into each mini cheesecake cup. Press firmly to form a compact, even layer (about 5 minutes).
- Place the crust-lined pans in the fridge for at least 10 minutes to set.
- In a large bowl, beat softened cream cheese with powdered sugar and vanilla extract until smooth and creamy (3-5 minutes).
- In a separate chilled bowl, whip cold heavy cream until stiff peaks form (4-6 minutes).
- Gently fold the whipped cream into the cream cheese mixture using slow, sweeping motions (2-3 minutes).
- Spoon the cheesecake filling over the chilled crusts, filling each cup about ¾ full. Smooth the tops evenly.
- Refrigerate the mini cheesecakes for at least 4 hours or preferably overnight to set.
- Once chilled, arrange sliced strawberries in horizontal stripes to mimic the flag’s red stripes. Place clusters of blueberries in the top left corner for the blue field. Add dollops or thin stripes of whipped cream for the white stripes.
- Serve chilled. Let sit for 5 minutes at room temperature before serving for best texture.
Notes
Ensure cream cheese is fully softened to avoid lumps. Fold whipped cream gently into cream cheese mixture to keep it airy. Press crust firmly to prevent crumbling. Chill cheesecakes for at least 4 hours for best texture. Fresh berries are preferred for topping but thawed frozen berries can be used if drained well. For dairy-free or gluten-free options, substitute cream cheese and crust accordingly.
Nutrition
- Serving Size: 1 mini cheesecake
- Calories: 275
- Sugar: 14
- Sodium: 150
- Fat: 20
- Saturated Fat: 12
- Carbohydrates: 18
- Fiber: 1
- Protein: 4
Keywords: no-bake cheesecake, mini cheesecakes, patriotic dessert, 4th of July dessert, American flag dessert, easy cheesecake, summer dessert


