Love this? Save it for later!
Share the inspiration with your friends
Last Saturday afternoon, my neighbor watched me fumble with a batch of chocolate brownies that just wouldn’t come together right. She didn’t say anything at first, just smiled and handed me a tattered recipe card with a few scribbles on the back. “Try this,” she said, “It’s my little secret for when I want to impress but keep it simple.” That’s how this Decadent Red Velvet Cheesecake Brownie Bars recipe found its way into my kitchen — not as a formal lesson, but as a friendly nudge over a shared fence. Honestly, it felt less like borrowing a recipe and more like catching a moment of kindness.
At first, I wasn’t sure if I could pull off the layered effect she described — rich red velvet swirled with creamy cheesecake atop fudgy brownies sounds like a lot of work, right? But as I mixed the batter and saw the dazzling red color come alive, I got hooked. Maybe you’ve been there too — craving a dessert that’s more than just sweet, something that feels like a little celebration in every bite. This recipe stays with me because it’s that perfect balance of indulgence and ease, the kind you want on a random Tuesday and a special occasion alike.
And let me tell you, the first time I pulled these bars out of the oven, I forgot to set a timer and almost burnt the edges. Luckily, the neighbor’s advice on watching the crust saved the batch. Now, I make these Decadent Red Velvet Cheesecake Brownie Bars often — sometimes with a glass of cold milk, sometimes sharing with friends — and every time, it feels like a small, sweet conversation in my kitchen.
Why You’ll Love This Recipe
This isn’t just another dessert recipe tossed around on the internet. I’ve made these Decadent Red Velvet Cheesecake Brownie Bars more times than I can count, tweaking and testing until the texture and flavors hit just right. Here’s what makes it stand out:
- Quick & Easy: You can whip these bars up in about 45 minutes, ideal for those moments when you want something impressive without spending hours in the kitchen.
- Simple Ingredients: No need to track down fancy items — most are pantry staples or easy to find at your local grocery store.
- Perfect for Any Occasion: Whether it’s a casual get-together, holiday party, or an everyday treat, these bars fit right in.
- Crowd-Pleaser: I’ve served these at potlucks and family dinners; they always disappear fast, loved by kids and adults alike.
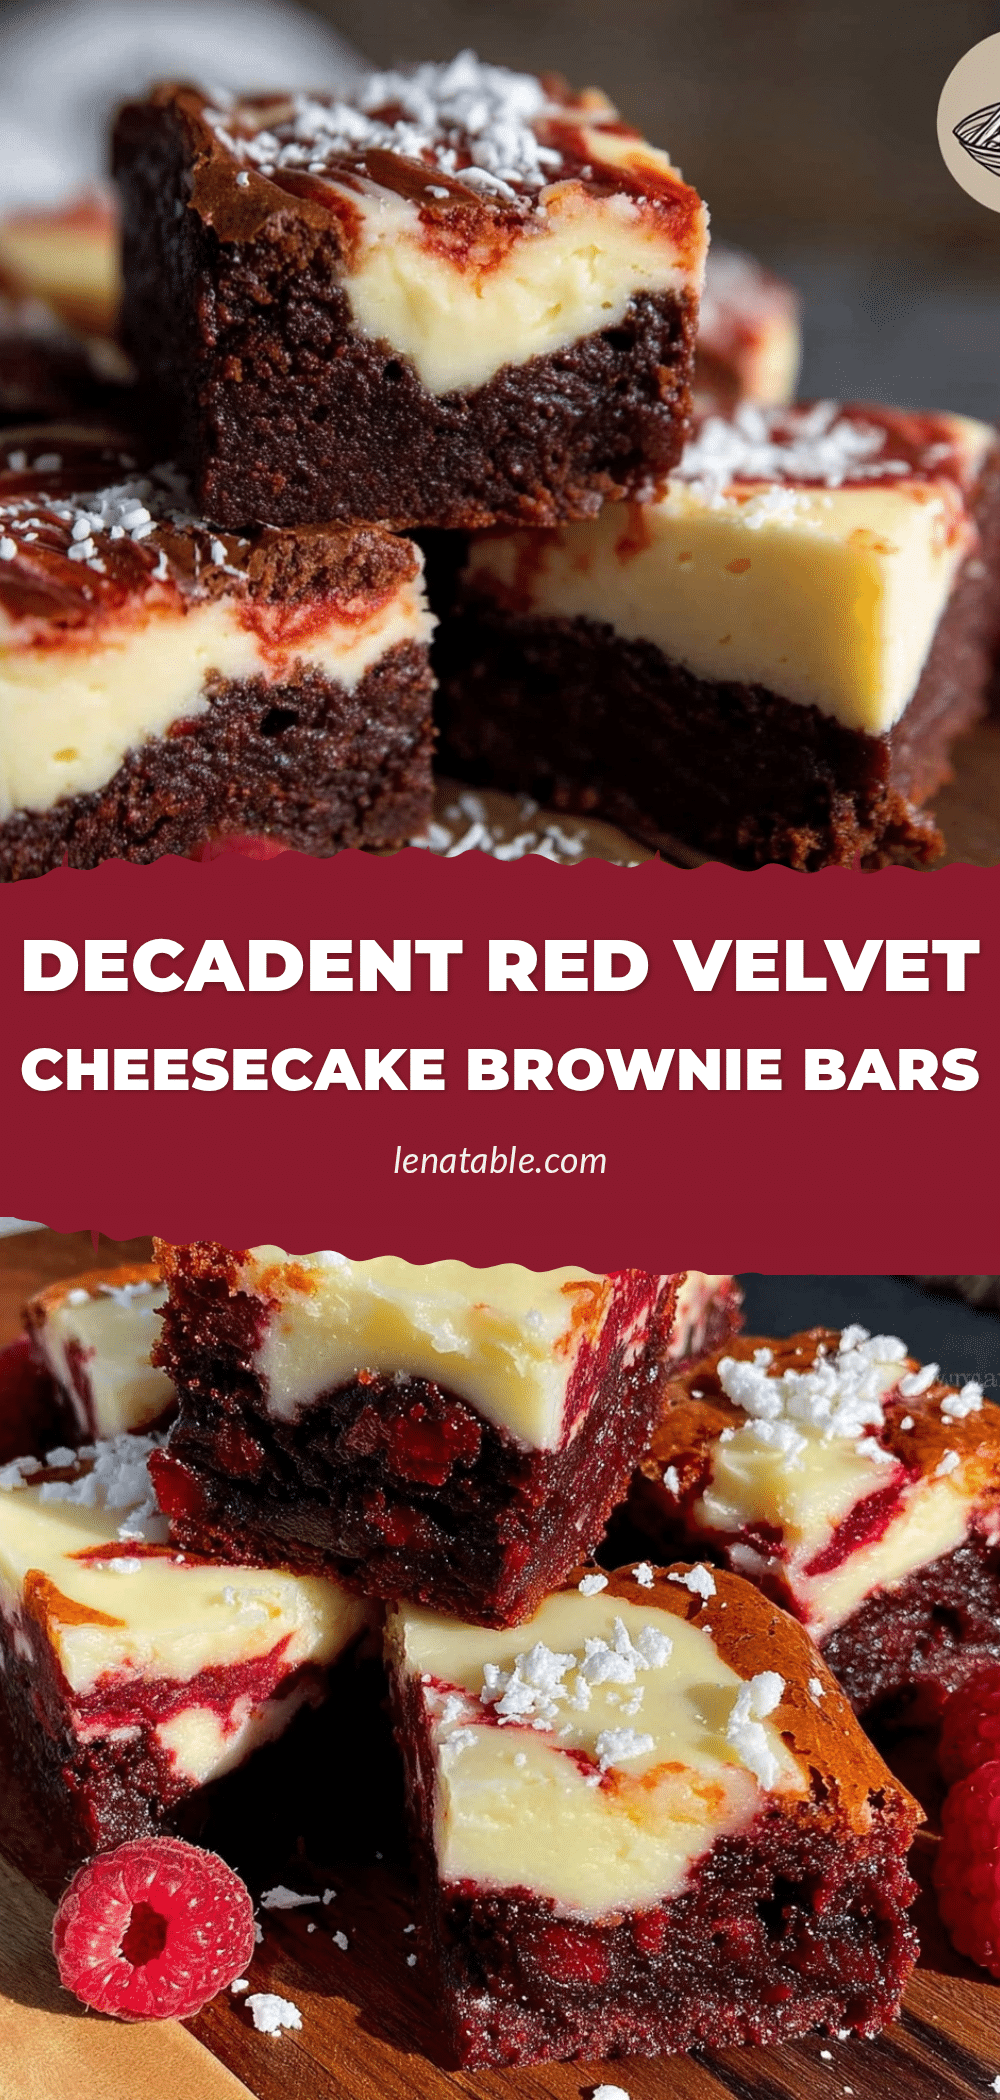
- Unbelievably Delicious: The fudgy brownie base, the tangy cheesecake swirl, and that velvety red velvet layer create a flavor and texture that’s downright addictive.
What sets this recipe apart? It’s the way the cheesecake layer melts into the brownie, creating a luscious marbled effect that looks fancy but is honestly straightforward. Plus, I use a hint of espresso powder in the brownie to deepen the chocolate flavor without making it taste like coffee — a trick I picked up from my pastry chef friend. This recipe isn’t just dessert; it’s a little moment of joy baked into every bar.
What Ingredients You Will Need
This recipe calls for simple, wholesome ingredients to bring together bold flavor and satisfying texture without fuss. Most of these you probably already have on hand.
- For the brownie base:
- Unsalted butter, 1/2 cup (113g), melted (I prefer Kerrygold for its creaminess)
- Granulated sugar, 1 cup (200g)
- Large eggs, 2, room temperature
- Pure vanilla extract, 1 teaspoon
- All-purpose flour, 3/4 cup (95g)
- Unsweetened cocoa powder, 1/4 cup (25g), sifted
- Espresso powder, 1 teaspoon (optional but recommended for richer flavor)
- Salt, 1/4 teaspoon
- Red food coloring, 2 tablespoons (gel-based works best for vibrant color)
- For the cheesecake swirl:
- Cream cheese, 8 oz (225g), softened (Philadelphia brand is a go-to for smooth texture)
- Granulated sugar, 1/4 cup (50g)
- Large egg, 1, room temperature
- Pure vanilla extract, 1/2 teaspoon
- All-purpose flour, 1 tablespoon (optional, helps stabilize the swirl)
If you want a dairy-free version, try swapping cream cheese with a coconut-based alternative and use a plant-based butter substitute. For gluten-free, almond flour can replace all-purpose flour but expect a slightly different texture. In the summer, I sometimes add fresh raspberries on top before baking for a juicy twist.
Equipment Needed
- 9×9 inch (23×23 cm) square baking pan — I like using a metal pan for even heat, but glass works fine too.
- Parchment paper or non-stick spray to line the pan, making removal easy.
- Mixing bowls — one large for the brownie batter, one medium for the cheesecake mixture.
- Electric mixer or sturdy whisk — an electric hand mixer speeds up the process but you can manage with whisking by hand.
- Measuring cups and spoons — accuracy is key for baking success.
- Rubber spatula for folding and scraping the batter.
- Toothpick or skewer to test doneness.
If you don’t have a mixer, a strong whisk and some elbow grease will do. And if you’re on a budget, many stores offer inexpensive baking kits that include measuring tools and mixing bowls. Keeping your equipment clean and dry is a small but important step to getting the best results.
Preparation Method
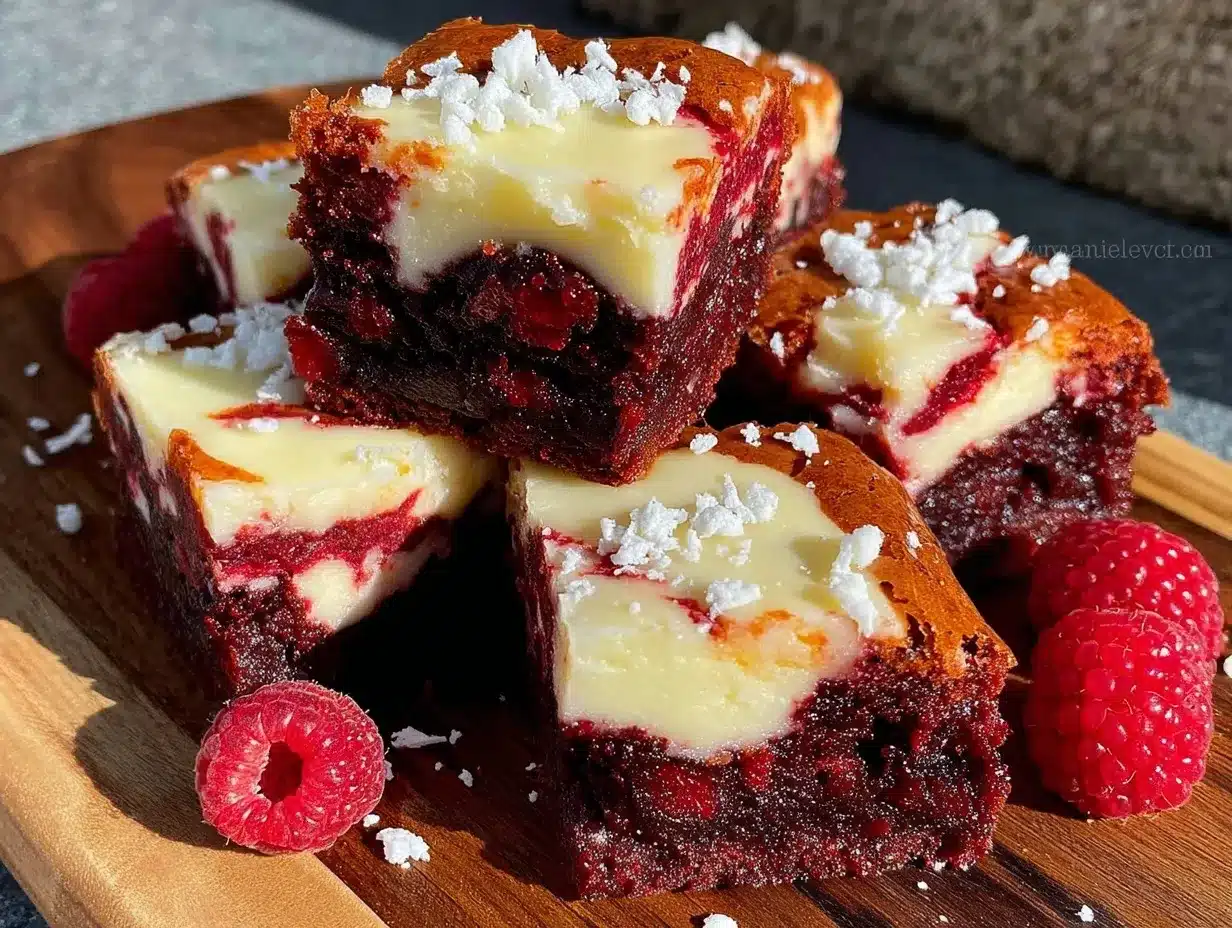
- Preheat your oven to 350°F (175°C). Line the 9×9 inch pan with parchment paper, leaving an overhang on two sides for easy lifting later. This step saves you from digging out sticky bars.
- Prepare the brownie batter: In a large bowl, whisk together melted butter and granulated sugar until combined and slightly glossy, about 1-2 minutes. Add the eggs one at a time, whisking well after each addition. Stir in vanilla extract and red food coloring; the batter will turn a vibrant red that makes you smile.
- In a separate bowl, sift together the flour, cocoa powder, espresso powder, and salt. Gradually fold the dry ingredients into the wet batter using a rubber spatula, mixing just until combined — don’t overmix or you’ll toughen the brownies.
- Prepare the cheesecake swirl: In a medium bowl, beat cream cheese and sugar with an electric mixer until smooth and creamy, about 2-3 minutes. Add the egg and vanilla, mixing until just combined. Stir in the flour gently.
- Assemble the layers: Pour half of the brownie batter into the prepared pan, spreading it evenly. Dollop half of the cheesecake mixture over the brownie layer in small spoonfuls. Repeat with remaining brownie batter and cheesecake mixture.
- Create the swirl: Use a butter knife or skewer to gently swirl the cheesecake into the brownie batter, making pretty marbled patterns without overmixing.
- Bake for 30-35 minutes. Start checking at 30 minutes by inserting a toothpick into the center — it should come out with moist crumbs but no wet batter. The edges will be set and slightly pulling away from the pan.
- Cool completely in the pan on a wire rack. This can take about an hour, but it’s worth the wait to get clean, firm bars.
- Lift out the bars using the parchment overhang. Cut into squares with a sharp knife, wiping the blade between cuts for neat edges.
Tip: If your kitchen is warm, you might find the cheesecake layer a bit soft when cutting. Pop the bars in the fridge for 15-20 minutes to firm up before slicing. If you’re short on time, cutting while still slightly warm works too — just expect a more rustic look.
Cooking Tips & Techniques
One thing I learned the hard way is not to skip bringing eggs and cream cheese to room temperature. Cold ingredients don’t blend well and can lead to a lumpy cheesecake layer. Honestly, waiting 30 minutes ahead of time is a tiny inconvenience for smooth batter.
When mixing the dry and wet ingredients, fold gently. You want to keep the air in the batter for a tender crumb rather than tough, dense brownies. Overmixing is a common mistake that I caught myself doing more than once!
Also, don’t underestimate the power of that espresso powder. It’s subtle but gives the chocolate depth and richness. If you’re not a coffee fan, just use a teaspoon of cocoa powder extra instead.
Timing-wise, I multitask by prepping the cheesecake swirl while the brownie batter rests a few minutes. It keeps me efficient without rushing and helps the batter settle nicely for smooth layering.
Finally, always line your pan with parchment paper. It makes a huge difference when removing the bars — no crumbling or mess, just perfect squares every time.
Variations & Adaptations
- Dietary: Swap all-purpose flour for gluten-free flour blend to make these bars gluten-free. Use dairy-free cream cheese and butter alternatives for a vegan-friendly treat.
- Seasonal: Add fresh or frozen raspberries to the cheesecake layer before swirling for a fruity burst. Or sprinkle chopped toasted pecans on top for fall vibes.
- Flavor twists: For a hint of warmth, add 1/2 teaspoon cinnamon and a pinch of cayenne pepper to the brownie batter. I once made a peppermint version for the holidays by adding peppermint extract to the cheesecake layer — festive and fun!
- Cooking method: If you want a more fudgy texture, bake at 325°F (160°C) for 40-45 minutes instead. Or, for a quicker version, make mini bars in a muffin tin and reduce baking time to about 20 minutes.
- Personal variation: I sometimes drizzle melted white chocolate over the cooled bars for an extra decadent finish — it’s a favorite at birthday parties.
Serving & Storage Suggestions
These Decadent Red Velvet Cheesecake Brownie Bars are best served slightly chilled or at room temperature. I like to plate them with a dusting of powdered sugar or a dollop of whipped cream. They pair beautifully with a cup of coffee or a glass of cold milk — classic combo, you know?
If you’re serving at a party, arrange the bars on a pretty platter with fresh berries or mint leaves for a pop of color. For a cozy night in, warm one bar for 10 seconds in the microwave — gooey and irresistible.
Store leftovers in an airtight container in the refrigerator for up to 5 days. You can freeze the bars for up to 3 months; just thaw overnight in the fridge before serving. I’ve found that flavors deepen and meld after a day, so sometimes I make these a day ahead when entertaining.
Nutritional Information & Benefits
Each bar (assuming 16 servings) contains approximately 220 calories, 12g fat, 25g carbohydrates, and 3g protein. The cream cheese adds a creamy texture and some calcium, while the cocoa powder contributes antioxidants.
This dessert is gluten-containing by default but can be adapted. It’s not low in sugar or fat, so best enjoyed as an occasional treat. Personally, I find the richness satisfying enough that a small square is perfect — no need to overindulge.
With simple ingredients and homemade goodness, these bars beat boxed mixes any day. Plus, making them yourself means you can tweak sweetness or swap ingredients to suit your dietary needs.
Conclusion
So, why make these Decadent Red Velvet Cheesecake Brownie Bars? Because they’re that sweet spot where rich chocolate meets tangy cheesecake, wrapped in a festive red velvet hug. They’re straightforward to make, impressive to serve, and impossible to resist.
Feel free to customize this recipe as you like — add nuts, try different flavor extracts, or make mini versions for bite-sized indulgence. I love how this recipe feels like a little gift from a neighbor — simple, warm, and just what you need when you want to treat yourself or loved ones.
If you give these bars a try, I’d love to hear how you made them your own. Share your tweaks, or just tell me what you thought in the comments below. Happy baking!
FAQs
- Can I make these bars ahead of time?
Yes! They actually taste better after sitting overnight in the fridge. Just store them covered to keep them fresh. - What can I use instead of red food coloring?
You can try natural options like beet juice powder, but the color won’t be as vibrant. Gel food coloring gives the best red velvet look. - How do I know when the bars are done baking?
Look for set edges and a toothpick that comes out with moist crumbs but no wet batter. - Can I use low-fat cream cheese?
Yes, but the texture might be a bit less creamy. Full-fat cream cheese gives the best flavor and consistency. - Are these bars freezer-friendly?
Absolutely! Wrap tightly and freeze for up to 3 months. Thaw overnight in the fridge before serving.
Pin This Recipe!
Decadent Red Velvet Cheesecake Brownie Bars
These bars combine a fudgy brownie base with a tangy cheesecake swirl and vibrant red velvet color, creating a luscious marbled dessert perfect for any occasion.
- Prep Time: 15 minutes
- Cook Time: 30-35 minutes
- Total Time: 45-50 minutes
- Yield: 16 servings 1x
- Category: Dessert
- Cuisine: American
Ingredients
- 1/2 cup (113g) unsalted butter, melted
- 1 cup (200g) granulated sugar
- 2 large eggs, room temperature
- 1 teaspoon pure vanilla extract
- 3/4 cup (95g) all-purpose flour
- 1/4 cup (25g) unsweetened cocoa powder, sifted
- 1 teaspoon espresso powder (optional)
- 1/4 teaspoon salt
- 2 tablespoons red food coloring (gel-based recommended)
- 8 oz (225g) cream cheese, softened
- 1/4 cup (50g) granulated sugar
- 1 large egg, room temperature
- 1/2 teaspoon pure vanilla extract
- 1 tablespoon all-purpose flour (optional)
Instructions
- Preheat your oven to 350°F (175°C). Line a 9×9 inch square baking pan with parchment paper, leaving an overhang on two sides for easy lifting.
- In a large bowl, whisk together melted butter and granulated sugar until combined and slightly glossy, about 1-2 minutes.
- Add the eggs one at a time, whisking well after each addition. Stir in vanilla extract and red food coloring until the batter is vibrant red.
- In a separate bowl, sift together the flour, cocoa powder, espresso powder, and salt.
- Gradually fold the dry ingredients into the wet batter using a rubber spatula, mixing just until combined. Do not overmix.
- In a medium bowl, beat cream cheese and sugar with an electric mixer until smooth and creamy, about 2-3 minutes.
- Add the egg and vanilla extract to the cream cheese mixture, mixing until just combined. Stir in the flour gently.
- Pour half of the brownie batter into the prepared pan, spreading evenly.
- Dollop half of the cheesecake mixture over the brownie layer in small spoonfuls.
- Repeat with the remaining brownie batter and cheesecake mixture.
- Use a butter knife or skewer to gently swirl the cheesecake into the brownie batter, creating marbled patterns without overmixing.
- Bake for 30-35 minutes. Start checking at 30 minutes by inserting a toothpick into the center; it should come out with moist crumbs but no wet batter.
- Edges will be set and slightly pulling away from the pan when done.
- Cool completely in the pan on a wire rack, about 1 hour.
- Lift out the bars using the parchment overhang and cut into squares with a sharp knife, wiping the blade between cuts for neat edges.
Notes
Bring eggs and cream cheese to room temperature before mixing for a smooth batter. Fold dry ingredients gently to avoid tough brownies. Use gel-based red food coloring for best color. If kitchen is warm, chill bars 15-20 minutes before slicing. Bars can be stored in the fridge up to 5 days or frozen up to 3 months.
Nutrition
- Serving Size: 1 bar (1/16th of rec
- Calories: 220
- Fat: 12
- Carbohydrates: 25
- Protein: 3
Keywords: red velvet, cheesecake, brownie bars, dessert bars, easy dessert, layered dessert, chocolate, cream cheese swirl