Love this? Save it for later!
Share the inspiration with your friends
This was supposed to be a simple white queso. You know, the kind you throw together with some processed cheese and a can of green chiles. I had the block of Velveeta in my hand at the grocery store, and I was already mentally checking out—just another dip, nothing special. But then I saw them. A whole display of fresh Hatch chiles, right there in the produce section, and I grabbed a bag without a second thought. I mean, it was September, and if you know anything about Hatch season, you know you don’t walk past them. So I got home, ditched the processed cheese idea, and decided to make something from scratch. Honestly, I was a little nervous. I’d never made a real queso before—one that didn’t come from a block of something orange. I had a pot of milk heating on the stove, a pile of shredded cheddar, and a bag of those beautiful roasted chiles. I was stirring, and stirring, and nothing was happening. The cheese was clumping. The milk was looking sad. I almost dumped the whole thing. But then I grabbed the cream cheese from the fridge—because that’s what you do when things go wrong, right? You add cream cheese. And I threw in a handful of the Hatch chiles, maybe more than I should have. What came out was nothing like the plan. It was better. It was smoky, creamy, a little spicy, and absolutely perfect for game day. I kept making it, tweaking it, and now it’s the only queso I’ll ever serve. Maybe you’ve been there—standing over a pot, convinced you’ve ruined dinner, only to end up with something you can’t stop thinking about.
Why You’ll Love This Recipe
This isn’t just another queso recipe. It’s the one that disappears first at every party, and people always ask for the recipe. Here’s why it works so well:
- Quick & Easy: You can have this on the table in under 20 minutes. It’s perfect for last-minute game day plans or when you need a snack fast.
- Simple Ingredients: No processed cheese blocks or canned soups. Just real cheese, milk, and fresh Hatch chiles. You probably already have most of it in your fridge.
- Perfect for Game Day: This dip was made for the big screen. It holds up well, stays warm, and pairs with everything from chips to nachos to hot dogs.
- Crowd-Pleaser: I’ve served this at tailgates, Super Bowl parties, and casual get-togethers. It gets rave reviews every single time. Kids love it. Adults love it. It’s a universal win.
- Unbelievably Delicious: The smoky flavor from the roasted Hatch chiles combined with the creamy, velvety cheese base is next-level comfort food. It’s the kind of dip that makes you close your eyes after the first bite.
What makes this recipe different from the rest? It’s the technique. I don’t just melt cheese and call it a day. I start with a roux—a little butter and flour—to create a stable base that prevents the cheese from breaking. Then I add the cream cheese for extra richness and the Hatch chiles for that signature New Mexico flavor. It’s not just another version of queso; it’s the best version I’ve ever made. And honestly, it’s the kind of recipe that makes you feel like you actually know what you’re doing in the kitchen.
What Ingredients You Will Need
This recipe uses simple, wholesome ingredients to deliver bold flavor and a silky-smooth texture. You don’t need anything fancy—just good cheese, fresh chiles, and a few pantry staples. Here’s what you’ll need:
- Unsalted butter – 2 tablespoons. This is the base of the roux, and it helps thicken the queso without making it grainy.
- All-purpose flour – 2 tablespoons. It works with the butter to create a stable emulsion, so your cheese doesn’t separate. (If you’re gluten-free, try a 1:1 gluten-free flour blend here.)
- Whole milk – 2 cups. I prefer whole milk for the creamiest result, but 2% works too. Avoid skim milk—it can make the queso watery.
- Cream cheese – 4 ounces, softened and cut into cubes. This is my secret ingredient. It adds a tangy richness and helps stabilize the cheese sauce. I recommend Philadelphia brand for the best texture.
- Sharp cheddar cheese – 2 cups, freshly shredded. Pre-shredded cheese has anti-caking agents that can make your queso grainy. Take the extra minute to shred it yourself—it makes a huge difference.
- Monterey Jack cheese – 1 cup, freshly shredded. This melts beautifully and adds a mild, buttery flavor that balances the sharp cheddar.
- Fire-roasted Hatch chiles – 1 cup, chopped. You can use fresh Hatch chiles if you find them, but canned or jarred fire-roasted ones work perfectly. I like the 505 Southwestern brand for consistent heat and flavor. (For a milder dip, remove the seeds and membranes before chopping.)
- Jalapeño – 1 small, seeded and minced. This adds a fresh, bright heat that cuts through the richness. Leave the seeds in if you want more spice.
- Garlic – 2 cloves, minced. Fresh garlic is non-negotiable here. It adds a punch of flavor that powdered garlic just can’t match.
- Ground cumin – 1 teaspoon. This gives the queso a warm, earthy note that pairs perfectly with the Hatch chiles.
- Kosher salt – 1/2 teaspoon, or to taste. I use Diamond Crystal brand—it’s less salty by volume, so adjust if you use a different brand.
- Fresh cilantro – 2 tablespoons, chopped. For garnish. It adds a pop of color and a fresh, herbaceous finish.
- Optional: Pickled jalapeños – For extra tang and heat. Add a tablespoon of the pickling liquid for a bright, acidic kick.
Equipment Needed
You don’t need a fancy kitchen to make this queso. Here’s what I use every time:
- A medium saucepan – A 3-quart saucepan is ideal. It gives you enough room to whisk without splashing. I love my Le Creuset for even heat distribution, but any heavy-bottomed pot works.
- A wooden spoon or silicone whisk – A whisk helps prevent lumps, but a wooden spoon works in a pinch. Just make sure you’re stirring constantly.
- A cutting board and sharp knife – For chopping the chiles, jalapeño, and garlic. A dull knife makes this step frustrating—trust me, I’ve been there.
- A microplane or garlic press – If you want to mince your garlic super fine, this is a game-changer. But a knife works fine too.
- A serving bowl – I like to use a small ceramic bowl that I can pop in the microwave to keep warm. Alternatively, a small slow cooker works great for keeping the queso warm during the game.
- Measuring cups and spoons – For accuracy. I’ve eyeballed it before, and it’s never as good.
If you don’t have a whisk, don’t sweat it. I’ve made this with a fork before, and it turned out fine. Just be patient and stir vigorously.
Preparation Method
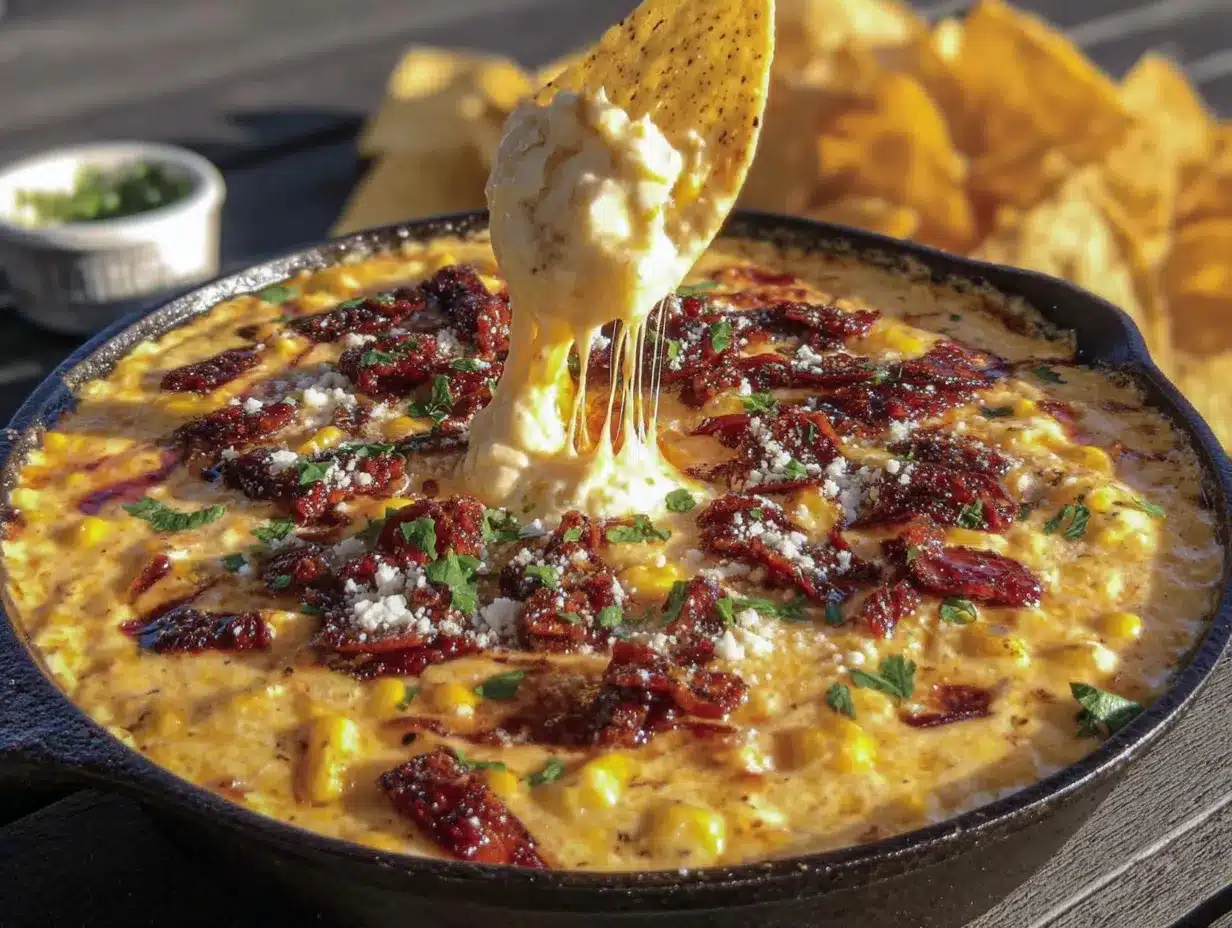
Let’s get into the nitty-gritty. This recipe comes together in about 15 to 20 minutes, and most of that time is just stirring. Here’s how to do it:
- Prep your ingredients. Before you turn on the stove, shred your cheeses, chop your chiles, mince your jalapeño and garlic, and measure everything out. Once you start cooking, you won’t have time to stop. This is the most important step—I’ve learned this the hard way, scrambling to shred cheese while milk is boiling over.
- Melt the butter. Place your saucepan over medium heat and add the 2 tablespoons of butter. Let it melt completely, swirling the pan occasionally. You want it to foam slightly but not brown. If it starts to brown, your heat is too high—pull it off the burner for a second.
- Make the roux. Once the butter is melted, add the 2 tablespoons of flour. Whisk constantly for about 1 minute. The mixture should look like a thick paste and smell slightly nutty. This step is crucial—it prevents your queso from being grainy. (I once skipped this step and ended up with a clumpy mess. Never again.)
- Slowly add the milk. Pour in the 2 cups of whole milk, a little at a time, whisking continuously. Start with about 1/4 cup, whisk until smooth, then add another 1/4 cup. Keep going until all the milk is incorporated. The mixture should be smooth and bubbling gently. This takes about 3 to 4 minutes. If you see lumps, keep whisking—they’ll usually smooth out.
- Add the cream cheese. Drop in the 4 ounces of cubed cream cheese and whisk until it melts completely. This should take about 2 minutes. The sauce will start to look thick and velvety. This is where the magic happens—the cream cheese adds that luscious texture that makes this queso so addictive.
- Add the spices and aromatics. Stir in the minced garlic, ground cumin, and kosher salt. Let it cook for about 30 seconds, until the garlic is fragrant. Don’t skip this step—raw garlic doesn’t taste as good, and it needs a moment to bloom.
- Add the cheeses. Reduce the heat to low. Add the shredded cheddar and Monterey Jack cheese, one handful at a time, whisking until each addition is fully melted before adding the next. This gradual process ensures a smooth, creamy sauce. If you dump all the cheese in at once, you risk clumping. Be patient—it’s worth it.
- Fold in the chiles and jalapeño. Once all the cheese is melted, stir in the chopped Hatch chiles and minced jalapeño. Mix until everything is evenly distributed. The sauce should be thick, creamy, and slightly speckled with green and red (if you used fire-roasted chiles).
- Taste and adjust. Dip a chip in and taste it. Need more salt? Add a pinch. Want more heat? Stir in a tablespoon of pickled jalapeño juice or a dash of hot sauce. This is your queso—make it yours.
- Serve immediately. Pour the queso into a serving bowl, garnish with fresh cilantro, and serve with tortilla chips, sliced bell peppers, or warm soft pretzels. If you’re not serving it right away, keep it warm in a small slow cooker on the “warm” setting, stirring occasionally.
Cooking Tips & Techniques
I’ve made this queso more times than I can count, and I’ve learned a few things along the way. Here are my best tips:
- Low and slow is the way to go. Cheese sauces are finicky. If your heat is too high, the proteins in the cheese will seize up, and you’ll end up with a grainy, oily mess. Keep the heat on low when adding the cheese, and be patient.
- Freshly shredded cheese is non-negotiable. I know it’s tempting to buy the bagged stuff, but the anti-caking agents in pre-shredded cheese (usually potato starch or cellulose) prevent it from melting smoothly. I learned this the hard way when I made a queso that looked like cottage cheese. Never again.
- Don’t skip the cream cheese. It’s not just for flavor—the cream cheese acts as a stabilizer, helping the sauce stay smooth even as it cools. It’s the difference between a queso that breaks and one that stays creamy for hours.
- If your queso gets too thick, thin it out. Queso will thicken as it cools. If it’s too thick for your liking, stir in a splash of warm milk or even a little beer (lager works great). Just add it slowly and whisk until smooth.
- Make it ahead of time. You can make this queso a day in advance. Let it cool completely, then store it in an airtight container in the fridge. To reheat, warm it gently on the stove over low heat, stirring constantly, or in the microwave in 30-second bursts. You might need to add a splash of milk to bring it back to life.
Variations & Adaptations
This recipe is incredibly versatile. Here are a few ways to switch it up:
- Spicy Hatch Queso: For more heat, add a diced serrano pepper or a teaspoon of crushed red pepper flakes along with the garlic. You can also use hot Hatch chiles instead of mild ones. I once made this for a friend who loves spicy food, and we added a whole habanero (seeded and minced). It was intense, but amazing.
- Smoky Bacon Queso: Cook 4 slices of bacon until crispy, crumble them, and stir them in just before serving. The smoky, salty bacon pairs beautifully with the Hatch chiles. I’ve also used smoked paprika (1 teaspoon) for a similar effect without the meat.
- Vegetarian/Vegan Option: Use a high-quality vegan cheddar shreds (I like Violife) and a plant-based cream cheese. Replace the butter with vegan butter or olive oil, and use unsweetened oat milk instead of whole milk. The texture will be slightly different, but it’s still delicious. I’ve served this to vegan friends, and they didn’t miss the dairy.
- Beer Queso: Replace 1/2 cup of the milk with a light lager or Mexican beer like Modelo or Corona. Add it after the roux, and let it cook for a minute before adding the rest of the milk. The beer adds a subtle yeasty flavor that’s perfect for game day.
- Loaded Queso: Top your finished queso with diced tomatoes, sliced black olives, green onions, and a dollop of sour cream. It turns this dip into a full-on meal. I’ve even added seasoned ground beef or chorizo for a heartier version.
Serving & Storage Suggestions
This queso is best served warm, straight from the pot. Here’s how to make it shine:
- Serving temperature: Serve it hot, but not boiling. If it’s too hot, it can burn your mouth. Let it sit for a minute or two after cooking. I usually pour it into a pre-warmed serving bowl to keep it at the perfect temperature.
- What to dip: Tortilla chips are the classic choice, but this queso is also amazing on nachos, drizzled over tacos, or spooned onto hot dogs. I’ve even used it as a sauce for baked potatoes. Don’t limit yourself.
- Complementary dishes: Serve it alongside guacamole, pico de gallo, and sour cream for a full spread. It also pairs well with grilled meats, like carne asada or chicken. For a game day spread, I always make a batch of this queso and a batch of salsa verde.
- Storage: Store leftover queso in an airtight container in the fridge for up to 4 days. The texture will thicken significantly, so don’t be alarmed. To reheat, warm it gently on the stove over low heat, stirring constantly. Add a splash of milk to thin it out if needed. You can also microwave it in 30-second bursts, stirring between each.
- Freezing: I don’t recommend freezing this queso. Dairy-based sauces tend to separate and become grainy when thawed. It’s best enjoyed fresh or within a few days.
Nutritional Information & Benefits
Let’s be real—this is a treat. But it’s made with real ingredients, and that counts for something. Here’s the estimated nutritional breakdown per serving (based on 12 servings):
- Calories: 220
- Total Fat: 18g
- Saturated Fat: 11g
- Cholesterol: 55mg
- Sodium: 400mg
- Total Carbohydrates: 6g
- Dietary Fiber: 0g
- Sugars: 3g
- Protein: 10g
While this isn’t health food, the Hatch chiles do offer some benefits. They’re rich in vitamin C and capsaicin, which can boost metabolism and reduce inflammation. Plus, using real cheese means you’re getting calcium and protein. I like to think of it as a balanced indulgence—enjoy it in moderation, and pair it with fresh veggies for dipping. Honestly, the mental health benefits of a good queso on game day are real. It’s comfort food, and sometimes that’s exactly what you need.
Conclusion
This Hatch Chili Queso Dip is more than just a recipe—it’s a game day essential. It’s the dip that turns a good party into a great one, the one that people hover around with chips in hand. I love how it brings people together, how the smoky aroma fills the kitchen, and how that first bite always gets a “wow.” I hope you give it a try, and I hope you make it your own. Add more chiles, swap in a different cheese, or throw in some bacon—whatever feels right. And when you do, I’d love to hear about it. Leave a comment below, share a photo on social media, or send me a message. Let me know how it turned out, what you changed, and who you shared it with. Until next time, happy cooking, and may your queso always be perfectly creamy.
Frequently Asked Questions
Can I use canned Hatch chiles instead of fresh?
Absolutely. Canned or jarred fire-roasted Hatch chiles work perfectly in this recipe. I actually prefer them for convenience—they’re already roasted and peeled, so you can just chop and go. Just drain them well before adding to the queso.
Why did my queso turn out grainy?
Grainy queso is usually a sign of high heat or pre-shredded cheese. Make sure you’re using freshly shredded cheese and keeping the heat on low when you add it. If your sauce still turns grainy, you can try whisking in a tablespoon of cornstarch mixed with a tablespoon of cold milk to help smooth it out.
Can I make this queso in a slow cooker?
Yes, you can. Prepare the roux and milk base on the stove, then transfer it to a slow cooker set on low. Add the cheeses and chiles, and stir occasionally until everything is melted. This is a great option for parties—just keep the slow cooker on the “warm” setting.
How do I make this queso less spicy?
To tone down the heat, use mild Hatch chiles and remove the seeds and membranes from the jalapeño. You can also reduce the amount of chiles to 1/2 cup and add a little more cheese to balance the flavor. If it’s still too spicy, stir in a tablespoon of sour cream or a splash of milk.
Can I use a different type of cheese?
Definitely. While cheddar and Monterey Jack are my favorites, you can experiment with other melting cheeses. Gouda, pepper jack, or even a mild provolone would work well. Just avoid cheeses that don’t melt smoothly, like feta or goat cheese, unless you’re going for a different texture.
Pin This Recipe!

Best Hatch Chili Queso Dip for Game Day

This smoky, creamy, and slightly spicy queso dip is made with real cheese, fire-roasted Hatch chiles, and a secret ingredient—cream cheese. It’s the perfect game day appetizer that comes together in under 20 minutes and always disappears first at parties.
- Prep Time: 10 minutes
- Cook Time: 10 minutes
- Total Time: 20 minutes
- Yield: 12 servings 1x
- Category: Appetizer
- Cuisine: Mexican-American
Ingredients
- 2 tablespoons unsalted butter
- 2 tablespoons all-purpose flour
- 2 cups whole milk
- 4 ounces cream cheese, softened and cut into cubes
- 2 cups sharp cheddar cheese, freshly shredded
- 1 cup Monterey Jack cheese, freshly shredded
- 1 cup fire-roasted Hatch chiles, chopped
- 1 small jalapeño, seeded and minced
- 2 cloves garlic, minced
- 1 teaspoon ground cumin
- 1/2 teaspoon kosher salt
- 2 tablespoons fresh cilantro, chopped (for garnish)
- Optional: pickled jalapeños and pickling liquid for extra tang and heat
Instructions
- Prep your ingredients: Shred cheeses, chop chiles, mince jalapeño and garlic, and measure everything out before starting.
- Melt the butter: Place a medium saucepan over medium heat and add 2 tablespoons of butter. Let it melt completely until it foams slightly but does not brown.
- Make the roux: Add 2 tablespoons of flour and whisk constantly for about 1 minute until the mixture forms a thick paste and smells slightly nutty.
- Slowly add the milk: Pour in 2 cups of whole milk, a little at a time (about 1/4 cup increments), whisking continuously until smooth and bubbling gently. This takes about 3-4 minutes.
- Add the cream cheese: Drop in 4 ounces of cubed cream cheese and whisk until completely melted, about 2 minutes. The sauce will become thick and velvety.
- Add spices and aromatics: Stir in minced garlic, ground cumin, and kosher salt. Cook for about 30 seconds until fragrant.
- Add the cheeses: Reduce heat to low. Add shredded cheddar and Monterey Jack cheese, one handful at a time, whisking until each addition is fully melted before adding the next.
- Fold in chiles and jalapeño: Stir in chopped Hatch chiles and minced jalapeño until evenly distributed.
- Taste and adjust: Dip a chip and taste. Adjust salt or heat as desired (add pickled jalapeño juice or hot sauce for more heat).
- Serve immediately: Pour into a serving bowl, garnish with fresh cilantro, and serve with tortilla chips, sliced bell peppers, or warm soft pretzels. Keep warm in a small slow cooker if not serving right away.
Notes
For best results, use freshly shredded cheese (pre-shredded contains anti-caking agents that cause graininess). Keep heat on low when adding cheese to prevent separation. If queso thickens too much, thin with a splash of warm milk or beer. Can be made a day ahead and reheated gently. Not recommended for freezing.
Nutrition
- Serving Size: 1/12 of recipe
- Calories: 220
- Sugar: 3
- Sodium: 400
- Fat: 18
- Saturated Fat: 11
- Carbohydrates: 6
- Protein: 10
Keywords: Hatch chili queso, game day dip, queso dip, Hatch chile recipe, cheese dip, party appetizer, football food, creamy queso, spicy queso


