Love this? Save it for later!
Share the inspiration with your friends
My niece had been planning her Halloween party for months. I mean, this kid had color-coded spreadsheets and a Pinterest board that would make professional event planners jealous. She asked me to bring something “magical but not too complicated.” No pressure, right?
I spent a week testing different ideas—spiderweb cupcakes, mummy hot dogs, the usual suspects. Nothing felt right. Then I stumbled on this idea while staring at my black cocoa powder, wondering why I only used it once a year. Black cocoa has this almost Oreo-like flavor, and it hit me: witch hats. But not just any witch hats—hot chocolate bombs shaped like them.
The first batch was a disaster, honestly. The chocolate seized, the hats cracked, and I may have yelled at my kitchen scale. But the second batch? Pure magic. The black cocoa gives these bombs this deep, dark color that looks straight out of a Halloween movie. When you drop one into hot milk, the chocolate melts open to reveal marshmallows and sprinkles floating to the surface like tiny stars. My niece texted me a photo of her friends gathered around a mug, completely mesmerized. That’s the moment I knew this recipe was staying in my permanent collection. Maybe you’ve been there—searching for that one Halloween treat that feels special without requiring a culinary degree.
Why You’ll Love This Recipe
Let me tell you why these witch hat hot chocolate bombs have become my most-requested Halloween recipe. I tested this at three different parties, and every single time, people stopped what they were doing to watch the chocolate melt.
- Easy Enough for Beginners : You don’t need fancy candy-making experience. If you can melt chocolate and use a silicone mold, you can make these.
- Simple Ingredients : No weird specialty items. Black cocoa powder is the only unique ingredient, and you can find it online or at well-stocked grocery stores.
- Perfect for Halloween Parties : These work for adult gatherings, kids’ parties, or just a cozy night in with a spooky movie.
- Crowd-Pleaser : I’ve watched adults get just as excited as kids when the chocolate shell cracks open.
- Unbelievably Delicious : Black cocoa has this deep, almost smoky chocolate flavor that regular cocoa just can’t match.
What makes these different from other hot chocolate bombs? The shape, for starters. Most bombs are spheres, but the witch hat design adds that Halloween wow factor without extra work. Plus, the black cocoa creates a color so dark it looks photoshopped. I’ve had people ask if I used food coloring (I didn’t).
This recipe is the kind that makes you look like a kitchen wizard without the stress. It’s Halloween magic you can actually pull off on a Tuesday night.
What Ingredients You Will Need
This recipe uses simple, mostly pantry-friendly ingredients to create something that looks far more complicated than it actually is. Here’s what you’ll need:
For the Chocolate Shell
- 12 ounces dark chocolate chips or chopped dark chocolate (I prefer Ghirardelli 60% cacao for its smooth melting properties)
- 2 tablespoons black cocoa powder (I recommend The Cocoa Trader brand for the deepest color)
- 1 teaspoon coconut oil or vegetable shortening (helps thin the chocolate for easier molding)
For the Filling
- 1/2 cup hot cocoa mix (use your favorite brand or homemade mix)
- 1/2 cup mini marshmallows (the tiny ones work best for fitting inside the bombs)
- 2 tablespoons Halloween sprinkles (orange, purple, and green add festive color)
For the Hat Decorations
- 1/4 cup white candy melts or white chocolate chips
- 1 tablespoon coconut oil (for thinning the white chocolate)
- Black sanding sugar or edible glitter (optional, for sparkle)
- Pretzel sticks or candy corn for hat bands (I use candy corn because it sticks better)
Ingredient Tips from My Kitchen
Black cocoa powder is the star here. It’s different from regular Dutch-process cocoa—it’s been alkalized more, giving it that dark color and mellow flavor. Don’t substitute regular cocoa powder; the color won’t be the same. If you can’t find black cocoa, you can use dark cocoa powder plus a tiny drop of black food coloring (oil-based, not water-based, or your chocolate will seize).
For the chocolate, avoid chocolate chips with stabilizers if possible. They don’t melt as smoothly. A good-quality dark chocolate bar chopped into small pieces works best. I learned this the hard way after my first batch turned into a grainy mess.
Equipment Needed
You don’t need a professional pastry kitchen for this, but having the right tools makes everything easier.
- Witch hat silicone mold : This is non-negotiable. I bought mine on Amazon for about $10. Look for one with a pointed tip and wide brim for the best witch hat shape.
- Microwave-safe bowls : At least two medium-sized ones for melting chocolate.
- Small offset spatula or spoon : For spreading chocolate evenly inside the molds.
- Baking sheet : To hold the molds steady while they set in the fridge.
- Piping bag or small zip-top bag : For drizzling white chocolate decorations.
- Pastry brush : A small, clean one helps paint chocolate into the mold crevices.
- Kitchen thermometer : Optional but helpful if you’re new to working with chocolate.
If you don’t have a pastry brush, you can use the back of a small spoon to spread the chocolate. It takes a little longer but works fine. For the piping bag, a sandwich bag with the corner snipped off does the job perfectly. No need to buy specialty equipment.
Preparation Method
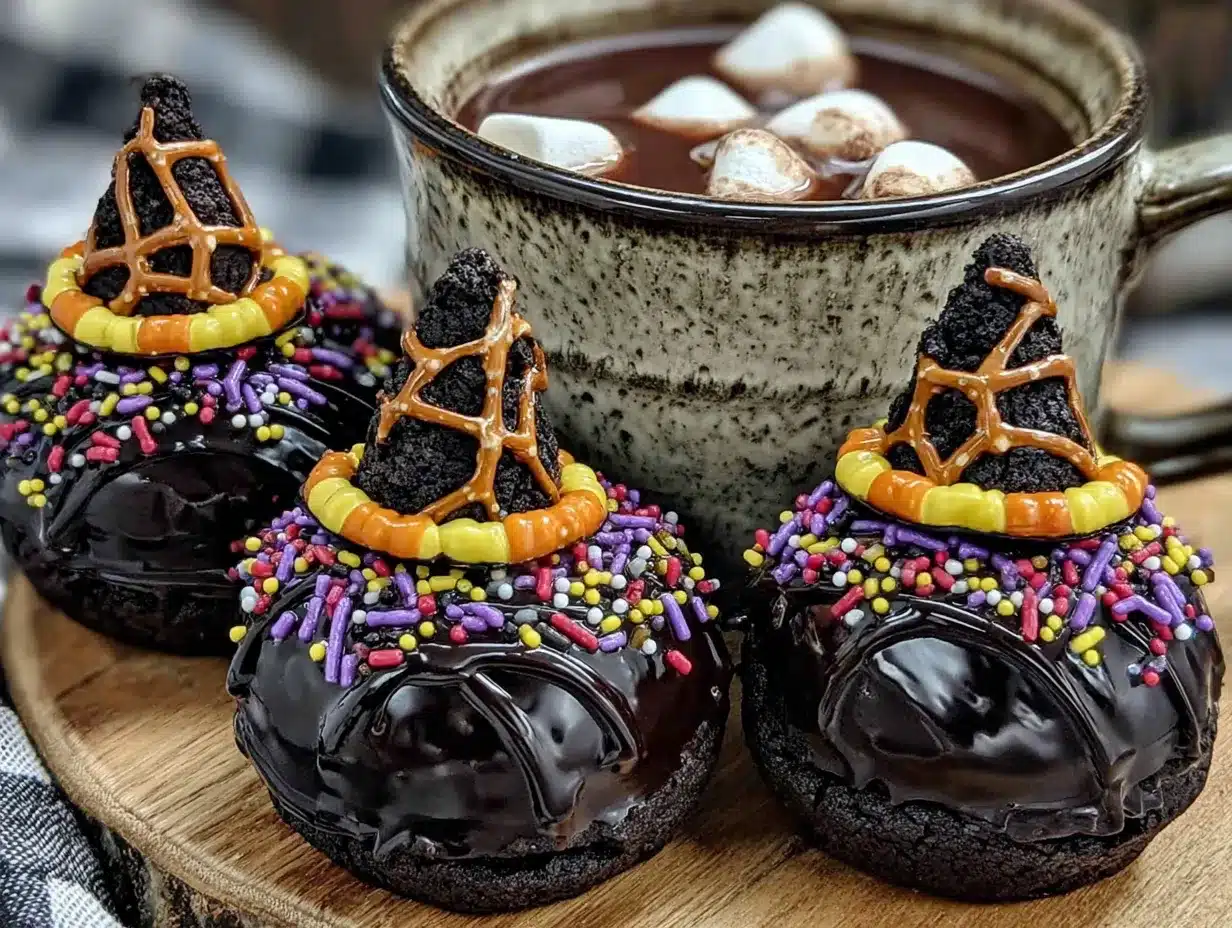
Let me walk you through this step by step. I’ve included all the little details I wish someone had told me the first time.
Step 1: Prepare Your Chocolate Mixture
Place the dark chocolate chips in a microwave-safe bowl. Microwave in 30-second intervals, stirring thoroughly after each interval. This usually takes about 2 minutes total. Once the chocolate is mostly melted (a few small lumps are fine), add the black cocoa powder and coconut oil. Stir continuously until everything is smooth and glossy. The mixture will look thin at first, but it thickens as it cools slightly. Let it rest for 2 minutes.
Step 2: Fill the Molds
Using a small spoon or offset spatula, drop about 1 tablespoon of the black chocolate mixture into each cavity of the witch hat mold. Use the back of the spoon or a pastry brush to spread the chocolate up the sides and into the pointed tip. Make sure you get chocolate into every crevice—the tip of the hat is where people will notice thin spots. Place the filled mold on a baking sheet and refrigerate for 10 minutes, or until the chocolate is firm to the touch.
Step 3: Add a Second Layer
Remove the mold from the fridge. Add another thin layer of chocolate to each hat cavity, focusing on the sides and tip. This double-layer technique prevents cracks and holes. Return to the fridge for another 10 minutes.
Step 4: Prepare the Filling
While the chocolate sets, mix the hot cocoa powder, mini marshmallows, and Halloween sprinkles in a small bowl. Set aside.
Step 5: Remove the Chocolate Shells
Once the chocolate is completely firm, gently flex the silicone mold to release each hat shell. They should pop out easily. If they stick, pop the mold back in the fridge for 5 minutes. Handle them carefully—they’re fragile at this stage.
Step 6: Fill the Hats
Place the chocolate hat shells on a clean work surface with the open side facing up. Spoon about 1 to 2 teaspoons of the cocoa mixture into each shell. Don’t overfill—leave a little room for sealing.
Step 7: Seal the Bombs
Warm a small plate in the microwave for 30 seconds. Press the rim of each filled hat shell against the warm plate for about 5 seconds to melt the edge slightly. Immediately press a second empty hat shell (or a flat piece of chocolate) onto the melted edge to seal. Hold for 10 seconds. You should see a tiny bit of melted chocolate squeezing out—that means it’s sealed. Wipe away excess with your finger.
Step 8: Decorate the Hats
Melt the white candy melts or white chocolate chips in a small microwave-safe bowl in 20-second intervals, stirring each time. Add 1 teaspoon coconut oil to thin it to a drizzling consistency. Transfer to a small piping bag or zip-top bag with a tiny corner snipped off. Drizzle white chocolate around the base of each hat to look like a hat band. If using candy corn, press them into the white chocolate before it sets. Sprinkle with black sanding sugar or edible glitter while the white chocolate is still wet. Refrigerate for 15 minutes to set everything.
Step 9: Final Touch
Once fully set, your witch hat hot chocolate bombs are ready. Store them in an airtight container in the fridge until you’re ready to use them.
Cooking Tips & Techniques
Let me share some things I learned the hard way so you don’t have to repeat my mistakes.
Temperature Is Everything
Chocolate is finicky about temperature. If your kitchen is warm (above 75°F), your chocolate may not set properly. Work in a cool room if possible. If the chocolate starts looking greasy or streaky, you’ve overheated it. Start over—it’s not worth trying to salvage seized chocolate. I keep a bowl of ice water nearby to cool my hands if they get too warm from handling the molds.
The Double-Layer Trick
I cannot emphasize this enough: two thin layers are better than one thick layer. The first layer creates the base, and the second layer fills any tiny holes or thin spots. My first batch had a hole at the tip of every hat because I was impatient. Take the extra 10 minutes.
Testing for Doneness
When you press a chocolate shell, it should feel firm and not leave a fingerprint. If it feels soft or tacky, give it more time in the fridge. Humidity can also cause issues—if you live in a humid climate, work quickly and keep your chocolate refrigerated between steps.
Sealing Without Cracking
The warm plate method works, but don’t leave the chocolate on the plate too long or it will melt too much and lose its shape. A 5-second press is usually perfect. If you see cracks forming around the seal, your chocolate is too cold—let it sit at room temperature for a minute before trying again.
Variations & Adaptations
One of the best things about this recipe is how adaptable it is. Here are some variations I’ve tried and loved.
Dietary Variations
- Dairy-Free Version : Use dairy-free dark chocolate (many brands are naturally dairy-free) and coconut oil instead of butter. Check your cocoa mix for dairy content or make your own using coconut milk powder.
- Vegan Version : Same as dairy-free, but also ensure your marshmallows are vegan. Dandies brand makes great vegan mini marshmallows.
- Gluten-Free Version : Most hot cocoa mixes are naturally gluten-free, but double-check the label. Use certified gluten-free sprinkles.
Flavor Variations
- Peppermint Witch Hats : Add 1/4 teaspoon peppermint extract to the chocolate mixture and use crushed candy canes instead of sprinkles inside.
- Spiced Hot Chocolate : Mix 1/2 teaspoon cinnamon and a pinch of cayenne into the cocoa filling for a Mexican hot chocolate twist.
- White Chocolate Witch Hats : Use white chocolate instead of dark, and add black food coloring (oil-based) to achieve the dark color. The flavor is sweeter and creamier.
Different Cooking Methods
If you don’t have a microwave, you can melt the chocolate using a double boiler. Place a heatproof bowl over a pot of simmering water (make sure the bottom of the bowl doesn’t touch the water). Stir until melted, then proceed. This method takes longer but gives you more control over temperature.
My Personal Variation
I once made these with a pinch of smoked sea salt mixed into the chocolate. The salty-sweet combination with the black cocoa was incredible. I also tried adding a few drops of orange extract to the white chocolate drizzle for a subtle citrus note. It paired surprisingly well with the dark chocolate.
Serving & Storage Suggestions
How to Serve
To enjoy your witch hat hot chocolate bombs, heat 8 to 10 ounces of milk (dairy or plant-based) until steaming but not boiling. Place one bomb in a mug and pour the hot milk over it. Watch as the chocolate melts and the marshmallows and sprinkles rise to the surface. Stir until fully combined. The presentation is half the fun—serve these in clear glass mugs so everyone can see the magic happen.
Storage Instructions
Store your finished hot chocolate bombs in an airtight container in the refrigerator for up to 2 weeks. Layer them between sheets of parchment paper to prevent sticking. Do not store at room temperature if your kitchen is warm, as the chocolate may soften and lose its shape.
Freezer Instructions
These freeze beautifully. Place the bombs in a single layer in a freezer-safe container with parchment paper between layers. Freeze for up to 3 months. To use, drop a frozen bomb directly into hot milk—no need to thaw first. The chocolate may take an extra 30 seconds to melt, but it works perfectly.
Flavor Development
Interestingly, these bombs taste even better after a day or two in the fridge. The flavors meld together, and the black cocoa flavor becomes more pronounced. I actually prefer making them a day ahead for this reason.
Nutritional Information & Benefits
Please note these are estimated values based on one witch hat hot chocolate bomb made with whole milk and standard ingredients. Actual values will vary based on your specific ingredients and portion sizes.
Estimated Nutrition Per Serving (1 bomb with 8 oz whole milk):
- Calories: 320
- Fat: 18g
- Carbohydrates: 38g
- Protein: 6g
- Sugar: 28g
- Fiber: 3g
Health Benefits of Key Ingredients
Dark chocolate is rich in antioxidants called flavonoids, which may support heart health. Black cocoa powder contains even more antioxidants than regular cocoa due to its processing. Plus, the mini marshmallows provide a tiny dose of joy, which I firmly believe has its own health benefits.
Dietary Considerations
This recipe is naturally vegetarian. For vegan or dairy-free options, see the variations section above. It contains dairy and may contain traces of gluten depending on your ingredients. Always check labels if you have allergies.
My Wellness Perspective
Look, this is a treat. It’s not health food, and it shouldn’t pretend to be. But using quality dark chocolate and real ingredients means you’re getting more nutrients than you would from a packaged mix. I believe in enjoying these mindfully—one bomb with a mug of warm milk is a perfect portion that satisfies without overdoing it.
Frequently Asked Questions
Can I use milk chocolate instead of dark chocolate?
You can, but the color won’t be as dark. Milk chocolate has less cocoa solids, so the black cocoa powder won’t create that deep, dramatic black color. If you prefer milk chocolate, add an extra tablespoon of black cocoa powder and reduce the coconut oil slightly to compensate.
Why did my chocolate seize up?
Chocolate seizes when it comes into contact with even a tiny amount of water. Make sure all your bowls and utensils are completely dry. Also, if you overheat the chocolate (above 115°F for dark chocolate), it can seize. Always melt slowly and stir frequently. If it seizes, you can sometimes save it by adding a teaspoon of coconut oil and stirring vigorously, but honestly, it’s usually better to start fresh.
How do I get the chocolate to release from the mold easily?
Make sure your chocolate is completely set before attempting to remove it. If it’s still soft, it will stick. Silicone molds are flexible, so gently push from the bottom to release. If a hat sticks, pop the whole mold in the freezer for 5 minutes. The cold shrinks the chocolate slightly, making it easier to release.
Can I make these without a silicone mold?
Technically, yes, but it’s much harder. You could try shaping the chocolate over the bottom of a small cone or using a sphere mold and shaping the top into a point. But honestly, the silicone witch hat mold is inexpensive and makes the process so much easier. It’s worth the small investment.
How far in advance can I make these?
You can make them up to 2 weeks ahead if stored properly in the fridge. I often make them a week before Halloween and they’re perfect. Just keep them in an airtight container away from strong-smelling foods (chocolate absorbs odors easily).
Conclusion
These witch hat hot chocolate bombs are the Halloween treat you didn’t know you needed. They look impressive enough for a party but are simple enough for a Tuesday night baking session with your kids. The black cocoa gives them that spooky, dramatic color, while the warm milk transforms them into a cozy, comforting drink.
I love that this recipe lets me be creative without stressing over perfection. Each hat ends up slightly different, and that’s part of the charm. You can customize the fillings, change up the decorations, or experiment with different chocolate types. The possibilities are endless, and that’s what makes cooking fun.
I’d love to hear how yours turn out! Drop a comment below with your favorite variation or tag me in your photos if you share them online. Did you try a different filling? Add a special decoration? Let me know. And if you’re looking for more Halloween treats, check out my spiderweb cupcakes or mummy hot dogs for a full spooky spread.
Happy Halloween, and happy chocolate melting!
Pin This Recipe!
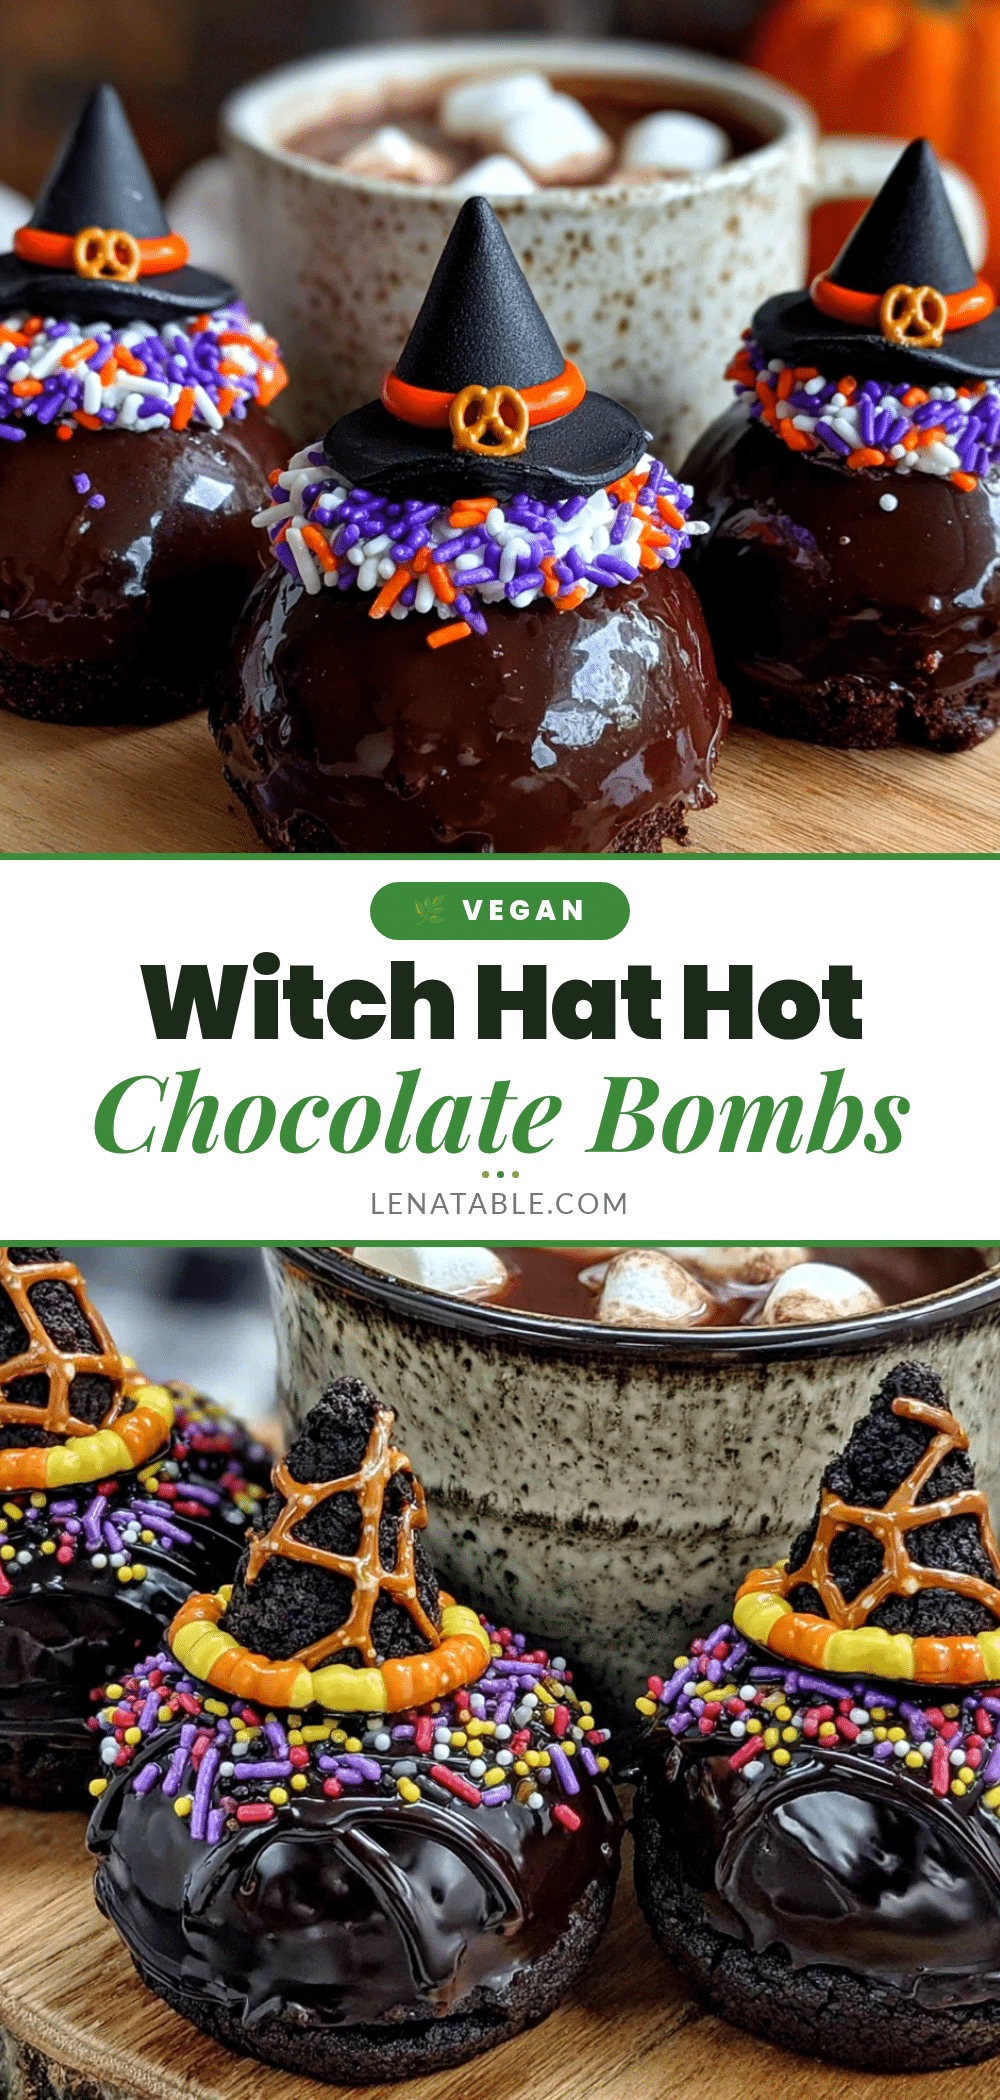
Easy Witch Hat Hot Chocolate Bombs with Black Cocoa
These witch hat hot chocolate bombs are the perfect Halloween treat—easy to make with black cocoa for a deep, spooky color. Drop one into hot milk for a magical, marshmallow-filled drink that delights kids and adults alike.
- Prep Time: 30 minutes
- Cook Time: 10 minutes
- Total Time: 1 hour 10 minutes (includes chilling time)
- Yield: 6 servings 1x
- Category: Dessert
- Cuisine: American
Ingredients
- 12 ounces dark chocolate chips or chopped dark chocolate (preferably Ghirardelli 60% cacao)
- 2 tablespoons black cocoa powder (recommended: The Cocoa Trader brand)
- 1 teaspoon coconut oil or vegetable shortening
- 1/2 cup hot cocoa mix
- 1/2 cup mini marshmallows
- 2 tablespoons Halloween sprinkles (orange, purple, green)
- 1/4 cup white candy melts or white chocolate chips
- 1 tablespoon coconut oil (for thinning white chocolate)
- Black sanding sugar or edible glitter (optional)
- Pretzel sticks or candy corn for hat bands (optional)
Instructions
- Prepare the chocolate mixture: Place dark chocolate chips in a microwave-safe bowl. Microwave in 30-second intervals, stirring after each, until mostly melted (about 2 minutes). Add black cocoa powder and 1 teaspoon coconut oil; stir until smooth and glossy. Let rest for 2 minutes.
- Fill the molds: Spoon about 1 tablespoon of the black chocolate mixture into each cavity of a witch hat silicone mold. Use a small spoon or pastry brush to spread the chocolate evenly up the sides and into the pointed tip. Place the mold on a baking sheet and refrigerate for 10 minutes until firm.
- Add a second layer: Remove from fridge. Add another thin layer of chocolate to each cavity, focusing on the sides and tip. Refrigerate for another 10 minutes.
- Prepare the filling: In a small bowl, mix hot cocoa mix, mini marshmallows, and Halloween sprinkles. Set aside.
- Remove the chocolate shells: Gently flex the silicone mold to release each hat shell. If they stick, refrigerate for 5 more minutes. Handle carefully.
- Fill the hats: Place the chocolate shells open-side up. Spoon 1 to 2 teaspoons of the cocoa mixture into each shell, leaving room for sealing.
- Seal the bombs: Warm a small plate in the microwave for 30 seconds. Press the rim of each filled shell against the warm plate for about 5 seconds to melt the edge. Immediately press a second empty shell or flat piece of chocolate onto the melted edge to seal. Hold for 10 seconds. Wipe away excess chocolate.
- Decorate the hats: Melt white candy melts or white chocolate chips in a microwave-safe bowl in 20-second intervals, stirring each time. Add 1 teaspoon coconut oil to thin. Transfer to a piping bag or zip-top bag with a tiny corner snipped. Drizzle white chocolate around the base of each hat to form a hat band. If using candy corn, press them into the white chocolate before it sets. Sprinkle with black sanding sugar or edible glitter while wet. Refrigerate for 15 minutes to set.
- Final touch: Once fully set, store in an airtight container in the fridge until ready to use.
Notes
Temperature is crucial: work in a cool room (below 75°F) to prevent chocolate from not setting. Two thin layers are better than one thick layer to avoid cracks. If chocolate seizes due to water or overheating, it’s best to start over. For best flavor, make a day ahead and refrigerate. Store in an airtight container in the fridge for up to 2 weeks or freeze for up to 3 months.
Nutrition
- Serving Size: 1 bomb with 8 oz who
- Calories: 320
- Sugar: 28
- Sodium: 150
- Fat: 18
- Saturated Fat: 10
- Carbohydrates: 38
- Fiber: 3
- Protein: 6
Keywords: witch hat hot chocolate bombs, Halloween hot chocolate, black cocoa bombs, easy Halloween dessert, hot cocoa bombs


