Love this? Save it for later!
Share the inspiration with your friends
I was standing in the grocery store aisle last Tuesday, staring at a package of tortillas like they held the secrets to the universe, when the smell hit me. Not from the tortillas—it was the weird, clean scent of a new lunchbox, that mix of plastic and vinyl that somehow smells like possibility and dread all at once. And suddenly I was seven years old, sitting on my aunt Linda’s linoleum kitchen floor, watching her roll up turkey and cheese wraps with the kind of focus most people reserve for brain surgery.
She’d lay out the tortilla flat, spread a thin layer of cream cheese like she was buttering toast for a king, and then layer the turkey with such precision it almost looked like art. I remember thinking, “Why doesn’t my mom do this?” (Sorry, Mom—you know I love you.) The thing is, Aunt Linda wasn’t even a great cook. She burned toast regularly and once set off the smoke alarm making scrambled eggs. But these pinwheels? They were her masterpiece. She’d slice them into perfect little spirals, and I’d watch the pattern of turkey and cheese repeat itself over and over like a delicious kaleidoscope.
She passed away a few years back, and honestly, I hadn’t thought about those lunchbox wraps in ages. But there I was, tortilla package in hand, feeling that familiar ache of wanting to recreate something I could almost taste but couldn’t quite hold onto. Maybe you’ve been there—that feeling of chasing a memory through food because it’s the only way to keep someone close. So I bought the tortillas. And the turkey. And the cream cheese. And I went home to try and bring back a little piece of my childhood, one pinwheel at a time.
Why You’ll Love These Easy Turkey and Cheese Pinwheel Wraps
Let me tell you, after testing this recipe about six times (and eating more pinwheels than I care to admit), I’ve figured out exactly what makes these the perfect lunchbox solution. They’re not just another wrap—they’re the wrap that actually works.
- Quick & Easy: We’re talking 15 minutes from start to finish. That’s less time than it takes to argue with a kid about why they can’t have cookies for breakfast.
- Simple Ingredients: You probably have most of this stuff in your fridge right now. No fancy grocery store scavenger hunts required.
- Perfect for Lunchboxes: These hold up beautifully in a lunch bag, don’t get soggy, and are the kind of thing kids actually eat (and trade with friends).
- Crowd-Pleaser: Adults love them too. I’ve brought these to potlucks and watched them disappear faster than the brownies.
- Unbelievably Delicious: The cream cheese adds this tangy creaminess that ties everything together. It’s simple, but it’s perfect.
What makes these different from every other pinwheel recipe out there? It’s the technique. Most recipes tell you to just roll everything up and slice, but they end up falling apart or getting dry. I figured out the secret: letting the cream cheese soften to room temperature, spreading it thin, and using the right tortilla-to-filling ratio. It makes all the difference, I promise.
This is the kind of recipe that makes you close your eyes after the first bite. It’s comfort food reimagined for busy mornings—faster, simpler, but with the same soul-soothing satisfaction. Perfect for impressing other parents at the school pickup line, or turning a rushed weekday lunch into something that actually feels special.
What Ingredients You Will Need
This recipe uses simple, everyday ingredients to deliver that perfect combination of creamy, savory, and satisfying. Nothing fancy here—just good, honest food that works. Here’s what you’ll need:
- 8 large flour tortillas (burrito-size works best; I prefer Mission or La Banderita for their flexibility)
- 1 (8 oz) package cream cheese, softened to room temperature (this is crucial—cold cream cheese tears the tortillas)
- 1 pound thinly sliced deli turkey (I like Boar’s Head oven-roasted turkey breast for the best flavor, but any good-quality turkey works)
- 8 slices provolone cheese (or Swiss, mozzarella, or cheddar—use what you love)
- 1/4 cup mayonnaise (optional, but adds extra creaminess and helps the tortillas stay moist)
- 1/2 teaspoon garlic powder (trust me on this—it adds a subtle savory note that makes these addictive)
- 1/4 teaspoon black pepper (freshly ground if you have it)
- 1/4 cup finely chopped fresh spinach (optional, for color and a little nutrition boost—the kids won’t even notice)
- 1/4 cup shredded carrots (optional, adds crunch and sweetness)
Let me talk about the cream cheese for a second. I’ve made these with both full-fat and reduced-fat versions, and honestly? Go with full-fat. It spreads better, tastes creamier, and the tortillas hold together much nicer. If you need dairy-free, Kite Hill makes a decent plant-based cream cheese, but the texture will be slightly different.
For the tortillas, look for ones that are soft and pliable. If they’re a little stiff, microwave them for 10 seconds wrapped in a damp paper towel—it makes them much easier to roll without cracking. Sun-dried tomato or spinach tortillas add a fun pop of color, but plain flour works great.
And about the turkey—ask the deli counter to slice it thin, but not shaved. You want slices that hold together but are thin enough to roll easily. If you’re feeling adventurous, try peppered turkey or honey turkey for a different flavor profile.
Equipment Needed
You don’t need much for this recipe, which is part of the beauty. Here’s what I use:
- A sharp chef’s knife (a dull knife will squish your pinwheels—trust me, I learned this the hard way)
- A large cutting board (give yourself room to work)
- A small offset spatula or butter knife (for spreading the cream cheese mixture evenly)
- Plastic wrap (for wrapping the rolls before chilling—this is non-negotiable if you want clean slices)
- A baking sheet (to hold the wrapped rolls in the fridge)
- Toothpicks (optional, but helpful for keeping pinwheels together in lunchboxes)
If you don’t have an offset spatula, don’t stress—a regular butter knife works fine. Just make sure the cream cheese is really soft so it spreads easily. I’ve also used a rubber spatula in a pinch, and it worked okay.
One tip: invest in a good knife sharpener. I use a simple handheld sharpener and it’s made a huge difference in how cleanly my pinwheels slice. A sharp knife means crisp edges and no squished fillings.
Preparation Method

Alright, let’s get rolling—literally. Here’s how to make these pinwheels like a pro:
-
Soften the cream cheese. Take your cream cheese out of the fridge about 30 minutes before you start. If you forgot (I do this all the time), microwave it for 10-15 seconds in a bowl. Check it every 5 seconds—you want it soft, not melted. Trust me on this one.
-
Mix the spread. In a small bowl, combine the softened cream cheese, mayonnaise (if using), garlic powder, and black pepper. Stir until smooth and well-combined. If you’re adding spinach or carrots, fold them in now. Taste it—you might want a pinch more pepper or garlic.
-
Prepare your workspace. Lay a large piece of plastic wrap on your counter. Place one tortilla on top. This makes cleanup so much easier, and it’s how you’ll wrap the rolls later.
-
Spread the cream cheese mixture. Using your offset spatula or butter knife, spread about 2 tablespoons of the cream cheese mixture evenly over the entire tortilla. Go all the way to the edges—this acts like glue and helps everything stay together. Don’t be stingy here; a thin, even layer is what you’re after.
-
Layer the turkey. Place 2-3 slices of turkey on top of the cream cheese, overlapping them slightly. You want full coverage, but not so thick that the roll becomes difficult to manage. Think of it like a thin blanket, not a heavy quilt.
-
Add the cheese. Lay one slice of provolone (or your cheese of choice) on top of the turkey. If your cheese slice is square, position it so the corners hang off the edges a bit—this ensures every bite has cheese.
-
Roll it up tight. Starting from one edge, roll the tortilla as tightly as you can without tearing it. Use your fingers to keep the filling tucked in as you go. Think of it like rolling a sleeping bag—firm and even pressure. When you get to the end, press gently to seal.
-
Wrap and chill. Roll the plastic wrap around the tortilla roll tightly, twisting the ends like a candy wrapper. Place it on your baking sheet. Repeat with remaining tortillas. Refrigerate for at least 30 minutes (or up to 24 hours). This step is crucial—chilling sets the cream cheese and makes slicing clean and easy.
-
Slice and serve. When you’re ready to serve, unwrap each roll and use a sharp knife to slice off the uneven ends (those are the chef’s snack—you earned them). Then slice the roll into 1-inch pinwheels. A gentle sawing motion works better than pressing straight down.
-
Pack them up. Arrange the pinwheels in your lunchbox or serving platter. If packing for later, keep them refrigerated until ready to go.
You should end up with about 6-8 pinwheels per large tortilla. The whole process takes about 15 minutes of active work, plus the chilling time. The pinwheels should look like perfect little spirals—turkey, cheese, and cream cheese in a beautiful pattern.
Cooking Tips & Techniques
I’ve made these pinwheels more times than I can count, and I’ve definitely learned some things the hard way. Here are my best tips:
Don’t skip the chilling step. I know, I know—you’re hungry and want to eat them now. But if you try to slice a room-temperature roll, you’ll end up with a squished mess. The cream cheese needs to firm up so the knife cuts through cleanly. Thirty minutes is the minimum, but an hour is even better.
Use a serrated knife for slicing. This was a game-changer for me. A serrated knife cuts through the tortilla without crushing the layers. If you don’t have one, make sure your chef’s knife is razor-sharp. I learned this after ruining an entire batch with a dull knife—the pinwheels looked more like sad little blobs than beautiful spirals.
Warm the tortillas if they’re stiff. Sometimes tortillas, especially ones that have been in the fridge, crack when you try to roll them. Pop them in the microwave for 10-15 seconds wrapped in a damp paper towel. This makes them pliable and easy to work with. I do this every time now, even with fresh tortillas.
Don’t overfill. It’s tempting to pile on the turkey and cheese, but less is more here. Too much filling makes the roll bulky and hard to slice, and everything falls apart. Think thin, even layers.
Make a double batch. These freeze beautifully (more on that below), so I always make extra. It’s the same amount of work, and future you will be so grateful on a busy morning.
Variations & Adaptations
One of the best things about this recipe is how flexible it is. Here are some of my favorite variations:
Low-Carb Version: Swap the flour tortillas for low-carb or lettuce wraps. My favorite is using large romaine lettuce leaves—they roll up beautifully and add a nice crunch. Just be aware they don’t hold up as well in a lunchbox, so eat them fresh.
Vegetarian Option: Skip the turkey and load up on roasted vegetables—bell peppers, zucchini, and mushrooms work great. Or use hummus instead of cream cheese for a totally different flavor profile. I’ve done a roasted red pepper hummus version that was absolutely killer.
Spicy Twist: Add a thin layer of chipotle mayo or sprinkle some red pepper flakes into the cream cheese mixture. My husband loves this version—he says it wakes up his lunch hour.
Breakfast Pinwheels: Swap the turkey for scrambled eggs and bacon. Use cheddar cheese instead of provolone. These are amazing for brunch or a grab-and-go breakfast.
Gluten-Free: Use gluten-free tortillas (I like Siete Foods brand) and double-check your deli meat for gluten-containing additives. Most turkey is gluten-free, but always read labels.
My personal favorite variation? I add a thin layer of pesto under the cream cheese. The basil flavor pairs beautifully with the turkey and provolone, and it makes the pinwheels look gorgeous with that green swirl. I discovered this completely by accident when I was out of regular cream cheese and had some leftover pesto cream cheese from a party. Best accident ever.
Serving & Storage Suggestions
These pinwheels are incredibly versatile when it comes to serving. Here’s how I handle them:
Serving: Serve them cold or at room temperature—they’re perfect either way. Arrange them on a platter with some fresh fruit, veggie sticks, and maybe a little dip like ranch or honey mustard. They’re great for parties, picnics, lunchboxes, or just snacking straight from the fridge (no judgment here).
Storage: Store leftover pinwheels in an airtight container in the refrigerator for up to 3 days. Place a paper towel at the bottom of the container to absorb any excess moisture. The pinwheels actually taste even better the next day as the flavors meld together.
Freezing: Here’s the best part—you can freeze these! Wrap each roll tightly in plastic wrap, then place them in a freezer bag. They’ll keep for up to 3 months. When you’re ready to use them, thaw overnight in the refrigerator, then slice as usual. I always keep a few rolls in the freezer for emergency lunches.
Reheating: Honestly, I prefer these cold. But if you want them warm, pop them in the microwave for 10-15 seconds or in a 350°F oven for 5 minutes. Just don’t overheat them or the cream cheese will get runny and everything will slide apart.
One thing I’ve noticed—the flavors really develop overnight. The garlic powder and pepper meld with the cream cheese, and the turkey absorbs some of that creamy goodness. So if you can plan ahead, make these the night before. Your future self will thank you.
Nutritional Information & Benefits
Here’s the approximate nutritional breakdown for one pinwheel (based on 8 pinwheels per large tortilla):
- Calories: 120-150
- Protein: 8-10g
- Carbohydrates: 10-12g
- Fat: 6-8g
- Fiber: 1-2g
- Sodium: 350-400mg
These numbers will vary depending on the specific brands and ingredients you use. If you’re watching sodium, look for low-sodium turkey and cheese.
The turkey provides lean protein that keeps you full and satisfied, while the cream cheese adds calcium and a little healthy fat. If you add spinach and carrots, you’re getting vitamins A and C, plus some extra fiber. Not bad for something that tastes like a treat!
For a lighter version, use reduced-fat cream cheese and low-fat cheese. You can also skip the mayonnaise to save some calories. But honestly, this recipe is pretty balanced as-is—it’s real food made with real ingredients, and that’s something I feel good about putting in my family’s lunchboxes.
Conclusion
These Easy Turkey and Cheese Pinwheel Wraps are more than just a lunchbox solution—they’re a little piece of comfort that’s easy enough for a busy weekday but special enough to feel like a treat. Whether you’re packing school lunches, prepping for a road trip, or looking for a crowd-pleasing appetizer, these pinwheels deliver every time.
I love this recipe because it’s forgiving. You can mess up the roll, slice them crooked, or forget an ingredient, and they still taste amazing. It’s the kind of recipe that builds confidence in the kitchen, even if you’re just starting out. And honestly? That’s the best kind of recipe to have in your back pocket.
So go ahead—grab those tortillas and that cream cheese, and make a batch. Customize them with your favorite fillings, get creative with the variations, and don’t forget to snack on those uneven end pieces. You’ve earned them.
I’d love to hear how yours turn out! Drop a comment below and tell me your favorite filling combination, or share a photo of your pinwheels on social media. Happy rolling, friends!
Frequently Asked Questions
Can I make these pinwheels ahead of time?
Absolutely! In fact, they taste better the next day. You can make the rolls up to 24 hours in advance and keep them wrapped in the fridge. Slice them just before serving for the best presentation.
How do I keep pinwheels from getting soggy in a lunchbox?
The cream cheese acts as a barrier that prevents moisture from seeping into the tortilla. Just make sure you spread it all the way to the edges. Also, let the pinwheels come to room temperature before packing—condensation can make them soggy if they go straight from fridge to lunchbox.
Can I use different types of cheese?
Definitely! Provolone, Swiss, cheddar, mozzarella, pepper jack—they all work great. Just make sure it’s sliced thin enough to roll easily. I’ve even used spreadable cheese like Boursin for extra flavor.
How long do these pinwheels last in the fridge?
Stored in an airtight container, they’ll keep for up to 3 days. After that, the tortillas start to get a little soft and the filling can separate. But honestly, they never last that long in my house.
Can I make these without cream cheese?
You can, but the texture will be different. Hummus, pesto, or even a thin layer of mayonnaise can work as a spread. The cream cheese is what gives these pinwheels their signature creamy texture and helps everything stick together, so I’d recommend sticking with it if you can.
Pin This Recipe!
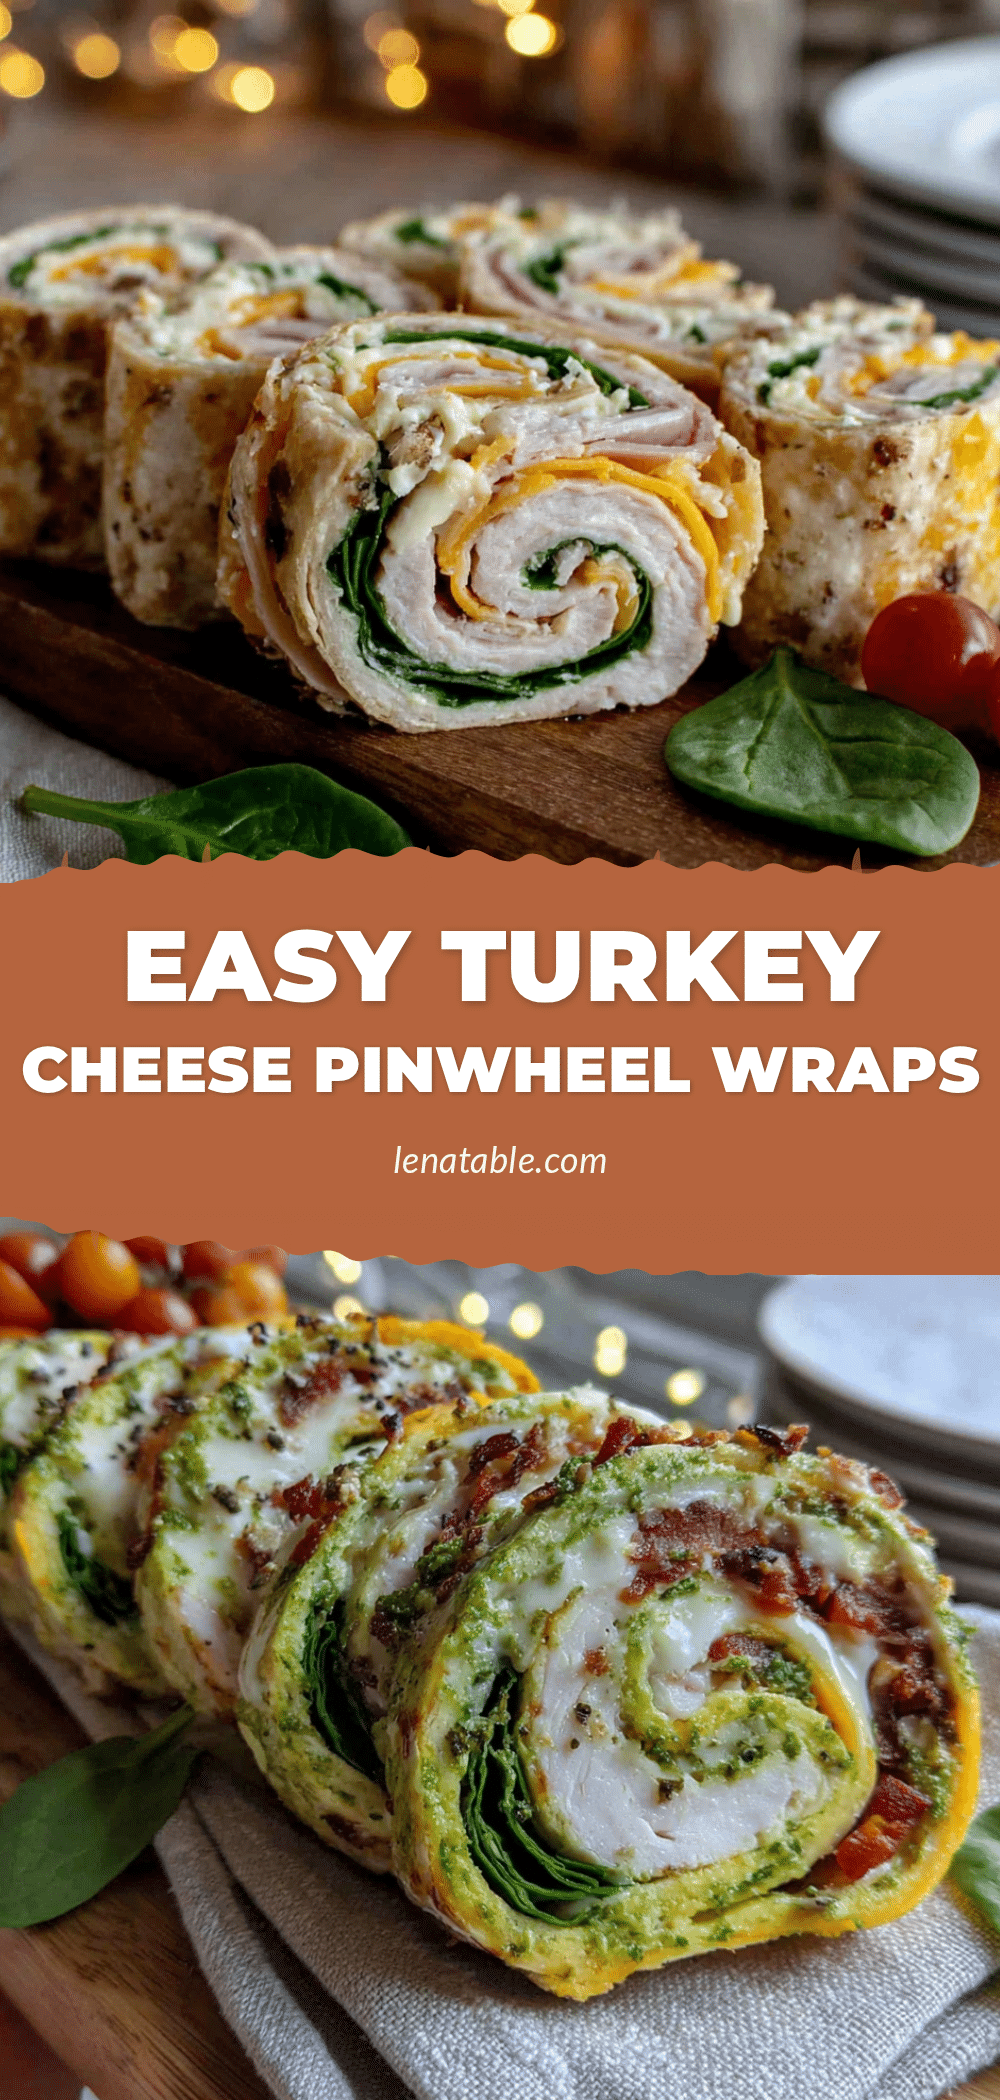
Easy Turkey and Cheese Pinwheel Wraps for Lunch

These easy turkey and cheese pinwheel wraps are perfect for lunchboxes, potlucks, or a quick snack. Made with simple ingredients like cream cheese, deli turkey, and provolone, they come together in just 15 minutes and are a crowd-pleaser for both kids and adults.
- Prep Time: 15 minutes
- Cook Time: 0 minutes
- Total Time: 45 minutes (includes 30 minutes chilling)
- Yield: 8 servings (about 6-8 pinwheels per tortilla, total 48-64 pinwheels) 1x
- Category: Lunch
- Cuisine: American
Ingredients
- 8 large flour tortillas (burrito-size)
- 1 (8 oz) package cream cheese, softened to room temperature
- 1 pound thinly sliced deli turkey (e.g., Boar’s Head oven-roasted turkey breast)
- 8 slices provolone cheese (or Swiss, mozzarella, cheddar)
- 1/4 cup mayonnaise (optional)
- 1/2 teaspoon garlic powder
- 1/4 teaspoon black pepper, freshly ground
- 1/4 cup finely chopped fresh spinach (optional)
- 1/4 cup shredded carrots (optional)
Instructions
- Soften the cream cheese: Take cream cheese out of fridge 30 minutes before starting, or microwave for 10-15 seconds in a bowl until soft but not melted.
- Mix the spread: In a small bowl, combine softened cream cheese, mayonnaise (if using), garlic powder, and black pepper. Stir until smooth. Fold in spinach or carrots if using. Taste and adjust seasoning.
- Prepare workspace: Lay a large piece of plastic wrap on counter. Place one tortilla on top.
- Spread cream cheese mixture: Using an offset spatula or butter knife, spread about 2 tablespoons of cream cheese mixture evenly over entire tortilla, all the way to edges.
- Layer turkey: Place 2-3 slices of turkey on top of cream cheese, overlapping slightly for full coverage but not too thick.
- Add cheese: Lay one slice of provolone on top of turkey, positioning corners to hang off edges slightly.
- Roll tightly: Starting from one edge, roll tortilla as tightly as possible without tearing, using fingers to keep filling tucked in. Press gently to seal at end.
- Wrap and chill: Roll plastic wrap around tortilla roll tightly, twisting ends like a candy wrapper. Place on baking sheet. Repeat with remaining tortillas. Refrigerate for at least 30 minutes (up to 24 hours).
- Slice and serve: Unwrap each roll, slice off uneven ends (chef’s snack), then slice into 1-inch pinwheels using a sharp knife with a gentle sawing motion.
- Pack them up: Arrange pinwheels in lunchbox or serving platter. Keep refrigerated until ready to go.
Notes
Don’t skip the chilling step—it sets the cream cheese for clean slicing. Use a serrated knife for best results. Warm tortillas if stiff. Make a double batch and freeze for up to 3 months. Flavors develop overnight, so make ahead if possible.
Nutrition
- Serving Size: 1 pinwheel
- Calories: 135
- Sugar: 1
- Sodium: 375
- Fat: 7
- Saturated Fat: 3.5
- Carbohydrates: 11
- Fiber: 1.5
- Protein: 9
Keywords: turkey pinwheels, cheese pinwheels, lunchbox wraps, easy lunch, kid-friendly, party appetizer, make-ahead, freezer-friendly


