Love this? Save it for later!
Share the inspiration with your friends
My buddy Dave asked why I couldn’t just stuff the buffalo chicken dip straight into the slider buns and bake it all together. I started to explain why that wouldn’t work—then stopped. Honestly, I had no good reason. I’d been making the dip and the sliders separately for years, like some kind of cooking robot following a script I’d written for myself. Dave just shrugged and said, “Seems like more work, man.”
He wasn’t wrong. That conversation happened on a random Tuesday night while we were complaining about our fantasy football teams. I’d made my usual spread—buffalo chicken dip in the slow cooker, plain sliders on the side. It worked fine. But Dave’s question stuck in my head like a song you can’t shake. The next Sunday, while the early games were on, I decided to try it. I mixed the dip filling, scooped it into the slider rolls, brushed them with garlic butter, and threw them in the oven. I was half expecting a soggy, melted mess.
What came out was pure magic. The buns got golden and slightly crisp on the edges while staying soft in the middle. The filling stayed creamy and hot, with that perfect buffalo kick. I grabbed one straight from the pan—burned my fingers, didn’t care—and took a bite. Let me tell you, I actually laughed out loud. It was that good. I texted Dave a photo with the caption “You did this.” He replied with about fifteen fire emojis. That’s how this recipe was born—not from some chef’s epiphany, but from a friend asking a simple question I was too stubborn to ask myself. Maybe you’ve been there, making something the same way for years without wondering if there’s a better way. Trust me, this is the better way.
Why You’ll Love This Recipe
These Game Day Buffalo Chicken Dip Stuffed Football Sliders are the kind of appetizer that disappears before halftime. I’ve tested this recipe at three different parties now, and every single time, someone asks for the recipe before the second quarter ends. Here’s why they’re a total game-changer:
- All-in-One Convenience: No more separate bowls of dip and buns. Everything bakes together in one pan, which means less cleanup and more time watching the game.
- Perfectly Portable: Each slider is self-contained. Guests can grab one and go without juggling a plate and a dipping bowl. Trust me, your furniture will thank you.
- Bold Buffalo Flavor: That creamy, spicy, tangy buffalo chicken dip we all love gets baked right into soft slider rolls. Every bite delivers the same punch as the classic dip, just in a handheld form.
- Customizable Heat Level: You control the spice. Use mild hot sauce for a crowd-friendly version or crank it up with extra cayenne for the heat seekers in your group.
- Make-Ahead Friendly: Assemble these up to 24 hours in advance and bake right before serving. Perfect for when you’re hosting and need to actually enjoy the party.
What makes these sliders different from every other stuffed bun recipe out there is the filling consistency. I spent three batches getting the ratio right—enough cream cheese to keep it sturdy, but enough hot sauce to keep that signature buffalo tang. The result? A filling that holds its shape inside the bun without turning into a greasy puddle. It’s not just another version of buffalo chicken sliders. It’s the version that makes you close your eyes after the first bite and forget about the game for a second. That’s comfort food reimagined—faster, easier, and somehow even more satisfying than the original.
What Ingredients You Will Need
This recipe uses mostly pantry staples and a few refrigerated items to create that bold, creamy buffalo flavor. I’ve tested this with different brands and ingredient variations, so I’ll share what works best based on my experience.
For the Buffalo Chicken Filling
- 2 cups cooked, shredded chicken (rotisserie chicken works great; about 1 whole chicken breast or 2 thighs)
- 8 ounces cream cheese, softened to room temperature (I prefer Philadelphia brand for the smoothest texture)
- 1/2 cup buffalo hot sauce (Frank’s RedHot is my go-to; it’s the classic for a reason)
- 1/2 cup ranch dressing (or blue cheese dressing if you’re that kind of person—no judgment)
- 1 cup shredded mozzarella cheese (low-moisture, part-skim works best; it melts without getting greasy)
- 1/2 cup crumbled blue cheese (optional but highly recommended for that authentic buffalo wing experience)
- 1/4 cup chopped green onions (about 3-4 green onions, white and light green parts)
- 1/2 teaspoon garlic powder
- 1/2 teaspoon onion powder
- 1/4 teaspoon salt (go easy here; the hot sauce and cheese add plenty of sodium)
For the Sliders
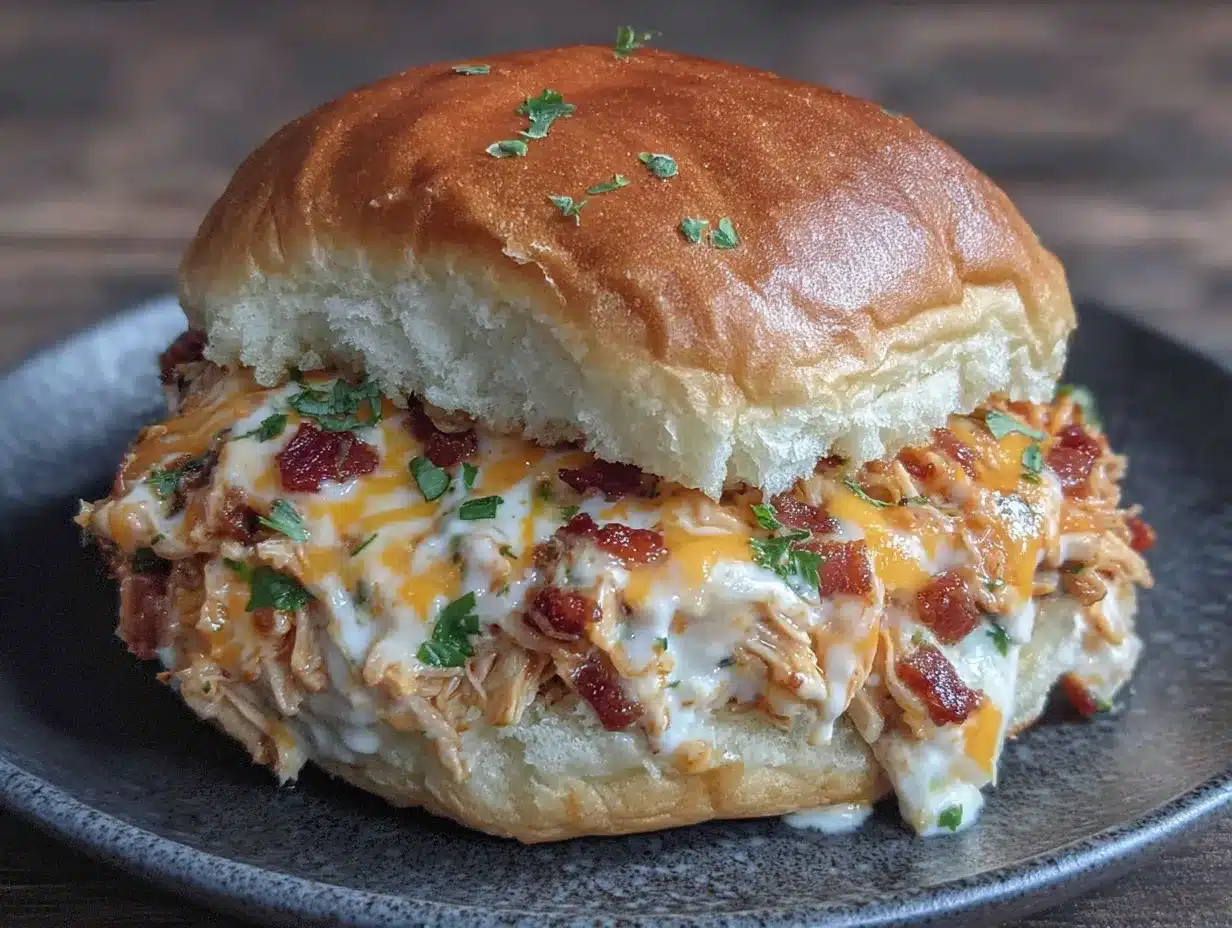
- 12 slider rolls (Hawaiian sweet rolls are my favorite—the slight sweetness balances the heat beautifully)
- 3 tablespoons unsalted butter, melted
- 1 teaspoon garlic powder
- 1 teaspoon dried parsley
- 1/4 cup grated Parmesan cheese (the powdery kind in the green can works perfectly here)
For the chicken, I usually grab a rotisserie chicken from the store when I’m short on time. If I’m meal prepping, I’ll poach two chicken breasts in salted water for about 15 minutes, then shred them with two forks. Both methods work great. Just make sure the chicken is finely shredded—not chunky—so it distributes evenly through the filling.
One thing I learned the hard way: don’t skip softening the cream cheese. Cold cream cheese creates lumps that never fully smooth out, even after baking. Leave it on the counter for about 30 minutes before you start mixing. If you forget, microwave it in 10-second bursts until it’s soft but not melted.
Equipment Needed
- 9×13-inch baking dish (glass or ceramic works best; metal pans can cause the bottoms to brown too quickly)
- Mixing bowl (medium size is fine)
- Cutting board and sharp knife
- Small saucepan or microwave-safe bowl (for melting butter)
- Pastry brush (or a spoon if you’re like me and lose your brush every other week)
- Aluminum foil
- Stand mixer or hand mixer (optional but makes the filling smoother; a wooden spoon works too)
If you don’t have a 9×13 dish, you can use two 8×8 pans or even a large cast-iron skillet. Just adjust the baking time slightly—smaller pans might need an extra 2-3 minutes. My grandmother’s old glass baking dish is my go-to for these sliders. It distributes heat evenly and the glass lets me see when the bottoms are getting golden. Budget tip: thrift stores always have glass baking dishes for a couple bucks. No need to buy new.
Preparation Method
- Preheat your oven to 350°F (175°C). While it’s heating, lightly grease your 9×13 baking dish with butter or non-stick spray. This step matters—I forgot once and spent twenty minutes scraping stuck-on cheese off the pan.
- Prepare the buffalo chicken filling. In a medium mixing bowl, combine the softened cream cheese, buffalo hot sauce, and ranch dressing. Mix until smooth and fully combined. A hand mixer makes this step effortless, but a sturdy spoon works if you put some elbow grease into it. Stir in the shredded mozzarella, crumbled blue cheese (if using), green onions, garlic powder, onion powder, and salt. Fold in the shredded chicken until everything is evenly coated. The mixture should look thick and creamy, not runny. If it seems loose, add another tablespoon of cream cheese.
- Prepare the slider rolls. Without separating the individual rolls, slice the entire slab of 12 rolls in half horizontally. You want one solid top half and one solid bottom half. Think of it like cutting a giant hamburger bun. Place the bottom half into your prepared baking dish. If the rolls feel stuck together, use a serrated knife and a gentle sawing motion. I’ve split more rolls than I care to admit rushing through this step.
- Assemble the sliders. Spread the buffalo chicken filling evenly over the bottom layer of rolls. Don’t be shy—get it into every corner and crevice. Place the top half of the rolls back on, pressing down gently so everything stays together.
- Make the garlic butter topping. In a small saucepan or microwave-safe bowl, melt the 3 tablespoons of butter. Stir in the garlic powder and dried parsley. Brush this mixture generously over the tops of the rolls. Make sure every roll gets some butter love—dry spots will bake up pale and sad. Sprinkle the grated Parmesan cheese evenly over the top. This creates that golden, slightly crispy crust that makes these sliders irresistible.
- Bake covered. Cover the baking dish loosely with aluminum foil. Bake for 15 minutes. The foil traps steam and ensures the filling heats through without the tops burning. After 15 minutes, remove the foil and bake for another 8-10 minutes, until the tops are golden brown and the cheese is bubbly. Your kitchen will smell like a sports bar at this point, and that’s a good thing.
- Rest and serve. Let the sliders rest in the pan for 5 minutes before serving. This is crucial—the filling needs time to set slightly so it doesn’t ooze out everywhere when you bite into it. Use a sharp knife to cut between the rolls, then serve warm. The filling should be hot and creamy, the tops golden and slightly crisp, and the bottoms soft but sturdy.
Cooking Tips & Techniques
I’ve made these sliders about a dozen times now, and I’ve picked up a few tricks along the way. Here’s what I wish someone had told me before my first attempt.
Don’t overmix the filling. I know it’s tempting to keep stirring until everything is perfectly uniform, but overmixing can break down the cream cheese and make the filling greasy. Stop mixing as soon as everything comes together. A few small lumps of cream cheese are totally fine—they’ll melt during baking anyway.
Watch your oven like a hawk after removing the foil. The line between “golden brown” and “burnt edges” is about 90 seconds. Every oven runs differently. My friend’s oven takes the full 10 minutes uncovered, but mine starts browning at 7 minutes. Check at 6 minutes and go from there. Burnt garlic butter tastes bitter, and nobody wants that.
Use a serrated knife to cut the rolls. I made the mistake of using a chef’s knife once, and it squished the rolls flat. A serrated knife (like a bread knife) cuts through without compressing the soft bread. If your rolls are particularly sticky, pop them in the freezer for 10 minutes before cutting. That trick changed my slider game completely.
Let the cream cheese sit out. I cannot stress this enough. Cold cream cheese creates lumps that never fully disappear, even after baking. Set it out when you start preheating the oven. If you forget, microwave it in 10-second bursts, flipping it over between each burst. It’s not as good as room temperature, but it’s better than cold.
Double the recipe for crowds. These go fast. I made one batch for a party of eight, and they were gone in 15 minutes. For bigger gatherings, make two pans. They reheat beautifully, so leftovers (if you have any) are a bonus.
Variations & Adaptations
One of the best things about this recipe is how flexible it is. Here are some variations I’ve tried and loved:
Spicy Buffalo Version: Add 1 teaspoon of cayenne pepper to the filling and use extra-hot buffalo sauce. I did this for a party where everyone claimed they “loved spicy food.” Three people were sweating by the end of the first quarter. It was glorious. Just warn your guests before they take that first bite.
Smoky Chipotle Twist: Replace the buffalo sauce with 1/2 cup of adobo sauce from a can of chipotle peppers in adobo. Finely chop one chipotle pepper and mix it in too. The smoky, slightly sweet heat pairs beautifully with the creamy cheese filling. This version tastes more like a Southwest-inspired slider, and it’s become my personal favorite for non-football gatherings.
Healthier Light Version: Use reduced-fat cream cheese, low-fat mozzarella, and Greek yogurt instead of ranch dressing. Skip the butter topping and brush the rolls with olive oil instead. The texture won’t be quite as rich, but the flavor is still fantastic. I’ve served this version to friends who are on keto diets, and they went back for seconds.
Vegetarian Buffalo Cauliflower: Replace the shredded chicken with 2 cups of finely chopped roasted cauliflower. Toss the cauliflower in buffalo sauce before mixing it into the filling. The texture is surprisingly similar, and the cauliflower absorbs the buffalo flavor beautifully. My vegetarian sister-in-law requests this version every time she visits.
Breakfast Sliders: This one sounds weird, but trust me. Swap the buffalo sauce for 1/4 cup of maple syrup mixed with 1/4 cup of sriracha. Use breakfast sausage crumbles instead of chicken. The sweet-spicy combination is unreal. I made these for a Sunday brunch once, and they disappeared faster than the pancakes.
Serving & Storage Suggestions
These sliders are best served warm, straight from the oven. The filling should be hot and creamy, and the tops should have that slight crunch from the Parmesan butter topping. I like to serve them on a large wooden cutting board with extra buffalo sauce and ranch dressing on the side for dipping. Celery sticks and carrot chips make great crunchy companions—they cut through the richness and add freshness.
For a full game day spread, pair these sliders with classic buffalo wings, a simple green salad with ranch dressing, and plenty of cold drinks. They also work great alongside chili, loaded nachos, or a big bowl of guacamole with tortilla chips. If you’re feeling fancy, sprinkle some fresh chopped chives or extra green onions over the top right before serving.
Storage: Leftover sliders (if you have any) can be stored in an airtight container in the refrigerator for up to 3 days. The texture softens a bit overnight, but the flavor actually gets better as the filling melds together. To reheat, place them in a 350°F oven for about 10 minutes, covered with foil. The microwave works in a pinch, but the buns will get chewy. I don’t recommend freezing these—the cream cheese filling separates when thawed and the texture gets grainy. Trust me, I tried it once and regretted it.
These sliders also travel well. I’ve taken them to potlucks and tailgates by assembling them at home, wrapping the dish tightly in foil, and baking them at the destination. They hold up for about an hour at room temperature, so they’re perfect for sharing.
Nutritional Information & Benefits
Here’s the honest truth: these sliders are indulgent. They’re not health food, and I’m not going to pretend they are. But they do have some redeeming qualities worth mentioning.
Each slider (based on 12 servings) contains approximately:
– Calories: 285
– Protein: 18g
– Fat: 16g
– Carbohydrates: 18g
– Fiber: 1g
– Sugar: 4g
– Sodium: 620mg
The chicken provides lean protein that helps keep you full and supports muscle recovery—handy if you’re running around the backyard playing touch football between games. The cream cheese and mozzarella add calcium for bone health. The hot sauce contains capsaicin, which has been shown to boost metabolism slightly and reduce inflammation. The green onions add a small amount of vitamins A and K.
For those with dietary restrictions, this recipe contains gluten (from the rolls), dairy (from the cheese and cream cheese), and eggs (from the rolls). To make it gluten-free, use gluten-free slider rolls. For a dairy-free version, substitute vegan cream cheese, dairy-free mozzarella, and use a dairy-free ranch dressing. The texture will be slightly different, but the flavor still delivers that buffalo kick.
Conclusion
These Game Day Buffalo Chicken Dip Stuffed Football Sliders have become my signature party dish, and I’m not even sorry about it. They’re the kind of recipe that makes you look like a hero in the kitchen without actually doing much work. The filling is rich and creamy, the buns are soft and buttery, and every bite delivers that buffalo chicken flavor we all crave during game time.
What I love most about this recipe is how it brings people together. There’s something about pulling a pan of golden, cheesy sliders out of the oven that makes everyone gather around. No fancy plating, no complicated techniques—just good food that tastes like the best parts of game day. Whether you’re hosting the Super Bowl, a Monday Night Football party, or just a casual weekend gathering, these sliders deliver every single time.
I’d love to hear how yours turn out. Did you add extra hot sauce? Try the chipotle version? Forget to soften the cream cheese and learn the hard way like I did? Drop a comment below and let me know. And if you make these for your next game day spread, tag me in your photos—I want to see those golden, cheesy tops in all their glory. Now go preheat that oven and make something delicious. Your friends will thank you.
Frequently Asked Questions
Can I make these sliders ahead of time?
Yes! Assemble the sliders completely, cover with foil, and refrigerate for up to 24 hours. When you’re ready to bake, add about 5 minutes to the covered baking time since the filling starts cold. The garlic butter topping can be brushed on right before baking.
What’s the best hot sauce to use?
Frank’s RedHot is the classic choice for buffalo flavor. It has the right balance of heat and tang without being overwhelmingly spicy. If you want more heat, use a hot sauce like Tabasco or add cayenne pepper. For a milder version, use a mild wing sauce or mix the hot sauce with extra ranch dressing.
Can I use canned chicken instead of fresh?
You can, but I don’t recommend it. Canned chicken has a softer, mushier texture that doesn’t hold up well in the filling. Fresh shredded chicken—whether from a rotisserie bird or poached breasts—has better texture and flavor. If you’re in a pinch, drain the canned chicken well and pat it dry with paper towels before mixing.
How do I keep the sliders from getting soggy?
The key is not overloading the filling with liquid. Make sure your cream cheese is softened but not melted, and don’t add extra hot sauce beyond what the recipe calls for. Also, letting the sliders rest for 5 minutes after baking allows excess steam to escape, which helps keep the buns firm.
Can I freeze these sliders?
I don’t recommend freezing them. The cream cheese filling tends to separate when thawed, leaving a grainy texture. If you absolutely must freeze them, assemble without the butter topping, freeze unbaked, and add the topping right before baking. The texture won’t be as good as fresh, but it’ll work in a pinch.
Pin This Recipe!
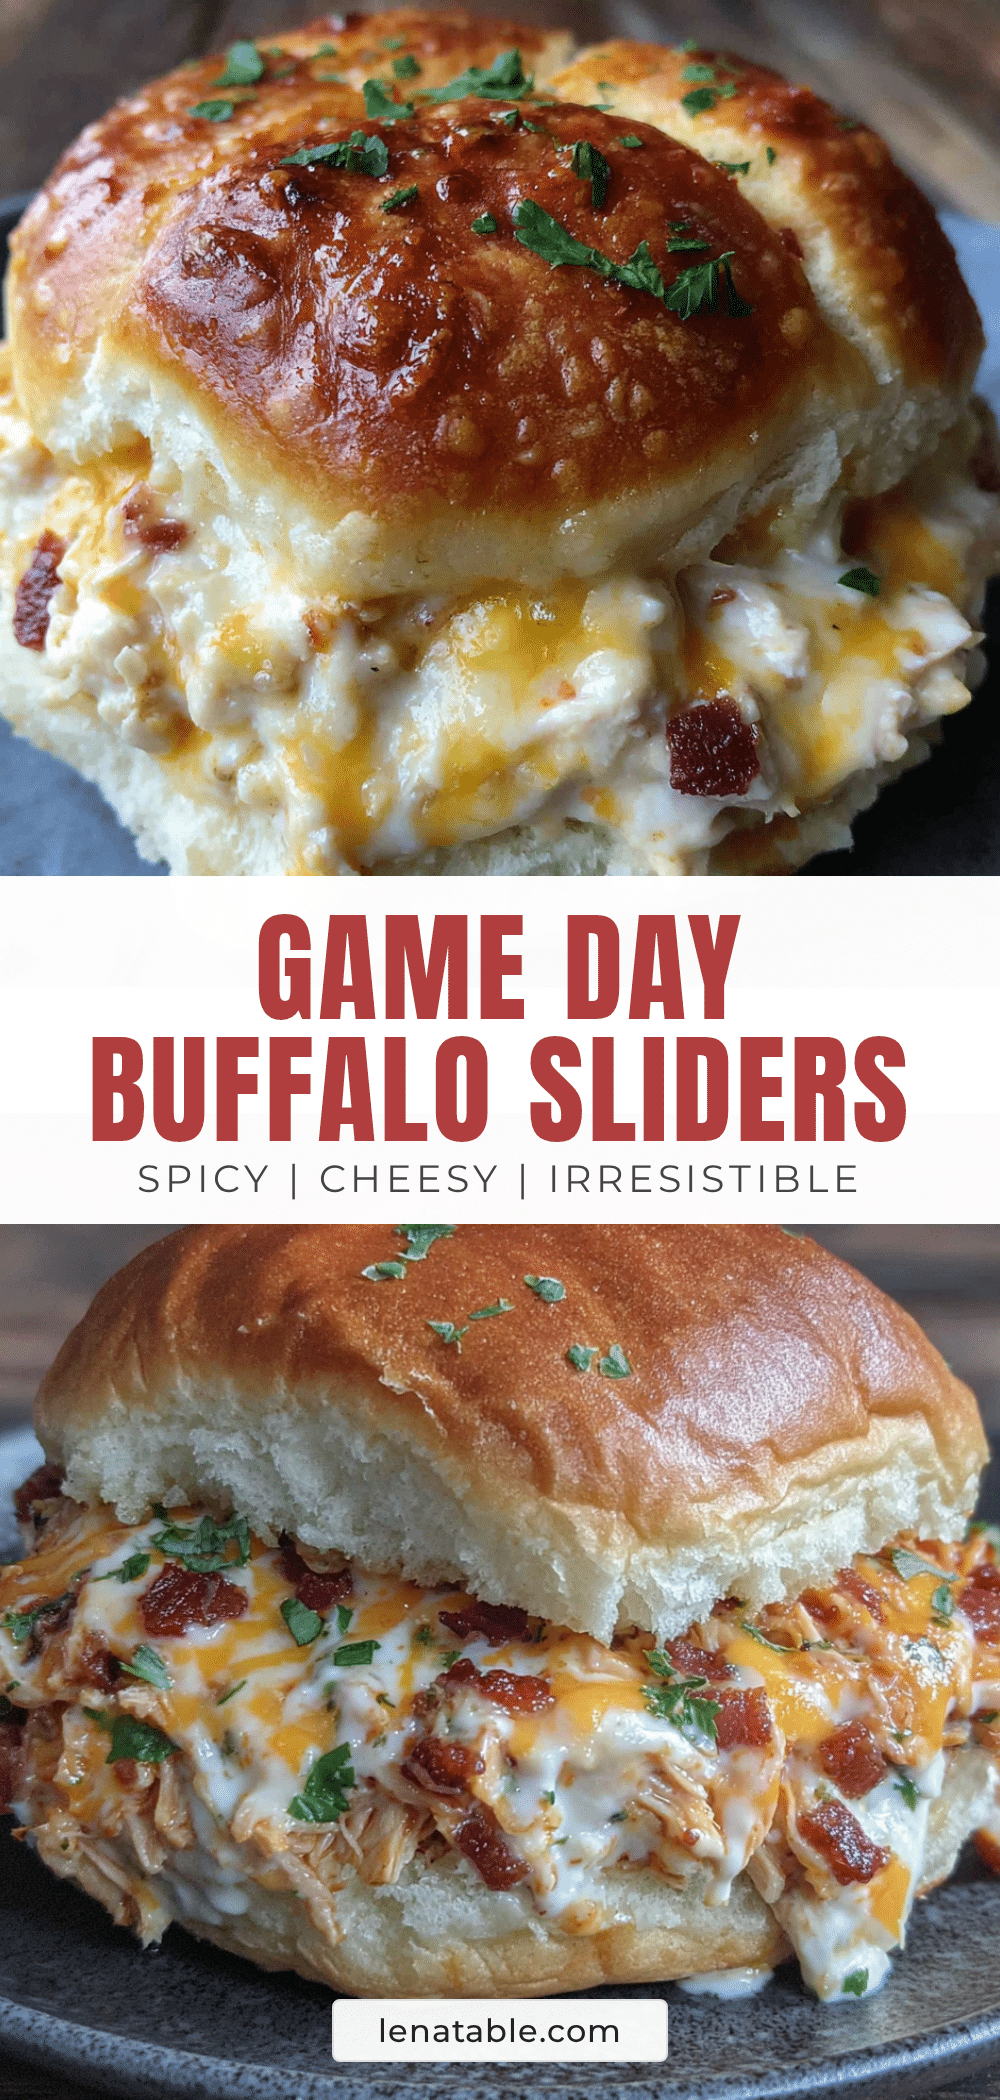
Best Game Day Buffalo Chicken Dip Stuffed Football Sliders

These all-in-one sliders combine creamy buffalo chicken dip with soft slider rolls, baked together for a portable, crowd-pleasing appetizer that disappears before halftime.
- Prep Time: 15 minutes
- Cook Time: 25 minutes
- Total Time: 40 minutes
- Yield: 12 servings 1x
- Category: Appetizer
- Cuisine: American
Ingredients
- 2 cups cooked, shredded chicken (rotisserie chicken works great; about 1 whole chicken breast or 2 thighs)
- 8 ounces cream cheese, softened to room temperature
- 1/2 cup buffalo hot sauce (Frank’s RedHot recommended)
- 1/2 cup ranch dressing (or blue cheese dressing)
- 1 cup shredded mozzarella cheese (low-moisture, part-skim)
- 1/2 cup crumbled blue cheese (optional)
- 1/4 cup chopped green onions (about 3–4 green onions, white and light green parts)
- 1/2 teaspoon garlic powder
- 1/2 teaspoon onion powder
- 1/4 teaspoon salt
- 12 slider rolls (Hawaiian sweet rolls recommended)
- 3 tablespoons unsalted butter, melted
- 1 teaspoon garlic powder
- 1 teaspoon dried parsley
- 1/4 cup grated Parmesan cheese
Instructions
- Preheat your oven to 350°F (175°C). Lightly grease a 9×13-inch baking dish with butter or non-stick spray.
- Prepare the buffalo chicken filling: In a medium mixing bowl, combine softened cream cheese, buffalo hot sauce, and ranch dressing. Mix until smooth. Stir in shredded mozzarella, crumbled blue cheese (if using), green onions, garlic powder, onion powder, and salt. Fold in shredded chicken until evenly coated.
- Prepare the slider rolls: Without separating the individual rolls, slice the entire slab of 12 rolls in half horizontally, creating one solid top half and one solid bottom half. Place the bottom half into the prepared baking dish.
- Assemble the sliders: Spread the buffalo chicken filling evenly over the bottom layer of rolls. Place the top half of the rolls back on, pressing down gently.
- Make the garlic butter topping: In a small saucepan or microwave-safe bowl, melt the butter. Stir in garlic powder and dried parsley. Brush this mixture generously over the tops of the rolls. Sprinkle grated Parmesan cheese evenly over the top.
- Bake covered: Cover the baking dish loosely with aluminum foil. Bake for 15 minutes. Remove the foil and bake for another 8-10 minutes, until the tops are golden brown and the cheese is bubbly.
- Rest and serve: Let the sliders rest in the pan for 5 minutes before serving. Use a sharp knife to cut between the rolls, then serve warm.
Notes
Don’t overmix the filling; stop as soon as everything comes together. Watch your oven closely after removing foil to prevent burning. Use a serrated knife to cut the rolls. Let cream cheese sit out to soften. Double the recipe for crowds. Leftovers can be stored in an airtight container in the refrigerator for up to 3 days. Reheat in a 350°F oven for about 10 minutes, covered with foil. Freezing is not recommended.
Nutrition
- Serving Size: 1 slider
- Calories: 285
- Sugar: 4
- Sodium: 620
- Fat: 16
- Saturated Fat: 8
- Carbohydrates: 18
- Fiber: 1
- Protein: 18
Keywords: buffalo chicken dip, sliders, game day, football, appetizer, buffalo chicken, stuffed sliders


