Love this? Save it for later!
Share the inspiration with your friends
There used to be a tiny bakery tucked behind a vintage bookstore in Portland called “The Whisk and Whimsy” that made the most incredible black cat sugar cookies every October. When they closed their doors three years ago — honestly, I still get a little sad thinking about it — I knew I had to figure out how to recreate those cookies myself. After seven tries — including one batch that looked more like angry possums than cute cats — I finally got it.
Let me tell you, there was something magical about those cookies. They weren’t just shaped like cats; they had personality. Some were stretching, others were sitting, and a few were mid-pounce. The bakery owner once told me she used a special technique to get that perfect matte black color without making the cookies taste like charcoal. I spent a whole weekend testing different cocoa powder ratios, and I think I cracked the code.
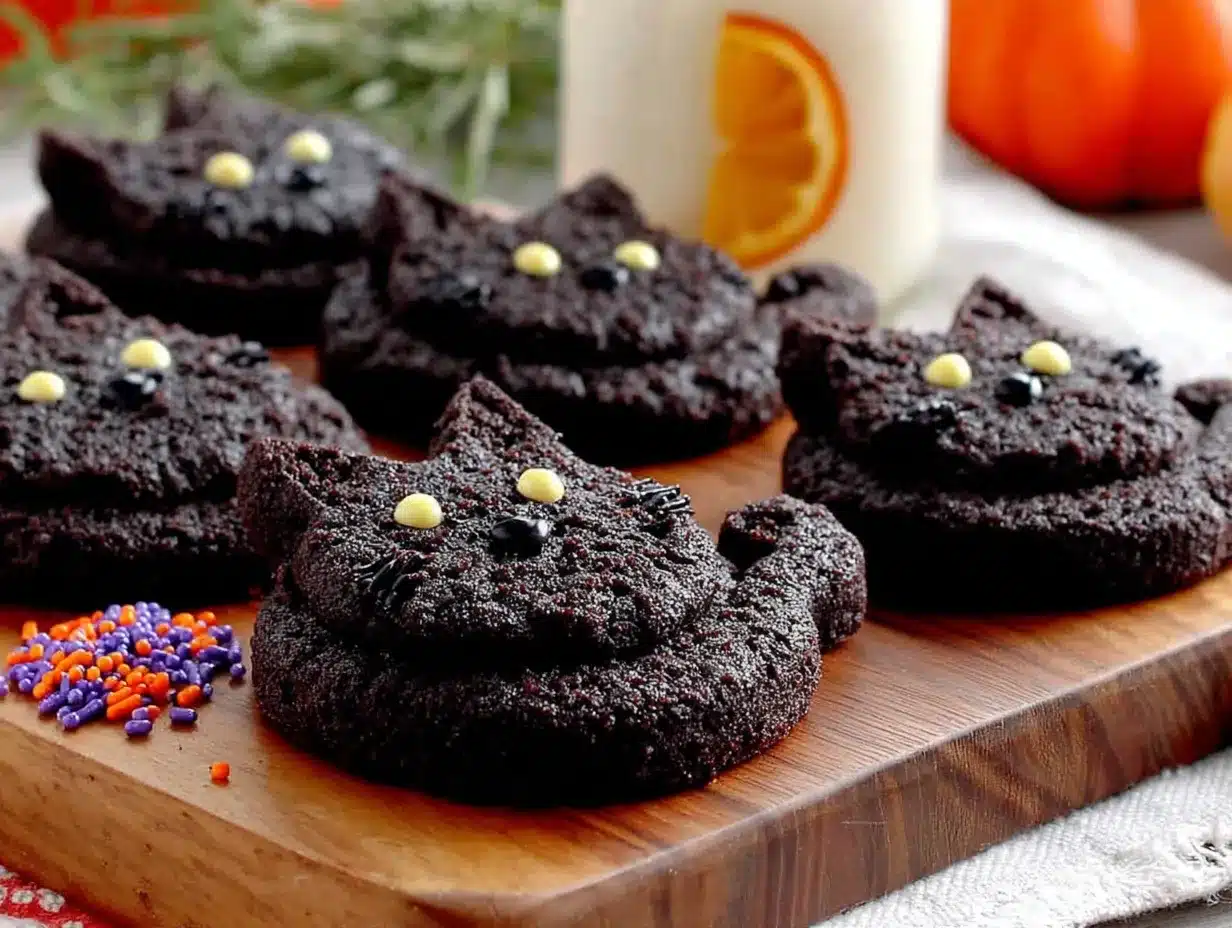
I remember standing in my kitchen at midnight, covered in flour, staring at a tray of cookies that finally looked right. The black was deep and even, the edges were clean, and the little orange eyes I piped on gave each cat its own expression. I almost cried — no joke. Maybe you’ve been there, that moment when a recipe you’ve been chasing finally comes together. It’s the best feeling.
These cookies have become my Halloween tradition now. I make them every year for my neighborhood’s pumpkin carving party, and they disappear faster than anything else on the dessert table. They’re the kind of cookie that makes people stop and smile, and honestly, that’s why I keep making them. Not because they’re fancy or complicated, but because they bring a little bit of that bakery magic back into my kitchen.
Why You’ll Love This Recipe
These black cat sugar cookies aren’t just adorable — they’re actually easier to make than you’d think. After testing this recipe about a dozen times (and yes, I ate every single test cookie), I can promise you it works. Here’s why this recipe stands out:
- No Chilling Required : The dough goes straight from the mixer to the rolling pin. No waiting, no fridge time — just roll, cut, and bake.
- Simple Ingredients : You probably have most of these in your pantry right now. Butter, sugar, flour, eggs — the usual suspects.
- Perfect for Halloween Parties : These cookies are total showstoppers on any dessert table. Kids love them, adults love them, and they photograph beautifully for social media.
- Customizable Expressions : Each cookie can have its own personality. Give them different eye shapes, add whiskers, or pipe on little smiles — it’s up to you.
- Deep Black Color Without Artificial Dye : This is the trick I learned from that bakery — using black cocoa powder gives you that gorgeous dark color without needing tons of food coloring.
What makes these cookies different from every other sugar cookie recipe out there is the texture. They’re crisp on the edges but still slightly soft in the center — that perfect balance that keeps you reaching for “just one more.” I’ve tried dozens of sugar cookie recipes over the years, and this one finally nails that bakery-quality texture at home.
These cookies are the kind that make you close your eyes after the first bite. They’re comfort food reimagined — festive enough for Halloween but simple enough that you won’t stress yourself out making them. Perfect for impressing party guests without spending hours in the kitchen.
What Ingredients You Will Need
This recipe uses simple, wholesome ingredients to create cookies that look like they came from a professional bakery. Most of these are pantry staples, which means you can whip up a batch whenever the Halloween spirit strikes.
For the Cookies
- Unsalted butter, softened (1 cup / 226g) — I prefer Kerrygold for its rich flavor, but any good-quality butter works
- Granulated sugar (1 cup / 200g) — regular white sugar gives the cookies that classic sweetness and crisp edges
- Large egg (1, room temperature) — let it sit out for 30 minutes for better incorporation
- Vanilla extract (2 teaspoons) — pure vanilla, not imitation, makes a noticeable difference in flavor
- All-purpose flour (2 ½ cups / 312g) — spoon and level for accuracy, don’t scoop directly from the bag
- Black cocoa powder (⅓ cup / 40g) — this is the secret ingredient for that deep, dark color; look for it at specialty baking stores or online
- Baking powder (1 teaspoon) — make sure it’s fresh, or your cookies won’t spread properly
- Salt (½ teaspoon) — fine sea salt works best, it balances the sweetness
For the Royal Icing
- Powdered sugar (2 cups / 240g) — sift it first to avoid lumpy icing
- Meringue powder (2 tablespoons) — gives the icing that perfect glossy finish and helps it set hard
- Water (3-4 tablespoons) — add slowly, you might not need all of it
- Orange gel food coloring — for the eyes; I recommend Americolor brand for vibrant color without altering consistency
- Black gel food coloring (optional) — only if your cocoa powder didn’t give you a dark enough base
Ingredient Selection Tips
Black cocoa powder is the real hero here. It’s different from regular Dutch-process cocoa — it’s been heavily alkalized, which gives it that almost-black color and a subtle Oreo-like flavor. You can find it at most baking supply stores or online. If you can’t find it, use Dutch-process cocoa plus a teaspoon of black gel food coloring, but honestly, the black cocoa powder gives better results.
For the butter, make sure it’s truly softened — you should be able to press your finger into it and leave an indent without it being greasy. Cold butter won’t cream properly, and melted butter will make flat cookies. Room temperature matters more than you think.
Equipment Needed
You don’t need a professional bakery setup for these cookies, but a few key tools will make your life much easier. Here’s what I use:
- Stand mixer or hand mixer — either works, but a stand mixer with the paddle attachment makes creaming butter and sugar effortless
- Rolling pin — I prefer a French-style tapered rolling pin for better control, but any rolling pin works
- Cat-shaped cookie cutters — look for sets that include different poses; I found a great set on Amazon that has sitting, stretching, and pouncing cats
- Baking sheets (2) — light-colored aluminum sheets give the most even browning
- Parchment paper — non-negotiable for easy cleanup and preventing sticking
- Cooling rack — lets air circulate so your cookies cool evenly without soggy bottoms
- Piping bags (small) — or zip-top bags with the corner snipped off for the icing
- Small round piping tip (size 2 or 3) — for piping the eyes and details
- Offset spatula — helpful for transferring cut cookies to the baking sheet
If you don’t have cat-shaped cutters, you can use a sharp knife to freehand the shapes — I’ve done it before, and while it takes longer, the cookies end up with a charmingly handmade look. Also, I learned the hard way that dark baking sheets can over-brown the bottoms of these cookies, so stick with light-colored ones if you can.
Preparation Method
Let me walk you through this step by step. I’ve included all the little details I wish someone had told me the first time I made these.
- Preheat your oven to 350°F (175°C) and line two baking sheets with parchment paper. This gives the oven time to stabilize while you prepare the dough.
- Cream the butter and sugar together in your stand mixer fitted with the paddle attachment. Beat on medium speed for about 3 minutes until the mixture is light and fluffy — you should see it change from yellow to almost white. Scrape down the sides of the bowl halfway through.
- Add the egg and vanilla and beat on low until just combined. Don’t overmix here — you just want everything incorporated. The mixture might look slightly curdled at this point, but that’s totally normal.
- Whisk the dry ingredients together in a separate bowl — flour, black cocoa powder, baking powder, and salt. This ensures the cocoa powder is evenly distributed so you don’t end up with streaks of lighter dough.
- Gradually add the dry ingredients to the wet mixture, mixing on low speed. Add about a third at a time, mixing until just combined between additions. Stop when the dough comes together — it should be soft but not sticky. If it feels too sticky, add a tablespoon more flour.
- Lightly flour your work surface and roll the dough out to about ¼-inch (6mm) thickness. I like to place the dough between two sheets of parchment paper for easier rolling — it prevents sticking and makes cleanup a breeze.
- Cut out your cat shapes using your cookie cutters. Press straight down and lift up — don’t twist the cutter, or the edges will seal and your cookies won’t bake evenly. Re-roll the scraps and continue cutting until all the dough is used.
- Place the cookies on the prepared baking sheets, spacing them about 2 inches apart. They won’t spread much, but they need a little breathing room for even baking.
- Bake for 8-10 minutes — start checking at 8 minutes. The cookies should look set around the edges but still slightly soft in the center. They’ll continue to firm up as they cool. For crispier cookies, bake the full 10 minutes; for softer ones, pull them at 8.
- Let the cookies cool on the baking sheet for 5 minutes, then transfer them to a wire rack to cool completely. Don’t skip this step — the cookies are fragile when hot and need that brief rest to firm up.
- While the cookies cool, make the royal icing. Combine the powdered sugar and meringue powder in a bowl. Add 3 tablespoons of water and whisk until smooth. The icing should be thick but flow slowly — think honey consistency. Add the extra tablespoon of water if needed, one teaspoon at a time.
- Divide the icing — leave most of it white (or tint it very lightly gray), and tint a small portion orange for the eyes. Transfer each color to separate piping bags fitted with small round tips.
- Pipe the eyes onto each cookie — two small orange dots works perfectly. Let the eyes set for about 15 minutes before adding any additional details like pupils or outlines.
- Add finishing details — pipe small white or black dots for pupils, add whiskers, or outline the ears. Let the icing set completely before stacking or storing, about 2-3 hours.
Cooking Tips & Techniques
After making these cookies more times than I care to count, I’ve picked up a few tricks that make a real difference. Let me share what I’ve learned the hard way so you don’t have to.
The biggest mistake I made early on was overworking the dough. Sugar cookie dough is forgiving, but if you handle it too much, the gluten develops and you end up with tough, chewy cookies instead of tender, crisp ones. Mix just until the flour disappears, and when you re-roll the scraps, try to do it only once or twice. The third re-roll always produces noticeably tougher cookies.
Temperature control is everything with these cookies. If your kitchen is warm, the dough can get sticky fast. I keep a small bowl of flour nearby and dust my rolling pin lightly between each batch. If the dough starts sticking to your cutter, dip the cutter in flour before each cut — it makes a world of difference.
For perfectly even baking, rotate your baking sheets halfway through. The back of the oven is usually hotter than the front, and that can lead to uneven browning. I set a timer for 4 minutes, rotate the sheets, and check again at 8 minutes.
Here’s a trick I learned from that bakery — chill the cut cookies on the baking sheet for 10 minutes before baking. This helps them hold their shape better, especially if your dough has gotten warm from handling. The edges stay sharp, and the cats keep their distinct poses instead of spreading into blobs.
One time I forgot to add the baking powder — I was distracted by my cat knocking over a plant — and the cookies came out flat and dense. Don’t skip it! Also, make sure your baking powder is fresh. If it’s been sitting in your cabinet for more than six months, it might not work as well.
Variations & Adaptations
One of the best things about this recipe is how easily it adapts. Here are some variations I’ve tried and loved:
Gluten-Free Version : Substitute the all-purpose flour with a 1:1 gluten-free baking flour blend. I’ve had good results with King Arthur’s Measure for Measure blend. Add an extra tablespoon of flour if the dough feels too sticky — gluten-free doughs can be a bit finicky.
Vegan Adaptation : Use vegan butter (I like Miyoko’s) and replace the egg with a flax egg (1 tablespoon ground flaxseed mixed with 3 tablespoons water, let sit for 5 minutes). For the royal icing, use aquafaba (chickpea water) instead of meringue powder — 3 tablespoons of aquafaba whipped to stiff peaks works beautifully.
Flavor Twists : Add ½ teaspoon of peppermint extract for a chocolate-mint vibe, or swap the vanilla for almond extract for a marzipan-like undertone. I once made a batch with orange zest in the dough, and the citrus notes paired surprisingly well with the dark cocoa.
Different Occasions : These cookies aren’t just for Halloween! Use different cookie cutters and adjust the icing colors — heart shapes for Valentine’s Day with pink and red icing, or stars for the Fourth of July with blue and white details. The black cocoa dough works for any occasion where you want a dramatic dark cookie.
No Icing Option : If you’re short on time, skip the royal icing entirely. Press candy eyes into the dough before baking, or use a toothpick to draw simple cat faces on the baked cookies using melted chocolate chips. It’s less refined but just as cute.
Serving & Storage Suggestions
These cookies are best served at room temperature, which lets the royal icing set properly and gives you that perfect snap when you bite into them. I like to arrange them on a black or orange platter for Halloween parties — the contrast makes the cat shapes really pop.
For a complete Halloween dessert spread, pair these cookies with spiced pumpkin cupcakes with cream cheese frosting and a bowl of candy corn. The combination of flavors and textures is always a hit. If you’re serving them at a party, arrange the cats in a playful scene — some sitting, some stretching — to create a fun display.
Storage instructions : Store the cookies in an airtight container at room temperature for up to 5 days. Layer them between sheets of parchment paper to prevent the icing from sticking. Don’t refrigerate them — the moisture in the fridge can make the cookies soft and the icing tacky.
Freezer instructions : You can freeze the baked, un-iced cookies for up to 3 months. Wrap them tightly in plastic wrap and place them in a freezer-safe bag. When you’re ready to decorate, thaw them at room temperature for about an hour, then ice as usual. The dough itself also freezes beautifully — wrap it in plastic wrap, then foil, and freeze for up to 2 months. Thaw overnight in the fridge before rolling and cutting.
Reheating tip : If your cookies have lost their crispness (it happens in humid weather), pop them in a 300°F (150°C) oven for 3-4 minutes. Let them cool completely before serving — they’ll crisp right back up.
Nutritional Information & Benefits
While these are definitely a treat, here’s the estimated nutritional breakdown per cookie (based on 24 cookies):
- Calories: 165
- Fat: 7g
- Carbohydrates: 24g
- Protein: 2g
- Sugar: 14g
The black cocoa powder in these cookies actually contains antioxidants — cocoa is rich in flavonoids, which can support heart health. Of course, the butter and sugar balance that out, so these are still an occasional treat, not a health food. But it’s nice to know there’s a tiny bit of goodness in every bite!
For those with dietary concerns, this recipe contains gluten, dairy, and eggs. The vegan and gluten-free variations I mentioned earlier work well for most dietary restrictions. If you’re watching your sugar intake, you can reduce the sugar in the dough by ¼ cup without significantly affecting the texture, though the cookies will be slightly less crisp.
Conclusion
These black cat sugar cookies have become my most-requested Halloween recipe, and I think they’ll become yours too. They’re adorable without being fussy, delicious without being complicated, and they bring a genuine smile to everyone who sees them. That moment when someone picks up a cookie and laughs because the cat’s expression is just too perfect? That’s why I keep making them.
I’d love to see your versions! Tag me in your photos, leave a comment below with your favorite variation, and let me know if your cats turned out as mischievous as mine. Remember, the beauty of these cookies is that no two are exactly alike — embrace the imperfections, because that’s where the personality comes from.
Happy Halloween baking, friends. May your kitchen be filled with the smell of cocoa and the sound of laughter.
Frequently Asked Questions
Can I use regular cocoa powder instead of black cocoa powder?
You can, but your cookies will be a dark brown rather than black. If you want that deep black color, add 1-2 teaspoons of black gel food coloring to the dough along with regular cocoa powder. The flavor will be slightly different — black cocoa has that distinctive Oreo taste — but the cookies will still be delicious.
Why did my cookies spread too much?
This usually happens when the dough is too warm. Try chilling the cut cookies on the baking sheet for 10-15 minutes before baking. Also, make sure your butter was properly softened — if it was too soft or partially melted, the cookies will spread more. And check that your baking powder isn’t expired!
How far in advance can I make these cookies?
You can make the dough up to 2 days ahead and keep it wrapped in the fridge. Baked, un-iced cookies can be stored at room temperature for up to a week, or frozen for 3 months. Iced cookies are best within 3-4 days — the icing stays prettiest that way.
Can I use a different type of icing?
Absolutely! A simple glaze made from powdered sugar and milk works well, or you can use melted white chocolate or candy melts for a different look. Royal icing gives the cleanest, most professional finish, but it’s not the only option. For a super quick version, just pipe on eyes using melted chocolate chips.
How do I get the icing perfectly smooth?
The key is consistency. Your royal icing should be thick enough to hold its shape but thin enough to flow slowly from the piping tip. If it’s too thick, add water a drop at a time. If it’s too thin, add more powdered sugar. Also, let the icing sit for 5 minutes after mixing — any air bubbles will rise to the surface and you can pop them with a toothpick before piping.
Pin This Recipe!
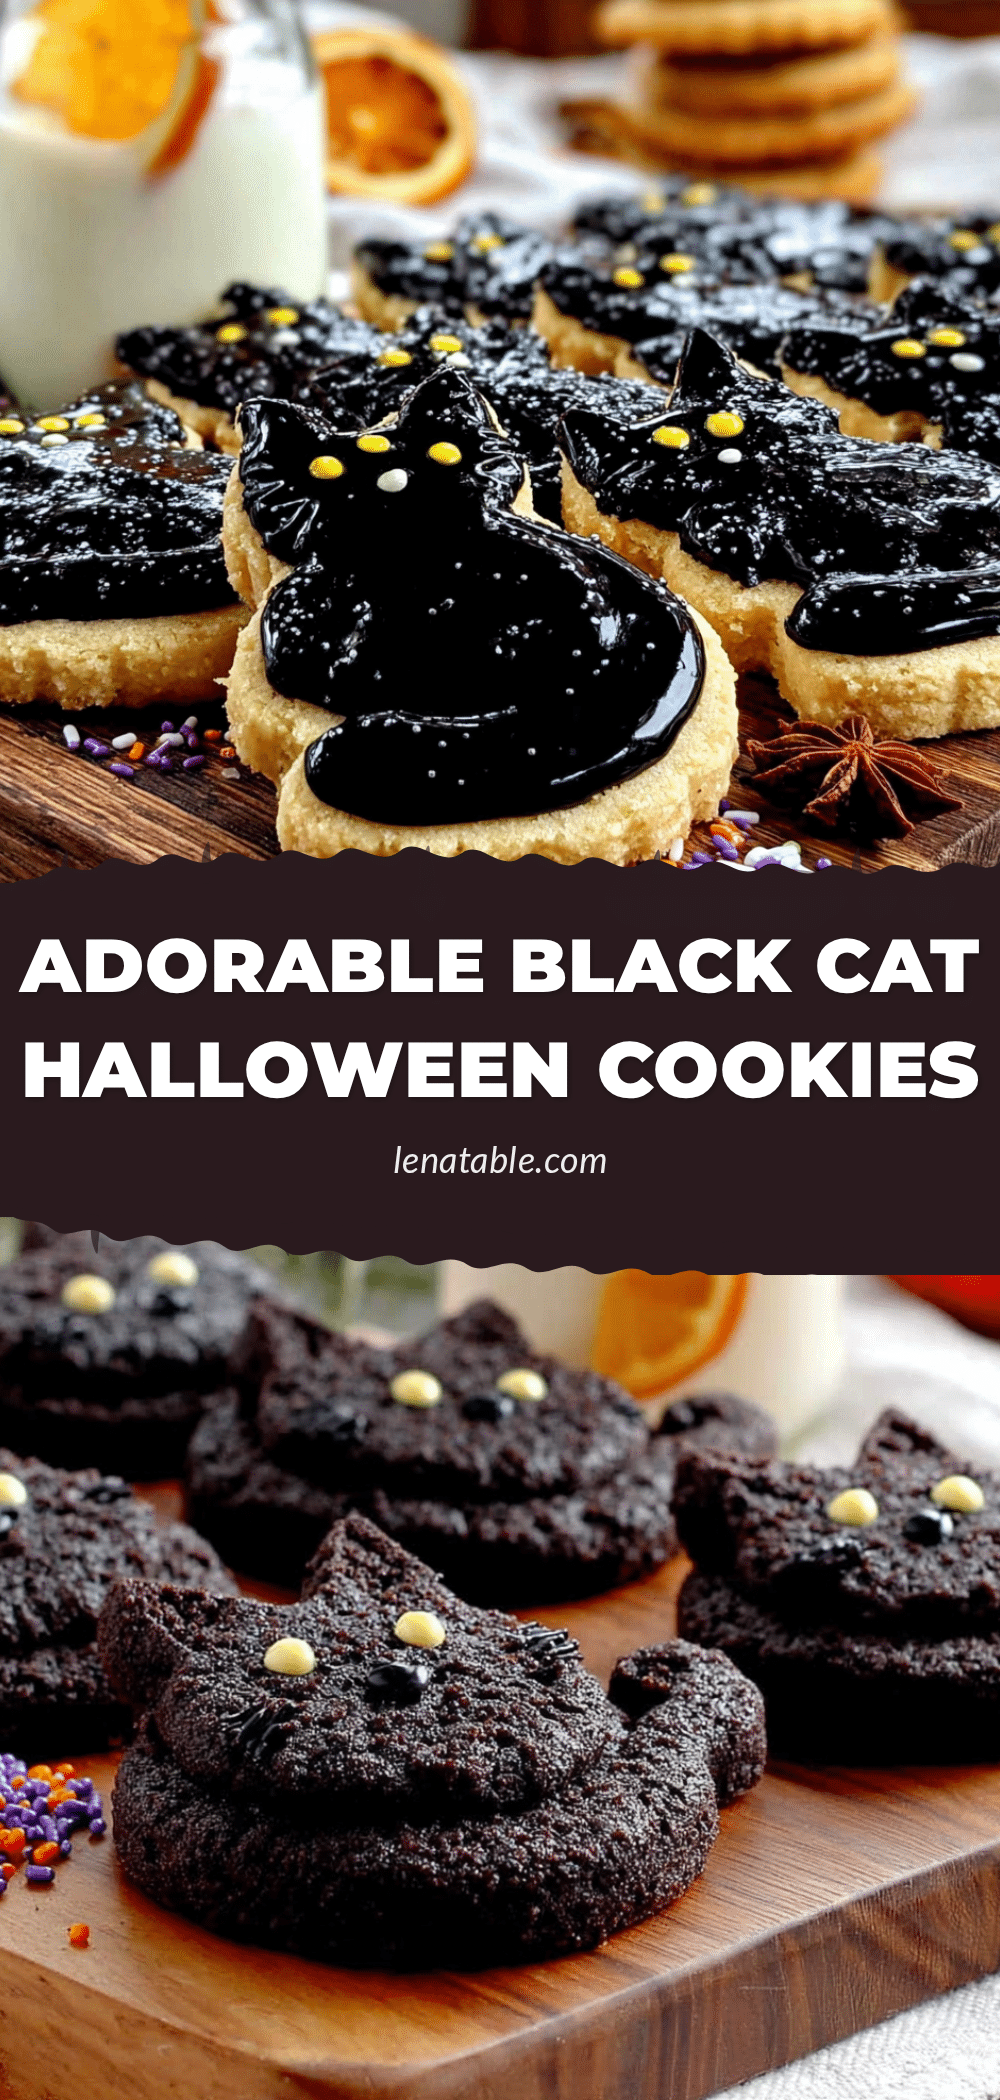
Adorable Black Cat Sugar Cookies: Easy Halloween Recipe

These black cat sugar cookies are crisp on the edges, soft in the center, and feature a deep black color from black cocoa powder. Perfect for Halloween parties, they are easy to make with no chilling required and can be decorated with royal icing for adorable, customizable expressions.
- Prep Time: 20 minutes
- Cook Time: 10 minutes
- Total Time: 30 minutes
- Yield: 24 servings 1x
- Category: Dessert
- Cuisine: American
Ingredients
- 1 cup (226g) unsalted butter, softened
- 1 cup (200g) granulated sugar
- 1 large egg, room temperature
- 2 teaspoons vanilla extract
- 2 ½ cups (312g) all-purpose flour
- ⅓ cup (40g) black cocoa powder
- 1 teaspoon baking powder
- ½ teaspoon fine sea salt
- 2 cups (240g) powdered sugar
- 2 tablespoons meringue powder
- 3–4 tablespoons water
- Orange gel food coloring
- Black gel food coloring (optional)
Instructions
- Preheat your oven to 350°F (175°C) and line two baking sheets with parchment paper.
- Cream the butter and sugar together in a stand mixer fitted with the paddle attachment on medium speed for about 3 minutes until light and fluffy. Scrape down the sides halfway through.
- Add the egg and vanilla and beat on low until just combined. The mixture may look slightly curdled.
- In a separate bowl, whisk together the flour, black cocoa powder, baking powder, and salt.
- Gradually add the dry ingredients to the wet mixture, mixing on low speed. Add about a third at a time, mixing until just combined. Stop when the dough comes together—soft but not sticky. If too sticky, add a tablespoon more flour.
- Lightly flour your work surface and roll the dough out to about ¼-inch (6mm) thickness. For easier rolling, place the dough between two sheets of parchment paper.
- Cut out cat shapes using cookie cutters. Press straight down and lift up—do not twist. Re-roll scraps and continue cutting until all dough is used.
- Place cookies on prepared baking sheets, spacing them about 2 inches apart.
- Bake for 8-10 minutes. Start checking at 8 minutes—cookies should look set around the edges but still slightly soft in the center. For crispier cookies, bake 10 minutes; for softer, pull at 8.
- Let cookies cool on the baking sheet for 5 minutes, then transfer to a wire rack to cool completely.
- While cookies cool, make the royal icing: Combine powdered sugar and meringue powder in a bowl. Add 3 tablespoons water and whisk until smooth. The icing should be thick but flow slowly—honey consistency. Add extra water if needed, one teaspoon at a time.
- Divide the icing—leave most white (or tint very light gray), and tint a small portion orange for the eyes. Transfer each color to separate piping bags fitted with small round tips.
- Pipe the eyes onto each cookie—two small orange dots. Let eyes set for about 15 minutes before adding additional details.
- Add finishing details: pipe small white or black dots for pupils, add whiskers, or outline ears. Let icing set completely before stacking or storing, about 2-3 hours.
Notes
For the deepest black color, use black cocoa powder. If you can’t find it, use Dutch-process cocoa plus 1 teaspoon black gel food coloring. Chill cut cookies on the baking sheet for 10 minutes before baking to help them hold their shape. Store in an airtight container at room temperature for up to 5 days. Freeze un-iced cookies for up to 3 months.
Nutrition
- Serving Size: 1 cookie
- Calories: 165
- Sugar: 14
- Sodium: 95
- Fat: 7
- Saturated Fat: 4
- Carbohydrates: 24
- Fiber: 1
- Protein: 2
Keywords: black cat sugar cookies, Halloween cookies, sugar cookies, black cocoa cookies, easy Halloween recipe, no chill sugar cookies


