Love this? Save it for later!
Share the inspiration with your friends
I was supposed to be making caramel popcorn balls for a Halloween party. That was the plan, anyway. I had the marshmallows melting, the butter bubbling, and I reached for the caramel bits in my pantry—except what I grabbed was a bag of candy corn that my kid had stashed next to the baking supplies. I didn’t even realize until I’d dumped half the bag into the pot. Let me tell you, the panic that shot through me was real. I stood there, spatula in hand, staring at this mess of melted marshmallow and orange-and-yellow candies, thinking I’d just ruined an entire batch of treats.
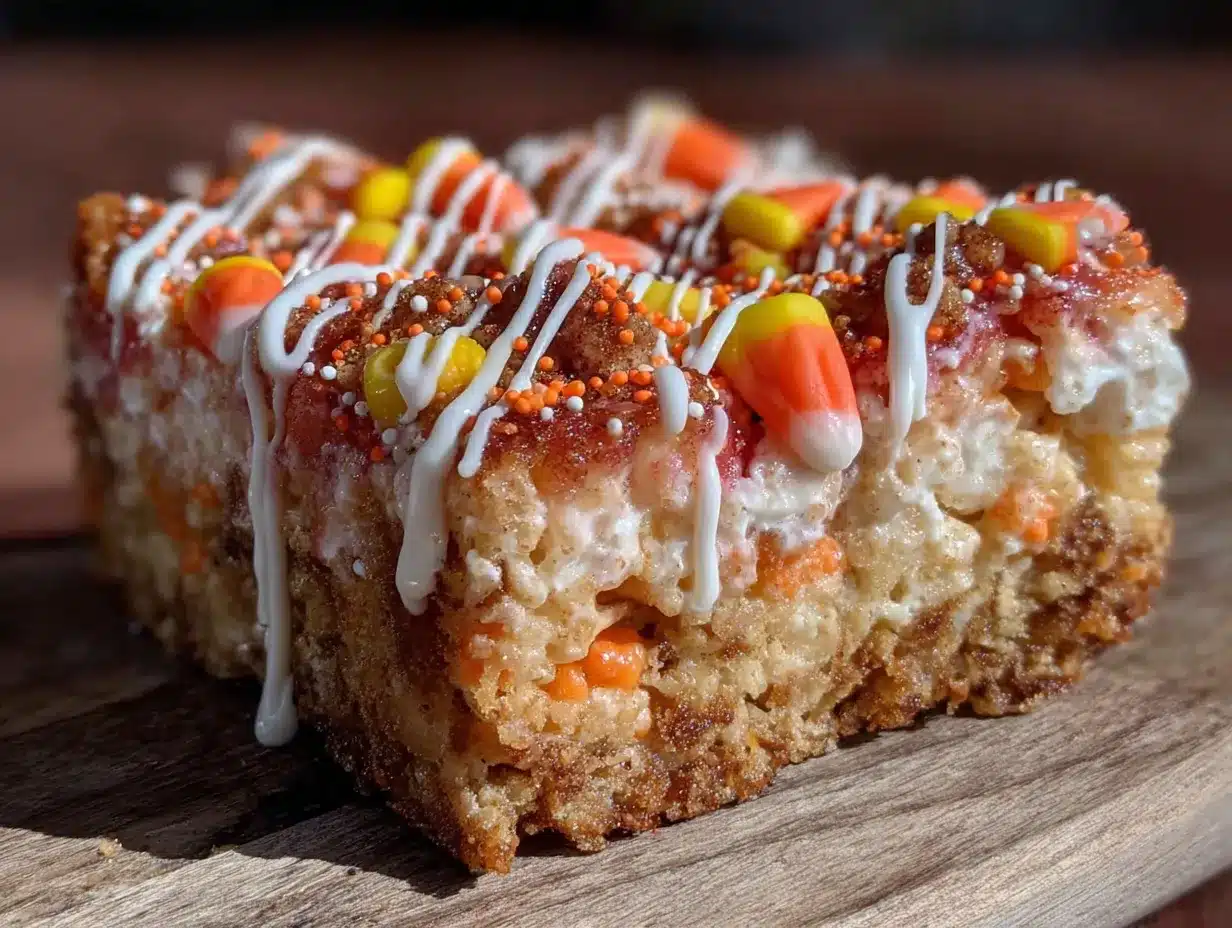
But I was already running late, and there was no way I was starting over. So I stirred it anyway, added the crispy rice cereal, and pressed it into the pan, fully expecting to apologize to everyone at the party for the weird, crunchy mistake I’d brought. When I cut into them later, the candy corn had melted into these gorgeous little swirls of color, and the white chocolate I’d originally planned to drizzle on top actually made the whole thing look intentional. People asked for the recipe all night. I mean, honestly—I just stood there shrugging and said, “It was an accident.” Maybe you’ve been there, where a kitchen blunder turns into something you secretly love more than the original plan. That’s exactly how these Easy Candy Corn Krispie Treats with White Chocolate were born.
Why You’ll Love This Recipe
These aren’t your average rice krispie treats. They’re chewy, buttery, and packed with that nostalgic candy corn sweetness that somehow feels perfect for fall. And the white chocolate drizzle? It takes them from “kid snack” to “dessert table hero” in about two minutes flat.
- Quick & Easy: You’re looking at about 15 minutes of active time. Seriously. Melt, stir, press, drizzle, done.
- Simple Ingredients: Four main ingredients plus a little butter. No specialty baking aisles required.
- Perfect for Halloween Parties: These disappear fast at school functions, office potlucks, or neighborhood get-togethers.
- Crowd-Pleaser: Kids love the candy corn crunch, adults love the white chocolate finish. Everyone wins.
- Unbelievably Delicious: The candy corn melts into the marshmallow base, creating these little pockets of caramel-like flavor that you don’t expect. It’s next-level comfort food disguised as a simple treat.
What makes this recipe different from all the other krispie treat versions out there? It’s the way the candy corn softens and blends into the marshmallow mixture instead of staying separate and crunchy. I tested this three times to get the ratio right—too much candy corn and it gets overly sweet, too little and you lose the magic. This version hits that perfect balance where every bite has a hint of that classic candy corn taste without overwhelming the marshmallow base.
This is the kind of recipe that makes you close your eyes after the first bite. It’s comfort food reimagined—faster, simpler, but with the same soul-soothing satisfaction that only a homemade treat can bring. Perfect for impressing guests without stress, or turning a simple Tuesday into something a little more memorable.
What Ingredients You Will Need
This recipe uses simple, pantry-friendly ingredients to deliver that bold, nostalgic flavor and satisfying texture. No fancy shopping trips required—you probably already have most of these on hand.
For the Krispie Treat Base
- 3 tablespoons unsalted butter (I prefer Kerrygold for the richness, but any brand works fine)
- 1 package (10 ounces) marshmallows (standard size, not mini—though mini work in a pinch)
- 6 cups crispy rice cereal (like Rice Krispies, or any store brand—just make sure it’s fresh and crunchy)
- 1 cup candy corn (Brausch’s is my go-to for consistent texture, but seasonal store brands work great too)
- 1/4 teaspoon salt (optional, but it balances the sweetness beautifully—don’t skip it)
For the White Chocolate Drizzle
- 1/2 cup white chocolate chips (Ghirardelli melts the smoothest, but Toll House works perfectly)
- 1 teaspoon coconut oil or vegetable shortening (this helps the chocolate drizzle smoothly without seizing up)
Ingredient Selection Tip: For the candy corn, look for a fresh bag—stale candy corn gets hard and doesn’t melt as nicely into the marshmallow mixture. If you’re shopping early in the season, check the expiration date. I learned this the hard way when I grabbed a clearance bag in November and ended up with crunchy bits that never softened.
Substitution Guidance: You can swap the white chocolate for milk chocolate or dark chocolate if that’s more your style. For a dairy-free version, use vegan butter and dairy-free white chocolate chips—just note the texture will be slightly less creamy. And if you want to cut the sweetness a little, reduce the candy corn to 3/4 cup and add a pinch more salt.
Equipment Needed
- Large pot or Dutch oven (you need room to stir everything without spilling over—I use my 5-quart Le Creuset, but any heavy-bottomed pot works)
- 9×13-inch baking pan (glass or metal, both work fine—just grease it well)
- Parchment paper (this is non-negotiable for easy removal—trust me on this one)
- Rubber spatula (a sturdy one—flimsy spatulas will break when you’re pressing the mixture into the pan)
- Microwave-safe bowl (for melting the white chocolate)
- Measuring cups and spoons
- Sharp knife (for clean cuts—a dull knife will squish the treats)
Budget-Friendly Options: No Dutch oven? A regular stockpot works just fine. Don’t have a 9×13 pan? Use a 9×9 square pan for thicker treats (just increase the pressing time by a minute or two). And if you don’t have parchment paper, grease the pan generously with butter—just be prepared for a slightly trickier removal.
Preparation Method
- Prepare your pan. Line a 9×13-inch baking pan with parchment paper, leaving some overhang on two sides. This creates handles for lifting the treats out later. Lightly grease the parchment with a little butter or non-stick spray.
- Melt the butter. In a large pot over medium-low heat, melt the 3 tablespoons of butter. Swirl it around until it’s fully liquid and starting to foam slightly—about 2 minutes. Don’t let it brown; you want it golden, not nutty.
- Add the marshmallows. Dump the entire 10-ounce bag of marshmallows into the pot. Stir constantly with your rubber spatula until they’re completely melted and smooth. This takes about 4-5 minutes. The mixture will be very sticky and stretchy—that’s exactly what you want.
- Stir in the candy corn. Add the 1 cup of candy corn and the 1/4 teaspoon salt (if using). Stir gently but thoroughly. The candy corn will start to soften and melt into the marshmallow mixture, creating streaks of orange and yellow. Don’t overmix—you want some visible color variation. This takes about 1 minute.
- Add the cereal. Remove the pot from heat. Pour in the 6 cups of crispy rice cereal. Fold everything together gently until the cereal is evenly coated. Work quickly here—the mixture stiffens as it cools. If it gets too hard to stir, pop the pot back on low heat for 30 seconds to loosen it up.
- Press into the pan. Transfer the mixture to your prepared pan. Use a piece of parchment paper or a lightly greased spatula to press it into an even layer. Don’t press too hard—you want them chewy, not dense and hard. Aim for gentle, even pressure. Let them cool at room temperature for about 20 minutes.
- Make the white chocolate drizzle. While the treats cool, place the 1/2 cup white chocolate chips and 1 teaspoon coconut oil in a microwave-safe bowl. Microwave in 20-second intervals, stirring after each, until smooth and fully melted. This usually takes about 60-90 seconds total. Be careful—white chocolate burns easily.
- Drizzle and set. Use a fork or a small spoon to drizzle the melted white chocolate over the cooled treats. I like to do zigzag patterns, but you can also spoon it into a piping bag for cleaner lines. Let the chocolate set at room temperature for about 30 minutes, or pop the pan in the fridge for 15 minutes if you’re in a hurry.
- Cut and serve. Lift the treats out of the pan using the parchment paper overhang. Place on a cutting board and use a sharp knife to cut into squares. I usually get 12-16 pieces depending on how big I cut them. Wipe the knife clean between cuts for the neatest edges.
Sensory Cue: When you’re pressing the mixture into the pan, it should feel warm and pliable but not hot. The marshmallow mixture will be stretchy—if it’s sticking to everything, your pan wasn’t greased enough. And when you cut into the finished treats, you should hear a slight crackle from the cereal, not a squish.
Cooking Tips & Techniques
Don’t Overheat the Marshmallows. This is the biggest mistake I see people make. If you melt marshmallows over high heat or for too long, they turn into this hard, rubbery mess that’s impossible to work with. Keep the heat on medium-low and stir constantly. The moment they’re smooth, pull them off the heat. I ruined my first batch by walking away for “just a second” to check my phone—came back to a pot of marshmallow cement.
Work Quickly with the Cereal. Once you add the cereal, you have about 60-90 seconds to mix and press everything before it starts setting. I like to have my pan prepped and ready before I even start melting the butter. If you’re slow like me (no judgment), wet your spatula with a little water—it helps prevent sticking.
Temperature Matters for the White Chocolate. White chocolate is finicky. If you overheat it, it seizes into a grainy, clumpy mess that’s useless for drizzling. Always melt it in short bursts and stir between each one. If it does seize, you can try adding a teaspoon more coconut oil and stirring vigorously—sometimes that saves it. But honestly, it’s better to just start over than fight with seized chocolate.
Let Them Cool Completely Before Cutting. I know it’s tempting to cut into them while they’re still warm, but you’ll end up with jagged, messy edges. Patience pays off here. If you’re really in a rush, refrigerate them for 20 minutes—it firms everything up nicely.
Multitasking Strategy: While the treats are cooling, melt your white chocolate. That way, you’re not standing around waiting. And if you’re making these for a party, you can prep everything the night before—just wait to drizzle the white chocolate until the day you serve them for the freshest look.
Variations & Adaptations
Halloween Sprinkle Version: Before the white chocolate sets, sprinkle orange and black nonpareils or Halloween-themed sprinkles over the top. It adds a fun crunch and makes them look extra festive. I did this for my daughter’s class party and the kids went wild.
Chocolate Drizzle Swap: Not a white chocolate fan? Use semi-sweet or dark chocolate chips instead. The bitterness of dark chocolate actually balances the sweetness of the candy corn really well. My husband prefers this version—he says the white chocolate is “too much sugar” (as if that’s a thing).
Peanut Butter Twist: Stir in 1/4 cup of creamy peanut butter along with the butter when you melt it. It adds a savory richness that pairs beautifully with the candy corn. Just be aware that the treats will be a little softer and might not hold their shape as well in warm weather.
Gluten-Free Option: Most crispy rice cereals are naturally gluten-free, but double-check the label if you’re serving someone with celiac disease. The rest of the ingredients are gluten-free, so this is an easy swap.
Vegan Adaptation: Use vegan butter and vegan marshmallows (Dandies brand works great). For the white chocolate, look for dairy-free white chocolate chips—they’re becoming easier to find. The texture will be slightly different, but the flavor is still spot-on.
Serving & Storage Suggestions
These treats are best served at room temperature. The texture is perfectly chewy with just a hint of crunch from the cereal, and the white chocolate drizzle should be firm but not hard. If you’ve refrigerated them, let them sit out for 10-15 minutes before serving—they’ll soften up nicely.
For presentation, I like to arrange them on a white platter or a wooden board with some mini pumpkins or fall leaves scattered around. It makes them look intentional and festive, even though we know they started as a happy accident.
Storage: Keep the treats in an airtight container at room temperature for up to 5 days. Layer them between sheets of parchment paper to prevent sticking. Do not refrigerate them long-term—the fridge dries them out and makes the cereal stale.
Freezer Instructions: These freeze surprisingly well! Wrap individual treats tightly in plastic wrap, then place them in a freezer-safe bag. They’ll keep for up to 3 months. To thaw, let them sit at room temperature for about 30 minutes. The white chocolate might get a little cloudy after freezing, but the flavor is still great.
Flavor Development Note: The candy corn flavor actually mellows and blends more evenly after a day or two. I honestly think these taste better on day two than day one. So don’t stress about making them fresh—they’re actually better made ahead.
Nutritional Information & Benefits
Per serving (based on 16 pieces): Approximately 210 calories, 7g fat, 36g carbohydrates, 2g protein, 1g fiber, 22g sugar.
Health Benefits of Key Ingredients: While these are definitely a treat (not a health food), the crispy rice cereal provides some iron and B vitamins. The butter adds a small amount of vitamin A, and the white chocolate contains calcium. Honestly, the biggest benefit here is the joy factor—sometimes you need a little sweetness in your life, and that’s okay.
Dietary Considerations: This recipe contains dairy (butter, white chocolate) and may contain gluten depending on your cereal brand. It’s not suitable for vegans unless you make the substitutions noted above. The treats are nut-free as written, but always check labels if you’re serving someone with allergies.
My Personal Perspective: I don’t believe in labeling food as “bad.” These treats are a celebration treat—perfect for Halloween, birthdays, or just because. Enjoy them in moderation, share them with people you love, and don’t stress about the sugar content. Life’s too short to skip the good stuff.
Conclusion
These Easy Candy Corn Krispie Treats with White Chocolate are proof that some of the best recipes come from mistakes. What started as a pantry mix-up turned into a fall favorite that my family requests every single year. They’re quick, they’re simple, and they deliver that nostalgic candy corn flavor in a way that feels fresh and fun.
I’d love for you to try these and make them your own. Maybe add a sprinkle of sea salt on top, or swap the white chocolate for dark chocolate—whatever feels right to you. Drop a comment below and let me know how they turned out, or share a photo of your creation. Honestly, nothing makes my day like seeing someone else enjoy a recipe that started as a happy accident in my kitchen.
Happy Halloween, happy fall, and happy accidental baking. You’ve got this!
Frequently Asked Questions
Can I use stale candy corn for this recipe?
Fresh candy corn works best because it softens and melts into the marshmallow mixture more evenly. Stale candy corn tends to stay hard and crunchy, which can throw off the texture. If you only have stale candy corn, try microwaving it for 10-15 seconds to soften it before adding it to the pot.
Why did my white chocolate seize up?
White chocolate is sensitive to heat and moisture. If it seizes (turns grainy and clumpy), it’s usually because it got too hot or a drop of water got into the bowl. Always melt it in short bursts and use a completely dry bowl. If it does seize, stir in a teaspoon of coconut oil—it sometimes helps smooth it out.
Can I make these treats ahead of time?
Absolutely! In fact, they taste even better on day two. Make them up to two days in advance and store them in an airtight container at room temperature. Wait to drizzle the white chocolate until the day you serve them for the freshest look.
How do I get clean cuts when slicing the treats?
Use a sharp knife and wipe it clean between each cut. For the neatest edges, refrigerate the treats for 20 minutes before slicing. A light spray of non-stick cooking spray on the knife blade also helps prevent sticking.
Can I double this recipe?
Yes, but use a larger pot or make it in two batches. Doubling the recipe in a standard pot makes it nearly impossible to stir everything evenly. I recommend making two separate batches—it’s worth the extra few minutes for better results.
Pin This Recipe!

Easy Candy Corn Krispie Treats: Best White Chocolate Dessert

These Easy Candy Corn Krispie Treats with White Chocolate are a happy accident turned fall favorite. Chewy, buttery, and packed with nostalgic candy corn sweetness, they’re quick to make and perfect for Halloween parties.
- Prep Time: 15 minutes
- Cook Time: 10 minutes
- Total Time: 25 minutes
- Yield: 12-16 servings 1x
- Category: Dessert
- Cuisine: American
Ingredients
- 3 tablespoons unsalted butter
- 1 package (10 ounces) marshmallows
- 6 cups crispy rice cereal
- 1 cup candy corn
- 1/4 teaspoon salt (optional)
- 1/2 cup white chocolate chips
- 1 teaspoon coconut oil or vegetable shortening
Instructions
- Line a 9×13-inch baking pan with parchment paper, leaving overhang on two sides. Lightly grease the parchment with butter or non-stick spray.
- In a large pot over medium-low heat, melt the 3 tablespoons of butter until fully liquid and starting to foam slightly, about 2 minutes. Do not let it brown.
- Add the entire 10-ounce bag of marshmallows to the pot. Stir constantly with a rubber spatula until completely melted and smooth, about 4-5 minutes.
- Stir in the 1 cup of candy corn and 1/4 teaspoon salt (if using). Stir gently until the candy corn starts to soften and melt into the marshmallow mixture, creating streaks of color. Do not overmix.
- Remove the pot from heat. Pour in the 6 cups of crispy rice cereal. Fold gently until the cereal is evenly coated. Work quickly as the mixture stiffens as it cools.
- Transfer the mixture to the prepared pan. Use a piece of parchment paper or a lightly greased spatula to press it into an even layer with gentle pressure. Let cool at room temperature for about 20 minutes.
- While the treats cool, place the 1/2 cup white chocolate chips and 1 teaspoon coconut oil in a microwave-safe bowl. Microwave in 20-second intervals, stirring after each, until smooth and fully melted (about 60-90 seconds total).
- Use a fork or small spoon to drizzle the melted white chocolate over the cooled treats in zigzag patterns. Let the chocolate set at room temperature for about 30 minutes, or refrigerate for 15 minutes if in a hurry.
- Lift the treats out of the pan using the parchment paper overhang. Place on a cutting board and use a sharp knife to cut into squares. Wipe the knife clean between cuts for neat edges.
Notes
For best results, use fresh candy corn. The treats taste even better on day two. Store in an airtight container at room temperature for up to 5 days. Freeze individual treats wrapped in plastic wrap for up to 3 months.
Nutrition
- Serving Size: 1 piece (based on 16
- Calories: 210
- Sugar: 22
- Sodium: 120
- Fat: 7
- Saturated Fat: 4
- Carbohydrates: 36
- Fiber: 1
- Protein: 2
Keywords: candy corn krispie treats, white chocolate dessert, Halloween treats, easy rice krispie treats, fall dessert


