Love this? Save it for later!
Share the inspiration with your friends
There used to be a tiny bakery tucked behind a vintage bookstore in Portland, Oregon, that made the most incredible pumpkin cheesecake bars I had ever tasted. The kind with a perfect swirl on top that looked like a spiderweb. When they closed their doors right before the pandemic, I honestly felt a little lost. I mean, that bakery was my fall ritual. After about eight attempts — and one particularly sad batch that looked more like a Jackson Pollock painting than a spiderweb — I finally cracked the code. Let me tell you, the relief was real.
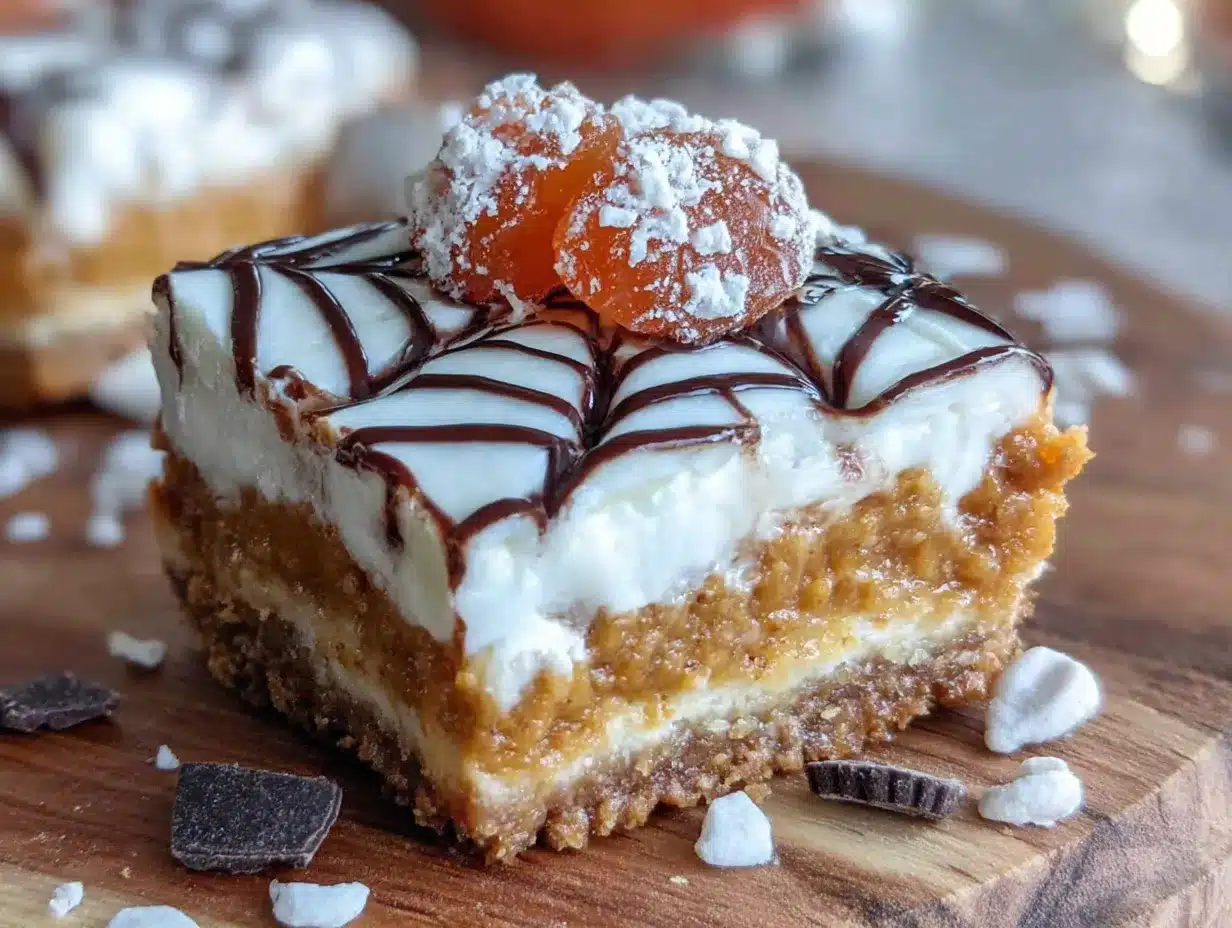
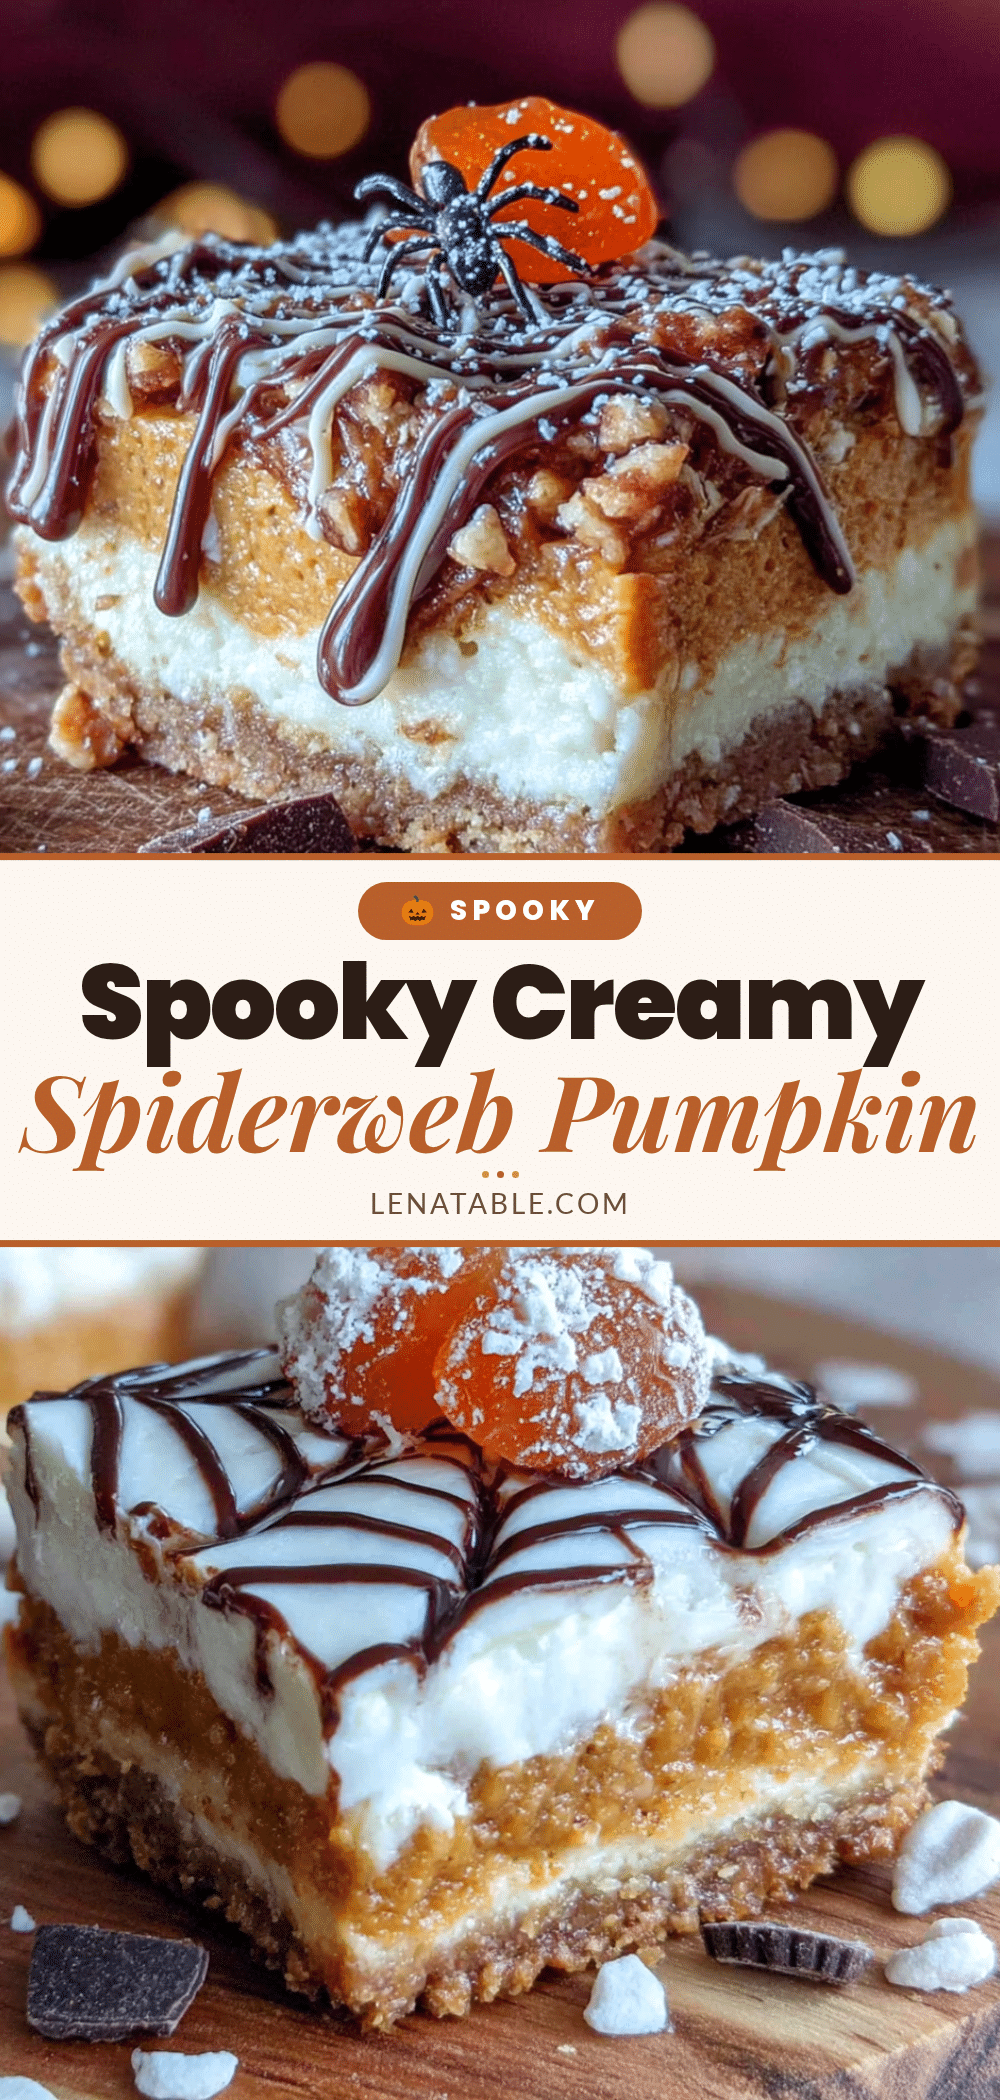
These Perfect Spiderweb Pumpkin Cheesecake Bars are my love letter to that little bakery. They have that same creamy, spiced pumpkin filling layered over a buttery shortbread crust, all topped with that iconic chocolate web design. I remember the day I finally got the swirl right — I may have done a little dance in my kitchen. Honestly, if you have ever tried to recreate a restaurant dish and failed, you know that feeling when it finally works. It is pure magic.
The thing about these bars is that they look like you spent hours fussing over them, but the technique is surprisingly forgiving. That spiderweb pattern? It is just a toothpick and a steady hand. The flavor is everything you want in a fall dessert — warm cinnamon, rich pumpkin, tangy cream cheese, and a hint of dark chocolate. I have made these for Thanksgiving, Halloween parties, and random Tuesday nights when I needed a little seasonal comfort. They never last long.
So whether you are chasing a memory like I was, or just looking for the perfect fall dessert to impress your friends, these spiderweb cheesecake bars are the answer. They are the recipe that made me stop missing that little bakery. And maybe they will become your new fall tradition too.
Why You’ll Love This Recipe
I have tested this recipe more times than I care to admit, and each batch taught me something new. The first time, the crust was too crumbly. The third time, the swirl turned into a muddy mess. But by batch number seven, I had it dialed in perfectly. Here is why I think you will fall for these bars just as hard as I did.
- Stunning Presentation: That spiderweb design is a showstopper. People will think you are a pastry chef. I promise it is easier than it looks.
- Perfect Texture Combo: You get a buttery, slightly crunchy shortbread crust, a silky smooth cheesecake layer, and a rich pumpkin spiced filling all in one bite.
- Make-Ahead Friendly: These bars actually taste better the next day. The flavors meld together beautifully overnight. Perfect for holiday prep.
- No Water Bath Needed: Unlike traditional cheesecake, these bars bake up perfectly without the fuss of a water bath. Less stress, same creamy result.
- Crowd-Pleasing Flavors: Pumpkin and cream cheese are a match made in dessert heaven. Add chocolate to the mix and you have got a trifecta of deliciousness.
What makes these bars different from the dozens of pumpkin cheesecake recipes out there is the technique. I use a slightly chilled cream cheese mixture that holds its shape better when you add the pumpkin layer. This prevents the dreaded sinking effect where your layers blend together into one sad, uniform mess. The chocolate spiderweb is also applied at just the right moment — too early and it sinks, too late and it cracks. I learned that one the hard way, let me tell you.
This recipe is the kind that makes you close your eyes after the first bite. It is comfort food reimagined — familiar enough to feel like home, but special enough to feel like an occasion. Perfect for impressing guests without spending all day in the kitchen, or turning a simple fall evening into something memorable.
What Ingredients You Will Need
This recipe uses simple, wholesome ingredients that come together to create something truly special. Most of these are pantry staples, especially if you do a lot of fall baking. Here is everything you need and why each ingredient matters.
For the Shortbread Crust
- 1 ½ cups all-purpose flour (spooned and leveled for accuracy)
- ½ cup powdered sugar (dissolves more easily than granulated for a tender crust)
- ½ cup unsalted butter, cold and cut into small cubes (I prefer Kerrygold for its rich flavor)
- ¼ teaspoon salt (balances the sweetness)
For the Pumpkin Cheesecake Filling
- 16 ounces cream cheese, softened to room temperature (full-fat is best for that silky texture)
- ¾ cup granulated sugar
- 2 large eggs, room temperature (cold eggs can cause the batter to curdle)
- 1 teaspoon vanilla extract
- 1 cup pumpkin puree (not pumpkin pie filling — make sure it is 100% pure pumpkin)
- 1 teaspoon ground cinnamon
- ½ teaspoon ground ginger
- ¼ teaspoon ground nutmeg
- ¼ teaspoon ground cloves
- ¼ teaspoon salt
For the Spiderweb Topping
- ¼ cup semi-sweet chocolate chips (I use Ghirardelli for smooth melting)
- 1 teaspoon coconut oil or vegetable oil (helps the chocolate flow smoothly for the web design)
Ingredient Tips: For the best texture, make sure your cream cheese is truly at room temperature. I usually take it out of the fridge about two hours before baking. If you are in a hurry, you can microwave it in 10-second bursts, but be careful not to melt it. The pumpkin puree should be patted dry with a paper towel if it looks watery — this prevents the cheesecake from being too loose. I learned this trick from a pastry chef friend, and it makes a real difference.
You can substitute the all-purpose flour with a gluten-free 1:1 baking blend if needed. I have tried it with King Arthur’s Measure for Measure flour and the crust turned out beautifully. For a dairy-free version, use vegan butter and dairy-free cream cheese. The texture will be slightly different, but still delicious.
Equipment Needed
You do not need any fancy equipment for these bars, which is part of why I love this recipe so much. Here is what you will need:
- 9×9-inch square baking pan (an 8×8 will also work, but your bars will be slightly thicker and may need a few extra minutes of baking)
- Parchment paper (for easy lifting and clean removal)
- Food processor or pastry cutter (for the crust — honestly, you can also use your hands if you do not mind getting a little messy)
- Electric hand mixer or stand mixer (for the cheesecake filling)
- Medium mixing bowls (one for the crust, one for the filling)
- Small microwave-safe bowl (for melting chocolate)
- Toothpick or wooden skewer (for creating the spiderweb design)
- Piping bag or small zip-top bag (for the chocolate drizzle)
- Cooling rack
If you do not have a food processor, you can make the crust by rubbing the cold butter into the flour mixture with your fingertips until it resembles coarse crumbs. It takes a little longer, but it works just as well. I actually prefer doing it by hand sometimes — it feels more connected to the process, you know?
Preparation Method
Let me walk you through this step by step. I have included all the little details I wish someone had told me the first time I made these.
Step 1: Prepare the Crust
Preheat your oven to 350°F (175°C). Line your 9×9-inch baking pan with parchment paper, leaving some overhang on two opposite sides. This will make lifting the bars out later so much easier. In a food processor, combine the flour, powdered sugar, and salt. Pulse a few times to mix. Add the cold butter cubes and pulse until the mixture looks like coarse sand with some pea-sized butter pieces remaining. Do not over-process — those little butter bits create a flakier texture. Press the mixture firmly into the bottom of the prepared pan. I use the bottom of a measuring cup to really pack it down evenly. Bake for 15-18 minutes, until the edges are just starting to turn golden. Set aside to cool slightly while you make the filling.
Step 2: Make the Cheesecake Filling
In a large bowl, beat the softened cream cheese with an electric mixer on medium speed until smooth and creamy, about 2 minutes. Scrape down the sides and bottom of the bowl. Add the granulated sugar and beat until combined, another minute. Add the eggs one at a time, beating on low after each addition just until incorporated. Over-mixing at this stage can incorporate too much air and cause cracks later. Stir in the vanilla extract.
Step 3: Prepare the Pumpkin Layer
Remove about 1 cup of the plain cheesecake batter and set it aside in a small bowl. To the remaining batter, add the pumpkin puree, cinnamon, ginger, nutmeg, cloves, and salt. Mix on low speed until just combined and smooth. The color should be a beautiful warm orange. Give it a taste — the spices should be present but not overwhelming.
Step 4: Layer the Fillings
Pour the pumpkin cheesecake mixture over the pre-baked crust and spread it evenly with a spatula. Drop spoonfuls of the reserved plain cheesecake batter on top of the pumpkin layer. You want about 6-8 dollops spaced evenly across the surface. Here is the fun part — use a toothpick or skewer to swirl the plain batter into the pumpkin layer. Drag the toothpick through the dollops in a circular motion to create a marbled effect. Do not over-swirl or the layers will blend too much. You want distinct ribbons of cream cheese running through the pumpkin.
Step 5: Bake the Cheesecake Bars
Place the pan in the preheated oven and bake at 350°F (175°C) for 35-40 minutes. The edges should be set and slightly puffed, but the center should still jiggle slightly when you gently shake the pan. This is the sweet spot — over-baking will cause cracks. Turn off the oven, crack the door open, and let the bars cool inside for 15 minutes. This gradual cooling helps prevent the top from cracking. Then transfer the pan to a wire rack and let it cool completely at room temperature, about 1 hour.
Step 6: Create the Spiderweb Design
Once the bars are completely cool, refrigerate them for at least 4 hours, or overnight. This is crucial for clean slices and a stable surface for the spiderweb. When you are ready to decorate, melt the chocolate chips and coconut oil together in a small microwave-safe bowl in 20-second intervals, stirring between each, until smooth. Transfer the melted chocolate to a small piping bag or a zip-top bag with a tiny corner snipped off. Pipe a spiral of chocolate starting from the center of the cheesecake, working outward in a continuous circle. Leave about ½ inch between each ring. Then, working quickly before the chocolate sets, use a toothpick to drag lines from the center outward through the chocolate rings, creating the spiderweb pattern. Wipe the toothpick clean between each line for the best effect. Repeat until you have 8-10 lines radiating from the center.
Step 7: Slice and Serve
Refrigerate the bars for another 15-20 minutes to let the chocolate set completely. Then use the parchment overhang to lift the entire block out of the pan. Place it on a cutting board and use a sharp knife to slice into 9 or 16 squares. Wipe the knife clean between cuts for the neatest edges. Serve chilled or at room temperature.
Cooking Tips & Techniques
I have made this recipe more times than I can count, and I have definitely learned a few things the hard way. Here are my best tips to help you nail it on the first try.
Room Temperature Ingredients Matter: I cannot stress this enough. Cold cream cheese creates lumps that no amount of mixing will fix. Cold eggs can cause the batter to separate. Set everything out on the counter at least two hours before you start baking. Your future self will thank you.
Do Not Over-Bake: This is the number one mistake I see people make with cheesecake bars. The center should still have a slight jiggle when you take them out of the oven. They will continue to set as they cool. Over-baked cheesecake turns dry and cracked, and nobody wants that.
Patience with Chilling: I know it is tempting to dig in as soon as they cool, but trust me on this one. The bars need at least 4 hours in the fridge to firm up properly. Overnight is even better. The texture becomes so much creamier and the flavors meld together beautifully.
Perfecting the Spiderweb: If your chocolate is too thick, it will not pipe smoothly. Add a tiny bit more oil if needed. If it is too thin, it will run everywhere. The consistency should be like warm honey. Practice on a piece of parchment paper first if you are nervous. I messed up my first three attempts before I got the hang of it.
Clean Slices Every Time: Run your knife under hot water and wipe it dry between each cut. This gives you those gorgeous, clean edges that make these bars look bakery-worthy. I learned this from watching cooking shows, and it really works.
Variations & Adaptations
One of the best things about this recipe is how easily it adapts to different tastes and dietary needs. Here are some variations I have tried and loved.
Gluten-Free Version: Substitute the all-purpose flour with a 1:1 gluten-free baking blend. I have used Bob’s Red Mill and King Arthur with great results. The crust will be slightly more crumbly, so handle it gently when pressing it into the pan.
Dairy-Free Version: Use vegan cream cheese and vegan butter. Miyoko’s cream cheese works beautifully here. The texture will be a touch softer, so be extra careful when slicing. The flavor is still fantastic.
White Chocolate Spiderweb: Swap the semi-sweet chocolate for white chocolate for a more dramatic contrast against the orange pumpkin layer. Add a drop of orange food coloring to the white chocolate for a Halloween-themed twist. I did this for a party last year and everyone went crazy for it.
Pecan Praline Topping: Skip the spiderweb and top the bars with a pecan praline mixture instead. Combine ½ cup chopped pecans, 2 tablespoons brown sugar, and 1 tablespoon melted butter. Sprinkle over the top before baking. It adds a wonderful crunch.
Pumpkin Spice Latte Version: Add 1 tablespoon of instant espresso powder dissolved in 1 teaspoon of water to the pumpkin filling. It deepens the flavor and gives it that coffee shop vibe. I tried this on a whim one morning and it was a game-changer.
Serving & Storage Suggestions
These bars are incredibly versatile when it comes to serving. Here is how I like to enjoy them.
Serving Temperature: I prefer these bars chilled straight from the fridge. The texture is firmer and the flavors are more pronounced. If you prefer a softer texture, let them sit at room temperature for about 15 minutes before serving. Top with a dollop of whipped cream and a sprinkle of cinnamon for an extra special touch.
Perfect Pairings: These bars pair beautifully with a hot cup of coffee, a spiced chai latte, or a glass of cold milk. For a dessert spread, serve them alongside apple cider donuts, pecan pie, or a simple vanilla ice cream. They are also fantastic on a Thanksgiving dessert table next to a classic pumpkin pie.
Storage Instructions: Store any leftover bars in an airtight container in the refrigerator for up to 5 days. Place a sheet of parchment paper between layers to prevent the spiderweb from smudging. The bars actually taste better on day two or three as the flavors continue to develop.
Freezing Instructions: These bars freeze beautifully. Wrap the entire block or individual slices tightly in plastic wrap, then in aluminum foil. Freeze for up to 3 months. To thaw, transfer to the refrigerator overnight. The texture remains creamy and delicious. I always keep a batch in my freezer for unexpected guests or last-minute cravings.
Reheating Tips: I do not recommend reheating these bars. They are meant to be enjoyed cold or at room temperature. If you want a warm dessert, serve them alongside a scoop of warmed apple compote or caramel sauce.
Nutritional Information & Benefits
While these are definitely a treat, there are a few nutritional highlights worth mentioning. Here is the approximate breakdown per bar (based on 16 servings).
| Nutrient | Amount per Bar |
|---|---|
| Calories | 285 |
| Total Fat | 18g |
| Saturated Fat | 10g |
| Cholesterol | 65mg |
| Sodium | 210mg |
| Total Carbohydrates | 28g |
| Dietary Fiber | 1g |
| Sugars | 18g |
| Protein | 5g |
| Vitamin A | 120% DV |
Pumpkin is packed with vitamin A, which is great for eye health and immune function. It also provides fiber and antioxidants. The cream cheese adds calcium and protein. While this is not a health food by any means, it is nice to know you are getting a little nutritional boost from that pumpkin. I always tell myself that the vitamin A cancels out the sugar — that is how I justify having two bars.
Dietary Considerations: This recipe contains gluten, dairy, and eggs. For gluten-free and dairy-free adaptations, see the variations section above. The bars are nut-free as written, making them safe for school events and parties.
Conclusion
These Perfect Spiderweb Pumpkin Cheesecake Bars are the fall dessert you have been looking for. They have the nostalgic flavor of pumpkin pie, the creamy richness of cheesecake, and a show-stopping design that makes everyone think you are a baking genius. But underneath all that beauty, they are actually quite simple to make.
I love this recipe because it brings together everything I adore about fall baking — warm spices, cozy flavors, and a little bit of whimsy. That spiderweb design never gets old. Every time I make these bars, I smile. And honestly, that is what cooking should be about, right? Joy, connection, and a little bit of deliciousness.
I would love to hear how these turn out for you. Did you try a different variation? Did your spiderweb come out perfectly on the first try? Drop a comment below and let me know. And if you share a photo on Pinterest, tag me — I love seeing your creations. Happy baking, friends!
Frequently Asked Questions
Can I use pumpkin pie filling instead of pumpkin puree?
No, I do not recommend it. Pumpkin pie filling is already sweetened and spiced, which will throw off the balance of this recipe. Stick with 100% pure pumpkin puree for the best results. The flavor will be cleaner and you can control the sweetness and spice levels yourself.
Why did my cheesecake crack on top?
Cracks usually happen from over-baking or sudden temperature changes. Make sure to take the bars out while the center still jiggles slightly. Let them cool gradually in the oven with the door cracked open before transferring to the counter. Also, avoid over-mixing the batter — too much air can cause cracks as it escapes during baking.
Can I make these bars ahead of time?
Absolutely. In fact, I recommend it. These bars need at least 4 hours of chilling time anyway, so making them a day ahead is perfect. They actually taste better on day two. You can also freeze them for up to 3 months. Just wrap them tightly and thaw overnight in the fridge when you are ready to serve.
My chocolate spiderweb turned out messy. What went wrong?
A few things could be happening. Your chocolate might have been too thick — add a little more oil to thin it out. Or you might have waited too long to drag the toothpick through the chocolate. Work quickly once the chocolate is piped, and wipe the toothpick clean between each line. Practice on parchment paper first if you are unsure.
Can I use a different pan size?
An 8×8-inch pan will work, but your bars will be thicker and may need an extra 5-7 minutes of baking time. A 9×13-inch pan will yield thinner bars that bake faster — check them at 25 minutes. Keep an eye on the edges to prevent over-baking. The 9×9-inch pan is truly the sweet spot for this recipe.
Pin This Recipe!
Perfect Spiderweb Pumpkin Cheesecake Bars: Easy Fall Dessert
These Perfect Spiderweb Pumpkin Cheesecake Bars feature a buttery shortbread crust, creamy spiced pumpkin cheesecake filling, and a stunning chocolate spiderweb design. They are an easy, make-ahead fall dessert that looks impressive but is surprisingly simple to create.
- Prep Time: 30 minutes
- Cook Time: 35-40 minutes
- Total Time: 5 hours 5 minutes (includes chilling)
- Yield: 16 servings 1x
- Category: Dessert
- Cuisine: American
Ingredients
- 1 ½ cups all-purpose flour
- ½ cup powdered sugar
- ½ cup unsalted butter, cold and cut into small cubes
- ¼ teaspoon salt
- 16 ounces cream cheese, softened to room temperature
- ¾ cup granulated sugar
- 2 large eggs, room temperature
- 1 teaspoon vanilla extract
- 1 cup pumpkin puree (not pumpkin pie filling)
- 1 teaspoon ground cinnamon
- ½ teaspoon ground ginger
- ¼ teaspoon ground nutmeg
- ¼ teaspoon ground cloves
- ¼ teaspoon salt
- ¼ cup semi-sweet chocolate chips
- 1 teaspoon coconut oil or vegetable oil
Instructions
- Preheat oven to 350°F (175°C). Line a 9×9-inch baking pan with parchment paper, leaving overhang on two opposite sides.
- In a food processor, combine flour, powdered sugar, and salt. Pulse to mix. Add cold butter cubes and pulse until mixture resembles coarse sand with some pea-sized butter pieces. Press firmly into the bottom of the prepared pan. Bake for 15-18 minutes until edges are just golden. Set aside to cool slightly.
- In a large bowl, beat softened cream cheese with an electric mixer on medium speed until smooth, about 2 minutes. Add granulated sugar and beat until combined, about 1 minute. Add eggs one at a time, beating on low after each addition. Stir in vanilla extract.
- Remove about 1 cup of the plain cheesecake batter and set aside. To the remaining batter, add pumpkin puree, cinnamon, ginger, nutmeg, cloves, and salt. Mix on low until just combined and smooth.
- Pour the pumpkin cheesecake mixture over the pre-baked crust and spread evenly. Drop spoonfuls of the reserved plain cheesecake batter on top (6-8 dollops). Use a toothpick or skewer to swirl the plain batter into the pumpkin layer in a circular motion to create a marbled effect.
- Bake at 350°F (175°C) for 35-40 minutes. Edges should be set, center should jiggle slightly. Turn off oven, crack door open, and let bars cool inside for 15 minutes. Transfer to a wire rack and cool completely at room temperature, about 1 hour.
- Refrigerate bars for at least 4 hours or overnight. When ready to decorate, melt chocolate chips and coconut oil together in a small microwave-safe bowl in 20-second intervals, stirring between each, until smooth. Transfer to a small piping bag or zip-top bag with a tiny corner snipped off.
- Pipe a spiral of chocolate starting from the center of the cheesecake, working outward in a continuous circle, leaving about ½ inch between rings. Working quickly, use a toothpick to drag lines from the center outward through the chocolate rings to create a spiderweb pattern. Wipe toothpick clean between each line. Repeat for 8-10 lines.
- Refrigerate bars for another 15-20 minutes to set the chocolate. Use parchment overhang to lift the block out of the pan. Slice into 9 or 16 squares using a sharp knife, wiping clean between cuts. Serve chilled or at room temperature.
Notes
For best texture, ensure cream cheese and eggs are at room temperature. Do not over-bake; center should jiggle slightly. Chill at least 4 hours or overnight for clean slices. If chocolate is too thick, add a little more oil. Practice spiderweb on parchment first if needed.
Nutrition
- Serving Size: 1 bar
- Calories: 285
- Sugar: 18
- Sodium: 210
- Fat: 18
- Saturated Fat: 10
- Carbohydrates: 28
- Fiber: 1
- Protein: 5
Keywords: pumpkin cheesecake bars, spiderweb cheesecake, fall dessert, Halloween dessert, Thanksgiving dessert, pumpkin bars, cheesecake bars, chocolate spiderweb


