Love this? Save it for later!
Share the inspiration with your friends
I wasn’t supposed to be in her kitchen. I’d just stopped by to drop off a casserole dish I’d borrowed three weeks prior—the kind of thing you keep meaning to return but never do until the guilt outweighs the awkwardness. But as soon as I walked through the back door, that smell hit me. It was warm and sweet, but there was something else in there too. A little nutmeg, a whisper of rum, and something creamy that I couldn’t quite place. My neighbor, Carol, was standing at the counter in her slippers, flour dusted across the front of her sweater like she’d been in a food fight and lost.
“Oh, those are just cookies,” she said when I asked what on earth was making my mouth water. Just cookies. She said it like it was nothing—like she hadn’t just created the most intoxicating aroma I’d ever walked into. She handed me one, still warm, and I swear I almost dropped it. The cookie was soft, almost pillowy, and coated in a cinnamon-sugar that sparkled under her kitchen lights. But the flavor—honestly, it was like Christmas in a single bite. There was eggnog in there, I realized. Not the fake stuff either. Real, rich, holiday eggnog.
I stood there eating three of them while she told me about how she’d been tweaking the recipe for years. “My husband says I should just write it down,” she laughed, wiping her hands on a dish towel. “But I keep changing it.” I asked her to tell me everything, right there, and she did. She recited it like a poem she’d memorized. I scribbled it on the back of an envelope I found in my purse. That envelope is still tucked into my cookbook, stained and crinkled, and I use it every single December. Maybe you’ve been there—stumbling into a recipe that feels like it was waiting for you. That’s what these Fluffy Eggnog Snickerdoodle Cookies are. They were waiting for me, and now I’m passing them to you.
Why You’ll Love This Recipe
Let me tell you why these cookies have become my absolute go-to for the holiday season. I’ve tested this recipe more times than I can count, and each batch just confirms what I already knew—this is something special. These aren’t your average snickerdoodles. They’re softer, fluffier, and packed with that unmistakable eggnog flavor that makes you feel like you’re wrapped in a cozy blanket by the fire.
- Quick & Easy: From start to finish, you’re looking at about 25 minutes. The dough comes together in one bowl, and there’s no chilling required. Yes, you read that right—no chilling. Perfect for when you need cookies now and not in two hours.
- Simple Ingredients: You probably have most of these in your pantry right now. Flour, butter, sugar, eggs. The only “special” ingredient is the eggnog, and honestly, if it’s December, you already have a carton in your fridge. I know I do.
- Perfect for Holiday Gatherings: Cookie swaps, office parties, family dinners—these disappear faster than anything else on the table. I brought them to a potluck last year and watched three people ask for the recipe before the appetizers were even served.
- Crowd-Pleaser: Kids love the cinnamon-sugar coating. Adults love the subtle eggnog kick. And everyone loves how soft and fluffy they are. It’s the kind of cookie that makes people close their eyes after the first bite.
- Unbelievably Delicious: The texture is what gets me every time. They’re not dense or cakey—they’re light, almost cloud-like, with a tender crumb that melts in your mouth. The eggnog adds a richness that regular snickerdoodles just don’t have.
What makes this recipe different from the rest? It’s the technique. I use a little trick with the butter and eggnog that creates an ultra-soft texture without making the cookies spread too thin. The result is a cookie that stays fluffy for days—if they last that long. This isn’t just another snickerdoodle recipe. It’s the one you’ll come back to year after year.
What Ingredients You Will Need
This recipe uses simple, wholesome ingredients to deliver that signature holiday flavor. Most of these are pantry staples, so you won’t need to make a special trip to the store. Here’s what you’ll need:
For the Cookies
- 2 ¾ cups all-purpose flour (spooned and leveled for accuracy)
- 1 teaspoon baking soda (make sure it’s fresh for best rise)
- ½ teaspoon cream of tartar (this is the secret to that classic snickerdoodle tang)
- ½ teaspoon salt (I use fine sea salt)
- 1 teaspoon ground nutmeg (freshly grated if you have it—it makes a difference)
- ½ teaspoon ground cinnamon
- ¼ teaspoon ground cloves (optional, but adds warmth)
- ¾ cup unsalted butter, softened to room temperature (I prefer Kerrygold for the richness)
- 1 cup granulated sugar
- ½ cup packed light brown sugar
- 1 large egg, room temperature
- 1 teaspoon vanilla extract
- ½ cup eggnog (use full-fat for best flavor and texture)
For the Cinnamon-Sugar Coating
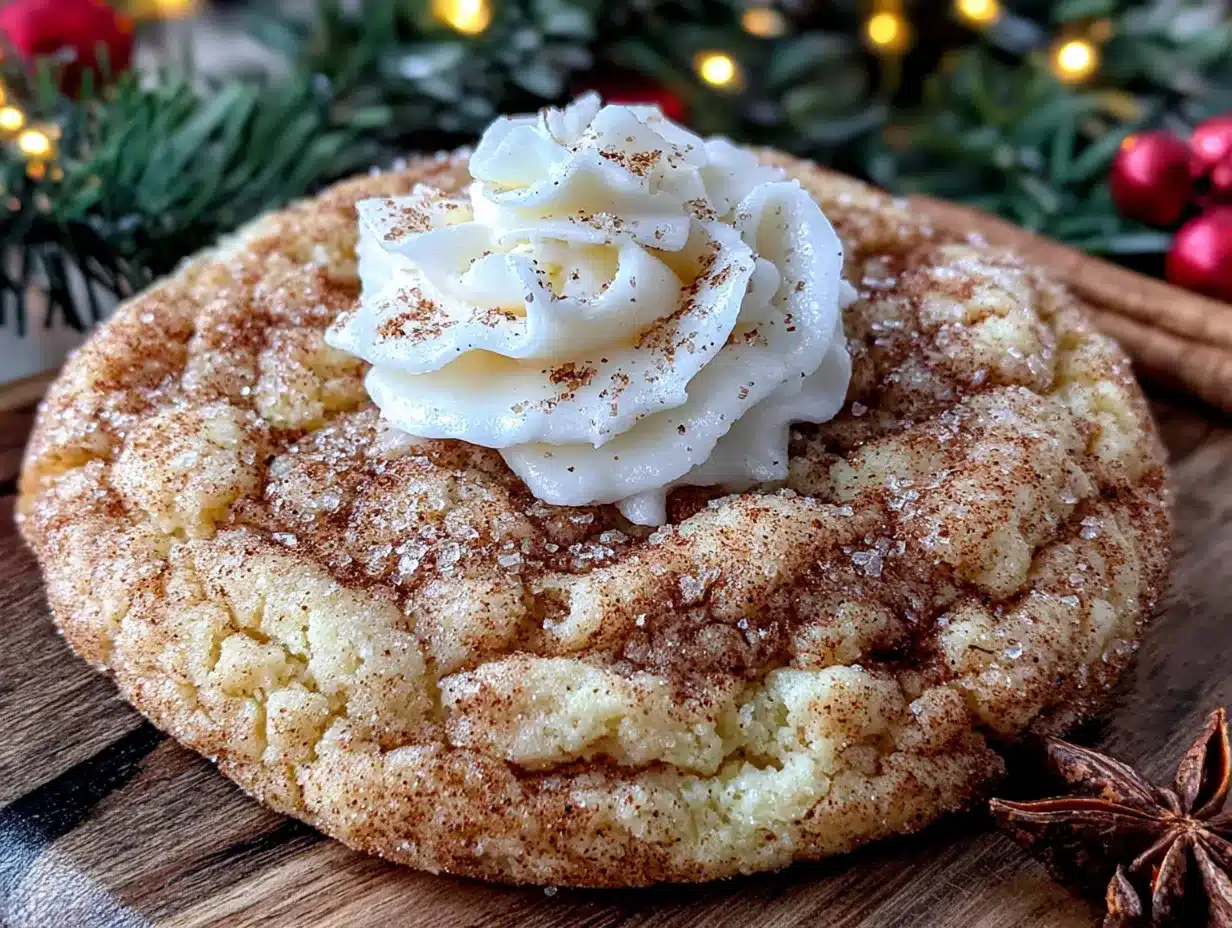
- ¼ cup granulated sugar
- 1 tablespoon ground cinnamon
- ½ teaspoon ground nutmeg
A few notes on ingredients. For the eggnog, I recommend using a good-quality brand like Hood or Southern Comfort. Avoid the low-fat versions—they have more water content and will make your cookies spread too much. If you’re dairy-free, you can use a plant-based eggnog, but look for one that’s thick and creamy, not watery. I’ve tried this with oat milk eggnog and it worked, but the texture was slightly less fluffy.
For the butter, make sure it’s truly softened. You want it to give slightly when you press it, but not be melted. If you’re in a hurry, cut it into small cubes and let it sit on the counter for 15 minutes. Don’t microwave it—I’ve done that, and the cookies turned out flat and greasy. Learn from my mistakes, okay?
If you don’t have cream of tartar, you can substitute it with 1 teaspoon of lemon juice or white vinegar mixed into the eggnog. But honestly, cream of tartar is what gives snickerdoodles their signature flavor, so I’d recommend picking some up. It’s cheap and lasts forever in your pantry.
Equipment Needed
You don’t need a fancy kitchen to make these cookies. Here’s what you’ll need:
- Large mixing bowl (I use a glass bowl, but metal or ceramic works fine)
- Medium mixing bowl (for the dry ingredients)
- Electric hand mixer or stand mixer (a whisk and some elbow grease will work too, but your arm will thank you for the mixer)
- Rubber spatula (for scraping down the sides)
- Measuring cups and spoons
- Cookie scoop (I use a 1.5-tablespoon scoop for consistent sizing)
- Baking sheets (I prefer light-colored ones for even browning)
- Parchment paper or silicone baking mat
- Cooling rack
- Small bowl (for the cinnamon-sugar coating)
If you don’t have a cookie scoop, you can use two spoons to portion the dough. It won’t be as uniform, but that’s okay—homemade cookies have character. For the baking sheets, avoid dark non-stick pans if you can. They absorb more heat and can cause the bottoms to brown too quickly. I learned that the hard way with a batch that came out looking like hockey pucks.
One more thing—invest in parchment paper. It makes cleanup so much easier and prevents the cookies from sticking without adding extra grease. Silicone mats work great too, but I find that parchment gives a slightly crisper bottom.
Preparation Method
- Preheat your oven to 350°F (175°C). Line two baking sheets with parchment paper or silicone mats. This is important—don’t skip the lining, or you’ll be scraping cookies off the pan later.
- In a medium bowl, whisk together the dry ingredients: 2 ¾ cups all-purpose flour, 1 teaspoon baking soda, ½ teaspoon cream of tartar, ½ teaspoon salt, 1 teaspoon ground nutmeg, ½ teaspoon ground cinnamon, and ¼ teaspoon ground cloves (if using). Whisk until everything is evenly distributed. Set aside.
- In a large bowl, cream the butter and sugars. Using an electric mixer on medium speed, beat ¾ cup softened unsalted butter, 1 cup granulated sugar, and ½ cup packed light brown sugar together until light and fluffy. This should take about 2-3 minutes. Scrape down the sides of the bowl with a rubber spatula halfway through. You’ll know it’s ready when the mixture looks pale and almost like whipped butter.
- Add the wet ingredients. Beat in 1 large egg and 1 teaspoon vanilla extract until well combined. Then, with the mixer on low speed, slowly pour in ½ cup eggnog. Mix until just combined—don’t overmix here. The batter might look a little curdled at this point, but don’t panic. That’s normal. The eggnog and butter are just getting to know each other.
- Gradually add the dry ingredients. With the mixer on low, add the flour mixture in two additions, mixing until just incorporated. Use your spatula to fold in any remaining streaks of flour. The dough will be soft and slightly sticky—that’s exactly what you want. If it feels too sticky to handle, you can refrigerate it for 15 minutes, but I usually don’t need to.
- Prepare the cinnamon-sugar coating. In a small bowl, mix together ¼ cup granulated sugar, 1 tablespoon ground cinnamon, and ½ teaspoon ground nutmeg. Set aside.
- Shape the cookies. Using a cookie scoop or two spoons, portion out about 1.5 tablespoons of dough. Roll each portion into a ball between your palms. The dough will be soft, so work gently. Roll each ball in the cinnamon-sugar mixture until fully coated. Place the coated balls on the prepared baking sheets, spacing them about 2 inches apart. They will spread, so give them room.
- Bake for 10-12 minutes. The cookies should look puffed and set around the edges, but still soft and slightly underdone in the center. This is key—if you wait until they look fully baked, they’ll be overdone. The centers will continue to set as they cool on the baking sheet. For softer cookies, bake for 10 minutes. For slightly firmer cookies, go for 11-12 minutes.
- Cool on the baking sheet for 5 minutes. This allows them to finish setting without overbaking. After 5 minutes, transfer the cookies to a wire rack to cool completely. If you try to move them too soon, they’ll fall apart. Trust me, I’ve made that mistake more times than I’d like to admit.
Pro tip: For extra fluffy cookies, try this. After you roll the dough balls in the cinnamon-sugar, place them on the baking sheet and gently press down the top just slightly with your fingers. This helps them spread evenly without becoming flat. You want a nice domed top, not a pancake.
Cooking Tips & Techniques
I’ve made these cookies more times than I can count, and I’ve learned a few things along the way. Here are my best tips for getting perfect results every time.
Don’t overmix the dough. This is the number one mistake I see people make. Once you add the flour, mix only until it disappears. Overmixing develops the gluten, which makes the cookies tough instead of tender. I speak from experience—my first batch was a sad, dense mess because I kept mixing “just a little more.”
Use room temperature ingredients. This is crucial. Cold egg and cold eggnog will seize the butter, making the dough lumpy and uneven. Take your egg and eggnog out of the fridge about 30 minutes before you start baking. If you forget, place the egg in a bowl of warm water for 5 minutes, and microwave the eggnog for 10-15 seconds. Not hot, just not cold.
Measure your flour correctly. Spoon the flour into your measuring cup and level it off with a knife. Don’t scoop directly from the bag—that packs the flour and gives you too much. Too much flour means dry, crumbly cookies. I learned this from a baking class I took years ago, and it changed everything.
Rotate your baking sheets halfway through. Ovens have hot spots, and rotating ensures even baking. I do this at the 5-minute mark. It takes two seconds and makes a huge difference.
Let the cookies cool on the pan. I know it’s tempting to move them right away, but be patient. The cookies are fragile when they come out of the oven. That 5-minute rest on the baking sheet is what allows them to set properly without breaking. I once tried to move a cookie after 2 minutes and ended up with a handful of crumbs.
Use a cookie scoop for consistent sizing. This isn’t just about looks—it’s about even baking. If some cookies are bigger than others, they’ll bake at different rates. A scoop ensures every cookie is the same size and bakes evenly. Plus, it’s faster than rolling by hand.
Variations & Adaptations
One of the things I love about this recipe is how versatile it is. Here are some variations I’ve tried and loved.
Eggnog Glaze: For an extra festive touch, whisk together 1 cup powdered sugar, 2 tablespoons eggnog, and ¼ teaspoon nutmeg. Drizzle over the cooled cookies. It adds a beautiful finish and intensifies the eggnog flavor. I did this for a Christmas party last year and they were gone in minutes.
Spiced Variation: Add ¼ teaspoon ground cardamom and ⅛ teaspoon ground ginger to the dry ingredients. The cardamom pairs beautifully with the nutmeg and gives the cookies a more complex, warming flavor. This is my husband’s favorite version.
Gluten-Free Option: Substitute the all-purpose flour with a 1:1 gluten-free baking flour blend. I’ve used Bob’s Red Mill and King Arthur brands with great success. The texture will be slightly more delicate, so handle the dough gently. You might need to add an extra tablespoon of eggnog if the dough seems dry.
Vegan Adaptation: Use plant-based butter (like Miyoko’s or Earth Balance), a flax egg (1 tablespoon ground flaxseed mixed with 3 tablespoons water), and a thick vegan eggnog. The cookies won’t be quite as fluffy, but they’ll still be delicious. I’ve made this for a vegan friend and she asked for the recipe immediately.
Bourbon Eggnog Cookies: Add 1 tablespoon of bourbon or dark rum to the dough along with the eggnog. The alcohol adds depth and warmth without being overpowering. Just keep in mind that the alcohol won’t fully bake out, so this version is for adults only.
Mini Cookies: Use a smaller scoop (about 1 tablespoon) and bake for 8-9 minutes. These are perfect for cookie platters or for portion control. I made a batch of minis for a cookie exchange and they were a hit.
Serving & Storage Suggestions
These cookies are best served slightly warm, when the centers are still soft and the cinnamon-sugar coating is perfectly set. Let them cool for about 10 minutes after baking, then serve. They’re wonderful with a glass of cold milk, a cup of hot coffee, or—if you’re feeling festive—a mug of spiced eggnog.
For presentation, I like to arrange them on a white platter with a sprinkle of extra cinnamon and a few star anise pods for decoration. They also look beautiful in a clear jar tied with a ribbon—perfect for holiday gifting.
Storage Instructions: Store the cookies in an airtight container at room temperature for up to 5 days. Place a slice of bread in the container to keep them soft—the bread absorbs excess air and the cookies stay fluffy. Replace the bread every other day if needed.
Freezer Instructions: You can freeze the baked cookies for up to 3 months. Place them in a single layer on a baking sheet and freeze until solid, then transfer to a freezer-safe bag or container. To thaw, leave them at room temperature for about 30 minutes. You can also freeze the unbaked dough balls. Roll them in the cinnamon-sugar, place them on a baking sheet, and freeze until solid. Transfer to a freezer bag. When ready to bake, place the frozen dough balls on a lined baking sheet and bake at 350°F for 12-14 minutes—no need to thaw.
How flavors develop: These cookies actually taste even better the next day. The spices meld together overnight, and the texture softens slightly. I often make them a day ahead for events. Just store them in an airtight container and they’ll be perfect.
Nutritional Information & Benefits
Here’s the approximate nutritional information per cookie (based on 24 cookies):
- Calories: 175
- Total Fat: 8g
- Saturated Fat: 5g
- Cholesterol: 30mg
- Sodium: 120mg
- Total Carbohydrates: 24g
- Dietary Fiber: 1g
- Sugars: 14g
- Protein: 2g
While these are definitely a treat, the eggnog does offer some nutritional benefits. Eggnog is a good source of calcium, vitamin A, and vitamin D. The nutmeg and cinnamon in this recipe also have antioxidant properties and can aid in digestion. Of course, these cookies are meant to be enjoyed in moderation—they’re a holiday indulgence, not a health food.
If you’re watching your sugar intake, you can reduce the sugar in the dough to ¾ cup granulated and ⅓ cup brown sugar. The cookies will be slightly less sweet but still delicious. You can also use a sugar substitute like monk fruit sweetener, though the texture may be slightly different.
These cookies contain dairy, eggs, and gluten. For allergen-friendly options, see the variations section above.
Conclusion
These Fluffy Eggnog Snickerdoodle Cookies have become a staple in my holiday baking rotation, and I have a feeling they’ll become one in yours too. They’re everything you want in a holiday cookie—soft, fluffy, warmly spiced, and undeniably festive. The best part? They come together in under 30 minutes with ingredients you probably already have on hand.
I love how adaptable this recipe is. Whether you’re making them for a cookie swap, a family gathering, or just a quiet night by the tree, they always deliver. And honestly, there’s something magical about the way the eggnog and cinnamon come together. It’s like Christmas in cookie form.
I’d love to hear how yours turn out. Did you try any of the variations? Did you add a glaze or keep them classic? Drop a comment below and let me know. And if you share them on social media, tag me—I love seeing your baking adventures. Until next time, happy baking, and may your cookies always be fluffy.
Frequently Asked Questions
Can I use low-fat eggnog in this recipe?
I wouldn’t recommend it. Low-fat eggnog has a higher water content, which can make the cookies spread too much and turn out flat. Full-fat eggnog gives the cookies their signature fluffy texture and rich flavor. If that’s all you have, you can try adding an extra tablespoon of flour to compensate, but the results won’t be the same.
Why did my cookies turn out flat?
There are a few common reasons. Your butter might have been too soft or melted. Your baking soda could be old and inactive. Or you might have overmixed the dough, which develops too much gluten. Make sure your butter is softened but not melted, check that your baking soda is fresh (it should fizz when mixed with vinegar), and mix the dough just until the flour disappears.
Can I make the dough ahead of time?
Yes! You can refrigerate the dough for up to 3 days. Just wrap it tightly in plastic wrap or store it in an airtight container. When you’re ready to bake, let the dough sit at room temperature for about 10 minutes to soften slightly, then roll into balls and coat in the cinnamon-sugar. You may need to add a minute or two to the baking time if the dough is still cold.
How do I keep the cookies soft for several days?
Store them in an airtight container with a slice of bread. The bread absorbs excess moisture in the container, keeping the cookies soft and fluffy. Replace the bread every other day. You can also add a damp paper towel to the container, but make sure it doesn’t touch the cookies directly. I’ve kept these cookies soft for up to 5 days using this method.
Can I double this recipe?
Absolutely. This recipe doubles beautifully. Just make sure you have a large enough mixing bowl—the dough will be a lot. You’ll also need to bake in batches, so give the baking sheets time to cool between batches. If the dough gets too warm while you’re working, pop it in the fridge for 15 minutes to firm up.
Pin This Recipe!
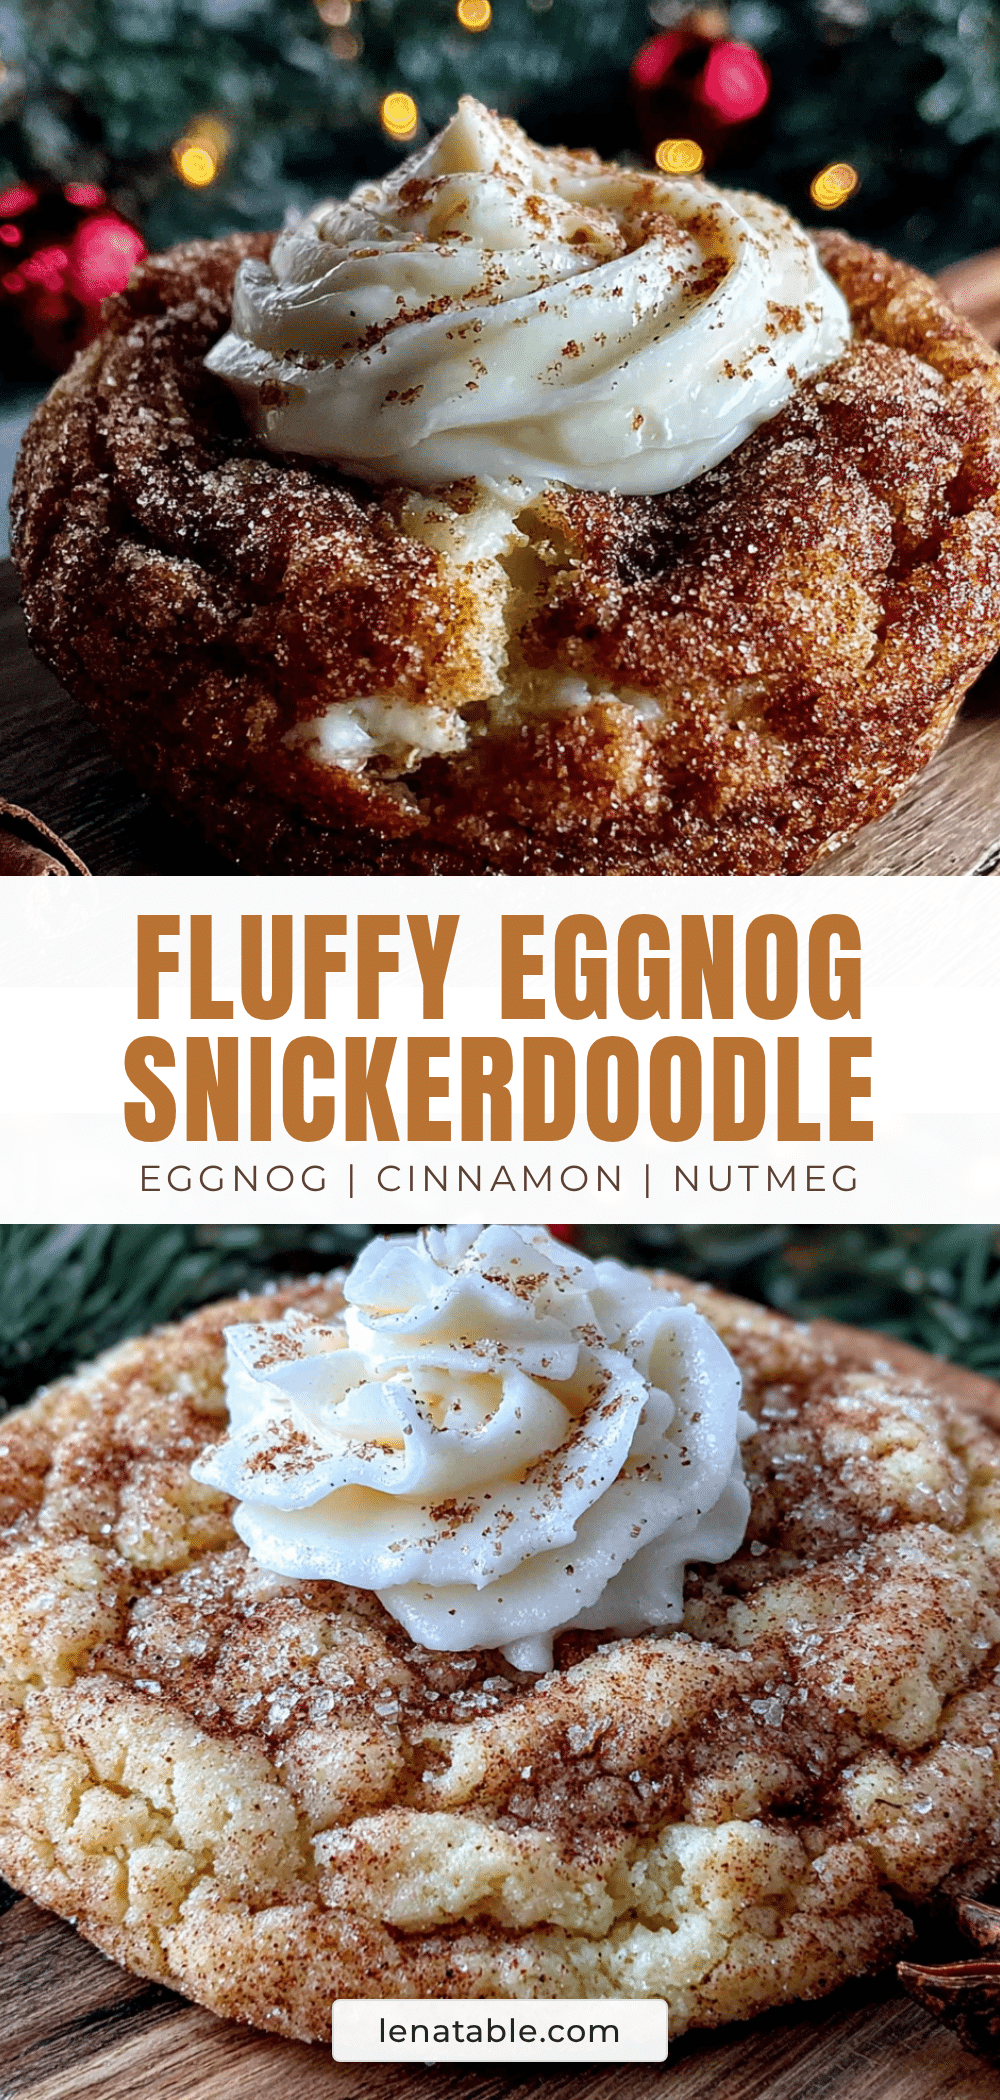
Fluffy Eggnog Snickerdoodle Cookies: Easy Holiday Recipe

These soft, fluffy snickerdoodle cookies are infused with rich eggnog and coated in a cinnamon-sugar mixture, making them the perfect holiday treat. Quick and easy to make with no chilling required, they’re a crowd-pleaser for cookie swaps and gatherings.
- Prep Time: 15 minutes
- Cook Time: 10-12 minutes
- Total Time: 25 minutes
- Yield: 24 cookies 1x
- Category: Dessert
- Cuisine: American
Ingredients
- 2 ¾ cups all-purpose flour (spooned and leveled)
- 1 teaspoon baking soda
- ½ teaspoon cream of tartar
- ½ teaspoon salt (fine sea salt)
- 1 teaspoon ground nutmeg (freshly grated preferred)
- ½ teaspoon ground cinnamon
- ¼ teaspoon ground cloves (optional)
- ¾ cup unsalted butter, softened to room temperature
- 1 cup granulated sugar
- ½ cup packed light brown sugar
- 1 large egg, room temperature
- 1 teaspoon vanilla extract
- ½ cup eggnog (full-fat)
- ¼ cup granulated sugar (for coating)
- 1 tablespoon ground cinnamon (for coating)
- ½ teaspoon ground nutmeg (for coating)
Instructions
- Preheat your oven to 350°F (175°C). Line two baking sheets with parchment paper or silicone mats.
- In a medium bowl, whisk together the dry ingredients: 2 ¾ cups all-purpose flour, 1 teaspoon baking soda, ½ teaspoon cream of tartar, ½ teaspoon salt, 1 teaspoon ground nutmeg, ½ teaspoon ground cinnamon, and ¼ teaspoon ground cloves (if using). Set aside.
- In a large bowl, cream the butter and sugars. Using an electric mixer on medium speed, beat ¾ cup softened unsalted butter, 1 cup granulated sugar, and ½ cup packed light brown sugar together until light and fluffy, about 2-3 minutes. Scrape down the sides of the bowl halfway through.
- Add the wet ingredients. Beat in 1 large egg and 1 teaspoon vanilla extract until well combined. Then, with the mixer on low speed, slowly pour in ½ cup eggnog. Mix until just combined (the batter may look slightly curdled).
- Gradually add the dry ingredients. With the mixer on low, add the flour mixture in two additions, mixing until just incorporated. Fold in any remaining streaks of flour with a spatula. The dough will be soft and slightly sticky.
- Prepare the cinnamon-sugar coating. In a small bowl, mix together ¼ cup granulated sugar, 1 tablespoon ground cinnamon, and ½ teaspoon ground nutmeg. Set aside.
- Shape the cookies. Using a cookie scoop or two spoons, portion out about 1.5 tablespoons of dough. Roll each portion into a ball between your palms. Roll each ball in the cinnamon-sugar mixture until fully coated. Place the coated balls on the prepared baking sheets, spacing them about 2 inches apart.
- Bake for 10-12 minutes. The cookies should look puffed and set around the edges, but still soft and slightly underdone in the center. For softer cookies, bake for 10 minutes; for firmer, 11-12 minutes.
- Cool on the baking sheet for 5 minutes. This allows them to finish setting. After 5 minutes, transfer the cookies to a wire rack to cool completely.
Notes
For extra fluffy cookies, after rolling dough balls in cinnamon-sugar, gently press down the top slightly with your fingers before baking. Use room temperature ingredients for best results. Avoid overmixing the dough. Store in an airtight container with a slice of bread to keep soft for up to 5 days. Can freeze baked cookies or unbaked dough balls for up to 3 months.
Nutrition
- Serving Size: 1 cookie
- Calories: 175
- Sugar: 14
- Sodium: 120
- Fat: 8
- Saturated Fat: 5
- Carbohydrates: 24
- Fiber: 1
- Protein: 2
Keywords: eggnog cookies, snickerdoodle, holiday cookies, Christmas cookies, fluffy cookies, easy cookie recipe


