Love this? Save it for later!
Share the inspiration with your friends
My roommate asked why I couldn’t just skip the chilling step and bake the cookies right away. I started to explain why that wouldn’t work — then stopped. Honestly, I had been reciting the same rule for years: cookie dough needs to chill. It’s what every baking blog says, what my grandmother always did, and what I’d preached to anyone who would listen. But standing there in my tiny apartment kitchen, I realized I couldn’t actually remember the last time I tested that rule for myself.
So I did something reckless. I scooped the dough straight from the bowl onto the baking sheet and popped it in the oven. Ten minutes later, I was staring at the most perfect, golden-edged, gooey-centered cookie I had ever made. My roommate didn’t say a word — she just grabbed one and took a bite, and that smug little smile said everything. I mean, I’ve been baking cookies for over a decade, and this one batch taught me more than all the recipes I’d followed before.
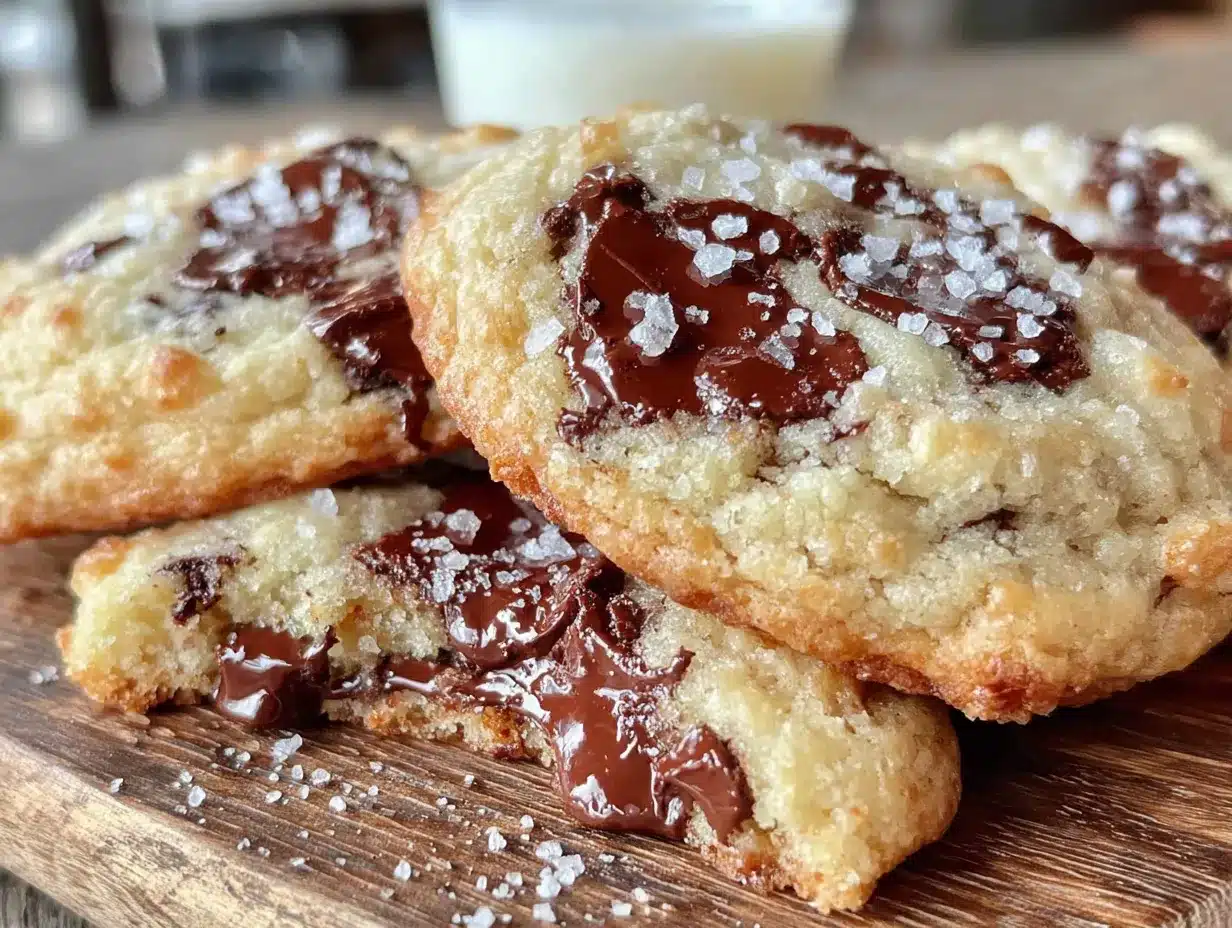
Maybe you’ve been there — holding onto a kitchen rule so tightly you forget to question it. That was me with chilling cookie dough. But here’s the thing: not all cookies need that rest in the fridge. These perfect small-batch chocolate chip cookies skip the chill entirely, and they turn out absolutely incredible every single time. The edges get that beautiful crispy caramelization while the centers stay soft and almost fudgy. No waiting, no planning ahead, just warm cookies in under twenty minutes.
That night, I ate three cookies standing over the kitchen counter, and I knew I’d never go back to the old way. This recipe is the one I keep coming back to — not because it’s easier (though it definitely is), but because it honestly tastes better. Sometimes being wrong is the best thing that can happen to your cooking.
Why You’ll Love This Recipe
Let me tell you why this recipe has become my absolute go-to for cookie cravings. I’ve tested this batch at least two dozen times — tweaking the butter temperature, adjusting the sugar ratio, even trying different flour brands. What I landed on is genuinely foolproof.
- No Chilling Required: From mixing bowl to warm cookies in under 20 minutes. No planning, no waiting, no fridge space needed.
- Perfect Small Batch: Makes exactly 6 cookies — enough to satisfy a craving without tempting you with a whole batch staring from the counter.
- Simple Pantry Ingredients: You probably have everything already. Butter, sugar, an egg, flour, chocolate chips. That’s it.
- Consistently Perfect Texture: Crispy edges with soft, almost gooey centers every single time. No spreading disasters or hockey pucks.
- Beginner-Friendly: If you can stir and scoop, you can make these. No stand mixer or fancy techniques needed.
What makes this recipe different from every other chocolate chip cookie out there? It’s the butter technique. Most no-chill recipes end up flat and greasy, but I figured out that browning the butter just slightly and letting it cool for exactly 5 minutes changes everything. It adds this nutty depth while keeping the dough stable enough to bake immediately. Honestly, I’ve served these to friends who swore they preferred chilled dough cookies, and they couldn’t tell the difference — they just asked for the recipe.
This recipe isn’t just good — it’s the kind that makes you close your eyes after the first bite. It’s comfort food at its finest, ready when you need it most. Perfect for a late-night craving, a rainy afternoon pick-me-up, or when you want to impress someone without spending hours in the kitchen.
What Ingredients You Will Need
This recipe uses simple, everyday ingredients to create cookies that taste anything but ordinary. Each component plays a specific role in getting that perfect texture and flavor, so here’s what you need and why it matters.
- Unsalted butter, 4 tablespoons (56g): I prefer using unsalted so I can control the salt level. Let it come to room temperature for about 15 minutes — you want it soft but not melted. I’ve tested this with salted butter too, just reduce the added salt to a pinch.
- Granulated sugar, 3 tablespoons (38g): This gives the cookies those crispy, caramelized edges. Regular white sugar works perfectly here.
- Light brown sugar, 3 tablespoons (45g), packed: The brown sugar adds moisture and that chewy texture we all love. Make sure it’s packed firmly into the measuring spoon. Dark brown sugar works too, but the cookies will be slightly darker and more molasses-flavored.
- One large egg yolk (about 18g): Just the yolk — no whites. This is the secret to rich, tender cookies without making the dough too wet. Save the egg white for an omelet or freeze it for later.
- Vanilla extract, ½ teaspoon: Real vanilla makes a difference here. I recommend Nielsen-Massey or simply the store brand pure vanilla — just avoid imitation if you can.
- All-purpose flour, ½ cup plus 1 tablespoon (75g): Spoon and level your flour — don’t scoop straight from the bag or you’ll end up with dry cookies. I’ve used King Arthur and Gold Medal with great results.
- Baking soda, ¼ teaspoon: This helps the cookies spread just enough and gives them that nice golden color. Make sure yours isn’t expired — it loses potency over time.
- Salt, ¼ teaspoon: I use fine sea salt. If you’re using kosher salt, increase to ½ teaspoon. The salt balances the sweetness and enhances the chocolate flavor.
- Semi-sweet chocolate chips, ⅓ cup (60g): I love Ghirardelli or Guittard for their rich flavor and good melt. Feel free to use dark chocolate, milk chocolate, or even chopped chocolate bars. For a fun twist, try white chocolate and macadamia nuts.
One thing I learned the hard way — use room temperature ingredients. Cold butter or a cold egg yolk will make the dough stiff and hard to mix, resulting in uneven cookies. Just let everything sit out for about 15 minutes before you start.
Equipment Needed
You don’t need fancy equipment for these cookies, which is honestly one of my favorite things about this recipe.
- Mixing bowl: Any medium bowl works. I use a glass or ceramic bowl, but metal is fine too.
- Whisk or fork: For mixing the wet ingredients together. A fork actually works surprisingly well if you don’t have a whisk handy.
- Rubber spatula or wooden spoon: For folding in the dry ingredients and chocolate chips. I prefer a silicone spatula because it scrapes the bowl clean.
- Baking sheet: A standard half-sheet pan works perfectly. No need to grease it — the butter in the dough prevents sticking.
- Parchment paper or silicone baking mat: This ensures easy cleanup and prevents the bottoms from browning too quickly. I prefer parchment paper because it’s disposable.
- Cookie scoop or tablespoon: For evenly sized cookies. A 1.5-tablespoon scoop makes perfectly proportioned cookies. If you’re using a spoon, just be consistent with your scoops.
- Cooling rack: Optional but helpful — it lets air circulate under the cookies so they don’t get soggy bottoms.
If you don’t have a cookie scoop, just use two spoons — one to scoop and one to scrape the dough onto the pan. I’ve done this plenty of times when my scoop was in the dishwasher, and it works just fine.
Preparation Method
- Preheat your oven to 350°F (175°C). Line a baking sheet with parchment paper or a silicone mat. Getting the oven fully preheated is important — if you put the cookies in a cold oven, they’ll spread too much before they start baking.
- Brown the butter (optional but recommended). In a small saucepan over medium heat, melt the 4 tablespoons of butter. Swirl the pan occasionally. After about 3-4 minutes, the butter will start to foam and turn golden brown with little brown specks at the bottom. It should smell nutty and amazing. Immediately pour it into a heat-safe bowl and let it cool for exactly 5 minutes. Don’t skip the cooling — hot butter will cook the egg yolk.
- Mix the sugars and butter. In your mixing bowl, combine the granulated sugar and brown sugar with the cooled browned butter. Stir vigorously with a whisk or fork for about 1 minute until it looks like wet sand and is well combined. You want the sugars to dissolve slightly into the butter.
- Add the egg yolk and vanilla. Drop in the egg yolk and vanilla extract. Whisk until the mixture is smooth, thick, and slightly lighter in color — about 30 seconds. It should look like a thick caramel sauce. Scrape down the sides of the bowl.
- Combine the dry ingredients. In a small separate bowl, whisk together the flour, baking soda, and salt. Make sure there are no lumps — baking soda loves to hide in clumps and will give you a bitter bite if you miss one.
- Fold in the dry ingredients. Add the flour mixture to the wet ingredients. Using your rubber spatula, fold gently until just combined. Stop as soon as you no longer see streaks of flour — overmixing will make the cookies tough. The dough will be soft and slightly sticky, which is exactly what you want.
- Add the chocolate chips. Fold in the chocolate chips until evenly distributed. If you want those Insta-worthy cookies with chips showing on top, press a few extra chips onto the surface of each dough ball after scooping.
- Scoop the dough. Using your cookie scoop or a tablespoon, portion the dough into 6 equal balls, about 1.5 tablespoons each. Place them on the prepared baking sheet, spacing them about 2 inches apart. They will spread, but not as much as chilled dough.
- Bake immediately. Pop the baking sheet into the preheated oven. Bake for 10-12 minutes. At 10 minutes, the edges should be golden brown and the centers will look slightly puffy and pale. For softer cookies, pull them at 10 minutes. For crispier edges, go to 12 minutes. The cookies will continue to set as they cool on the pan.
- Cool on the pan. Let the cookies rest on the baking sheet for 5 minutes. This is crucial — they’re very fragile right out of the oven. After 5 minutes, transfer them to a cooling rack. Or, you know, eat one straight from the pan while it’s still warm. I won’t judge.
A quick note: if your cookies spread too much, your butter was probably too warm. Let it cool a bit longer next time. If they didn’t spread enough, your flour was likely overmeasured — spoon it lightly into the cup next time.
Cooking Tips & Techniques
After making these cookies more times than I care to admit, I’ve picked up a few tricks that make a real difference.
The butter temperature is everything. I learned this the hard way after a batch that turned into one giant cookie pancake. If your browned butter is too hot when you add the egg yolk, you’ll end up with scrambled egg bits in your dough. Let it cool for those full 5 minutes — set a timer if you have to. On the flip side, if the butter cools too much and solidifies, your dough will be crumbly. Room temperature is the sweet spot, about 75°F.
Weigh your ingredients if you can. I know, I know — measuring cups are easier. But flour is notoriously finicky. One cup scooped straight from the bag can weigh anywhere from 120g to 150g depending on how you scoop. That 30g difference will make or break your cookies. A simple kitchen scale costs about $15 and will improve every baked good you make.
Don’t overmix once the flour goes in. This is the most common mistake I see. Gluten develops when flour mixes with liquid, and the more you stir, the tougher your cookies get. Fold just until you can’t see dry flour anymore. A few streaks are fine — they’ll disappear as you fold in the chocolate chips.
Use a cookie scoop for even baking. Unevenly sized cookies bake at different rates. The small ones burn while the big ones are still raw in the middle. A scoop ensures every cookie is the same size and bakes evenly. Plus, it’s faster than scooping with a spoon.
Let them cool on the pan. I ruined so many cookies by trying to move them too soon. They need those 5 minutes on the hot pan to finish setting up. If you try to move them earlier, they’ll fall apart. Trust the process — the wait is worth it.
Variations & Adaptations
One of the best things about this recipe is how easily it adapts to whatever you have on hand or whatever you’re craving.
Double Chocolate Chip: Replace 1 tablespoon of the flour with 1 tablespoon of unsweetened cocoa powder. Use dark chocolate chips instead of semi-sweet. The result is a rich, fudgy cookie that tastes like a brownie in cookie form. I made these for a friend’s birthday and they disappeared in minutes.
Gluten-Free Version: Substitute the all-purpose flour with a 1:1 gluten-free baking flour blend. I’ve tested this with Bob’s Red Mill and Cup4Cup, and both worked beautifully. The texture is slightly more delicate, so handle the dough gently. No other adjustments needed — the no-chill method works perfectly here.
Vegan Adaptation: Use vegan butter (I like Miyoko’s or Earth Balance) and replace the egg yolk with 1 tablespoon of aquafaba (the liquid from a can of chickpeas) mixed with ½ teaspoon of cornstarch. The cookies will be slightly less rich but still delicious. I was skeptical about aquafaba until I tried it, and honestly, it works surprisingly well.
Add-In Variations: Swap the chocolate chips for white chocolate and dried cranberries, or try butterscotch chips with toasted pecans. For a salty-sweet twist, sprinkle a little flaky sea salt on top of each cookie right after they come out of the oven. My personal favorite is using chopped dark chocolate bar instead of chips — the irregular pieces melt into puddles throughout the cookie.
Spiced Version: Add ¼ teaspoon of cinnamon and a pinch of nutmeg to the dry ingredients. It gives the cookies a warm, cozy flavor that’s perfect for fall. I made these during a snowstorm last winter, and they were exactly what we needed.
Serving & Storage Suggestions
These cookies are best enjoyed warm, straight from the oven. That first bite when the chocolate is still melted and the edges are perfectly crisp — that’s the moment this recipe was made for. Serve them with a cold glass of milk, a scoop of vanilla ice cream, or alongside a hot cup of coffee for the ultimate treat.
If you’re serving them to guests, arrange them on a pretty plate while they’re still slightly warm. A light dusting of powdered sugar or a drizzle of melted chocolate makes them look extra special without much effort. They’re perfect for cookie swaps, bake sales, or just because it’s Tuesday.
Storage: Store any leftover cookies (as if that happens often!) in an airtight container at room temperature for up to 3 days. To keep them soft, add a slice of bread to the container — the cookies will absorb the moisture and stay chewy. Replace the bread slice every day if you’re storing them longer.
Freezing: These cookies freeze beautifully. Place baked and cooled cookies in a single layer in a freezer-safe bag or container. They’ll keep for up to 3 months. To enjoy, let them thaw at room temperature for about 15 minutes, then pop them in a 300°F oven for 3-4 minutes to refresh that just-baked texture.
You can also freeze the unbaked dough balls. Scoop them onto a parchment-lined baking sheet and freeze until solid, then transfer to a freezer bag. When you’re ready, bake straight from frozen — just add 2-3 minutes to the baking time. This is my favorite trick for having fresh cookies anytime a craving strikes.
One thing I’ve noticed — these cookies actually taste even better the next day. The flavors meld together overnight, and the texture softens slightly. If you can resist eating them all, try saving one for the next morning with your coffee.
Nutritional Information & Benefits
Let’s be honest — cookies are a treat, not a health food. But knowing what’s in them helps you enjoy them mindfully. Here are the approximate values per cookie (based on 6 cookies per batch):
| Nutrient | Amount Per Cookie |
|---|---|
| Calories | 195 |
| Total Fat | 11g |
| Saturated Fat | 7g |
| Carbohydrates | 23g |
| Sugar | 15g |
| Protein | 3g |
| Sodium | 145mg |
These cookies are made with simple, recognizable ingredients — no preservatives or artificial additives. The butter provides a small amount of vitamin A, and the dark chocolate chips contain antioxidants called flavonoids, which are linked to heart health. The egg yolk adds protein and healthy fats. While this isn’t a health food by any stretch, making cookies from scratch means you control exactly what goes into them.
For dietary considerations: this recipe contains dairy (butter) and gluten (flour). It can be made gluten-free with a 1:1 flour blend and vegan with the substitutions listed above. The recipe is naturally nut-free, making it safe for school lunches and parties. Always check your chocolate chip labels for potential cross-contamination if allergies are a concern.
I believe in balance — enjoying a homemade cookie without guilt. These small-batch cookies give you exactly enough to satisfy a craving without a week’s worth of leftovers tempting you. Sometimes the best thing you can do for your wellness is to enjoy something delicious in moderation.
Conclusion
These perfect small-batch chocolate chip cookies are proof that you don’t need fancy techniques or hours of chilling to make something truly special. With simple ingredients and less than 20 minutes, you can have warm, gooey, bakery-quality cookies that rival any recipe out there. The browned butter adds depth, the no-chill method saves time, and the small batch means you get just enough to satisfy without overindulging.
I love this recipe because it reminds me that sometimes the best discoveries happen when we question the rules we’ve always followed. That night with my roommate taught me more than any baking book could — and now I get to share that lesson with you. Whether you’re a seasoned baker or someone who’s never made cookies from scratch, this recipe is for you.
I’d love to hear how these turn out for you! Did you try any variations? Did you manage to save any for the next day? Drop a comment below and let me know — your feedback helps other readers, and I genuinely love hearing about your baking adventures. If you enjoyed this recipe, share it with a friend who needs some warm cookies in their life. Happy baking, and remember — sometimes the best cookies are the ones you make right now.
Frequently Asked Questions
Can I use margarine instead of butter?
I wouldn’t recommend it. Margarine has a higher water content than butter, which will make your cookies spread too much and turn out flat. Stick with real butter for the best texture and flavor. If you need a dairy-free option, use a high-quality vegan butter stick (not the spreadable kind in a tub).
Why did my cookies turn out flat?
This usually happens for one of three reasons: your butter was too warm, you used too much sugar, or your flour was undermeasured. Make sure your browned butter cools for exactly 5 minutes before adding the egg yolk. Also, spoon your flour into the measuring cup and level it off — don’t scoop directly from the bag.
Can I double this recipe?
Absolutely! This recipe scales perfectly. Just double all the ingredients. Keep the baking time the same, but you may need to bake in batches depending on your oven size. The dough will still work without chilling, even when doubled.
How do I know when the cookies are done baking?
Look for golden brown edges with centers that still look slightly puffy and underdone. The centers will continue to cook from the residual heat of the pan after you take them out of the oven. If the centers look fully set and firm, you’ve overbaked them. Trust the visual cues over the timer.
Can I use whole wheat flour instead of all-purpose?
You can substitute up to half of the all-purpose flour with whole wheat flour without major issues. Using 100% whole wheat will result in denser, less tender cookies with a noticeable wheat flavor. If you try it, add an extra tablespoon of butter to compensate for the whole wheat flour’s absorbency.
Pin This Recipe!

Perfect Small-Batch Chocolate Chip Cookies: Easy, No-Chill Recipe

These perfect small-batch chocolate chip cookies skip the chill entirely, turning out absolutely incredible every single time with crispy edges and soft, almost fudgy centers. No waiting, no planning ahead, just warm cookies in under twenty minutes.
- Prep Time: 10 minutes
- Cook Time: 10-12 minutes
- Total Time: 20-22 minutes
- Yield: 6 cookies 1x
- Category: Dessert
- Cuisine: American
Ingredients
- 4 tablespoons (56g) unsalted butter, room temperature
- 3 tablespoons (38g) granulated sugar
- 3 tablespoons (45g) light brown sugar, packed
- 1 large egg yolk (about 18g)
- ½ teaspoon vanilla extract
- ½ cup plus 1 tablespoon (75g) all-purpose flour
- ¼ teaspoon baking soda
- ¼ teaspoon fine sea salt
- ⅓ cup (60g) semi-sweet chocolate chips
Instructions
- Preheat your oven to 350°F (175°C). Line a baking sheet with parchment paper or a silicone mat.
- Brown the butter (optional but recommended): In a small saucepan over medium heat, melt the 4 tablespoons of butter. Swirl the pan occasionally. After about 3-4 minutes, the butter will start to foam and turn golden brown with little brown specks at the bottom. It should smell nutty. Immediately pour it into a heat-safe bowl and let it cool for exactly 5 minutes.
- Mix the sugars and butter: In your mixing bowl, combine the granulated sugar and brown sugar with the cooled browned butter. Stir vigorously with a whisk or fork for about 1 minute until it looks like wet sand and is well combined.
- Add the egg yolk and vanilla: Drop in the egg yolk and vanilla extract. Whisk until the mixture is smooth, thick, and slightly lighter in color — about 30 seconds. Scrape down the sides of the bowl.
- Combine the dry ingredients: In a small separate bowl, whisk together the flour, baking soda, and salt until no lumps remain.
- Fold in the dry ingredients: Add the flour mixture to the wet ingredients. Using a rubber spatula, fold gently until just combined. Stop as soon as you no longer see streaks of flour.
- Add the chocolate chips: Fold in the chocolate chips until evenly distributed. For extra chips on top, press a few onto the surface of each dough ball after scooping.
- Scoop the dough: Using a cookie scoop or tablespoon, portion the dough into 6 equal balls, about 1.5 tablespoons each. Place them on the prepared baking sheet, spacing them about 2 inches apart.
- Bake immediately: Bake for 10-12 minutes. At 10 minutes, the edges should be golden brown and the centers will look slightly puffy and pale. For softer cookies, pull them at 10 minutes. For crispier edges, go to 12 minutes.
- Cool on the pan: Let the cookies rest on the baking sheet for 5 minutes. After 5 minutes, transfer them to a cooling rack.
Notes
The butter temperature is crucial: let browned butter cool for exactly 5 minutes before adding the egg yolk to avoid scrambling. Weigh ingredients for best results. Do not overmix once flour is added. Let cookies cool on the pan for 5 minutes before transferring. For softer cookies, bake 10 minutes; for crispier edges, bake 12 minutes.
Nutrition
- Serving Size: 1 cookie
- Calories: 195
- Sugar: 15
- Sodium: 145
- Fat: 11
- Saturated Fat: 7
- Carbohydrates: 23
- Fiber: 1
- Protein: 3
Keywords: small-batch chocolate chip cookies, no-chill cookies, easy cookie recipe, quick cookies, browned butter cookies


