Love this? Save it for later!
Share the inspiration with your friends
This was supposed to be a pumpkin cheesecake. The kind you bake in a springform pan, with a water bath and a cooling time that stretches into the next day. I had the cream cheese out, the graham crackers crushed, and I was already running late for a dinner party when I realized my oven was broken. Not broken-broken, but the kind of broken where it heats unevenly and you have to babysit it like a toddler. I stood there staring at the mixing bowl, the pumpkin puree, the pile of spices, and honestly, I almost just made a pumpkin pie instead. But I really wanted cheesecake. You know that feeling when you have your heart set on something and nothing else will do?
So I did something reckless. I skipped the oven entirely. I grabbed some small cups from the back of the cabinet, layered the cheesecake mixture with the crust, and threw them in the fridge hoping for the best. I figured worst case, I’d have a really fancy pudding situation and call it a day. But when I pulled those cups out a few hours later, they had set perfectly. The texture was creamy and light, the pumpkin flavor came through without being heavy, and the crust stayed crunchy even without baking. I brought them to the party anyway, and let me tell you, people went back for seconds before they even asked what was in them. I didn’t even tell anyone about the oven situation until dessert was gone.
These Easy No-Bake Pumpkin Cheesecake Cups have become my go-to fall dessert ever since. They take ten minutes to put together, require zero oven time, and somehow taste better than the baked version I originally planned. I’ve made them for Thanksgiving, for random weeknights, and for those moments when you just need something sweet without turning your kitchen into a disaster zone. Maybe you’ve been there too — craving a seasonal dessert but dreading the cleanup. That is exactly what these cups solve.
Why You’ll Love This Recipe
Let me tell you why these little cups have earned a permanent spot in my dessert rotation. I’ve tested this recipe more times than I care to count, tweaking the ratios and the chilling time until everything was just right. Here is what makes them special:
- 10 Minutes of Work : That is not a typo. From start to fridge in ten minutes flat. Perfect for when you need a dessert fast or when your oven is suddenly out of commission.
- Pantry-Friendly Ingredients : Cream cheese, pumpkin puree, graham crackers, and basic spices. Nothing fancy, nothing hard to find. You probably have most of this already.
- No-Bake Magic : No oven, no water bath, no complicated techniques. Just mix, layer, and chill. This is the kind of recipe that makes you look like a hero with almost no effort.
- Crowd-Pleasing Flavor : The pumpkin and spice blend is warm without being overpowering. The texture is creamy but light. Everyone from kids to grandparents loves these cups.
- Perfect for Any Occasion : Thanksgiving dessert table, Friendsgiving gathering, or just a Tuesday night treat. They look fancy but are secretly simple.
What really sets this recipe apart is the texture. Most no-bake cheesecakes can be too dense or too runny. I spent a lot of time figuring out the right balance of cream cheese to pumpkin to whipped topping so that the cups set up firm but stay silky smooth. The crust is another thing I obsessed over — it stays crunchy even after sitting in the fridge, which is harder than it sounds. These cups are not just a shortcut version of baked cheesecake. They are their own thing, and honestly, I think they are better.
There is something about that first bite that just makes you pause. The creamy pumpkin layer, the buttery crust, the hit of cinnamon and nutmeg. It is comfort food reimagined — faster, simpler, but with the same soul-soothing satisfaction. And the best part? You get to eat them out of a cup with a spoon, which automatically makes everything more fun.
What Ingredients You Will Need
This recipe uses simple, wholesome ingredients that come together to create something truly special. Most of these are pantry staples, especially if you do any fall baking. Here is everything you need and why each ingredient matters:
For the Crust
- 1 ½ cups graham cracker crumbs (about 10-12 full sheets, crushed finely) — I prefer using Honey Maid brand for consistent texture. You can crush them in a bag with a rolling pin or pulse them in a food processor.
- ¼ cup granulated sugar — Adds just enough sweetness to balance the buttery crumbs.
- 6 tablespoons unsalted butter, melted — Use real butter here, not margarine. It makes a huge difference in flavor and helps the crust hold together. Let it cool slightly before mixing.
- Pinch of salt — Sounds weird in a dessert crust, but it balances the sweetness and enhances the buttery flavor.
For the Pumpkin Cheesecake Filling
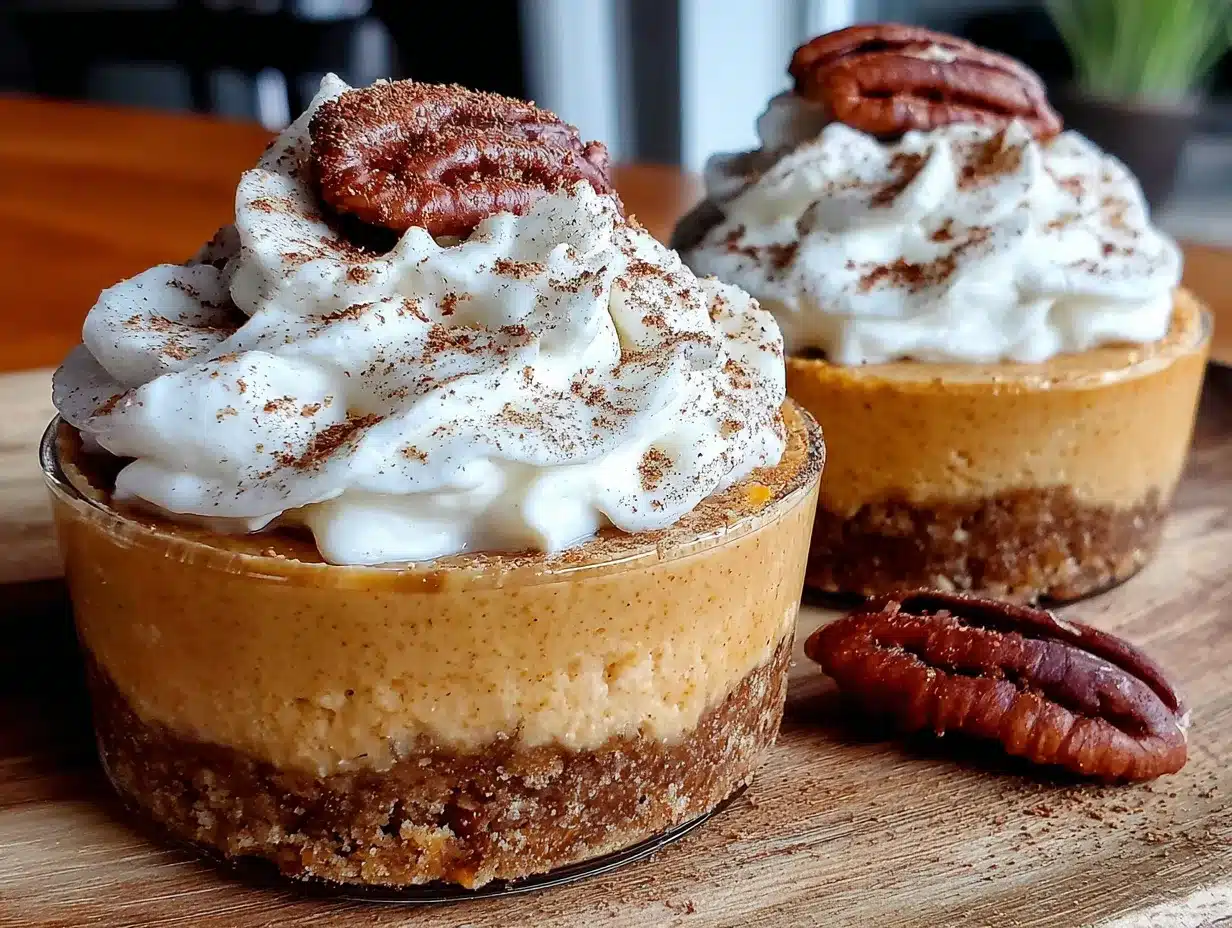
- 8 ounces cream cheese, softened — Full-fat is best for texture. Let it sit at room temperature for about 30 minutes before mixing. Philadelphia cream cheese is my go-to for consistent results.
- ½ cup pumpkin puree — Not pumpkin pie filling. Make sure you grab the plain puree. Libby’s is a reliable brand and has the right moisture content.
- ½ cup powdered sugar — Dissolves more easily than granulated and keeps the filling silky smooth.
- 1 teaspoon vanilla extract — Pure vanilla extract tastes better than imitation. It adds warmth and depth to the pumpkin flavor.
- 1 teaspoon pumpkin pie spice — You can buy it pre-mixed or make your own with cinnamon, nutmeg, ginger, and cloves. I make my own blend because I like extra cinnamon.
- ½ teaspoon ground cinnamon — Because you can never have too much cinnamon in a pumpkin dessert.
- 1 cup heavy whipping cream — This is what makes the filling light and fluffy instead of dense. You will whip it to stiff peaks before folding it in. (Substitution: use 1 ½ cups Cool Whip if you want an even easier option, but the texture will be slightly different.)
For Topping (Optional but Recommended)
- ¼ cup heavy whipping cream — For whipping into soft peaks to dollop on top.
- 1 tablespoon powdered sugar — To sweeten the whipped cream.
- ¼ teaspoon vanilla extract — For flavor.
- Crushed graham crackers or chopped pecans — For garnish and crunch.
- Caramel sauce — Drizzle on top for extra decadence. I like Stonewall Kitchen brand.
A quick note on substitutions: You can use dairy-free cream cheese and coconut cream (chilled and whipped) if you need a dairy-free version. The texture will be slightly different but still delicious. For a gluten-free option, use gluten-free graham crackers or crushed gluten-free cookies. I tested it with Schär brand graham-style crackers and it worked great.
Equipment Needed
You do not need much for this recipe, which is part of the beauty. Here is what you will need:
- Mixing bowls — One medium for the crust, one large for the filling. I use glass bowls because they do not hold onto smells.
- Electric hand mixer or stand mixer — You need this to whip the cream and beat the cream cheese. A whisk and strong arm can work for the cream cheese, but whipping cream by hand is tough. A hand mixer is fine and more budget-friendly.
- 6 to 8 small serving cups or jars — I use 6-ounce glass jars, but small mason jars, ramekins, or even wine glasses work. The number depends on the size of your cups.
- Measuring cups and spoons — For accuracy. Baking is science, even when there is no oven involved.
- Rubber spatula — For scraping every last bit of filling into the cups. Do not waste a drop.
- Ziploc bag or food processor — For crushing graham crackers. A rolling pin and a Ziploc bag work perfectly if you do not have a food processor.
- Small offset spatula or spoon — For spreading the layers evenly.
I have made these cups with just a whisk, a bowl, and a fork when I was traveling and had limited kitchen access. It took a little longer and my arm got tired, but it worked. The hand mixer makes it much easier though. If you make these often, a set of small glass jars with lids is worth investing in — they make serving and storing so much simpler.
Preparation Method
Alright, let me walk you through this step by step. I have made these cups dozens of times, so I will share all the little tricks I have picked up along the way.
- Make the crust. In a medium bowl, combine the graham cracker crumbs, sugar, and salt. Pour in the melted butter and stir with a fork until the mixture looks like wet sand and holds together when you squeeze it. The texture should be uniform with no dry spots. Set aside about 2 tablespoons of the crust mixture for garnishing later.
- Divide the crust among your cups. Spoon about 2 tablespoons of the crust mixture into each cup. Press it down firmly using the bottom of a small glass or a spoon. You want it compacted so it holds together when you eat it. Place the cups in the refrigerator while you make the filling. This helps the crust set up.
- Whip the cream. In a large bowl (or the bowl of your stand mixer), pour in 1 cup of heavy whipping cream. Beat on medium-high speed until soft peaks form, about 2-3 minutes. Soft peaks mean the cream holds its shape briefly but droops over. Be careful not to over-whip — you do not want butter. Set the whipped cream aside in the refrigerator.
- Beat the cream cheese. In another large bowl, beat the softened cream cheese with an electric mixer on medium speed until smooth and creamy, about 1 minute. Scrape down the sides and bottom of the bowl with a spatula. There should be no lumps at this stage. If your cream cheese is too cold, it will be lumpy, so make sure it is truly room temperature.
- Add the pumpkin and sugar. Add the pumpkin puree, powdered sugar, vanilla extract, pumpkin pie spice, and cinnamon to the cream cheese. Beat on medium speed until everything is combined and smooth, about 1 minute. Scrape the bowl again. The mixture should be a beautiful orange color and smell like autumn.
- Fold in the whipped cream. This is the most important step. Remove the whipped cream from the fridge. Add about one-third of it to the pumpkin mixture and gently fold it in with a rubber spatula. Fold by cutting through the center, scraping the bottom, and bringing the mixture up and over. Repeat until mostly combined, then add the remaining whipped cream and continue folding. Stop as soon as there are no more white streaks. Over-mixing will deflate the cream and make the filling dense.
- Fill the cups. Remove the cups with the crust from the refrigerator. Spoon or pipe the pumpkin cheesecake filling into each cup, dividing it evenly. I use a piping bag with a large round tip for clean layers, but a spoon works perfectly fine. Fill to about ¼ inch from the top of the cup. Tap the cups gently on the counter to settle the filling and remove any air bubbles.
- Chill. Place the filled cups in the refrigerator for at least 4 hours, but overnight is better. The filling needs time to set up and become firm. Do not rush this step — I have made the mistake of pulling them out after 2 hours and the texture was too soft. Patience pays off here.
- Make the topping. Just before serving, whip the remaining ¼ cup heavy cream with the powdered sugar and vanilla until soft peaks form. Dollop or pipe onto each cup. Sprinkle with the reserved graham cracker crumbs and a few chopped pecans if you like. Drizzle with caramel sauce for extra decadence.
- Serve and enjoy. These cups are best served cold, straight from the fridge. The contrast between the cold creamy filling and the crunchy crust is pure magic.
A few sensory cues to watch for: When you fold the whipped cream into the pumpkin mixture, you are looking for a uniform color with no streaks. The filling should be thick but scoopable, like a mousse. When you press the crust into the cups, it should feel compact and hold together when you press your finger into it. And when you take that first bite, the filling should be firm enough to hold its shape but melt on your tongue.
Cooking Tips & Techniques
Over the years, I have learned a few things the hard way so you do not have to. Here are my best tips for perfect no-bake pumpkin cheesecake cups every time:
Room temperature cream cheese is non-negotiable. I cannot stress this enough. Cold cream cheese will leave you with lumps that no amount of beating can fix. Take it out of the fridge at least 30 minutes before you start. If you forget, cut it into small cubes and let it sit for 15 minutes — it will soften faster.
Do not skip the chilling time. I know it is tempting to dig in after an hour, but the filling needs time to set. Four hours is the minimum. Overnight is ideal. The texture firms up beautifully and the flavors meld together. I have tested this many times and the difference between 2 hours and 6 hours is night and day.
Whip your cream to the right stage. Soft peaks are what you want — the cream should hold a shape but still be soft and billowy. If you overwhip it, the cream will start to separate and the filling will be grainy. If you underwhip it, the filling will be too loose. Watch for the cream to thicken and leave trails in the bowl, then stop.
Press the crust firmly. A loose crust will fall apart when you try to eat the cups. Use the bottom of a shot glass or a small measuring cup to press the crumbs down hard. I like to chill the crust for 10 minutes before adding the filling to help it set.
Use a piping bag for clean layers. If you want those Instagram-worthy layers, use a piping bag to fill the cups. It keeps the filling off the sides of the glass and gives a professional look. A Ziploc bag with the corner snipped off works just as well.
Make extra crust. I always make a little more crust than I think I need. It gives you room to press it firmly and still have some left for topping. Leftover crust crumbs are great sprinkled on ice cream or yogurt.
One mistake I made early on was using pumpkin pie filling instead of pure pumpkin puree. The pie filling has added sugar and spices, and it threw off the whole balance. The cups were way too sweet and the texture was off. Learn from my error and double-check the label.
Variations & Adaptations
These cups are incredibly versatile. Here are some ways to change them up based on your mood, diet, or what you have on hand:
Gluten-Free Version : Use gluten-free graham crackers or crushed gluten-free shortbread cookies. I have tested this with Schär brand graham-style crackers and the texture was perfect. You can also use crushed gluten-free pretzels for a salty-sweet crust.
Dairy-Free Version : Use dairy-free cream cheese (I like Kite Hill or Miyoko’s) and chill a can of full-fat coconut cream overnight. Scoop out the solid cream and whip it the same way you would heavy cream. The coconut flavor is subtle and pairs well with pumpkin.
Vegan Version : Combine the dairy-free substitutions above and use maple syrup instead of honey (if using). The texture will be slightly softer but still delicious. Chill for at least 6 hours for best results.
Pumpkin Chocolate Swirl : Melt ¼ cup of dark chocolate chips and swirl it into the filling before chilling. The chocolate and pumpkin combination is surprisingly good — like a pumpkin chocolate chip cookie in cup form.
Maple Pecan Twist : Add 2 tablespoons of maple syrup to the filling and top with candied pecans. The maple flavor enhances the pumpkin spice beautifully. I made this version for a Friendsgiving and it disappeared first.
Low-Sugar Option : Use a sugar substitute like monk fruit sweetener or erythritol in both the crust and filling. The texture will be similar, though the sweetness level may be slightly different. Taste and adjust as you go.
Extra Spiced : Add an extra ½ teaspoon of ginger and ¼ teaspoon of cloves to the filling for a more intense spice profile. This version is great for those who love a bold pumpkin flavor.
Individual Mini Version : Use shot glasses or 2-ounce cups for bite-sized desserts. These are perfect for parties or when you want a small treat without the commitment of a full cup.
Serving & Storage Suggestions
These cups are best served cold, straight from the refrigerator. The filling should be firm but creamy, and the crust should have a slight crunch. I like to take them out about 5 minutes before serving to take the chill off slightly, but that is personal preference.
Presentation ideas: Top each cup with a dollop of whipped cream, a sprinkle of cinnamon, and a few crushed graham crackers. A drizzle of caramel sauce makes them look extra fancy. For holidays, I sometimes add a small cinnamon stick or star anise for garnish. Mini gingerbread cookies on top are also adorable for Christmas.
What to serve with them: These cups are rich enough to stand alone, but they pair beautifully with a cup of hot coffee or spiced chai tea. A glass of dessert wine like a late harvest Riesling works too. If you are serving them as part of a dessert spread, they go well with apple crisp or pecan pie bars.
Storage instructions: Keep the cups covered in the refrigerator for up to 5 days. I use small glass jars with lids, but plastic wrap or foil works too. Do not add the whipped cream topping until just before serving — it will deflate and become watery if stored too long.
Freezing instructions: These cups freeze beautifully for up to 2 months. Prepare them without the whipped cream topping. Cover each cup tightly with plastic wrap and then foil. To serve, thaw in the refrigerator overnight. Add fresh whipped cream before serving. The texture after thawing is almost identical to fresh — I have tested this multiple times.
Flavor development: The flavors actually get better after a day or two in the fridge. The spices meld with the cream cheese and pumpkin, creating a deeper, more rounded flavor. I often make these a day ahead of time for this reason. Just do not add the toppings until serving.
Nutritional Information & Benefits
Here is the estimated nutritional breakdown per serving (based on 8 servings, without optional toppings):
| Nutrient | Amount per Serving |
|---|---|
| Calories | 320 |
| Total Fat | 24g |
| Saturated Fat | 14g |
| Cholesterol | 75mg |
| Sodium | 220mg |
| Total Carbohydrates | 24g |
| Dietary Fiber | 2g |
| Sugars | 15g |
| Protein | 4g |
| Vitamin A | 120% DV |
| Calcium | 6% DV |
Pumpkin is a nutritional powerhouse. It is loaded with vitamin A (beta-carotene), which supports eye health and immune function. It is also a good source of fiber, which helps with digestion and keeps you feeling full. The cream cheese provides calcium and protein, while the heavy cream adds healthy fats that help your body absorb the fat-soluble vitamins from the pumpkin.
If you are watching your sugar intake, you can reduce the sugar in the filling or use a sugar substitute. The pumpkin itself adds natural sweetness, so you might not miss the extra sugar. For a lower-calorie version, use reduced-fat cream cheese and light whipped topping — the texture will be slightly less rich but still satisfying.
These cups are not necessarily health food, but they are a treat you can feel good about. Real ingredients, no artificial flavors, and a serving of vegetables (yes, pumpkin counts) in dessert form. That is a win in my book.
Conclusion
These Easy No-Bake Pumpkin Cheesecake Cups have become my fall dessert signature for a reason. They are simple enough for a weeknight, fancy enough for company, and forgiving enough for beginner cooks. That happy accident with my broken oven turned into a recipe I genuinely prefer over the baked version. The texture is lighter, the flavor is brighter, and the whole process takes less time than deciding what to watch on Netflix.
I love that this recipe lets you focus on flavor instead of technique. No water baths, no cracks to worry about, no waiting for the oven to preheat. Just good ingredients layered together with a little patience for the chilling time. It is the kind of dessert that makes people think you worked harder than you did, and honestly, I am okay with that.
I would love to hear how these turn out for you. Did you add any fun toppings? Try a different crust? Make them for a holiday dinner? Drop a comment below and let me know. And if you share a photo on Pinterest or Instagram, tag me — I love seeing your creations. These cups are meant to be shared, so go ahead and make a batch for someone you care about. Happy no-baking!
Frequently Asked Questions
Can I use canned pumpkin pie filling instead of pumpkin puree?
No, I do not recommend it. Pumpkin pie filling has added sugar, spices, and sometimes thickeners that will throw off the balance of this recipe. The cups will be too sweet and the texture may not set properly. Always use 100% pure pumpkin puree for best results.
How long do these no-bake cheesecake cups need to chill?
At least 4 hours, but overnight is ideal. The filling needs time to firm up and the flavors need time to meld. If you try to rush the chilling time, the cups will be too soft and may not hold their shape. Plan ahead and make them the day before you want to serve them.
Can I make these cups ahead of time for a party?
Absolutely. These are perfect for making ahead. Prepare the cups without the whipped cream topping up to 2 days in advance. Keep them covered in the refrigerator. Add the whipped cream and garnishes just before serving for the best presentation.
Can I freeze these pumpkin cheesecake cups?
Yes, they freeze well for up to 2 months. Prepare them without the whipped cream topping, cover tightly with plastic wrap and foil, and freeze. Thaw overnight in the refrigerator before serving. Add fresh whipped cream after thawing. The texture remains creamy and delicious.
What if my cheesecake filling is too runny?
If your filling is runny, it could be because the cream cheese was not softened enough, the cream was not whipped to stiff peaks, or the mixture was over-mixed. To fix it, chill the filling for 30 minutes before spooning it into the cups. If it is still too runny after that, add a tablespoon of powdered sugar to help stabilize it. Make sure to chill the cups for the full 4 hours minimum.
Pin This Recipe!
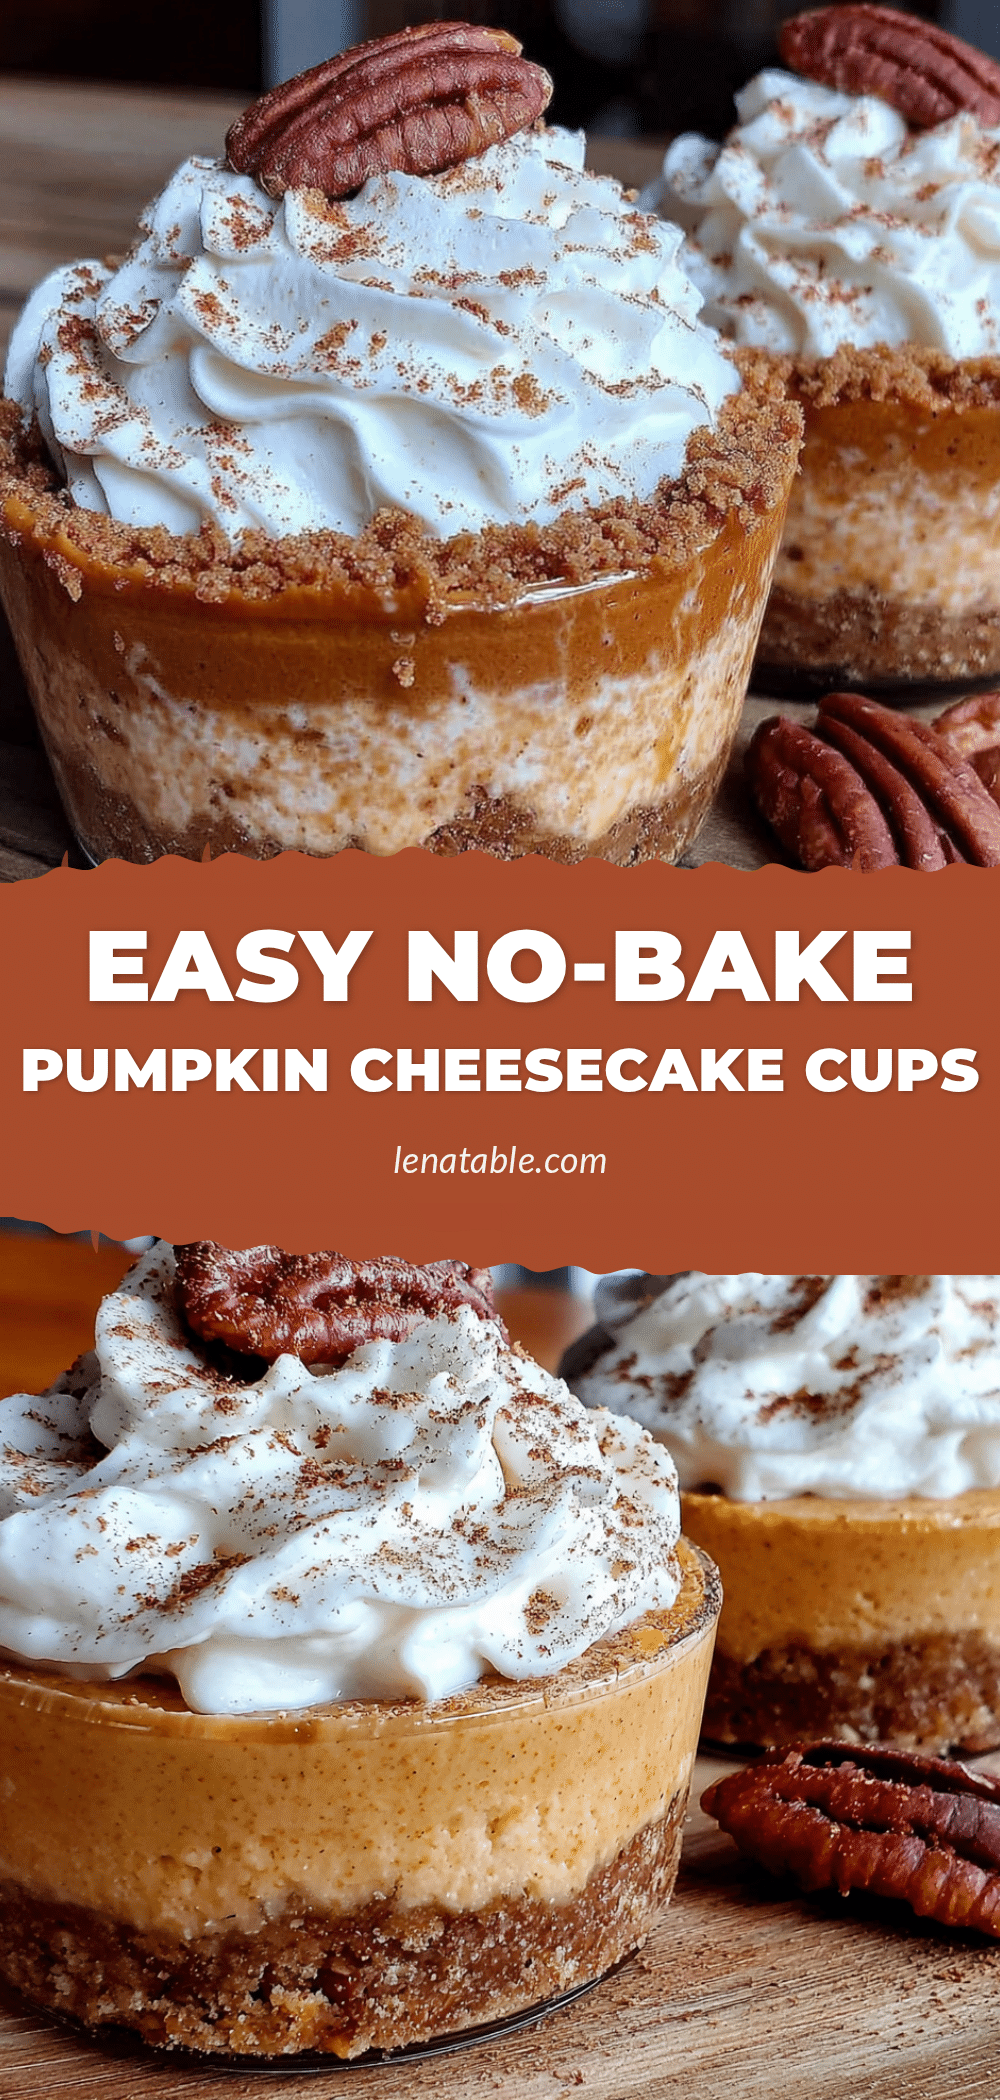
Easy No-Bake Pumpkin Cheesecake Cups: Best 10-Minute Dessert
These no-bake pumpkin cheesecake cups are a quick and easy fall dessert that comes together in just 10 minutes. Creamy pumpkin filling, buttery graham cracker crust, and a dollop of whipped cream make for a perfect treat without turning on the oven.
- Prep Time: 10 minutes
- Cook Time: 0 minutes
- Total Time: 4 hours 10 minutes (includes chilling)
- Yield: 8 servings 1x
- Category: Dessert
- Cuisine: American
Ingredients
- 1 ½ cups graham cracker crumbs (about 10–12 full sheets)
- ¼ cup granulated sugar
- 6 tablespoons unsalted butter, melted
- Pinch of salt
- 8 ounces cream cheese, softened
- ½ cup pumpkin puree (not pumpkin pie filling)
- ½ cup powdered sugar
- 1 teaspoon vanilla extract
- 1 teaspoon pumpkin pie spice
- ½ teaspoon ground cinnamon
- 1 cup heavy whipping cream
- ¼ cup heavy whipping cream (for topping)
- 1 tablespoon powdered sugar (for topping)
- ¼ teaspoon vanilla extract (for topping)
- Crushed graham crackers or chopped pecans (for garnish)
- Caramel sauce (optional, for drizzling)
Instructions
- Make the crust: In a medium bowl, combine graham cracker crumbs, sugar, and salt. Pour in melted butter and stir with a fork until the mixture looks like wet sand and holds together when squeezed. Set aside about 2 tablespoons for garnish.
- Divide the crust among 6 to 8 small cups (about 2 tablespoons each). Press down firmly using the bottom of a small glass or spoon. Place cups in the refrigerator while making the filling.
- Whip the cream: In a large bowl, beat 1 cup heavy whipping cream on medium-high speed until soft peaks form, about 2-3 minutes. Set aside in the refrigerator.
- Beat the cream cheese: In another large bowl, beat softened cream cheese on medium speed until smooth and creamy, about 1 minute. Scrape down sides and bottom.
- Add pumpkin and sugar: Add pumpkin puree, powdered sugar, vanilla extract, pumpkin pie spice, and cinnamon. Beat on medium speed until combined and smooth, about 1 minute. Scrape bowl again.
- Fold in whipped cream: Remove whipped cream from fridge. Add one-third to the pumpkin mixture and gently fold with a rubber spatula until mostly combined. Add remaining whipped cream and fold until no white streaks remain. Do not over-mix.
- Fill the cups: Remove cups with crust from refrigerator. Spoon or pipe the pumpkin cheesecake filling into each cup, dividing evenly. Fill to about ¼ inch from the top. Tap cups gently on counter to settle filling.
- Chill: Place filled cups in refrigerator for at least 4 hours, preferably overnight, until filling is firm.
- Make the topping: Just before serving, whip remaining ¼ cup heavy cream with 1 tablespoon powdered sugar and ¼ teaspoon vanilla until soft peaks form. Dollop or pipe onto each cup.
- Garnish and serve: Sprinkle with reserved graham cracker crumbs and chopped pecans if desired. Drizzle with caramel sauce. Serve cold.
Notes
Room temperature cream cheese is essential for a smooth filling. Do not skip the chilling time—at least 4 hours, but overnight is best. Use pure pumpkin puree, not pumpkin pie filling. For dairy-free, use dairy-free cream cheese and chilled coconut cream. For gluten-free, use gluten-free graham crackers.
Nutrition
- Serving Size: 1 cup (about 6 ounce
- Calories: 320
- Sugar: 15
- Sodium: 220
- Fat: 24
- Saturated Fat: 14
- Carbohydrates: 24
- Fiber: 2
- Protein: 4
Keywords: no-bake pumpkin cheesecake, pumpkin dessert, easy fall dessert, no-bake dessert, pumpkin cheesecake cups, 10-minute dessert


