Love this? Save it for later!
Share the inspiration with your friends
I was standing in line at the DMV — that gray, soul-crushing place where time goes to die — when the woman behind the counter started talking about cake. Not just any cake, mind you. She was describing a Neapolitan layer cake with such detail and passion that I almost forgot why I was there. Her name tag said Brenda, and she had been making this cake for her grandson’s birthday for the last fifteen years. She told me the secret was in how you layer the batters, and that most people mess it up by being too careful. I scribbled her instructions on the back of an expired registration form.
Honestly, I didn’t expect much. I mean, the recipe came from a DMV employee. But let me tell you — that first bite of this show-stopping Neapolitan layer cake made me call my mom immediately. The way the chocolate, vanilla, and strawberry flavors melt together is pure magic. It’s not just a pretty cake; it’s the kind of dessert that makes people close their eyes and go quiet for a second.
Maybe you’ve been there — searching for that one cake that feels special enough for a birthday but approachable enough for a Tuesday night. This is it. The layers aren’t complicated, and the whole thing comes together without any fancy pastry skills. I’ve made it for three birthdays since that DMV visit, and every single time, someone asks for the recipe. Brenda, wherever you are, thank you. This Neapolitan layer cake is now my signature move, and I’m pretty sure it’s about to become yours too.
Why You’ll Love This Recipe
This isn’t just another cake recipe. This is the one that stops conversations and starts new traditions. I’ve tested this Neapolitan layer cake at least a dozen times — tweaking the moisture level, adjusting the strawberry intensity, and perfecting the crumb structure. It passed the ultimate test: my picky neighbor, who claims to hate strawberry-flavored anything, asked for seconds.
- Quick & Easy: From start to finish, you’re looking at about an hour of active work. The batter comes together in one bowl, and you don’t need a stand mixer if you’ve got decent arm strength.
- Simple Ingredients: No hunting down obscure extracts or specialty flours. Butter, sugar, eggs, flour, cocoa powder, and freeze-dried strawberries — that’s the backbone of this beauty.
- Perfect for Celebrations: Birthdays, anniversaries, or just a Tuesday that needs some redemption. This cake turns any moment into an occasion.
- Crowd-Pleaser: Three flavors in one cake means there’s something for everyone. The chocolate lovers get their fix, the vanilla purists are happy, and the fruit fans are over the moon.
- Unbelievably Delicious: The texture is what gets me every time. It’s tender but sturdy enough to hold those layers, and the homemade strawberry puree makes all the difference. Skip the artificial stuff — trust me on this.
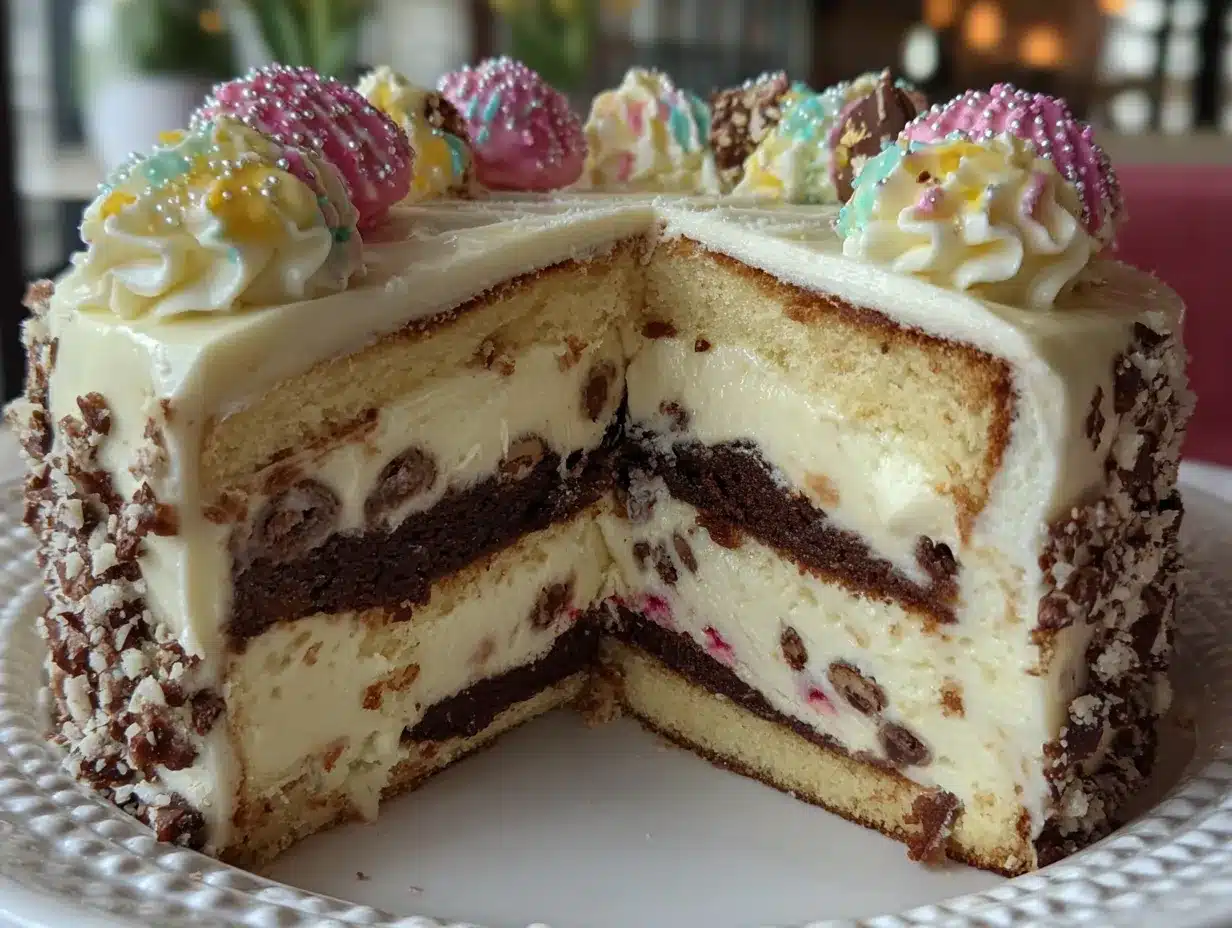
What sets this Neapolitan layer cake apart is the technique. Instead of just swirling the batters together, we’re building distinct layers that stay true to their individual flavors. The strawberry layer gets real fruit, the chocolate layer is deeply rich, and the vanilla layer is anything but boring. It’s the best version of a classic, and once you make it, you’ll never go back to the store-bought stuff.
What Ingredients You Will Need
This recipe relies on a handful of quality ingredients to deliver big flavor. Most of these are pantry staples, but the freeze-dried strawberries are the secret weapon — they pack intense strawberry flavor without adding extra liquid that would mess up the cake’s texture.
For the Cake Layers
- 3 cups (360g) all-purpose flour — spoon and level for accuracy
- 2 ½ teaspoons baking powder
- ½ teaspoon baking soda
- 1 teaspoon salt
- 1 cup (226g) unsalted butter, softened — I use Kerrygold for the richness
- 2 cups (400g) granulated sugar
- 4 large eggs, room temperature
- 1 tablespoon vanilla extract — pure, not imitation
- 1 ½ cups (360ml) buttermilk, room temperature — full-fat works best
For the Chocolate Layer
- ⅓ cup (40g) unsweetened cocoa powder — Dutch-process for deeper flavor
- 3 tablespoons hot water
For the Strawberry Layer
- 1 cup (30g) freeze-dried strawberries, ground to powder
- 3 tablespoons strawberry puree — from fresh or frozen strawberries (see note below)
For the Vanilla Buttercream Frosting
- 2 cups (452g) unsalted butter, softened
- 6 cups (720g) powdered sugar, sifted
- ¼ cup (60ml) heavy cream
- 2 teaspoons vanilla extract
- Pinch of salt
For Decoration (Optional)
- ½ cup chocolate shavings — use a vegetable peeler on a chocolate bar
- Fresh strawberries, halved
- Additional freeze-dried strawberry powder for dusting
Ingredient Note: For the strawberry puree, simply blend about ½ cup of fresh or thawed frozen strawberries until smooth. Strain out the seeds if you’re feeling fancy — I usually skip this step because I don’t mind the texture. You’ll need about 3 tablespoons for the cake batter. If you can’t find freeze-dried strawberries, you can substitute ¼ cup of strawberry jam (reduce the sugar in the batter by 2 tablespoons), but the flavor won’t be as intense. I’ve tried both, and the freeze-dried route is definitely superior.
Equipment Needed
You don’t need a professional bakery setup for this Neapolitan layer cake, but having the right tools makes the process smoother. Here’s what you’ll need:
- Three 8-inch round cake pans — I prefer light-colored metal pans for even baking. Dark pans can cause the edges to brown too quickly.
- Electric hand mixer or stand mixer — A hand mixer works perfectly fine. I’ve made this cake with both, and honestly, the hand mixer is easier to clean.
- Parchment paper — Cut circles for the bottom of each pan. Non-stick spray alone isn’t enough.
- Cooling racks — Essential for letting the layers cool completely before frosting. If you don’t have racks, you can use the inverted baking pans.
- Offset spatula — For smooth frosting application. A butter knife works in a pinch, but the spatula gives you that bakery-finish look.
- Food processor or blender — To grind the freeze-dried strawberries into powder. A rolling pin and a zip-top bag also work if you’re feeling rustic.
- Kitchen scale — Not mandatory, but weighing your flour guarantees consistent results. I’ve had too many dense cakes from over-measuring with cups.
Budget Tip: If you don’t have three 8-inch pans, you can bake the layers one at a time. Just let the batter sit at room temperature while the first layer bakes — it will be fine. I’ve done this when my pans were in the dishwasher, and the cake still turned out beautifully.
Preparation Method
Take your time with this one. The process is straightforward, but rushing through the steps will leave you with uneven layers. I learned this the hard way during my second attempt — my chocolate layer was twice as thick as the vanilla, and the whole cake looked like a Leaning Tower of Pisa situation.
- Preheat and Prep: Preheat your oven to 350°F (175°C). Grease three 8-inch round cake pans, line the bottoms with parchment paper, and dust the sides lightly with flour. Set them aside.
- Mix Dry Ingredients: In a medium bowl, whisk together the flour, baking powder, baking soda, and salt. This ensures even distribution of the leavening agents — no one wants a pocket of baking powder in their cake.
- Cream Butter and Sugar: In a large bowl, beat the softened butter and granulated sugar together until light and fluffy, about 3-4 minutes. Scrape down the sides halfway through. The mixture should look pale and almost doubled in volume.
- Add Eggs and Vanilla: Add the eggs one at a time, beating well after each addition. Stir in the vanilla extract. Don’t worry if the mixture looks slightly curdled at this point — it will come together once you add the flour.
- Alternate Dry and Wet: Add the flour mixture in three additions, alternating with the buttermilk. Start and end with the flour. Mix until just combined — overmixing will give you a tough cake. I usually stop when I can still see a few streaks of flour and finish mixing by hand with a spatula.
- Divide the Batter: Weigh or measure the batter into three equal portions — about 500g each. This is where precision matters. I use a kitchen scale, but you can also use a measuring cup. Eyeballing it will lead to uneven layers, and trust me, you’ll notice when you start stacking.
- Prepare the Chocolate Layer: In a small bowl, whisk the cocoa powder with the hot water until smooth. Fold this mixture into one portion of the batter until fully incorporated. The batter will thicken slightly — that’s normal.
- Prepare the Strawberry Layer: In another bowl, mix the ground freeze-dried strawberry powder with the strawberry puree until it forms a paste. Fold this into the second portion of batter. The color should be a soft pink — if it looks too pale, add a tiny drop of red food coloring. I usually skip the coloring because I like the natural look.
- Keep the Vanilla Layer Plain: The third portion stays as is. This is your vanilla layer.
- Bake the Layers: Pour each batter into a prepared pan and spread evenly. Bake for 22-28 minutes, rotating the pans halfway through. The cakes are done when a toothpick inserted in the center comes out with a few moist crumbs. Let them cool in the pans for 10 minutes, then transfer to wire racks to cool completely. Warning: Do not attempt to frost these while they’re even slightly warm. I ruined an entire batch of frosting this way — it melted into a greasy mess.
- Make the Frosting: While the cakes cool, beat the softened butter on medium speed until smooth and creamy, about 2 minutes. Gradually add the sifted powdered sugar, one cup at a time, beating on low speed. Add the heavy cream, vanilla extract, and salt. Increase the speed to medium-high and beat for 3-4 minutes until the frosting is light and fluffy. If it’s too stiff, add another tablespoon of cream. Too soft? Add a bit more powdered sugar.
- Assemble the Cake: Place one cooled cake layer on your serving plate (chocolate, strawberry, or vanilla — your choice for the bottom). Spread about ¾ cup of frosting evenly on top. Repeat with the second and third layers. Apply a thin crumb coat — just enough to seal in the crumbs — and refrigerate for 20 minutes. This step makes the final frosting layer look clean and professional.
- Frost and Decorate: Apply the remaining frosting to the chilled cake, using an offset spatula for smooth sides. Top with chocolate shavings, fresh strawberries, and a dusting of strawberry powder if desired. Stand back and admire your work.
Cooking Tips & Techniques
I’ve made this Neapolitan layer cake enough times to know where things can go wrong. Here are the lessons I learned the hard way so you don’t have to:
Room Temperature Ingredients Matter: I know it’s annoying to wait for eggs and buttermilk to warm up, but cold ingredients don’t emulsify properly. Your batter will look curdled, and the cake will bake up dense. Set everything out an hour before you start. If you forget — like I do half the time — place the eggs in a bowl of warm water for 5 minutes and microwave the buttermilk for 15 seconds.
Don’t Overmix the Strawberry Layer: The freeze-dried strawberry powder can make the batter a bit thick, and it’s tempting to keep mixing to smooth it out. Stop as soon as the pink color is even. Overmixing develops gluten, and you’ll end up with a tough strawberry layer. I speak from experience — my first attempt was more like strawberry hockey puck.
Level Your Layers: Even if your cakes bake up with domed tops, use a serrated knife to level them before stacking. A wobbly cake is a sad cake. I use a gentle sawing motion and check my progress every few cuts. You can save the scraps for cake truffles or just eat them — no judgment here.
Chill Between Steps: That 20-minute chill after the crumb coat isn’t optional. It firms up the frosting so the final layer goes on without dragging crumbs everywhere. I’ve skipped this step when I was in a hurry, and I ended up with a speckled mess that looked like a dalmatian.
Use a Turntable if You Have One: A lazy Susan or cake turntable makes frosting the sides infinitely easier. If you don’t have one, place the cake plate on an inverted bowl — it gives you the same rotating effect. I used this trick for years before I invested in a proper turntable.
Variations & Adaptations
This Neapolitan layer cake is incredibly adaptable. Here are some variations I’ve tried and loved:
Gluten-Free Version: Substitute the all-purpose flour with a 1:1 gluten-free baking flour blend. I’ve used King Arthur’s Measure for Measure blend with great results. Add an extra tablespoon of buttermilk to compensate for the drier gluten-free flour. The texture will be slightly more tender, but the flavor is spot on.
Dairy-Free Adaptation: Replace the butter in the cake with vegan butter sticks (not the spreadable kind) and use almond milk mixed with a teaspoon of apple cider vinegar instead of buttermilk. For the frosting, use vegan butter and canned coconut cream instead of heavy cream. The strawberry layer works perfectly with these swaps — I made this version for a friend with dairy allergies, and she couldn’t tell the difference.
Berry Swap: Not a strawberry fan? Use freeze-dried raspberries or blueberries instead. The technique is exactly the same — grind the freeze-dried berries into powder and mix with a little puree. Raspberry gives the cake a slightly tart edge that balances beautifully with the chocolate layer.
Cupcake Version: This batter makes about 24 cupcakes. Divide the batter into three bowls and flavor as directed. Layer the batters in each cupcake liner — a tablespoon of each flavor — and bake for 18-20 minutes. Top with a swirl of vanilla buttercream and a fresh berry. Perfect for parties where you don’t want to deal with slicing a cake.
Chocolate Ganache Drip: For an extra show-stopping look, skip the chocolate shavings and drizzle a chocolate ganache over the top of the frosted cake. Heat ½ cup of heavy cream until simmering, pour over 4 ounces of chopped dark chocolate, and let it sit for 2 minutes before stirring until smooth. Let it cool slightly, then pour over the center of the cake and let it drip down the sides.
Serving & Storage Suggestions
This Neapolitan layer cake is best served at room temperature. Cold cake from the fridge tastes fine, but the buttercream gets firm and the cake loses some of its tenderness. Let it sit out for about 30 minutes before slicing. Use a sharp, thin-bladed knife and wipe it clean between cuts for the prettiest slices.
What to Serve With It: A scoop of vanilla bean ice cream is the classic pairing, but I’m partial to a dollop of lightly sweetened whipped cream. For a coffee pairing, a cappuccino or a dark roast coffee cuts through the sweetness perfectly. If you’re feeling extra, a glass of cold milk is never a bad choice.
Storage Instructions: Store the cake in an airtight container at room temperature for up to 2 days. Beyond that, refrigerate it for up to 5 days. The cake actually tastes better on day two — the flavors meld together and the strawberry layer gets even more fragrant. I’ve tested this extensively, and day two is my favorite.
Freezing Instructions: You can freeze the unfrosted cake layers for up to 3 months. Wrap each cooled layer tightly in plastic wrap, then in aluminum foil. Thaw at room temperature before frosting. The frosted cake can also be frozen — place it in the freezer uncovered for 1 hour until the frosting is firm, then wrap in plastic wrap and foil. Thaw in the refrigerator overnight.
Reheating Tip: If you prefer your cake slightly warm (I do, especially with the chocolate layer), microwave individual slices for 10-15 seconds. The buttercream will soften, and the cake will taste freshly baked. Just don’t overdo it — 30 seconds will turn your beautiful slice into a puddle.
Nutritional Information & Benefits
Let’s be real — this is a celebration cake, not a health food. But knowing what’s in it helps you enjoy it mindfully. Here’s the approximate nutritional breakdown per slice (based on 12 servings):
- Calories: 620
- Fat: 34g
- Carbohydrates: 78g
- Protein: 6g
- Sugar: 58g
- Fiber: 2g
Health Highlights: The strawberry layer provides a small amount of vitamin C from the real fruit. The cocoa powder in the chocolate layer contains antioxidants called flavonoids, which support heart health in moderation. The buttermilk adds calcium and a bit of protein. Honestly, I tell myself that the eggs make it a breakfast food — but that’s just my personal justification for having a slice with my morning coffee.
Dietary Considerations: This recipe contains dairy, eggs, and gluten. For allergen-friendly versions, check the variations section above. It’s not suitable for vegan or nut-free diets without modifications. If you’re watching your sugar intake, you can reduce the sugar in the cake batter by ¼ cup without affecting the texture too much — but the frosting needs the full amount for stability.
Conclusion
This Neapolitan layer cake is more than just a dessert — it’s a conversation starter, a memory maker, and honestly, the best way I know to make people feel special. Every time I make it, I think about Brenda at the DMV, and how a random moment turned into one of my favorite recipes. That’s the thing about cooking — you never know where the best ideas will come from.
I hope you give this cake a try. Don’t stress about making it perfect — the imperfections are what make it yours. Maybe your strawberry layer is a little thicker on one side, or your frosting swirls aren’t magazine-worthy. That’s okay. It will still taste incredible, and the people you share it with will remember the love you put into it, not the tiny flaws.
If you make this Neapolitan layer cake, I’d love to hear about it. Drop a comment below and tell me how it turned out — did you add your own twist? Did someone ask for the recipe? Share your photos and tag me on social media. I read every single comment, and nothing makes me happier than knowing this cake brought a little sweetness into your kitchen. Now go preheat that oven — your show-stopping cake is waiting.
Frequently Asked Questions
Can I use a boxed cake mix for this Neapolitan layer cake?
Technically yes, but the flavor and texture won’t be the same. The homemade version has a tender crumb and distinct layers that box mixes just can’t replicate. If you’re short on time, use a white cake mix for the base and flavor two-thirds of it with cocoa and strawberry as directed. It’s a decent shortcut, but I’d save it for a weeknight, not a special occasion.
Why did my strawberry layer turn out dry?
This usually happens when the freeze-dried strawberry powder absorbs too much moisture from the batter. Make sure you’re grinding the strawberries into a fine powder — large chunks will create dry spots. Also, don’t overbake the strawberry layer. Check it at the 22-minute mark. If a toothpick comes out clean, it’s done, even if it looks slightly underdone in the center.
Can I make this cake a day ahead?
Absolutely. In fact, I prefer it. Assemble and frost the cake, then refrigerate it overnight. The flavors meld together beautifully, and the cake becomes even more moist. Just let it sit at room temperature for 30 minutes before serving. The only thing I don’t recommend is adding the fresh strawberry garnish until right before serving — they’ll release moisture and make the frosting weepy.
How do I get clean, even layers when slicing the cake?
Use a long, serrated knife and a gentle sawing motion. Chill the cake for 15 minutes in the freezer before slicing — it firms up the frosting and cake, making clean cuts easier. Wipe the knife clean between each slice. For perfectly even portions, mark the cake with toothpicks before cutting. I learned this trick from a pastry chef, and it’s a game-changer.
My chocolate layer is always denser than the others. What am I doing wrong?
The cocoa powder absorbs more liquid than the other flavorings, which can make the chocolate batter thicker. To fix this, add an extra tablespoon of buttermilk to the chocolate batter when you’re mixing in the cocoa paste. Also, make sure your cocoa powder is fresh — old cocoa loses its potency and can make the cake taste flat. I store my cocoa powder in a sealed container in a cool, dark cabinet.
Pin This Recipe!
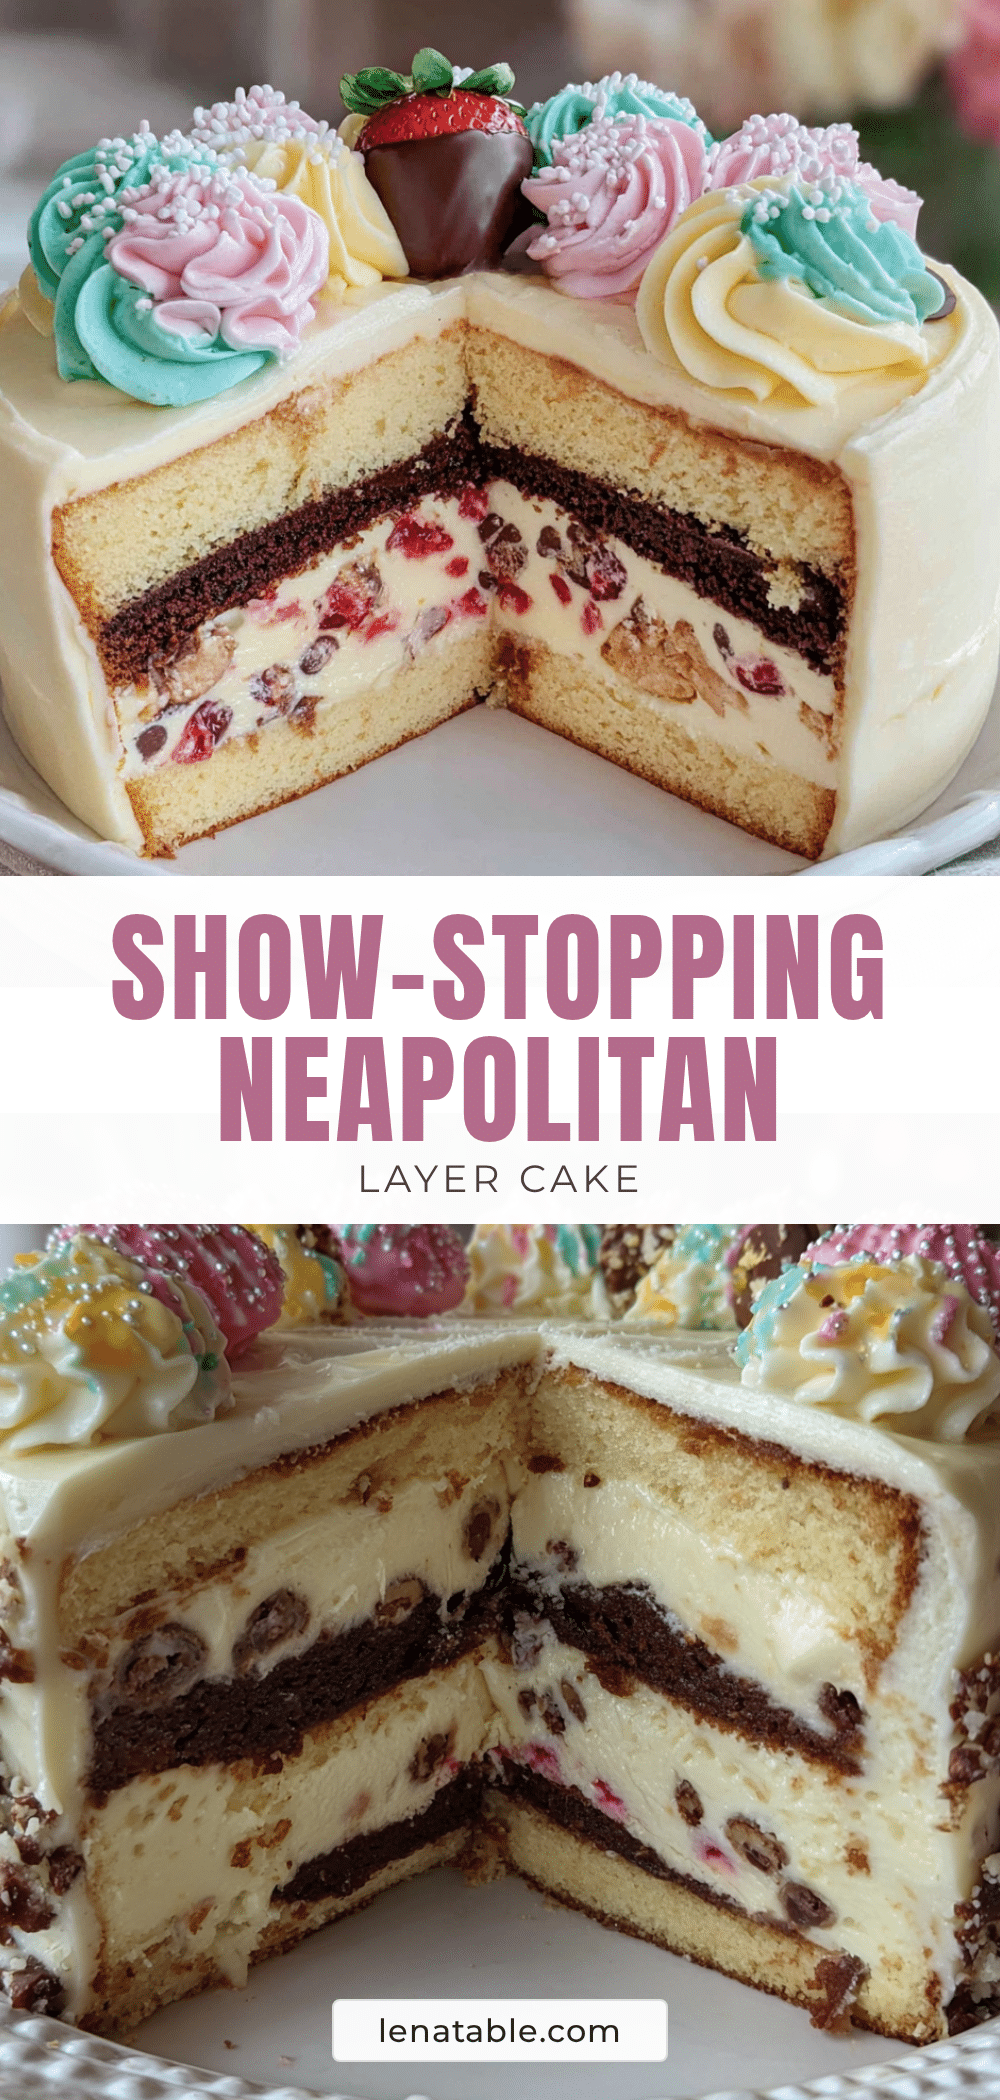
Best Homemade Neapolitan Layer Cake Recipe
A show-stopping Neapolitan layer cake with distinct chocolate, vanilla, and strawberry layers, topped with vanilla buttercream. Perfect for celebrations and guaranteed to impress.
- Prep Time: 1 hour
- Cook Time: 25 minutes
- Total Time: 1 hour 25 minutes
- Yield: 12 servings 1x
- Category: Dessert
- Cuisine: American
Ingredients
- 3 cups (360g) all-purpose flour
- 2 ½ teaspoons baking powder
- ½ teaspoon baking soda
- 1 teaspoon salt
- 1 cup (226g) unsalted butter, softened
- 2 cups (400g) granulated sugar
- 4 large eggs, room temperature
- 1 tablespoon vanilla extract
- 1 ½ cups (360ml) buttermilk, room temperature
- ⅓ cup (40g) unsweetened cocoa powder
- 3 tablespoons hot water
- 1 cup (30g) freeze-dried strawberries, ground to powder
- 3 tablespoons strawberry puree
- 2 cups (452g) unsalted butter, softened (for frosting)
- 6 cups (720g) powdered sugar, sifted
- ¼ cup (60ml) heavy cream
- 2 teaspoons vanilla extract
- Pinch of salt
- ½ cup chocolate shavings (optional)
- Fresh strawberries, halved (optional)
- Additional freeze-dried strawberry powder for dusting (optional)
Instructions
- Preheat oven to 350°F (175°C). Grease three 8-inch round cake pans, line bottoms with parchment paper, and dust sides lightly with flour.
- In a medium bowl, whisk together flour, baking powder, baking soda, and salt.
- In a large bowl, beat softened butter and granulated sugar until light and fluffy, about 3-4 minutes. Scrape down sides halfway through.
- Add eggs one at a time, beating well after each addition. Stir in vanilla extract.
- Add flour mixture in three additions, alternating with buttermilk, starting and ending with flour. Mix until just combined.
- Divide batter into three equal portions (about 500g each).
- For chocolate layer: whisk cocoa powder with hot water until smooth, then fold into one portion of batter.
- For strawberry layer: mix ground freeze-dried strawberry powder with strawberry puree to form a paste, then fold into second portion of batter.
- Keep third portion plain for vanilla layer.
- Pour each batter into prepared pans and spread evenly. Bake for 22-28 minutes, rotating pans halfway through. Cool in pans for 10 minutes, then transfer to wire racks to cool completely.
- For frosting: beat softened butter on medium speed until smooth and creamy, about 2 minutes. Gradually add sifted powdered sugar, one cup at a time, beating on low. Add heavy cream, vanilla extract, and salt. Increase speed to medium-high and beat for 3-4 minutes until light and fluffy.
- Assemble cake: place one cooled layer on serving plate, spread about ¾ cup frosting on top. Repeat with remaining layers. Apply thin crumb coat and refrigerate for 20 minutes.
- Apply remaining frosting to chilled cake. Decorate with chocolate shavings, fresh strawberries, and strawberry powder if desired.
Notes
Room temperature ingredients are crucial for proper emulsification. Do not overmix the strawberry layer. Level cake layers if domed. Chill cake after crumb coat for clean frosting. Cake tastes even better on day two.
Nutrition
- Serving Size: 1 slice
- Calories: 620
- Sugar: 58
- Fat: 34
- Carbohydrates: 78
- Fiber: 2
- Protein: 6
Keywords: Neapolitan cake, layer cake, chocolate, vanilla, strawberry, birthday cake, celebration cake


