Love this? Save it for later!
Share the inspiration with your friends
I wasn’t planning on baking anything that Tuesday. I’d stopped by my neighbor Maria’s house to borrow a cup of sugar—how cliché, right?—and the smell hit me before she even opened the screen door. Warm cinnamon, nutmeg, and something sweet and earthy I couldn’t quite place. It smelled like fall had exploded in her tiny kitchen.
Maria wasn’t trying to impress me. She was in sweatpants, stirring something in a single bowl with a wooden spoon, and she barely looked up when I walked in. “Oh, it’s just that pumpkin banana bread I throw together when the bananas get ugly,” she said, like it was nothing. Like she hadn’t just created the most intoxicating aroma I’d encountered all month. I stood there holding my empty measuring cup, completely distracted, watching her scrape the batter into a loaf pan with this casual, one-handed flick of her wrist.
Honestly, that’s how the best recipes find you—when someone isn’t trying. Maria didn’t have a fancy stand mixer. She didn’t have a recipe card taped to the cabinet. She just had brown bananas, a can of pumpkin puree, and this easy one-bowl pumpkin banana bread method she’d figured out during a chaotic week when her kids needed snacks and she had zero energy to wash multiple dishes. I mean, maybe you’ve been there—staring at overripe bananas and a can of pumpkin, wondering if they could actually become something delicious together.
She sliced me a warm piece before I left, and I almost forgot about the sugar entirely. The bread was impossibly moist, perfectly spiced, and had this tender crumb that felt almost cake-like. I’ve been making it ever since, and I still think about that Tuesday afternoon whenever the smell fills my own kitchen. This is one of those recipes that proves you don’t need fancy equipment or a culinary degree to make something absolutely unforgettable.
Why You’ll Love This Recipe
Let me tell you why this easy one-bowl pumpkin banana bread has become my go-to for everything from lazy Sunday mornings to last-minute potluck contributions. I’ve tested this recipe at least a dozen times, tweaking the ratios, playing with the spice blend, and even accidentally leaving out the sugar once (don’t ask). What I landed on is genuinely foolproof.
- No Mixer Required: You don’t need a stand mixer, hand mixer, or any fancy gadget. Just one bowl and a wooden spoon or spatula. Less cleanup, more sanity.
- Simple Pantry Ingredients: You probably already have flour, sugar, baking soda, and spices in your cabinet. The pumpkin and bananas are the only “special” items, and they’re easy to keep on hand.
- Perfect for Fall Mornings: This bread tastes like autumn in sliceable form. It’s cozy enough for a chilly October breakfast but simple enough to bake year-round.
- Crowd-Pleaser Status: I’ve brought this to brunches, work gatherings, and family dinners. It disappears fast. Kids love it, adults love it, and people always ask for the recipe.
- Unbelievably Moist: The combination of pumpkin puree and mashed bananas creates a texture that’s almost pudding-like in its tenderness. You won’t need butter or cream cheese to enjoy a slice—though it certainly doesn’t hurt.
What makes this recipe different from the dozens of pumpkin breads out there is the double-fruit approach. Most recipes rely on pumpkin alone, which can sometimes turn out a little dense or dry. The bananas add natural sweetness, moisture, and a subtle flavor that complements the pumpkin without overpowering it. It’s not just another version—it’s the version I keep coming back to.
This bread is the kind that makes you close your eyes after the first bite. It’s comfort food reimagined—simpler, faster, and somehow more satisfying than anything you’d buy at a bakery. Perfect for impressing guests without breaking a sweat, or turning a regular Tuesday into something worth remembering.
What Ingredients You Will Need
This recipe keeps things refreshingly simple. You’ll use basic baking staples plus two star ingredients that do all the heavy lifting. Let me walk you through each one so you know exactly what to grab.
- All-Purpose Flour – 1 ¾ cups (210 grams). Standard all-purpose flour works perfectly here. I’ve tested this with King Arthur Flour and Gold Medal, both give great results. If you want a whole wheat option, swap half the flour for whole wheat pastry flour—don’t go full whole wheat or the bread gets heavy.
- Granulated Sugar – ¾ cup (150 grams). Regular white sugar keeps the bread tender. You can use coconut sugar for a deeper flavor, but the texture will be slightly denser.
- Light Brown Sugar – ½ cup (100 grams), packed. This adds moisture and a subtle molasses note that pairs beautifully with pumpkin. Dark brown sugar works too if that’s what you have.
- Pumpkin Puree – 1 cup (240 grams). Make sure you grab pure pumpkin puree, not pumpkin pie filling. The filling has added sugar and spices that will throw off the balance. I usually buy Libby’s, but store brands work fine too.
- Ripe Bananas – 2 medium (about 1 cup mashed, 240 grams). The riper the better. You want bananas with lots of brown spots—they’re sweeter and easier to mash. If your bananas aren’t ripe yet, pop them in a 300°F oven for 10-15 minutes until the skins turn black.
- Large Eggs – 2, at room temperature. Eggs bind everything together and add richness. If you forgot to set them out, place them in a bowl of warm water for 5 minutes before using.
- Vegetable Oil – ½ cup (120 ml). Oil keeps this bread incredibly moist. I use avocado oil for a neutral flavor, but canola or melted coconut oil work too. Avoid olive oil—the flavor is too strong here.
- Vanilla Extract – 1 teaspoon. Pure vanilla extract adds warmth and depth. Imitation vanilla is fine in a pinch, but the real stuff makes a noticeable difference.
- Baking Soda – 1 teaspoon. This is your leavening agent. Make sure it’s fresh—test it by dropping a pinch into vinegar; it should fizz immediately.
- Ground Cinnamon – 1 ½ teaspoons. The backbone of the spice blend. I prefer Saigon cinnamon for its bold, slightly sweet heat.
- Ground Nutmeg – ½ teaspoon. Freshly grated nutmeg is incredible if you have it, but pre-ground works just fine.
- Ground Ginger – ½ teaspoon. Adds a gentle warmth that most pumpkin breads miss. Don’t skip it—it’s the secret to that “what is that amazing flavor?” reaction.
- Salt – ½ teaspoon. Balances the sweetness and enhances all the flavors. I use fine sea salt.
Optional Add-Ins: ½ cup chopped walnuts or pecans for crunch, or ½ cup chocolate chips for a sweeter twist. I often toss in a handful of dark chocolate chips when I’m feeling indulgent.
Equipment Needed
The beauty of this recipe is how little equipment it requires. You probably have everything already.
- Large Mixing Bowl – Any medium-to-large bowl works. I use a standard ceramic mixing bowl that’s about 3 quarts. Glass or stainless steel is fine too.
- Wooden Spoon or Rubber Spatula – A sturdy spoon for mixing the batter. I prefer a spatula because it scrapes the sides clean, but a wooden spoon is what Maria used, so either works.
- 9×5-inch Loaf Pan – This is the standard size for most banana bread recipes. If you only have an 8×4-inch pan, increase the baking time by 5-10 minutes and check for doneness early.
- Parchment Paper – Not strictly necessary, but it makes lifting the bread out of the pan so much easier. I always line my loaf pan with a parchment sling—just two long strips crisscrossed at the bottom.
- Measuring Cups and Spoons – For dry and wet ingredients. A kitchen scale is optional but helpful for consistent results, especially with flour.
- Fork or Potato Masher – For mashing the bananas. A fork works perfectly, but a potato masher is faster if you’re making multiple loaves.
- Cooling Rack – Essential for letting the bread cool evenly. If you don’t have one, you can use the inverted loaf pan with some space underneath, but a wire rack is better.
One tip I learned the hard way: spray your parchment paper with non-stick spray too, not just the pan. The sugar in this bread can stick to exposed paper, and you’ll lose a chunk of the crust. Trust me on this one.
Preparation Method
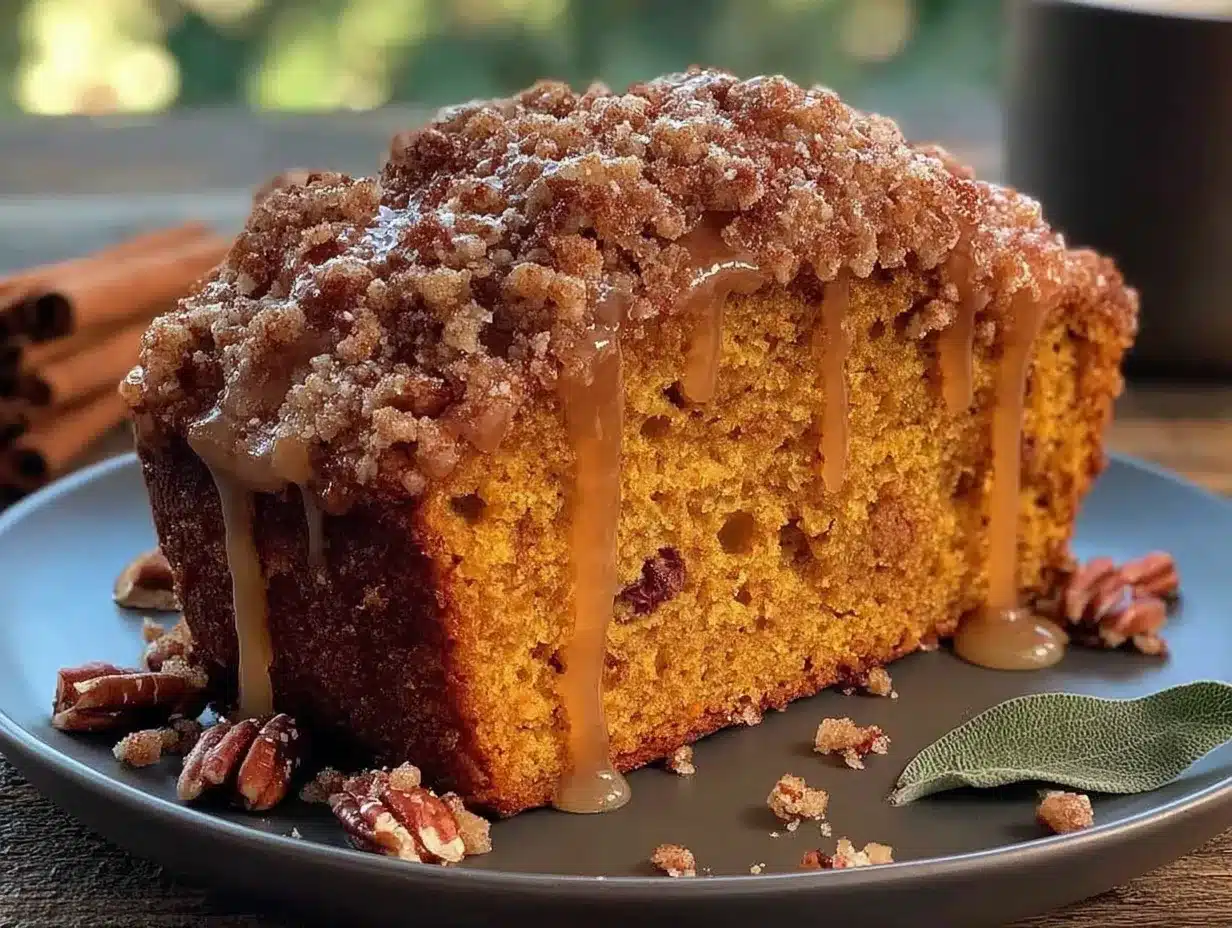
Let me walk you through this step by step. I’ve included all the little details I wish someone had told me the first time I made it.
- Preheat your oven to 350°F (175°C). Position the rack in the center of the oven. While it’s heating, line your 9×5-inch loaf pan with parchment paper, leaving a couple inches of overhang on the long sides. Spray the parchment lightly with non-stick cooking spray.
- Mash the bananas. In your large mixing bowl, add the two ripe bananas. Mash them thoroughly with a fork or potato masher until they’re mostly smooth with just a few small lumps. You want about 1 cup of mashed banana. Don’t over-mash into a liquid—small chunks add nice texture to the finished bread.
- Add the wet ingredients. To the mashed bananas, add the pumpkin puree, both sugars, vegetable oil, eggs, and vanilla extract. Whisk or stir with your wooden spoon until everything is well combined. The mixture should look smooth and slightly glossy. Take a moment to scrape the bottom of the bowl—sugar can hide down there.
- Add the dry ingredients. Sprinkle the flour, baking soda, salt, cinnamon, nutmeg, and ginger evenly over the wet mixture. Don’t dump them all in one pile—spreading them out helps incorporate more evenly with less mixing.
- Mix until just combined. Fold the dry ingredients into the wet using gentle strokes. Stop mixing as soon as you no longer see streaks of flour. A few small lumps are totally fine. Over-mixing at this stage will develop the gluten too much and make your bread tough. I usually count about 12-15 folds with my spatula.
- Fold in any add-ins. If you’re using nuts or chocolate chips, gently fold them in now with a few extra strokes. Don’t overwork the batter.
- Pour the batter into the prepared pan. Use your spatula to scrape every last bit of batter into the loaf pan. Spread it evenly, gently smoothing the top. Give the pan a couple gentle taps on the counter to release any air bubbles.
- Bake for 50-60 minutes. Place the pan in the preheated oven and bake until a toothpick inserted into the center comes out clean or with just a few moist crumbs. Start checking at 50 minutes. The top should be golden brown and spring back lightly when touched.
- Cool in the pan for 10 minutes. Set the loaf pan on a wire rack and let it cool for exactly 10 minutes. This allows the bread to set so it doesn’t fall apart when you remove it.
- Remove and cool completely. Use the parchment sling to lift the bread out of the pan and onto the wire rack. Let it cool completely before slicing—at least 1 hour. I know it’s tempting to cut into it warm, but the texture firms up beautifully as it cools. Warm bread tends to crumble and gummy.
My personal tip: If you want a bakery-style domed top, let the batter rest in the pan for 10-15 minutes before baking. This allows the baking soda to start reacting, creating a nice rise. I stumbled onto this trick when I got distracted by a phone call, and now I do it every time.
Cooking Tips & Techniques
After making this easy one-bowl pumpkin banana bread more times than I can count, I’ve collected a few hard-won lessons. Here’s what I wish I’d known from the start.
Don’t overmix the batter. This is the number one mistake I see people make. Once you add the flour, you want to mix just until the streaks disappear. Overmixing develops gluten, and too much gluten makes bread tough and dense instead of tender and cake-like. If you see a few tiny lumps in the batter, leave them alone. They’ll bake out.
Check your baking soda freshness. Baking soda loses its potency over time, especially if your container’s been open for months. To test it, drop a teaspoon into a small bowl of vinegar. If it fizzes vigorously, it’s good. If it barely bubbles, get a new box. Flat baking soda will give you a dense, sunken loaf.
Room temperature ingredients matter. I know it’s annoying to wait for eggs to warm up, but cold eggs can cause the oil to seize up, creating a lumpy batter that doesn’t bake evenly. Same goes for the pumpkin puree—if it’s straight from the fridge, let it sit on the counter for 20 minutes. Your batter will come together smoother and bake more consistently.
The toothpick test can lie. Sometimes a toothpick comes out clean, but the center is still slightly underdone. I’ve learned to also check by gently pressing the center of the bread. If it springs back, it’s done. If your finger leaves an indent, give it 5 more minutes. Also, if the top is browning too quickly but the center isn’t done, tent the loaf loosely with aluminum foil for the last 10-15 minutes of baking.
Let it cool completely. I cannot stress this enough. I ruined my first loaf by slicing into it after 20 minutes. The texture was gummy and the slices fell apart. The bread continues to set as it cools, and the flavors meld together. Patience pays off here. I usually bake it the night before I plan to serve it, and it’s always better the next day.
One more thing: if your bananas aren’t super ripe, add an extra tablespoon of brown sugar. The sweetness and moisture from very ripe bananas is hard to replicate, but a little extra sugar helps compensate. I learned this during a winter when bananas ripened slowly, and it saved the batch.
Variations & Adaptations
This recipe is incredibly forgiving, which is one of the reasons I love it. Here are some ways I’ve adapted it over the years.
Gluten-Free Version: Swap the all-purpose flour for a 1:1 gluten-free baking blend. I’ve had good results with Bob’s Red Mill Gluten-Free 1-to-1 Baking Flour. Add an extra tablespoon of oil to compensate for the drier texture of gluten-free flours. The bread will be slightly more delicate, so let it cool completely before slicing.
Dairy-Free Version: This recipe is already dairy-free since it uses oil instead of butter. Just make sure your chocolate chips (if using) are dairy-free. Enjoy Life brand makes great ones.
Vegan Version: Replace the two eggs with flax eggs (2 tablespoons ground flaxseed mixed with 6 tablespoons water, let sit for 5 minutes). The texture will be slightly denser, but still delicious. I’ve made this for vegan friends and they couldn’t tell the difference.
Spice It Up: If you love warm spices, add ¼ teaspoon ground cloves or allspice along with the other spices. I sometimes add a pinch of cardamom for a more complex flavor profile. It gives the bread an almost chai-like warmth that’s incredible with a cup of coffee.
Chocolate Lover’s Twist: Fold in ½ cup dark chocolate chips and swap the cinnamon for 1 teaspoon of cocoa powder. The chocolate and pumpkin combination is surprisingly good—rich but not overly sweet.
Muffin Version: Divide the batter into a greased 12-cup muffin tin and bake at 350°F for 18-22 minutes. This is my go-to when I need portable breakfasts for a busy week. They freeze beautifully too.
Streusel Topping: Mix ¼ cup flour, ¼ cup brown sugar, 2 tablespoons cold butter (cut into small pieces), and ½ teaspoon cinnamon. Sprinkle over the batter before baking. It adds a lovely crunchy crust that contrasts with the soft bread. I do this when I want to feel a little fancy.
Serving & Storage Suggestions
This bread is versatile enough for breakfast, snack time, or dessert. Here’s how I like to serve and store it.
Serving: Serve slices at room temperature or slightly warm. For an extra treat, toast a slice lightly and spread with salted butter or cream cheese. The warmth brings out the spices and makes the bread even more tender. I also love it with a drizzle of honey or maple syrup if I’m feeling indulgent.
Pairings: This bread pairs beautifully with a hot cup of coffee, chai latte, or spiced apple cider. For a brunch spread, serve it alongside scrambled eggs, fresh fruit, and yogurt. It also works as a simple dessert with a scoop of vanilla ice cream or a dollop of whipped cream.
Storage: Store leftover bread in an airtight container at room temperature for up to 4 days. The moisture from the pumpkin and bananas actually keeps it fresh longer than regular banana bread. If your kitchen is very warm, you can refrigerate it, but the texture will be slightly firmer. Bring slices to room temperature before serving for the best texture.
Freezing: This bread freezes like a dream. Wrap the completely cooled loaf (or individual slices) tightly in plastic wrap, then in aluminum foil or a freezer-safe bag. Freeze for up to 3 months. To thaw, leave at room temperature for a few hours or unwrap and microwave a slice for 20-30 seconds. I always keep a loaf in the freezer for unexpected guests or lazy mornings.
Flavor Development: Honestly, this bread tastes even better on day two. The spices meld together and the moisture distributes more evenly overnight. If you can resist eating it all on day one, wrap it tightly and let it sit on the counter. You’ll be rewarded with an even more flavorful slice the next morning.
Nutritional Information & Benefits
Here’s an approximate nutritional breakdown per slice (based on 10 slices, without add-ins). Keep in mind these are estimates and can vary based on specific ingredients and portion sizes.
| Nutrient | Amount Per Slice |
|---|---|
| Calories | 285 |
| Total Fat | 12g |
| Saturated Fat | 2g |
| Cholesterol | 37mg |
| Sodium | 280mg |
| Total Carbohydrates | 41g |
| Dietary Fiber | 2g |
| Sugars | 23g |
| Protein | 4g |
| Vitamin A | 95% DV |
| Vitamin C | 4% DV |
| Potassium | 180mg |
Health Benefits: Pumpkin is packed with vitamin A (over 95% of your daily needs per slice), which supports eye health and immune function. Bananas provide potassium, which helps regulate blood pressure. The fiber from both fruits aids digestion and keeps you feeling full longer. This bread also contains no butter and uses oil instead, which means it’s lower in saturated fat than traditional quick breads.
Dietary Considerations: This recipe is dairy-free and nut-free (unless you add nuts). It can easily be made gluten-free or vegan with the substitutions mentioned above. It contains eggs and gluten in its standard form, so keep that in mind for allergies.
I personally love that this bread feels indulgent but actually has some nutritional merit. It’s not health food by any stretch, but it’s a far cry from a boxed mix or bakery loaf loaded with preservatives. A slice with my morning coffee feels like a treat I don’t have to feel guilty about.
Conclusion
This easy one-bowl pumpkin banana bread has earned a permanent spot in my baking rotation, and I think it will in yours too. It’s the kind of recipe that reminds me why I love baking—simple ingredients, minimal fuss, and results that feel far greater than the effort you put in. Every time I pull a golden loaf from the oven, I think about Maria in her sweatpants, casually stirring greatness into existence.
I hope you’ll make this your own. Add your favorite spices, toss in some chocolate chips, or keep it classic. The beauty of this bread is how adaptable it is. And honestly, it’s pretty hard to mess up—even my “mistake” batches have been devoured within hours.
I’d love to hear how yours turns out! Leave a comment below and let me know what variations you tried, or tag me in your photos if you share them online. Did you add nuts? Go heavy on the cinnamon? Make it into muffins? I want to know all about it. Happy baking, friend—your kitchen is about to smell incredible.
Frequently Asked Questions
Can I use frozen bananas for this recipe?
Absolutely! Thaw frozen bananas completely, then drain off any excess liquid before mashing. Frozen bananas are actually sweeter than fresh ones, which makes this bread even more flavorful. Just make sure to mash them well since they can be a bit watery.
Why did my pumpkin banana bread sink in the middle?
A sunken middle usually means the bread was underbaked or the oven temperature was too low. Make sure your oven is properly preheated to 350°F and test the center with a toothpick before removing it. Also, check that your baking soda is fresh—expired baking soda won’t provide enough rise.
Can I make this recipe without pumpkin puree?
You can, but it won’t be pumpkin banana bread anymore! If you don’t have pumpkin, substitute with an equal amount of applesauce or mashed sweet potato. The texture will be similar, but the flavor will change. For a true pumpkin experience, stick with the puree.
How do I know when the bread is fully baked?
Insert a toothpick or skewer into the center of the loaf. If it comes out clean or with just a few moist crumbs (not wet batter), it’s done. Also, the top should be golden brown and spring back lightly when you press it with your finger. If the top is browning too fast, tent it with foil.
Can I double this recipe?
Yes! This recipe doubles beautifully. Use a large bowl and mix everything as directed. You can bake two loaves at once—just make sure they’re on the same oven rack and rotate them halfway through baking. You may need to add 5-10 minutes to the baking time since the oven is more crowded.
Pin This Recipe!
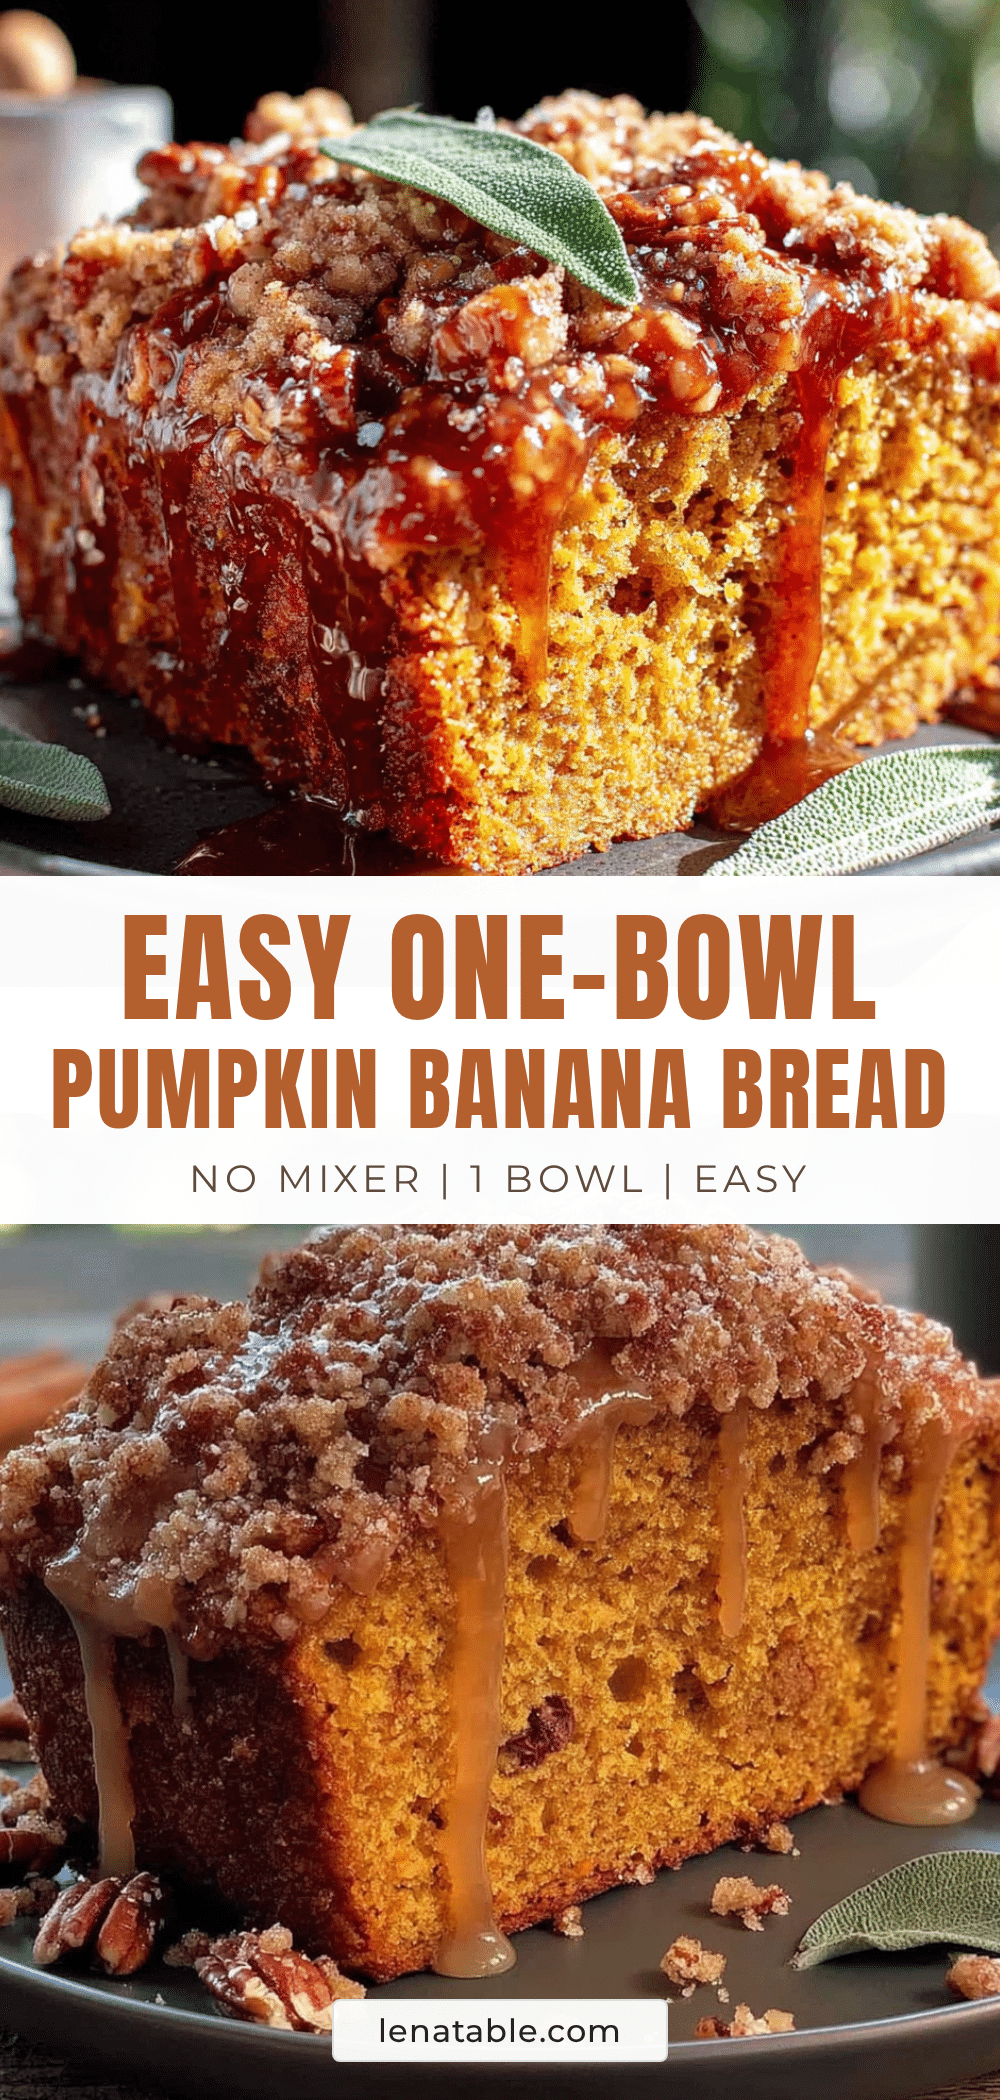
Easy One-Bowl Pumpkin Banana Bread Recipe (No Mixer)
This incredibly moist and flavorful pumpkin banana bread comes together in one bowl with no mixer required. It’s the perfect fall treat that’s simple enough for a lazy Sunday but impressive enough for any gathering.
- Prep Time: 15 minutes
- Cook Time: 55 minutes
- Total Time: 1 hour 10 minutes
- Yield: 10 servings 1x
- Category: Quick Bread
- Cuisine: American
Ingredients
- 1 ¾ cups (210 grams) all-purpose flour
- ¾ cup (150 grams) granulated sugar
- ½ cup (100 grams) light brown sugar, packed
- 1 cup (240 grams) pumpkin puree (not pumpkin pie filling)
- 2 medium ripe bananas (about 1 cup mashed, 240 grams)
- 2 large eggs, at room temperature
- ½ cup (120 ml) vegetable oil (avocado or canola work well)
- 1 teaspoon vanilla extract
- 1 teaspoon baking soda
- 1 ½ teaspoons ground cinnamon
- ½ teaspoon ground nutmeg
- ½ teaspoon ground ginger
- ½ teaspoon salt
- Optional: ½ cup chopped walnuts or pecans, or ½ cup chocolate chips
Instructions
- Preheat your oven to 350°F (175°C). Position the rack in the center of the oven. Line a 9×5-inch loaf pan with parchment paper, leaving overhang on the long sides. Spray the parchment lightly with non-stick cooking spray.
- In a large mixing bowl, mash the bananas with a fork or potato masher until mostly smooth with a few small lumps (about 1 cup).
- Add the pumpkin puree, granulated sugar, brown sugar, vegetable oil, eggs, and vanilla extract to the mashed bananas. Whisk or stir until well combined and smooth.
- Sprinkle the flour, baking soda, salt, cinnamon, nutmeg, and ginger evenly over the wet mixture. Fold gently with a spatula or wooden spoon until just combined—do not overmix. A few small lumps are fine.
- If using, gently fold in nuts or chocolate chips.
- Pour the batter into the prepared loaf pan and spread evenly. Tap the pan gently on the counter to release air bubbles.
- Bake for 50-60 minutes, until a toothpick inserted into the center comes out clean or with a few moist crumbs. The top should be golden brown and spring back when lightly pressed.
- Cool in the pan on a wire rack for 10 minutes. Then use the parchment sling to lift the bread out and transfer to the rack to cool completely (at least 1 hour) before slicing.
Notes
For a bakery-style domed top, let the batter rest in the pan for 10-15 minutes before baking. The bread tastes even better on day two as the flavors meld. If the top browns too quickly, tent with foil during the last 10-15 minutes of baking.
Nutrition
- Serving Size: 1 slice
- Calories: 285
- Sugar: 23
- Sodium: 280
- Fat: 12
- Saturated Fat: 2
- Carbohydrates: 41
- Fiber: 2
- Protein: 4
Keywords: pumpkin banana bread, one bowl, no mixer, easy, fall, moist, quick bread, pumpkin, banana


