Love this? Save it for later!
Share the inspiration with your friends
I was standing in the dairy aisle last Tuesday, staring at a tub of plain yogurt like it held the secrets to the universe, when a woman next to me sighed and said, “I just wish I could make chicken that doesn’t taste like cardboard.” I laughed, because honestly—I’ve been there. More times than I care to admit. That moment hit me, and suddenly I was back in my tiny first apartment at twenty-three, pulling another batch of sad, stringy chicken breasts out of the oven, wondering what I was doing wrong. You know that feeling when you spend an hour prepping dinner only to end up with something that needs a gallon of sauce to be edible? Yeah, that was me. Every single week.
I tried everything. Brining, pounding them thin, covering them in foil—you name it, I probably burned it or dried it out. It wasn’t until a neighbor—this sweet older lady named Carol who cooked like she had magic in her fingertips—casually mentioned she threw chicken breasts in her crockpot before bed and woke up to juicy, shreddable meat that I felt a flicker of hope. I mean, I was skeptical. Everyone knows chicken breasts get rubbery and dry in a slow cooker, right? That’s what I thought too. But Carol insisted there was a trick to it, and after three failed attempts (and one very sad sandwich), I finally cracked the code.
The secret isn’t complicated, and it doesn’t require fancy ingredients. It’s about timing, liquid, and trusting the process. This never-dry overnight crockpot chicken breast recipe has literally changed how I meal prep. No more dry, flavorless chicken that makes you dread lunch. Just tender, juicy meat that you can use for salads, sandwiches, tacos, or just eat straight off the fork (I won’t tell). Maybe you’ve been where I was—standing in your kitchen, frustrated, wondering why something so simple feels so impossible. Let me tell you, this recipe is the answer you’ve been looking for.
Why You’ll Love This Recipe
Let’s be real for a second. I’ve tested this recipe more times than I can count. I’ve tried different liquid ratios, different temperatures, different cook times. I’ve burned my tongue testing it straight from the pot at 6 AM. And honestly? This version is the one I keep coming back to. Here’s why you’re going to love it too:
- Set It and Forget It: You literally throw everything in the crockpot before bed, go to sleep, and wake up to perfectly cooked chicken. No hovering, no checking, no stress.
- Budget-Friendly: Chicken breasts are affordable, and you probably already have the other ingredients in your pantry. No need for a special grocery run.
- Meal Prep Hero: Make a batch on Sunday and use it all week. It stays juicy even after being refrigerated and reheated—which is basically a miracle in my book.
- Kid-Approved: My niece, who usually picks apart her food like a tiny food critic, actually asked for seconds. I almost cried.
- Endlessly Versatile: Shred it, slice it, cube it—this chicken works in everything from salads to soups to wraps to casseroles.
What makes this recipe different from every other crockpot chicken breast recipe out there? It’s the combination of a low-and-slow cooking time (8 hours on low, not high) and a simple liquid base that keeps the meat moist without making it soggy. No cream of mushroom soup, no weird canned ingredients. Just real food that tastes like you actually tried. This is the kind of recipe that makes you close your eyes after the first bite and think, “Why didn’t I figure this out sooner?” It’s comfort food reimagined—effortless, reliable, and so satisfying.
What Ingredients You Will Need
This recipe uses simple, wholesome ingredients to deliver juicy, flavorful chicken without any fuss. Most of these are pantry staples you probably already have on hand, which makes this perfect for those weeks when you just need dinner to work.
For the Chicken
- 2 pounds boneless, skinless chicken breasts (about 3-4 medium breasts) — Look for breasts that are similar in size so they cook evenly. If some are much thicker, consider cutting them in half horizontally.
- 1 cup low-sodium chicken broth — This is your moisture base. I prefer Swanson or Kitchen Basics for consistent flavor. You can also use vegetable broth or even water in a pinch, but broth adds more depth.
- 2 tablespoons olive oil — Helps keep the chicken moist and adds a touch of richness. You can substitute avocado oil if that’s what you have.
- 1 teaspoon salt — I use fine sea salt. Don’t skip this—it’s crucial for flavor.
- 1/2 teaspoon black pepper — Freshly ground is always better, but pre-ground works fine too.
- 1 teaspoon garlic powder — Not the same as fresh garlic, but for this recipe, the powder distributes more evenly and doesn’t burn.
- 1 teaspoon onion powder — Adds a subtle savory note that rounds everything out.
- 1/2 teaspoon paprika — I use sweet paprika, but smoked paprika adds a lovely depth if you have it.
- 1 tablespoon lemon juice (optional but recommended) — A little acid brightens the flavor and helps tenderize the meat slightly.
Optional Add-Ins for Extra Flavor
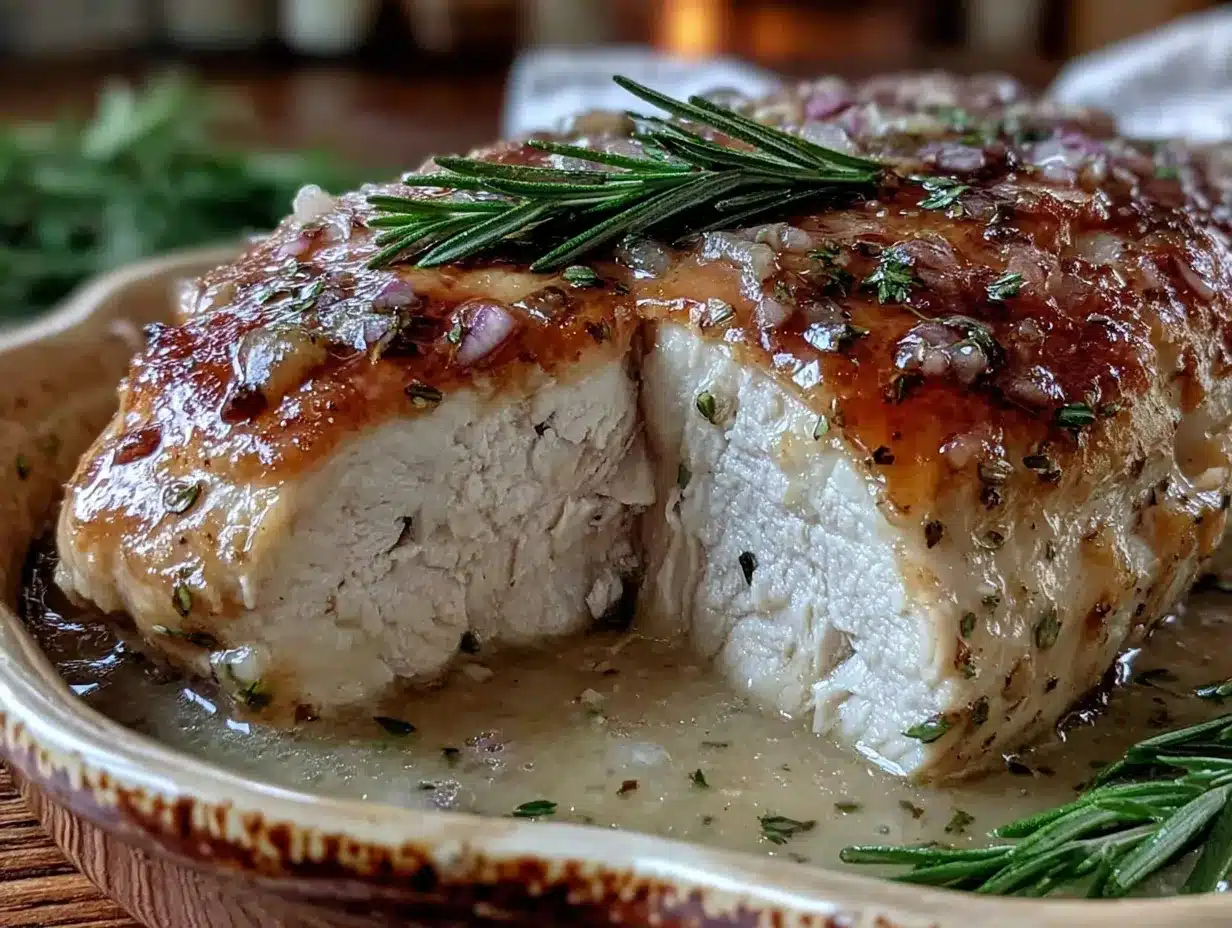
- 2 sprigs fresh rosemary or thyme — Throw them in before cooking for an herby infusion. Remove before shredding.
- 2 cloves garlic, smashed — If you want a stronger garlic flavor, add these whole. They’ll soften and mellow during cooking.
- 1/4 cup dry white wine — Swap for 1/4 cup of the broth if you want a more sophisticated flavor profile.
A quick note on ingredient selection: I’ve tested this with both organic and conventional chicken breasts, and honestly, the results are similar as long as you don’t overcook them. That said, I do recommend using low-sodium broth so you can control the salt level yourself. Full-sodium broths can make the final dish too salty, especially if you reduce the cooking liquid later. And if you’re using frozen chicken breasts? Thaw them first. I know it’s tempting to throw them in frozen, but it throws off the cooking time and can lead to uneven results. Trust me, I learned that one the hard way.
Equipment Needed
You don’t need a fancy kitchen for this recipe. Here’s what you’ll need:
- A 6-quart slow cooker — This is the sweet spot size. A smaller one might crowd the chicken, and a larger one can cause the liquid to evaporate too quickly. If you only have a 4-quart, that works too—just make sure the chicken fits in a single layer as much as possible.
- Tongs — For placing and removing the chicken without breaking it apart.
- Measuring cups and spoons — Accuracy matters, especially with the liquid.
- A small bowl — For mixing your seasonings before sprinkling them over the chicken.
- Two forks or a hand mixer — For shredding the chicken. I personally use two forks because I like the control, but a hand mixer on low speed makes quick work of it if you’re shredding a large batch.
- An instant-read thermometer — This is my number one recommendation. It takes the guesswork out of cooking chicken. You’re looking for 165°F in the thickest part. I use a ThermoPro and it’s never let me down.
If you don’t have a slow cooker, you can technically use a Dutch oven in the oven at 225°F for about 3-4 hours, but honestly, the whole point of this recipe is the overnight convenience. If you’re considering buying a slow cooker, you don’t need an expensive one. My first crockpot was a $20 basic model from a discount store, and it worked perfectly for years.
Preparation Method
This is the part where everything comes together. Follow these steps, and I promise you’ll never go back to dry chicken again.
- Pat the chicken breasts dry with paper towels. This is important—excess moisture on the surface can lead to a watery final result. Don’t skip this step, even if you’re tired and just want to get it over with. I’ve done it, and I regretted it.
- Mix your seasonings in a small bowl. Combine the salt, pepper, garlic powder, onion powder, and paprika. Stir them together so everything is evenly distributed.
- Season the chicken on both sides with the spice mixture. Rub it in gently with your hands. Yes, your fingers will get messy. That’s okay. Wash your hands after.
- Pour the chicken broth into the bottom of your slow cooker. Add the olive oil and lemon juice (if using). Give it a quick stir.
- Place the chicken breasts in the slow cooker in a single layer. Try not to overlap them too much. If they’re stacked, the ones on top might cook faster than the ones on the bottom.
- Add any optional aromatics now—rosemary sprigs, smashed garlic cloves, whatever you’re using. Tuck them around the chicken, not on top.
- Put the lid on and set your slow cooker to LOW. This is crucial. Do not use the high setting. High heat will make the chicken tough and dry, even with the liquid. Low and slow is the magic here.
- Cook for 7-8 hours overnight. I usually set mine up around 10 PM and it’s ready by 6 AM. If your slow cooker runs hot, check it at 6 hours. If it runs cool, it might need the full 8. You’ll learn your machine’s quirks over time.
- Check the internal temperature with your instant-read thermometer. Insert it into the thickest part of the largest breast. You’re looking for 165°F. If it’s not there yet, let it cook another 30 minutes and check again.
- Remove the chicken from the slow cooker using tongs. Transfer it to a cutting board or large bowl. Let it rest for 5 minutes before shredding or slicing. This resting time lets the juices redistribute, so you don’t end up with dry meat.
- Shred or slice as desired. If shredding, use two forks to pull the meat apart. It should be tender enough that this takes almost no effort. If it’s fighting you, it might need a bit more cooking time.
- Optional: Reserve the cooking liquid. Strain it and use it as a light broth for soups or to moisten the shredded chicken later. It’s full of flavor and shouldn’t go to waste.
A few notes from personal experience: If you wake up and your chicken smells a little sulfurous, don’t panic. That can happen with slow cookers, especially if the chicken sat at room temperature too long before cooking. As long as it reached 165°F, it’s safe to eat. Also, if you find your chicken is shredding beautifully but seems a bit bland, try adding a pinch more salt and pepper after shredding. Sometimes the seasoning needs a little boost at the end.
Cooking Tips & Techniques
I’ve made this recipe more times than I can count, and I’ve definitely made my share of mistakes. Here are the lessons I learned so you don’t have to repeat them:
Don’t overcrowd the pot. I know it’s tempting to cook a whole family pack at once, but crowding leads to uneven cooking. The chicken needs space for the heat and steam to circulate. If you’re cooking more than 2 pounds, use a larger slow cooker or cook in batches.
The liquid matters, but not as much as you think. You don’t need to submerge the chicken completely. In fact, you shouldn’t. Too much liquid can make the chicken waterlogged and bland. One cup of broth is plenty for 2 pounds of chicken. The steam created inside the covered pot does most of the work.
Resist the urge to peek. Every time you lift that lid, you release heat and steam, which extends the cooking time and can dry out your chicken. I know it’s hard, especially the first time. But trust the process. Your chicken will be fine.
Size matters. If your chicken breasts are wildly different sizes, they won’t cook evenly. I’ve started buying chicken breast tenderloins or cutting large breasts in half to ensure uniformity. It makes a noticeable difference.
My biggest failure? The time I decided to add a can of cream of mushroom soup because I thought it would make the chicken “creamier.” It turned into this weird, slimy mess that tasted like sadness. Stick with the broth. Simple is better.
Variations & Adaptations
One of the best things about this recipe is how adaptable it is. Here are some ways to switch it up:
Mexican-Inspired
Add 1 teaspoon cumin, 1 teaspoon chili powder, and a squeeze of lime juice to the broth. Use the shredded chicken for tacos, burrito bowls, or enchiladas. I made this version for a taco night and my brother-in-law asked for the recipe—which is basically the highest compliment he gives.
Italian Herb
Add 1 teaspoon dried oregano, 1 teaspoon dried basil, and 1/2 teaspoon dried thyme to the seasoning mix. Serve the shredded chicken over pasta with a splash of the cooking liquid and some Parmesan. It’s like chicken soup’s more sophisticated cousin.
Lemon Pepper
Increase the lemon juice to 2 tablespoons and add 1 tablespoon lemon zest. Use 1 teaspoon cracked black pepper instead of the regular stuff. This version is bright and fresh—perfect for spring salads or light sandwiches.
Dietary Adaptations
For a low-sodium version, use no-salt-added broth and skip the added salt. You can add herbs and spices for flavor instead. For a keto-friendly version, this recipe is already naturally low in carbs. Just be mindful of any added sugars in your broth. And for dairy-free? You’re already there—no dairy in this recipe at all.
Serving & Storage Suggestions
This chicken is incredibly versatile, so how you serve it really depends on your mood and what you have on hand.
Serving temperature: This chicken is delicious warm, right out of the slow cooker. But honestly? It’s also fantastic cold, straight from the fridge, sliced thin on a sandwich. Don’t sleep on cold chicken—it’s a meal prep lifesaver.
Presentation: If you’re serving it for dinner, I like to shred it and pile it on a platter with a drizzle of the reserved cooking liquid and a sprinkle of fresh parsley or chives. It looks like you put in way more effort than you actually did.
What to serve with it: This chicken pairs beautifully with roasted vegetables, a simple green salad, rice, quinoa, or mashed potatoes. For a complete meal, try it with a side of steamed broccoli and some crusty bread to soak up the juices.
Storage: Store leftover shredded chicken in an airtight container in the refrigerator for up to 4 days. I like to keep it in a glass container with a tight-fitting lid. If you want to freeze it, portion it into freezer-safe bags or containers and freeze for up to 3 months. Thaw overnight in the refrigerator before using.
Reheating: The key to reheating without drying it out is adding a splash of liquid. A tablespoon of chicken broth or water per serving works perfectly. Reheat in the microwave in 30-second bursts, stirring in between, or in a covered skillet over low heat for about 5 minutes. The chicken will stay tender and moist if you don’t rush it.
Flavor development: Here’s something interesting—this chicken actually tastes even better the next day. The flavors have time to meld and deepen. So if you’re meal prepping, don’t worry about it not being fresh. Day-old chicken is a gift.
Nutritional Information & Benefits
This recipe is about as wholesome as it gets. Here’s a rough estimate per serving (based on 4 servings, using 2 pounds of chicken breast):
| Nutrient | Amount per Serving |
|---|---|
| Calories | 280 |
| Protein | 46g |
| Fat | 8g |
| Saturated Fat | 1.5g |
| Carbohydrates | 1g |
| Sodium | 680mg (varies with broth) |
Chicken breast is an excellent source of lean protein, which is essential for muscle repair and keeping you full between meals. It’s also rich in B vitamins, particularly niacin and B6, which support energy metabolism. The olive oil provides healthy monounsaturated fats, and the garlic and onion powder add antioxidants without any extra calories.
This recipe is naturally gluten-free, dairy-free, and low-carb, making it suitable for a wide range of dietary needs. Just double-check your broth label if you’re strictly gluten-free—some brands add wheat-based ingredients.
From a wellness perspective, this recipe fits perfectly into a balanced diet. It’s not about deprivation—it’s about having a reliable, healthy option that doesn’t feel like a compromise. I’ve made this on weeks when I needed easy meals, and I’ve made it on weeks when I wanted to feel good about what I was eating. It works for both.
Frequently Asked Questions
Can I use frozen chicken breasts?
Technically yes, but I don’t recommend it. Frozen chicken releases a lot of water as it thaws, which can dilute the seasoning and make the final texture mushy. If you’re in a pinch, add an extra 30 minutes to the cook time and expect slightly different results. Thawing first is always better.
Why did my chicken turn out dry?
This usually happens for one of three reasons: you cooked it on high instead of low, you cooked it too long (more than 9 hours), or your slow cooker runs hot. Check your machine’s temperature with a thermometer if you’re unsure. Some older models cook hotter than newer ones.
Can I double this recipe?
Yes, but only if you have a large enough slow cooker. For 4 pounds of chicken, use a 7-quart or larger slow cooker and increase the broth to 1.5 cups. Keep the cook time the same—don’t double it. Check the temperature at 7 hours and go from there.
What’s the best way to shred the chicken?
Two forks is the classic method, and it works great. But if you’re shredding a large batch, a hand mixer on low speed is faster and gives you consistent results. Just be careful not to overmix or you’ll end up with chicken paste (ask me how I know).
Can I add vegetables to the slow cooker?
You can, but be careful. Vegetables like carrots, potatoes, and onions take longer to cook than chicken breasts. If you add them at the beginning, they might be overcooked by the time the chicken is done. I recommend adding hearty vegetables halfway through the cooking time, or cooking them separately and adding them at the end.
Conclusion
Look, I know there are a million chicken breast recipes out there. I’ve tried a lot of them. But this one? This one is different. It’s the recipe I turn to when I’m tired, when I’m busy, when I just need something to work without a fuss. It’s the recipe that finally solved my dry chicken problem, and honestly, it felt like a superpower the first time I pulled it off.
I hope you give it a try. And I hope it becomes your go-to too. Maybe you’ll tweak the seasonings, or add your own favorite herbs, or find a new way to use the leftovers. That’s the beauty of a good base recipe—it’s a starting point, not a rulebook. So go ahead, set your slow cooker before bed, and wake up to something that actually tastes good. You deserve it.
If you make this recipe, I’d love to hear about it. Drop a comment below, share your favorite variation, or tag me in your photos. Let’s keep this chicken conversation going—because honestly, we could all use a little more juicy chicken in our lives.
Pin This Recipe!
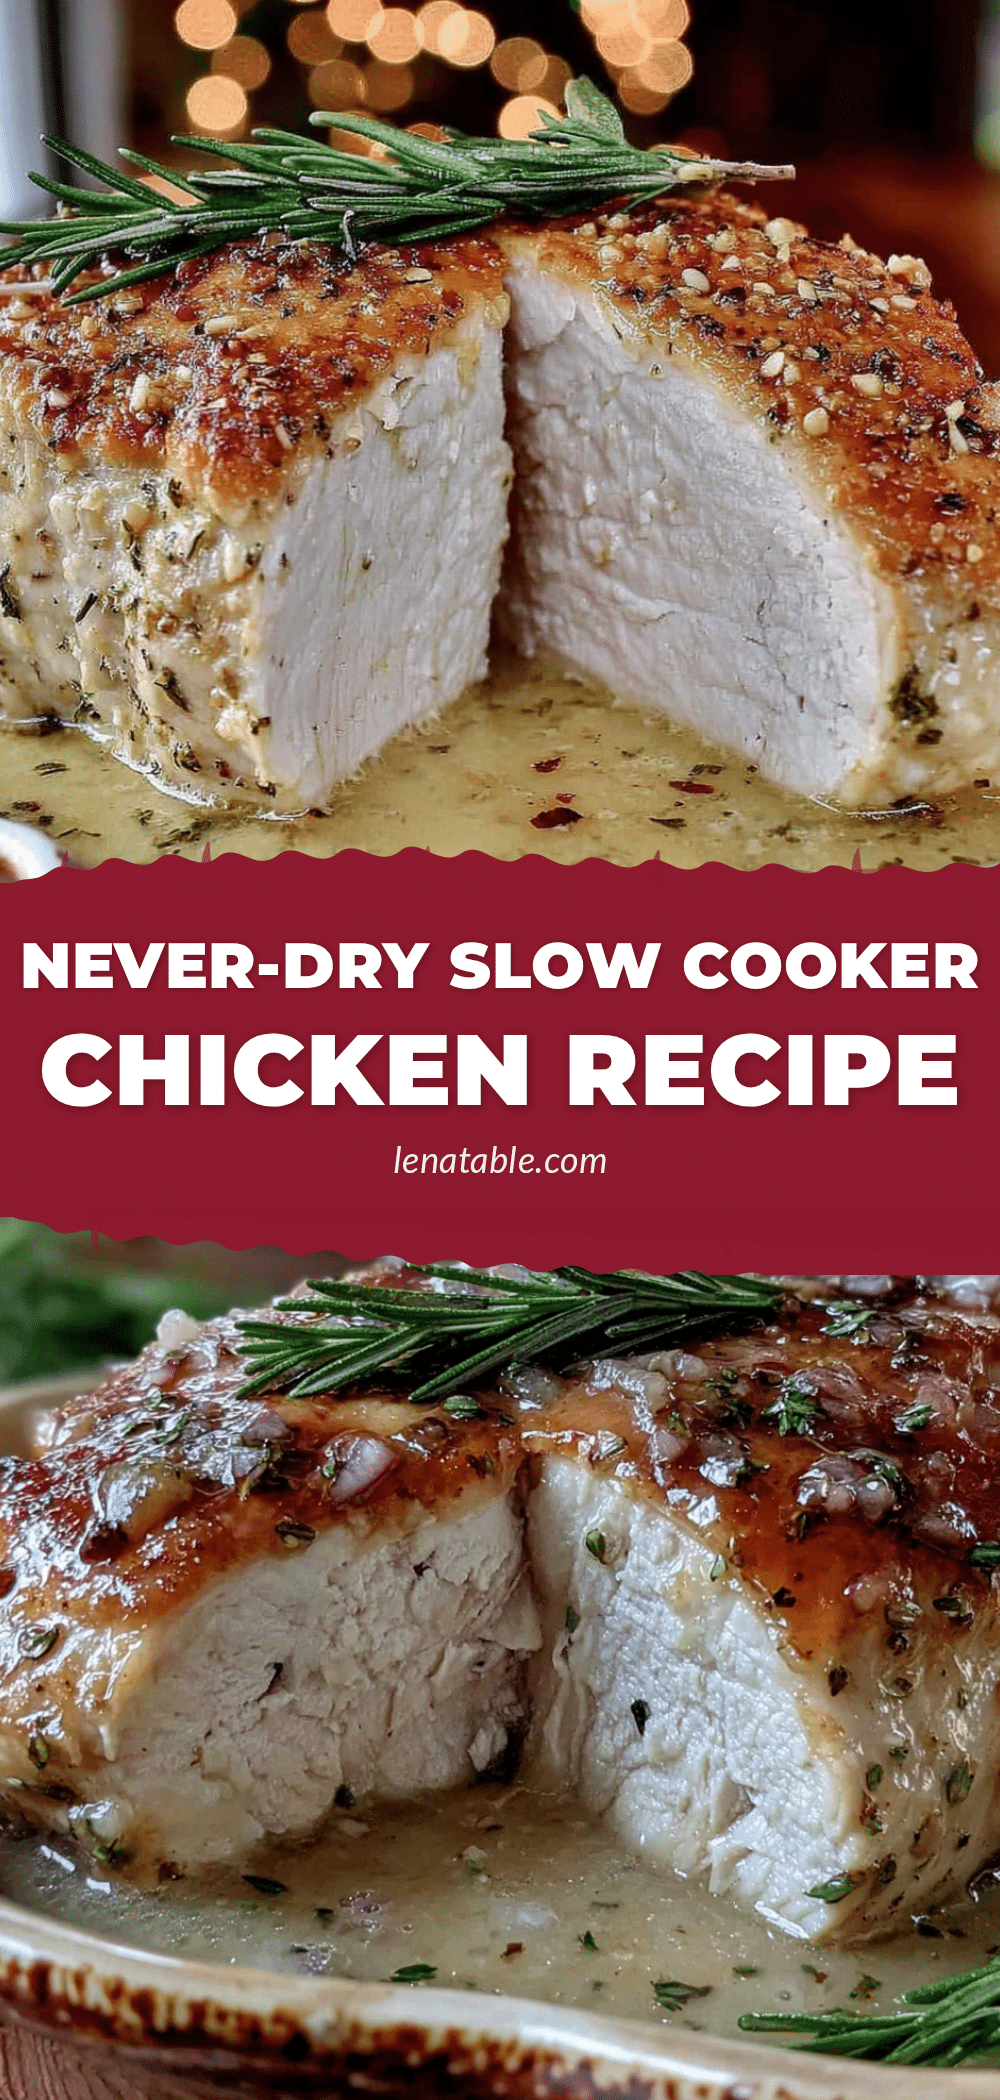
Best Never-Dry Overnight Crockpot Chicken Breast: Easy & Juicy
Tired of dry, flavorless chicken? This overnight crockpot chicken breast recipe delivers tender, juicy meat every time. Set it before bed and wake up to perfectly cooked chicken for salads, sandwiches, tacos, or meal prep.
- Prep Time: 10 minutes
- Cook Time: 7-8 hours
- Total Time: 7 hours 10 minutes to 8 hours 10 minutes
- Yield: 4 servings 1x
- Category: Main Course
- Cuisine: American
Ingredients
- 2 pounds boneless, skinless chicken breasts (about 3–4 medium breasts)
- 1 cup low-sodium chicken broth
- 2 tablespoons olive oil
- 1 teaspoon fine sea salt
- 1/2 teaspoon black pepper (freshly ground preferred)
- 1 teaspoon garlic powder
- 1 teaspoon onion powder
- 1/2 teaspoon paprika (sweet or smoked)
- 1 tablespoon lemon juice (optional but recommended)
- 2 sprigs fresh rosemary or thyme (optional)
- 2 cloves garlic, smashed (optional)
- 1/4 cup dry white wine (optional, substitute for 1/4 cup broth)
Instructions
- Pat the chicken breasts dry with paper towels to remove excess moisture.
- Mix the salt, pepper, garlic powder, onion powder, and paprika in a small bowl until evenly combined.
- Season the chicken on both sides with the spice mixture, rubbing it in gently.
- Pour the chicken broth into the bottom of a 6-quart slow cooker. Add the olive oil and lemon juice (if using) and stir briefly.
- Place the chicken breasts in the slow cooker in a single layer, avoiding overlapping as much as possible.
- Add any optional aromatics (rosemary sprigs, smashed garlic cloves, etc.) around the chicken.
- Put the lid on and set the slow cooker to LOW. Do not use the high setting.
- Cook for 7-8 hours overnight. Check at 6 hours if your slow cooker runs hot.
- Check the internal temperature with an instant-read thermometer inserted into the thickest part of the largest breast. It should reach 165°F.
- Remove the chicken from the slow cooker using tongs and transfer to a cutting board or large bowl. Let rest for 5 minutes.
- Shred or slice the chicken as desired. For shredding, use two forks to pull the meat apart.
- Optional: Strain and reserve the cooking liquid for soups or to moisten the shredded chicken later.
Notes
Don’t overcrowd the pot; cook in batches if needed. Resist the urge to lift the lid during cooking. For even cooking, ensure chicken breasts are similar in size. If using frozen chicken, thaw first for best results. The chicken tastes even better the next day as flavors meld.
Nutrition
- Serving Size: 1 serving (about 1/2
- Calories: 280
- Sodium: 680
- Fat: 8
- Saturated Fat: 1.5
- Carbohydrates: 1
- Protein: 46
Keywords: crockpot chicken, slow cooker chicken, overnight chicken, juicy chicken breast, meal prep chicken, never dry chicken, easy chicken recipe


