Love this? Save it for later!
Share the inspiration with your friends
I wasn’t expecting baking advice from my plumber, but there I was, standing in my kitchen with a leaky faucet, listening to Frank explain exactly how to make Halloween Rice Krispie Treats with Candy Corn. He’d noticed the bag of marshmallows on my counter and just started talking—something about how his kids wouldn’t touch a homemade Halloween treat unless it had candy corn on top, and how he’d perfected this recipe over years of school parties and neighborhood gatherings. Frank is not a guy who seems like he’d care about food coloring or marshmallow ratios. He fixes pipes. He drives a beat-up truck. But let me tell you, the man knows his crispy treats.
The funny thing is, I’d been overthinking Halloween desserts for weeks. Pinterest was full of these elaborate cake pops and fondant-covered cookies that honestly looked like they’d take a whole weekend to make. I mean, who has time for that on a Tuesday night before the school Halloween party? Frank just laughed when I showed him some of those fancy ideas. “Why make it complicated?” he said. “Kids just want something that tastes good and looks like Halloween.” He was right, and honestly, I felt a little silly for not thinking of it myself.
So I tried his method that same night—on a regular weeknight, between making dinner and helping with homework—and I’ve been making these Easy Halloween Rice Krispie Treats with Candy Corn ever since. They come together in about fifteen minutes of active work, and the hardest part is waiting for them to set. Maybe you’ve been there, staring at a bag of candy corn wondering what to do with it besides eating it straight from the bag. Well, this is your answer. These treats are simple, festive, and they actually taste like Halloween should—sweet, buttery, and just a little bit messy.
Why You’ll Love This Recipe
Let’s be real for a second. Halloween is already chaotic enough without adding complicated baking projects to your to-do list. These Easy Halloween Rice Krispie Treats with Candy Corn solve that problem completely. I’ve tested this recipe at least a dozen times—for my own kids’ classroom parties, for a neighborhood potluck, and honestly just because I wanted a sweet snack on a random October evening. Every single time, they disappear within minutes.
- Quick & Easy: You need about 15 minutes of hands-on time, plus 30 minutes for the treats to set. That’s it. No ovens, no complicated steps, no waiting for butter to soften.
- Simple Ingredients: You probably already have butter, marshmallows, and Rice Krispies cereal in your pantry. The only special addition is candy corn, which is everywhere during October.
- Perfect for Halloween Parties: These work for classroom celebrations, office potlucks, trunk-or-treat events, or just a fun after-school snack. They’re portable, they don’t melt, and kids of all ages love them.
- Crowd-Pleaser: I’ve yet to meet a person who doesn’t smile when they see these. There’s something about the orange and yellow candy corn against the white marshmallow treats that just screams Halloween fun.
- Unbelievably Delicious: The combination of gooey marshmallow, crispy cereal, and slightly chewy candy corn is honestly perfect. The candy corn softens just a bit as the treats set, so you get this wonderful texture contrast in every bite.
What makes my version different from the basic recipe on the cereal box? It’s the technique. I add the candy corn in two stages—some mixed right into the warm marshmallow mixture and some pressed on top. This way, every single bite has candy corn in it, not just the top layer. Plus, I use a little extra butter for a richer flavor and a pinch of salt to balance all that sweetness. It’s a small tweak, but it makes a big difference.
This is the kind of recipe that makes you close your eyes after the first bite. It’s comfort food in its purest form—nostalgic, simple, and completely satisfying. And the best part? You can make it with your kids without losing your mind. Trust me, I’ve done it.
What Ingredients You Will Need
This recipe uses six ingredients, and five of them are probably already in your kitchen. The only one you might need to pick up is the candy corn, but honestly, it’s everywhere during the Halloween season. Here’s what you need and why each ingredient matters.
- 6 tablespoons unsalted butter: I prefer unsalted so I can control the salt level, but salted butter works fine if that’s what you have. Just skip the extra salt I mention below. The butter adds richness and helps the marshmallows melt smoothly. I recommend using a good-quality brand like Kerrygold or Land O’Lakes for the best flavor.
- 1 package (10 ounces) mini marshmallows: Mini marshmallows melt faster and more evenly than the big ones. If you only have large marshmallows, that’s fine—just chop them into smaller pieces first. Jet-Puffed is my go-to brand because they melt consistently without getting grainy.
- 6 cups Rice Krispies cereal: The original is best for this recipe. Generic brands work too, but they can be slightly denser and less crispy. Stick with the real thing if you can. Make sure your cereal is fresh—stale cereal will give you sad, chewy treats.
- 1 cup candy corn: This is where the Halloween magic happens. You can use regular candy corn, or try the autumn mix that has those little pumpkins in it. I’ve also used the chocolate-covered candy corn, and it’s surprisingly good. Brach’s is the classic choice, but any brand works.
- 1/4 teaspoon salt: This is optional but highly recommended. A tiny pinch of salt balances the sweetness and makes the flavors pop. You won’t taste the salt—it just makes everything taste more like itself.
- 1 teaspoon vanilla extract: Also optional, but I love the warmth it adds. Pure vanilla extract is best, but imitation vanilla works fine for this recipe. Don’t skip it if you have it—it makes the treats taste more bakery-quality.
Ingredient Selection Tips: For the best texture, use fresh marshmallows. Stale marshmallows get hard and don’t melt as smoothly. Same goes for the cereal—check the expiration date before you start. If your candy corn has been sitting in the pantry since last Halloween, it might be too hard. Fresh candy corn is soft and chewy, which is what you want here.
Substitution Guidance: For a dairy-free version, use vegan butter and vegan marshmallows. Dandies brand makes excellent vegan marshmallows that melt just like the real thing. For a gluten-free option, this recipe is naturally gluten-free as long as you use certified gluten-free Rice Krispies (the original formula is gluten-free, but check the label to be safe). You can also swap the candy corn for candy pumpkins, candy corn-flavored M&Ms, or even chopped Reese’s Pieces for a different Halloween look.
Equipment Needed
You don’t need fancy equipment for these Easy Halloween Rice Krispie Treats with Candy Corn. That’s honestly one of the best things about this recipe. Here’s what you’ll need:
- Large pot or Dutch oven: You need something big enough to stir the marshmallows and cereal together without making a mess. A 5-quart pot works perfectly. I use my Le Creuset Dutch oven, but any heavy-bottomed pot will do.
- Wooden spoon or silicone spatula: The marshmallow mixture gets sticky, so use something sturdy. A silicone spatula is my favorite because it doesn’t scratch the pot and it scrapes the sides well. I’ve ruined a few wooden spoons by leaving them in the sink after making these—the marshmallow residue is no joke.
- 9×13-inch baking pan: This is the standard size for a full batch. If you want thicker treats, use a 9×9-inch pan. For thinner treats, a jelly roll pan works great. I’ve also made these in a 10-inch cast iron skillet for a fun presentation.
- Parchment paper or wax paper: Line your pan with this, and your life will be so much easier. The treats won’t stick, and you can lift the whole block out for easy cutting. I’ve forgotten the parchment before, and let me tell you, scraping marshmallow residue off a pan is not fun.
- Measuring cups and spoons: For the butter, marshmallows, cereal, and candy corn. Nothing fancy needed.
- Sharp knife: For cutting the treats once they’re set. A chef’s knife works great. Spray it with cooking spray to prevent sticking—trust me on this one.
Budget-Friendly Options: Don’t have a 9×13 pan? Use a disposable aluminum baking pan from the grocery store. They’re cheap and work perfectly. No silicone spatula? A regular spatula or even a big metal spoon will work—just be prepared for a little extra cleanup.
Preparation Method
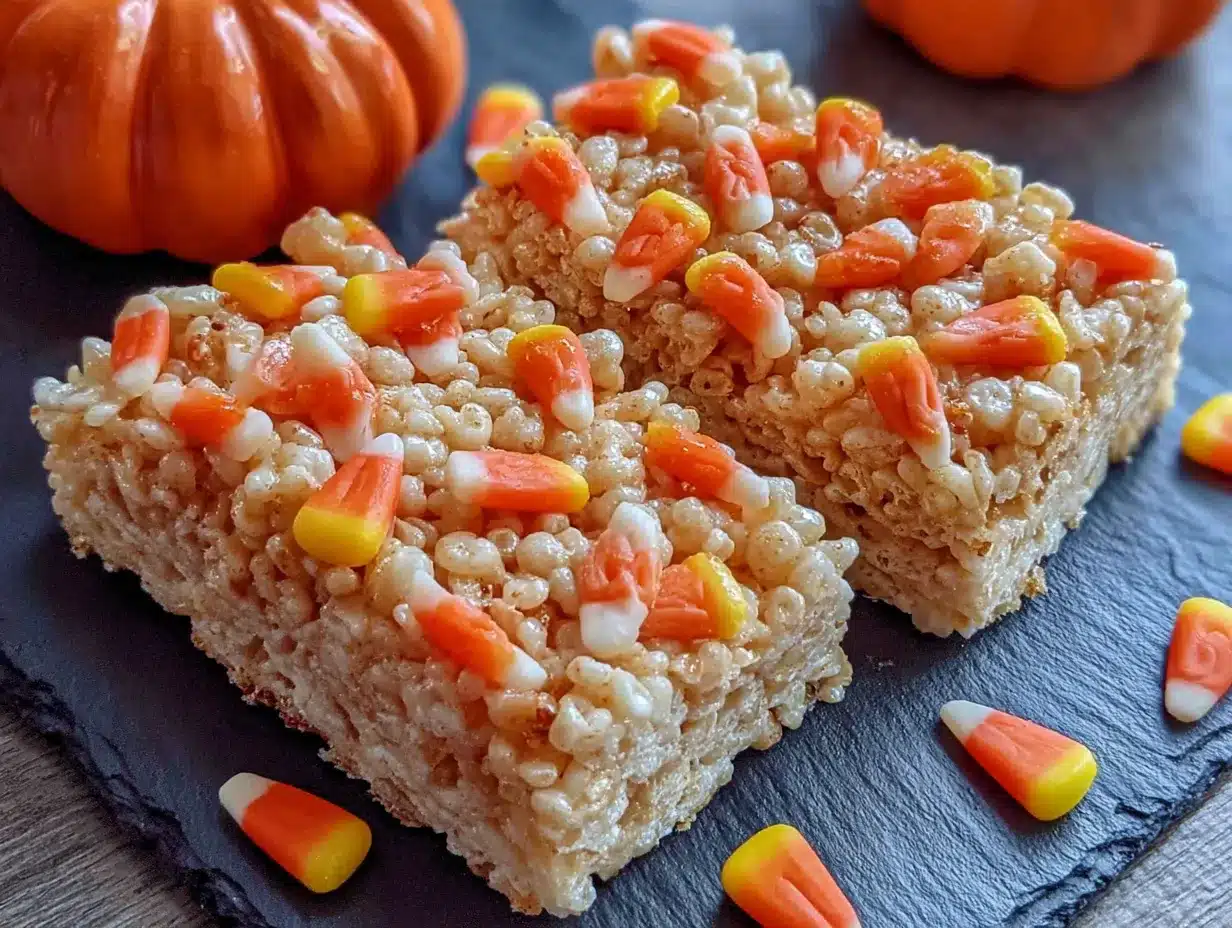
Alright, let’s make these Easy Halloween Rice Krispie Treats with Candy Corn. I’ve made this recipe so many times I could do it in my sleep, but I’ll walk you through every step like you’re standing right next to me in my kitchen.
- Prep your pan first. Line a 9×13-inch baking pan with parchment paper, leaving some overhang on two opposite sides. This creates handles that let you lift the whole block out later. Lightly spray the parchment with non-stick cooking spray. Don’t skip this step—even with parchment, the marshmallow can stick if you don’t grease it. I learned this the hard way when I had to chisel treats out of a pan.
- Melt the butter. Place your large pot over medium-low heat and add the 6 tablespoons of butter. Let it melt slowly, swirling the pan occasionally. You want the butter fully melted but not browned. If it starts to sizzle or brown, your heat is too high. Turn it down. This takes about 2-3 minutes.
- Add the marshmallows. Pour the entire 10-ounce bag of mini marshmallows into the melted butter. Stir constantly with your wooden spoon or silicone spatula. The marshmallows will start to puff up and then collapse as they melt. Keep stirring until the mixture is completely smooth and glossy. This usually takes about 4-5 minutes. Don’t walk away during this step—burnt marshmallow is a tragedy.
- Remove from heat and add vanilla and salt. Take the pot off the burner. Stir in the 1 teaspoon of vanilla extract and 1/4 teaspoon of salt if you’re using them. The vanilla will sizzle a bit when it hits the hot marshmallow—that’s normal and smells amazing.
- Add the cereal. Pour in the 6 cups of Rice Krispies cereal. Fold everything together gently but thoroughly. Use a folding motion—don’t stir too aggressively or you’ll crush the cereal. You want every piece of cereal coated in marshmallow, but you don’t want broken crumbs everywhere. This is where a silicone spatula really shines because it can reach the bottom of the pot.
- Add half the candy corn. Toss in 1/2 cup of candy corn and fold it into the mixture. Work quickly here because the marshmallow mixture is starting to set. The candy corn will soften slightly from the heat, which is exactly what we want. It makes the treats easier to cut later.
- Transfer to the pan. Scrape the entire mixture into your prepared pan. Use your spatula to spread it into an even layer. This part is a little sticky—spray your spatula with cooking spray to make it easier. If you have a piece of wax paper, you can also use that to press the mixture down without it sticking to your hands.
- Add the remaining candy corn. Sprinkle the remaining 1/2 cup of candy corn over the top. Gently press them into the surface so they stick. Don’t press too hard or you’ll flatten the treats. You want the candy corn to be visible and slightly embedded.
- Let them set. Leave the pan on the counter for about 30 minutes to let the treats firm up. Don’t put them in the refrigerator—that can make them too hard. Room temperature is perfect. You’ll know they’re ready when the top feels firm and the treats pull away from the edges of the pan slightly.
- Cut and serve. Lift the whole block out using the parchment handles. Place it on a cutting board. Use a sharp knife to cut into squares or rectangles. I usually go for 12 big squares or 24 smaller ones, depending on the crowd. Spray your knife with cooking spray between cuts for clean edges. The treats should slice cleanly without crumbling.
Sensory Cues: When you’re melting the marshmallows, the mixture should look like thick, glossy glue. It should stretch slightly when you lift the spatula. When you fold in the cereal, you should hear a soft crunching sound. The finished treats should feel firm but slightly springy when you press on them. If they feel rock hard, you cooked the marshmallows too long. If they’re falling apart, you didn’t use enough marshmallows or you didn’t press them firmly enough into the pan.
Personal Efficiency Tip: Measure out all your ingredients before you start. Once you begin melting the butter, everything moves fast. Having your cereal measured and your candy corn portioned out saves you from frantically opening bags while your marshmallows are turning into a sticky mess. I keep a little bowl of candy corn ready to go, and it makes the whole process so much smoother.
Cooking Tips & Techniques
I’ve made a lot of mistakes with these Easy Halloween Rice Krispie Treats with Candy Corn over the years. Here’s what I’ve learned so you don’t have to repeat my failures.
Low and slow is the way to go. The biggest mistake people make is using high heat to melt the marshmallows faster. Don’t do it. Medium-low heat gives you smooth, creamy marshmallows. High heat gives you burnt, grainy, sad marshmallows that won’t hold the treats together. I learned this when I was rushing one Tuesday night and ended up with a pot of brown, bitter marshmallow goo. It was not salvageable.
Don’t overmix the cereal. Once you add the cereal, fold it just until everything is coated. Overmixing crushes the cereal into tiny pieces, and your treats will be dense instead of light and crispy. You want distinct, recognizable cereal pieces in every bite. I count about 10-12 folds, and then I stop.
Use the wax paper trick. If you want perfectly flat, even treats, place a piece of wax paper over the mixture in the pan and press down with your hands. The wax paper prevents the marshmallow from sticking to your fingers, and you can apply even pressure across the whole surface. I use this trick every single time now.
Timing and multitasking. These treats come together fast, so have everything ready before you start. I like to line my pan, measure my cereal, and portion my candy corn before I even turn on the stove. The actual cooking time is about 10 minutes total, and you don’t want to be scrambling during that window.
Cleanup strategy. Marshmallow residue is sticky and hard to clean if it dries. Fill your pot with hot water and let it soak while the treats set. By the time you’re ready to clean, the marshmallow will have softened and will rinse right off. Don’t wait until the next morning—I’ve made that mistake, and it takes forever to scrub off.
Consistency check. If your mixture seems too dry, you might have cooked the marshmallows too long or used stale cereal. If it’s too wet, you might have added too much butter or not enough cereal. The perfect texture is when the mixture holds together when you squeeze a small amount in your hand but still looks light and airy.
Variations & Adaptations
One of the best things about this recipe is how easy it is to change up. Here are some variations I’ve tried and loved.
Chocolate Drizzle Version: After the treats set, melt 1/2 cup of semi-sweet chocolate chips with 1 teaspoon of coconut oil in the microwave (30-second intervals, stirring between each). Drizzle the melted chocolate over the top of the treats, then sprinkle with a little extra candy corn or Halloween sprinkles. Let the chocolate set before cutting. This adds a whole new layer of flavor, and the chocolate and candy corn combo is surprisingly good. I made this for a Halloween party last year, and people couldn’t stop talking about it.
Peanut Butter Twist: Add 1/4 cup of creamy peanut butter to the butter and marshmallow mixture as it melts. Stir until completely smooth before adding the cereal. The peanut butter adds richness and a savory note that balances the sweetness of the candy corn. If you’re making these for a school event, check for peanut allergies first. For a nut-free version, use sunflower seed butter instead.
Spooky Color Variation: For a more dramatic Halloween look, add a few drops of orange food coloring to the marshmallow mixture after it melts. Stir until the color is even, then proceed with the recipe. You can also add purple or green food coloring for a truly spooky vibe. I did orange one year and the treats looked like little pumpkin patches. My kids thought it was the coolest thing ever.
Vegan Adaptation: Use vegan butter (I like Miyoko’s or Earth Balance) and vegan marshmallows (Dandies brand is my favorite). The recipe works exactly the same way—just follow the same steps. The treats will look and taste almost identical to the original. My vegan friend brought these to a potluck once, and nobody even noticed the difference.
Add-Ins for Extra Texture: Fold in 1/2 cup of mini chocolate chips along with the first batch of candy corn. Or add 1/4 cup of chopped pecans or walnuts for a little crunch. I’ve also added crushed pretzels for a salty-sweet combination that’s absolutely addictive. Just be careful not to overload the mixture—too many add-ins can make the treats fall apart.
Serving & Storage Suggestions
These Easy Halloween Rice Krispie Treats with Candy Corn are best served at room temperature. The texture is perfect—firm enough to hold together but soft enough to be easy to bite into. If you serve them straight from the refrigerator, they’ll be too hard. If they’ve been in the fridge, let them sit on the counter for about 15 minutes before serving.
Presentation Ideas: Cut the treats into fun Halloween shapes using cookie cutters. Pumpkins, ghosts, and bats work great. Just spray the cookie cutter with cooking spray before each cut. Arrange the treats on a platter lined with orange or black napkins for a festive look. You can also stick a lollipop stick into each treat for a handheld version that’s perfect for parties.
Complementary Dishes: These treats pair beautifully with a warm mug of apple cider or hot chocolate. For a Halloween-themed dessert table, serve them alongside pumpkin cupcakes, caramel apples, or ghost-shaped cookies. They’re also great on their own as a quick after-school snack.
Storage Instructions: Store the treats in an airtight container at room temperature for up to 5 days. Place a sheet of wax paper between layers to prevent sticking. Do not refrigerate—the cold air will make the treats hard and dry. If your kitchen is very humid, the treats might get sticky. In that case, add a piece of bread to the container to absorb excess moisture (change the bread daily).
Freezer Instructions: These treats freeze beautifully. Wrap each piece individually in plastic wrap, then place them in a freezer-safe bag or container. They’ll keep for up to 3 months. To thaw, leave them at room temperature for about 30 minutes. Do not microwave frozen treats—the marshmallow will become rubbery.
How Flavors Develop: The candy corn softens more over time, so the treats are actually best on day two or three. The flavors meld together, and the texture becomes perfectly chewy. I honestly prefer them the day after I make them, but they rarely last that long in my house.
Nutritional Information & Benefits
Let’s be honest—these Easy Halloween Rice Krispie Treats with Candy Corn are a treat, not a health food. But here’s what you should know if you’re keeping track.
Estimated Nutritional Values (per serving, based on 12 servings):
- Calories: 280
- Total Fat: 8g
- Saturated Fat: 5g
- Cholesterol: 20mg
- Sodium: 210mg
- Total Carbohydrates: 52g
- Dietary Fiber: 0g
- Sugars: 32g
- Protein: 2g
Health Benefits of Key Ingredients: Rice Krispies cereal is fortified with iron and B vitamins, so there’s a tiny nutritional silver lining. The butter provides a small amount of vitamin A. Candy corn… well, candy corn makes people happy, and that counts for something, right?
Dietary Considerations: This recipe is naturally nut-free (if you use the basic version without peanut butter) and can be made gluten-free with certified gluten-free cereal. It is not dairy-free unless you use vegan substitutes. The treats are also egg-free, which is great for those with egg allergies.
Potential Allergens: Dairy (from the butter), and corn (from the candy corn and Rice Krispies). Some brands of marshmallows contain gelatin, which is not vegetarian. Check labels if you’re serving someone with specific dietary needs.
My Personal Wellness Perspective: I believe in balance. These treats are for celebrations, for Halloween fun, for making memories with your kids. They’re not an everyday snack, and that’s okay. Sometimes food is about joy and tradition, not about nutrition. Make these, enjoy them, and don’t feel guilty about it. Life is short—eat the candy corn.
Conclusion
These Easy Halloween Rice Krispie Treats with Candy Corn are everything I want in a holiday recipe—simple, festive, and genuinely delicious. They come together in minutes, use ingredients you probably already have, and they make everyone who sees them smile. What more could you ask for?
I love that this recipe came from an unexpected source. Frank the plumber probably has no idea that I’ve made these treats at least twenty times since he told me about them. But every time I make them, I think about how the best recipes often come from the most unlikely places. It’s a reminder that you don’t need fancy techniques or expensive equipment to create something wonderful. Sometimes you just need butter, marshmallows, cereal, and a little bit of candy corn.
I’d love to hear how these turn out for you. Did you add any fun variations? Did your kids help you make them? Did you use a different kind of candy? Drop a comment below and let me know. And if you’re looking for more easy Halloween treats, check out my spider web cupcakes or pumpkin dip recipe for even more festive fun. Happy Halloween, friends—now go make some memories in your kitchen.
Frequently Asked Questions
Can I use stale candy corn?
You can, but I wouldn’t recommend it. Fresh candy corn is soft and chewy, which is perfect for these treats. Stale candy corn gets hard and crunchy, and it won’t soften properly when mixed into the warm marshmallow. If all you have is stale candy corn, try softening it in the microwave for 10-15 seconds before adding it to the mixture.
Why are my Rice Krispie treats hard?
This usually happens when the marshmallows are cooked too long or at too high a temperature. The sugar in the marshmallows crystallizes, making the treats hard and dense. Next time, use medium-low heat and remove the pot from the burner as soon as the marshmallows are fully melted. Also, don’t press the mixture too firmly into the pan—gentle pressure is all you need.
Can I make these treats ahead of time?
Absolutely. These treats actually taste better the next day. Make them up to 3 days in advance and store them in an airtight container at room temperature. If you’re making them for a party, I recommend making them the day before so the flavors have time to meld together.
Can I use a different cereal?
You can, but the texture will be different. Cocoa Krispies would work for a chocolate version. Fruity Pebbles would add a fun color and flavor. If you use a denser cereal like Chex, the treats won’t be as light and crispy. Stick with a puffed rice cereal for the best results.
How do I cut clean squares without the treats falling apart?
Use a sharp knife and spray it with cooking spray between each cut. Let the treats set completely before cutting—at least 30 minutes at room temperature. If they’re still falling apart, they might need more time to set. You can also chill them in the refrigerator for 10 minutes before cutting, but don’t leave them in longer than that or they’ll get too hard.
Pin This Recipe!
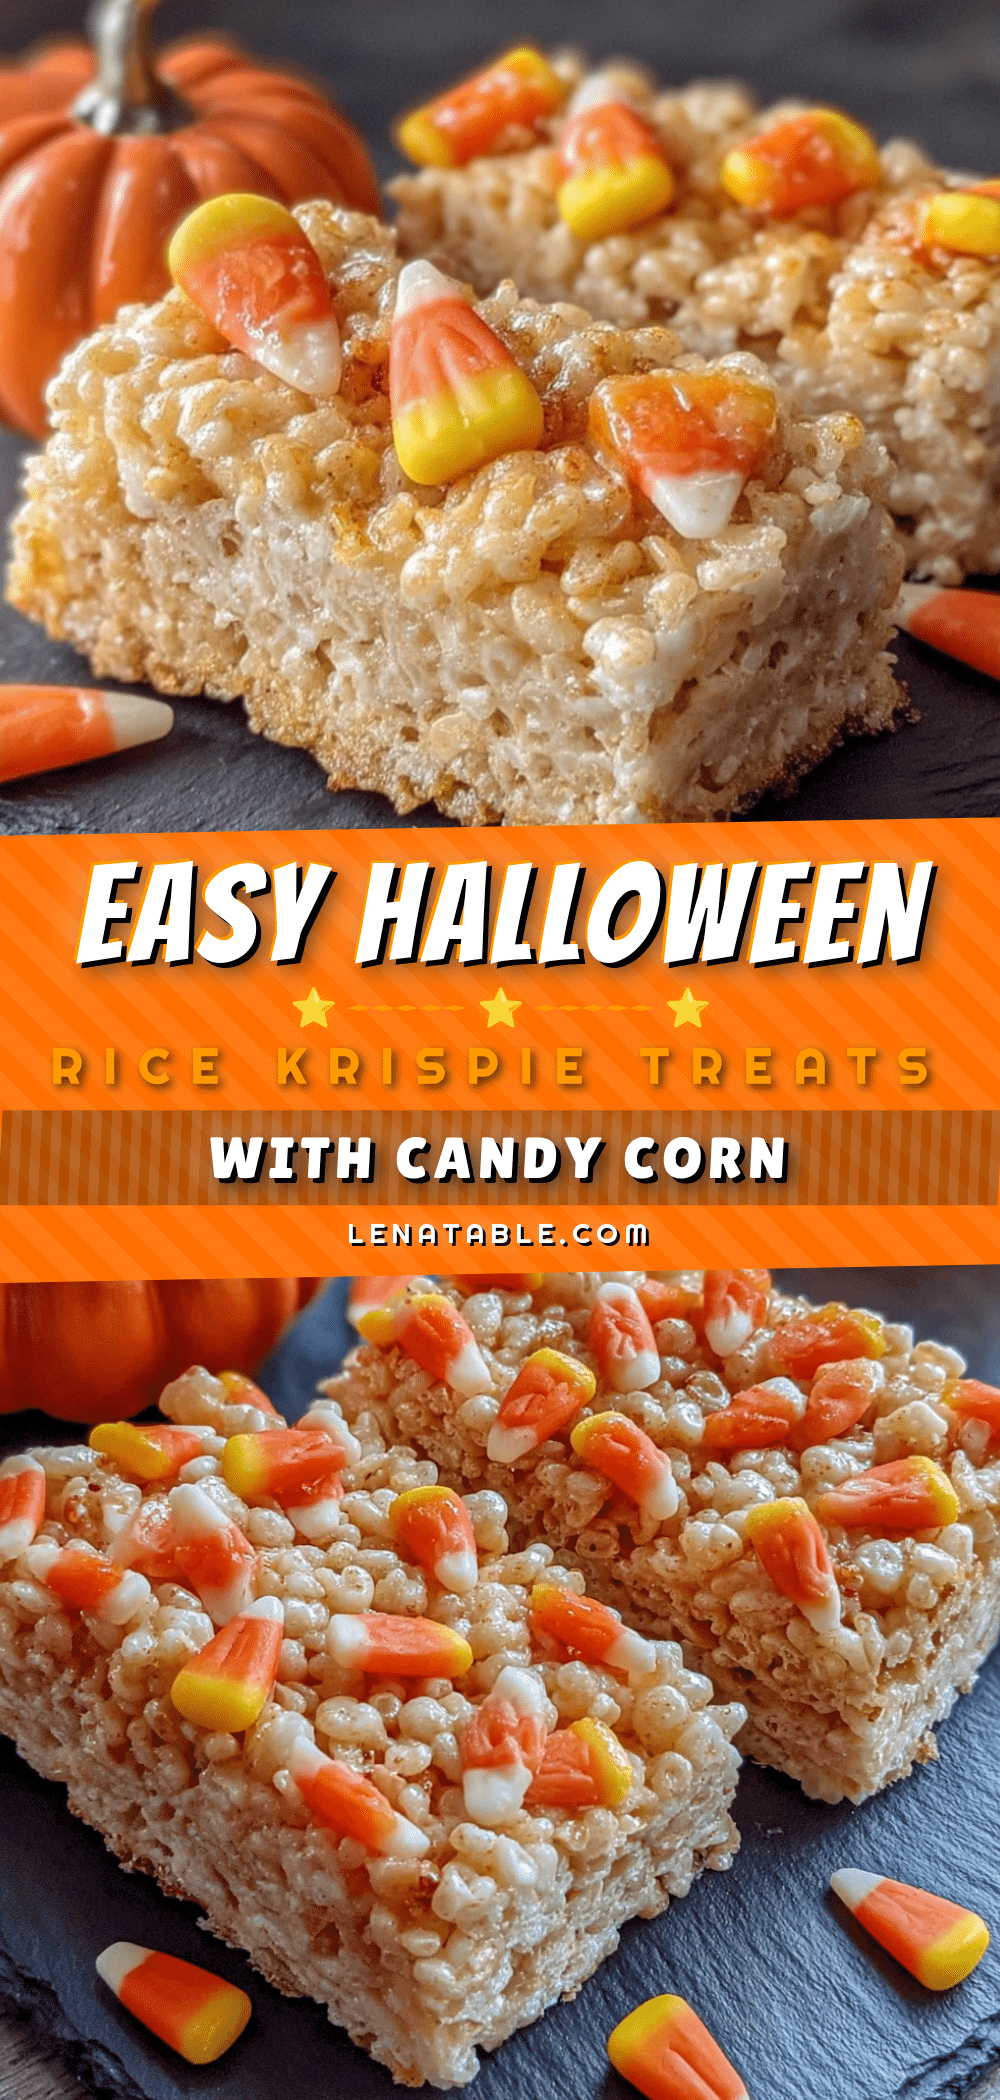
Easy Halloween Rice Krispie Treats with Candy Corn
These Easy Halloween Rice Krispie Treats with Candy Corn are a quick, festive, and delicious no-bake dessert perfect for Halloween parties, classroom celebrations, or a fun after-school snack. They come together in about 15 minutes of active work and use simple ingredients like butter, marshmallows, Rice Krispies cereal, and candy corn.
- Prep Time: 15 minutes
- Cook Time: 10 minutes
- Total Time: 45 minutes
- Yield: 12 servings 1x
- Category: Dessert
- Cuisine: American
Ingredients
- 6 tablespoons unsalted butter
- 1 package (10 ounces) mini marshmallows
- 6 cups Rice Krispies cereal
- 1 cup candy corn
- 1/4 teaspoon salt
- 1 teaspoon vanilla extract
Instructions
- Line a 9×13-inch baking pan with parchment paper, leaving overhang on two opposite sides. Lightly spray the parchment with non-stick cooking spray.
- Place a large pot over medium-low heat and melt the 6 tablespoons of butter, swirling occasionally, until fully melted but not browned (about 2-3 minutes).
- Add the entire 10-ounce bag of mini marshmallows to the melted butter. Stir constantly until the marshmallows are completely smooth and glossy (about 4-5 minutes).
- Remove the pot from heat. Stir in the 1 teaspoon of vanilla extract and 1/4 teaspoon of salt (if using).
- Pour in the 6 cups of Rice Krispies cereal. Fold gently but thoroughly until every piece of cereal is coated in marshmallow.
- Add 1/2 cup of candy corn and fold it into the mixture.
- Scrape the mixture into the prepared pan. Use a spatula (sprayed with cooking spray) to spread it into an even layer.
- Sprinkle the remaining 1/2 cup of candy corn over the top. Gently press them into the surface so they stick.
- Let the treats set at room temperature for about 30 minutes, until firm.
- Lift the block out using the parchment handles. Place on a cutting board. Use a sharp knife (sprayed with cooking spray between cuts) to cut into squares or rectangles.
Notes
For best results, use fresh marshmallows and fresh cereal. Do not refrigerate the treats as they will become hard. The treats are best served at room temperature. For a dairy-free version, use vegan butter and vegan marshmallows. For gluten-free, use certified gluten-free Rice Krispies. The candy corn can be substituted with candy pumpkins or Reese’s Pieces.
Nutrition
- Serving Size: 1 square (based on 1
- Calories: 280
- Sugar: 32
- Sodium: 210
- Fat: 8
- Saturated Fat: 5
- Carbohydrates: 52
- Protein: 2
Keywords: Halloween Rice Krispie treats, candy corn treats, no-bake Halloween dessert, easy Halloween recipe, Rice Krispie treats with candy corn


