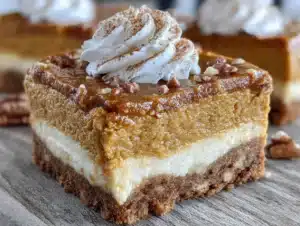
Love this? Save it for later!
Share the inspiration with your friends
The fall bake sale was in twelve hours and I’d completely forgotten. I mean, I’d signed up for it three weeks ago, written it on the calendar in big red letters, and then promptly let life—work deadlines, kid pickups, the usual chaos—erase it from my brain. It wasn’t until my phone buzzed with a reminder that I felt that cold panic wash over me. Everyone else would be bringing those gorgeous, layered pumpkin pies with homemade crusts that took all day. I had a block of cream cheese, a can of pumpkin puree, and about forty-five minutes before I needed to be in bed.
I stood in my kitchen, staring at the pantry like it might magically produce a solution. Then I remembered a trick my neighbor had mentioned once, something about using a boxed crust mix to save time. I grabbed it, along with a few other basics, and started throwing things together. Honestly, I wasn’t expecting much. I was just trying to avoid showing up empty-handed.
So imagine my surprise when these bars—these slightly frantic, thrown-together bars—ended up being the first thing to disappear from the dessert table. Someone actually asked me for the recipe. I laughed and said, “Sure, it’s the one I made in a panic.” But maybe you’ve been there, right? That moment when you need something impressive fast, and you just have to trust the process. These quick pumpkin pie cheesecake bars are that recipe for me now. They’re the reason I actually look forward to fall baking again.
Why You’ll Love This Recipe
These aren’t just any pumpkin bars. They’re the kind that make you wonder why you ever bothered with a full-on cheesecake or a traditional pie. I’ve tested this recipe about six times now, tweaking the sugar, playing with the bake time, and I can honestly say it’s foolproof. Here’s what makes it stand out:
- Quick & Easy: From start to finish, you’re looking at about an hour. That’s mixing, baking, and cooling time included. Perfect for a Tuesday night when you still want something homemade.
- Simple Ingredients: You probably have most of this in your pantry right now. No chasing down fancy extracts or obscure spices.
- Perfect for Fall Gatherings: Whether it’s Thanksgiving, a potluck, or just a cozy night in, these bars fit right in. They’re portable, sliceable, and everyone loves them.
- Crowd-Pleaser: I’ve served these to kids, adults, and even my aunt who “doesn’t like pumpkin.” She had two slices.
- Unbelievably Delicious: The combo of a buttery crust, creamy cheesecake, and spiced pumpkin filling is just next-level comfort food. It’s the kind of dessert that makes you close your eyes after the first bite.
What sets this recipe apart is the texture. The cheesecake layer stays silky and rich, while the pumpkin layer firms up perfectly without getting rubbery. It’s not just another version of pumpkin cheesecake bars—it’s the best version, born out of a real need for speed and flavor.
What Ingredients You Will Need
This recipe uses simple, wholesome ingredients to deliver bold flavor and satisfying texture without the fuss. Most of these are pantry staples, especially if you do any fall baking at all.
- For the Crust:
- 1 ½ cups graham cracker crumbs (about 12 full sheets, crushed)
- ¼ cup granulated sugar
- 6 tablespoons unsalted butter, melted (I use Land O’Lakes for consistent flavor)
- Pinch of salt
- For the Cheesecake Layer:
- 16 ounces cream cheese, softened (full-fat works best for creaminess)
- ½ cup granulated sugar
- 2 large eggs, room temperature
- 1 teaspoon vanilla extract
- For the Pumpkin Layer:
- 1 can (15 ounces) pumpkin puree (not pumpkin pie filling—look for 100% pure pumpkin)
- ½ cup packed brown sugar
- 2 large eggs, room temperature
- 1 teaspoon pumpkin pie spice (or ½ teaspoon cinnamon, ¼ teaspoon nutmeg, ¼ teaspoon ginger, ⅛ teaspoon cloves)
- ½ teaspoon cinnamon
- ¼ teaspoon salt
A few notes on ingredients: I really recommend using full-fat cream cheese here. Low-fat versions can make the cheesecake layer a bit watery, and we want that dense, creamy texture. For the pumpkin puree, I always grab Libby’s—it’s consistent and not too watery. If you only have pumpkin pie filling, just reduce the sugar and spices slightly, but honestly, pure pumpkin is safer. You can also swap the graham crackers for ginger snaps if you want a spicier crust. It’s a fun twist!
Equipment Needed
You don’t need a fancy kitchen to pull these off. Here’s what you’ll need:
- 9×9-inch baking pan (an 8×8 works too, but bars will be thicker and need a few extra minutes)
- Mixing bowls (one large, two medium)
- Electric hand mixer or stand mixer (you can do it by hand, but the cheesecake layer gets much smoother with a mixer)
- Parchment paper (for easy lifting and cleanup)
- Measuring cups and spoons
- Spatula
- Food processor or zip-top bag and rolling pin (for crushing graham crackers)
If you don’t have a food processor, just put the graham crackers in a zip-top bag and crush them with a rolling pin. It’s a little arm workout, but it works perfectly. I’ve also used the bottom of a heavy mug in a pinch. As for the pan, I prefer a metal one over glass for even baking. Glass can sometimes trap heat and make the edges overbake.
Preparation Method
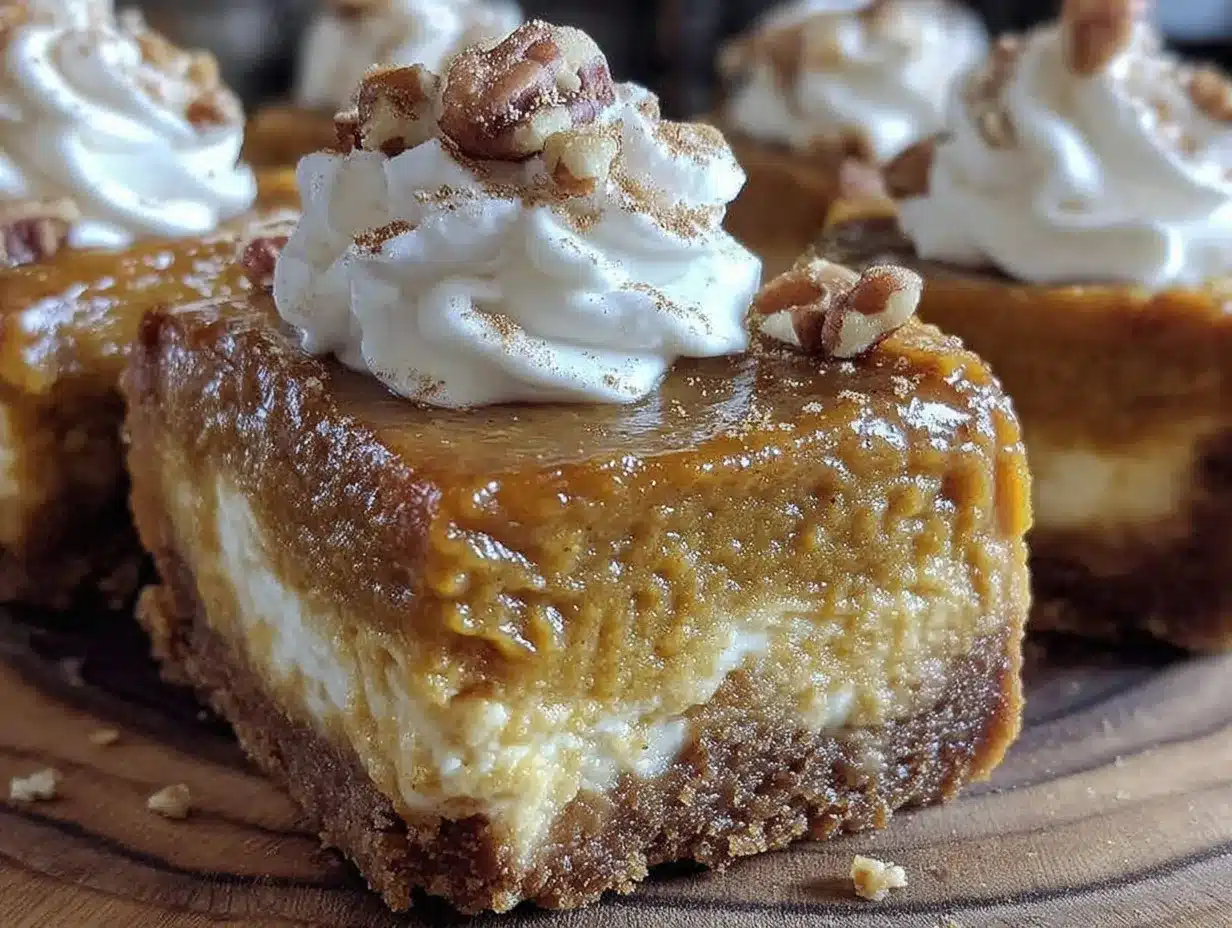
Let’s get baking! This whole process takes about 15 minutes of active prep and 35-40 minutes of baking time.
- Preheat and Prep: Preheat your oven to 350°F (175°C). Line your 9×9-inch baking pan with parchment paper, leaving some overhang on two sides. This makes lifting the bars out so much easier later. Lightly spray the parchment with non-stick spray.
- Make the Crust: In a medium bowl, combine 1 ½ cups graham cracker crumbs, ¼ cup sugar, and a pinch of salt. Pour in 6 tablespoons of melted butter and stir with a fork until it looks like wet sand. Press this mixture firmly into the bottom of your prepared pan. I use the bottom of a measuring cup to really pack it down. Bake for 8 minutes, then set aside to cool slightly while you make the fillings.
- Prepare the Cheesecake Layer: In a large bowl, beat 16 ounces of softened cream cheese with ½ cup sugar until smooth and creamy—about 2 minutes with a hand mixer. Scrape down the sides. Add 2 eggs, one at a time, beating well after each. Mix in 1 teaspoon vanilla. Be careful not to overmix once the eggs are in; it can incorporate too much air and cause cracks later. Pour this mixture over the warm crust and spread it evenly.
- Make the Pumpkin Layer: In another bowl, whisk together 1 can of pumpkin puree, ½ cup brown sugar, 2 eggs, 1 teaspoon pumpkin pie spice, ½ teaspoon cinnamon, and ¼ teaspoon salt. Whisk until smooth and well combined. It should be thick but pourable. Gently spoon this over the cheesecake layer, spreading it carefully to cover completely.
- Swirl It (Optional but Fun): Take a knife or a toothpick and gently swirl the two layers together. Just a few figure-eight motions. You don’t want to mix them fully—just create a marbled effect. If you prefer distinct layers, skip this step.
- Bake: Place the pan in the preheated oven and bake for 35-40 minutes. The edges should look set and slightly puffed, but the center will still jiggle a little when you shake the pan. That’s perfect. Overbaking is the enemy of creamy cheesecake. Remove from the oven and let cool on a wire rack for 1 hour.
- Chill: Once cooled to room temperature, transfer the pan to the refrigerator and chill for at least 3 hours, preferably overnight. This is crucial—it sets the bars and makes them sliceable. I know it’s hard to wait, but trust me.
- Slice and Serve: Use the parchment overhang to lift the entire block out of the pan. Place on a cutting board and use a sharp knife to slice into 16 squares. Wipe the knife clean between cuts for neat edges. Serve cold or at room temperature.
Cooking Tips & Techniques
I’ve made a few mistakes so you don’t have to. Here’s what I learned:
- Room Temperature Ingredients: This is the number one tip. Cold cream cheese will give you a lumpy cheesecake layer. Set it out on the counter for about 30 minutes before you start. Same for the eggs.
- Don’t Overmix the Cheesecake: Once you add the eggs, mix just until combined. Overmixing incorporates air, which can cause the cheesecake to puff up and then crack as it cools.
- The Jiggle Test: The center should still wobble slightly when you take it out of the oven. It will continue to set as it cools. If you wait until the center is completely firm, it will be overbaked and dry.
- Chill Time is Non-Negotiable: I once tried to rush this and cut into the bars after only an hour in the fridge. It was a mess. They need that full 3 hours to set properly.
- Sharp Knife for Clean Slices: Use a long, sharp knife and wipe it clean between each cut. It makes a huge difference in presentation.
Variations & Adaptations
This recipe is super flexible. Here are a few ways to switch it up:
- Gluten-Free Option: Use gluten-free graham crackers or crushed gluten-free cookies for the crust. The filling is naturally gluten-free, so this is an easy swap.
- Spiced Up Crust: Replace graham crackers with crushed ginger snaps or speculoos cookies. The extra ginger and spice pair beautifully with the pumpkin.
- Dairy-Free Version: Use a dairy-free cream cheese alternative (I like Kite Hill) and vegan butter for the crust. The texture will be slightly softer, but still delicious.
- Add a Topping: Drizzle with caramel sauce and a sprinkle of flaky sea salt before serving. Or top with a dollop of whipped cream and a dusting of cinnamon.
- Pumpkin-Forward Swirl: If you want more pumpkin flavor, increase the pumpkin layer by adding an extra ¼ cup of puree and an extra egg yolk. It makes the swirl more pronounced.
Serving & Storage Suggestions
These bars are best served cold, straight from the fridge. The texture is firm and creamy, like a dreamy cheesecake bar. For a prettier presentation, let them sit at room temperature for about 10 minutes before slicing—it softens the edges just slightly.
They pair beautifully with a hot cup of coffee or a spiced chai latte. For a full dessert spread, serve alongside a slice of classic apple pie or a warm cinnamon baked apples dish. If you’re feeling indulgent, a scoop of vanilla bean ice cream on top is never a bad idea.
Storage is easy. Keep the bars in an airtight container in the refrigerator for up to 5 days. They actually get better after a day or two as the flavors meld together. You can also freeze them for up to 3 months. Just wrap the whole block (or individual bars) tightly in plastic wrap, then foil. Thaw in the fridge overnight before serving.
To reheat, I don’t recommend it—they’re meant to be cold. But if you must, a quick 10-second zap in the microwave will take the chill off without melting the texture.
Nutritional Information & Benefits
Here’s an approximate breakdown per bar (based on 16 servings):
- Calories: 285
- Fat: 18g
- Carbohydrates: 28g
- Protein: 5g
- Sugar: 20g
- Fiber: 1g
These bars are a treat, but they do have some redeeming qualities. Pumpkin is packed with vitamin A and fiber, which is great for eye health and digestion. The eggs provide high-quality protein, and the cream cheese adds a bit of calcium. If you’re looking for a lower-sugar version, you can reduce the sugar in the cheesecake layer to ⅓ cup and use a sugar substitute in the pumpkin layer—just be aware it will affect the texture slightly. For a lighter option, try the dairy-free version mentioned above.
Conclusion
These quick pumpkin pie cheesecake bars are the fall dessert you didn’t know you needed. They’re fast enough for a weeknight, impressive enough for company, and forgiving enough for a beginner. I love them because they remind me that you don’t need hours in the kitchen to create something truly special. Sometimes the best recipes come from a moment of panic and a little bit of faith.
I’d love to hear how yours turn out! Did you add a swirl? Try a different crust? Leave a comment below and let me know. And if you share a photo on social media, tag me so I can see your beautiful creation. Happy baking, friends!
Frequently Asked Questions
Can I use a different size pan?
Yes, an 8×8 pan works, but the bars will be thicker. Increase the baking time by about 5-8 minutes and check for doneness with the jiggle test.
Can I make these ahead of time?
Absolutely! They actually taste better after a day in the fridge. Make them up to 2 days in advance and keep them covered in the refrigerator.
Why did my cheesecake layer crack?
This usually happens from overmixing or overbaking. Make sure your ingredients are room temperature, mix gently, and pull the bars out when the center still jiggles slightly.
Can I freeze these bars?
Yes, they freeze beautifully. Wrap tightly in plastic wrap and foil, and freeze for up to 3 months. Thaw overnight in the fridge before serving.
Can I use fresh pumpkin instead of canned?
You can, but you’ll need to cook and puree it first, then drain off excess water. Canned pumpkin is more consistent and saves time, which is the whole point of this recipe!
Pin This Recipe!
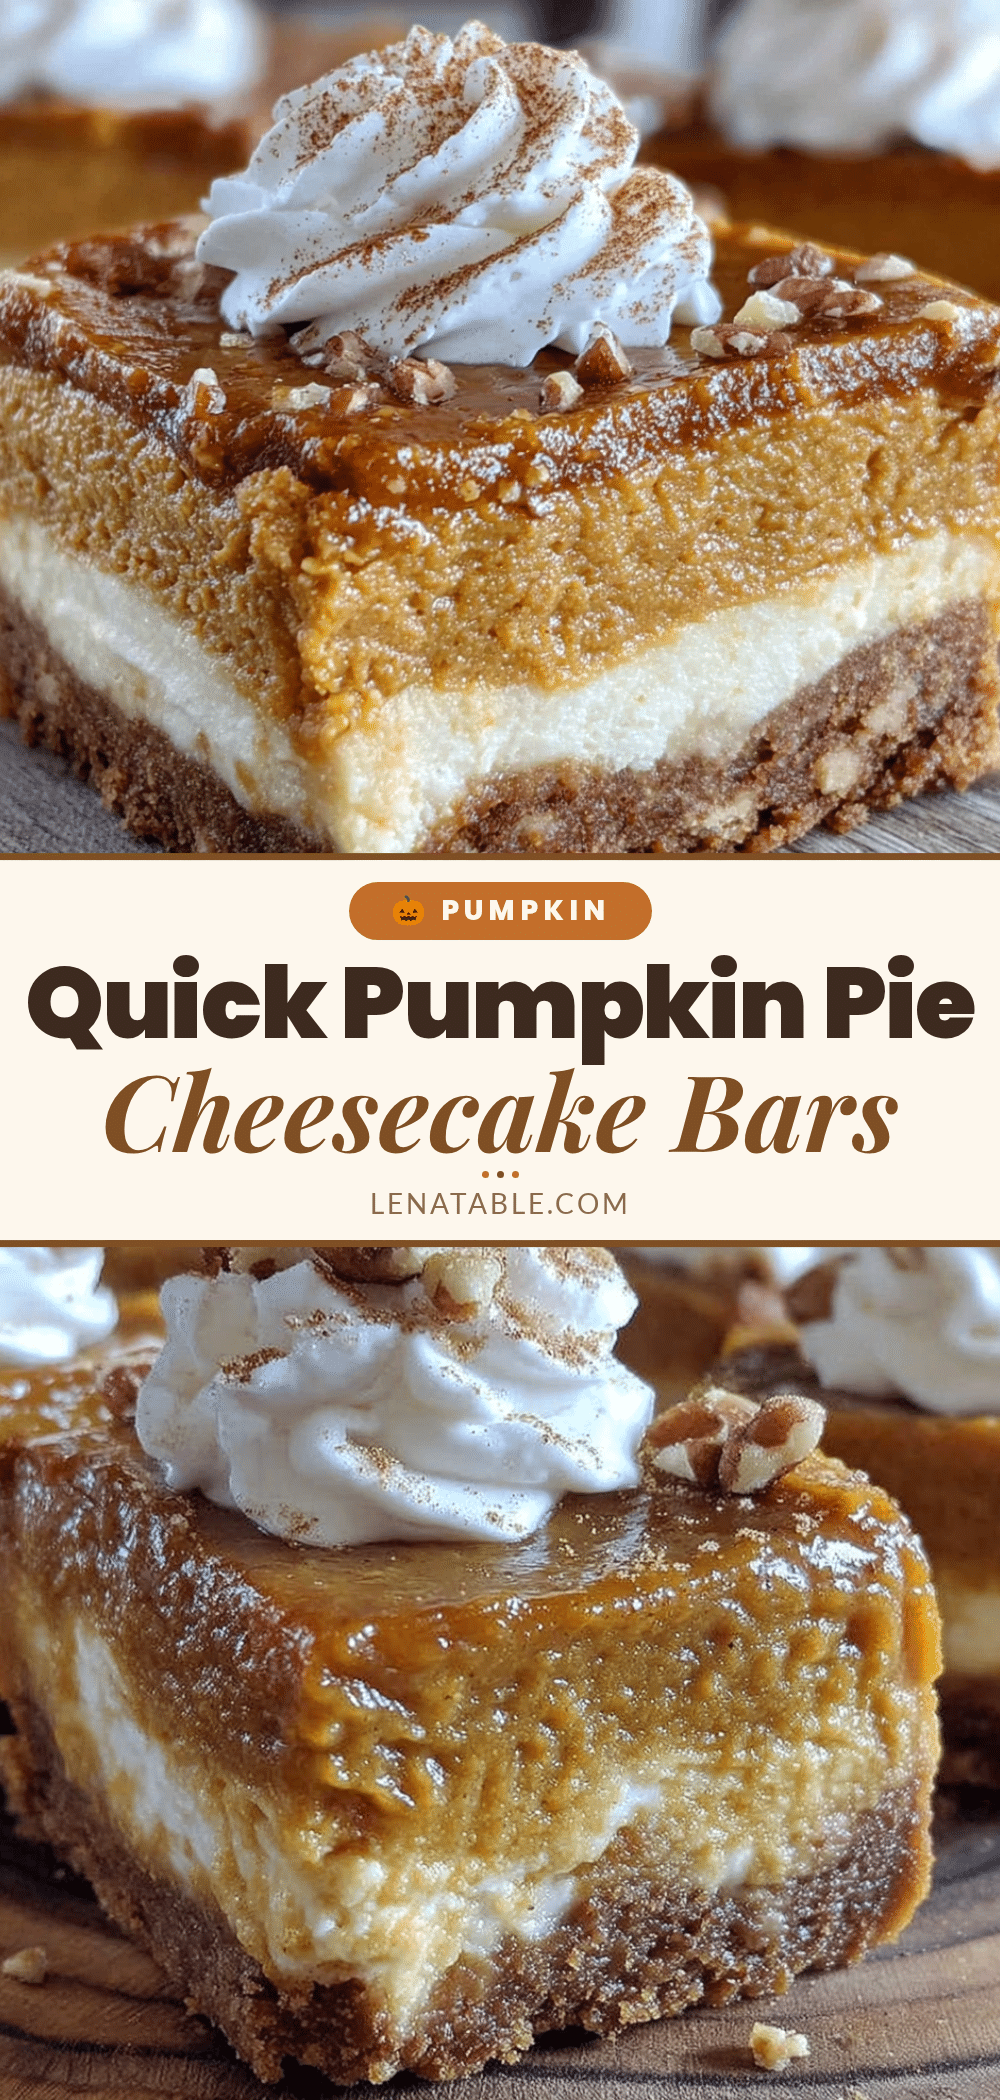
Best Easy Pumpkin Pie Cheesecake Bars Recipe
These quick pumpkin pie cheesecake bars are the fall dessert you didn’t know you needed. They’re fast enough for a weeknight, impressive enough for company, and forgiving enough for a beginner.
- Prep Time: 15 minutes
- Cook Time: 35-40 minutes
- Total Time: 1 hour (plus 3 hours chilling)
- Yield: 16 servings 1x
- Category: Dessert
- Cuisine: American
Ingredients
- 1 ½ cups graham cracker crumbs (about 12 full sheets, crushed)
- ¼ cup granulated sugar
- 6 tablespoons unsalted butter, melted
- Pinch of salt
- 16 ounces cream cheese, softened
- ½ cup granulated sugar
- 2 large eggs, room temperature
- 1 teaspoon vanilla extract
- 1 can (15 ounces) pumpkin puree
- ½ cup packed brown sugar
- 2 large eggs, room temperature
- 1 teaspoon pumpkin pie spice
- ½ teaspoon cinnamon
- ¼ teaspoon salt
Instructions
- Preheat your oven to 350°F (175°C). Line your 9×9-inch baking pan with parchment paper, leaving some overhang on two sides. Lightly spray the parchment with non-stick spray.
- In a medium bowl, combine 1 ½ cups graham cracker crumbs, ¼ cup sugar, and a pinch of salt. Pour in 6 tablespoons of melted butter and stir with a fork until it looks like wet sand. Press this mixture firmly into the bottom of your prepared pan. Bake for 8 minutes, then set aside to cool slightly.
- In a large bowl, beat 16 ounces of softened cream cheese with ½ cup sugar until smooth and creamy—about 2 minutes with a hand mixer. Scrape down the sides. Add 2 eggs, one at a time, beating well after each. Mix in 1 teaspoon vanilla. Pour this mixture over the warm crust and spread it evenly.
- In another bowl, whisk together 1 can of pumpkin puree, ½ cup brown sugar, 2 eggs, 1 teaspoon pumpkin pie spice, ½ teaspoon cinnamon, and ¼ teaspoon salt. Whisk until smooth and well combined. Gently spoon this over the cheesecake layer, spreading it carefully to cover completely.
- Take a knife or a toothpick and gently swirl the two layers together. Just a few figure-eight motions. If you prefer distinct layers, skip this step.
- Place the pan in the preheated oven and bake for 35-40 minutes. The edges should look set and slightly puffed, but the center will still jiggle a little when you shake the pan. Remove from the oven and let cool on a wire rack for 1 hour.
- Once cooled to room temperature, transfer the pan to the refrigerator and chill for at least 3 hours, preferably overnight.
- Use the parchment overhang to lift the entire block out of the pan. Place on a cutting board and use a sharp knife to slice into 16 squares. Wipe the knife clean between cuts for neat edges. Serve cold or at room temperature.
Notes
Room temperature ingredients are crucial for a smooth cheesecake layer. Don’t overmix the cheesecake once eggs are added. The center should still jiggle when you remove from the oven. Chill time is non-negotiable for clean slices. Use a sharp knife and wipe clean between cuts.
Nutrition
- Serving Size: 1 bar
- Calories: 285
- Sugar: 20
- Sodium: 220
- Fat: 18
- Saturated Fat: 10
- Carbohydrates: 28
- Fiber: 1
- Protein: 5
Keywords: pumpkin cheesecake bars, easy pumpkin dessert, fall baking, quick dessert, cheesecake bars, pumpkin pie bars