Love this? Save it for later!
Share the inspiration with your friends
I swore I hated no-churn ice cream. A whole three years of watching friends blend condensed milk with whipped cream, freeze it, and call it gelato. I’d take one polite spoonful and think — nope, too icy, too sweet, not worth the freezer space. Then last July, my sister showed up at my back door on a Tuesday holding a quart container with a sticky note that just said “try it.” I rolled my eyes so hard. But I was hot, the power bill was too high to run the AC all day, and she was blocking the doorway. So I grabbed a spoon, scraped off a bite, and stood there in the humidity letting this ridiculous, salty-sweet, velvety cold thing melt on my tongue. I didn’t say a word. I just took another scoop. And another. She laughed at me for a solid minute before I finally admitted — okay, maybe I was wrong. Maybe no-churn ice cream just needed the right flavor to win me over. And honestly? Salted caramel was the one that did it. Maybe you’ve been there too, skeptical of a shortcut dessert that sounds too good to be true. I get it. But this one’s different.
Why You’ll Love This Recipe
Let me tell you why this easy no-churn salted caramel ice cream has become my go-to for every hot weeknight when the kids are asking for something cold and I have exactly zero energy left. It’s not just good — it’s the kind of frozen dessert that makes you close your eyes after the first bite and forget the dishes in the sink for a minute.
- No Ice Cream Maker Needed — You don’t need any fancy equipment. Just a mixing bowl, a hand mixer or whisk, and a loaf pan. That’s it. No churning, no waiting for a frozen bowl, no special attachments.
- Quick to Put Together — The active prep time is under 15 minutes. I mean it. You can whip this up while dinner is simmering and pop it in the freezer before you sit down to eat.
- Simple Pantry Ingredients — Heavy cream, sweetened condensed milk, vanilla, butter, brown sugar, and salt. That’s everything. No eggs, no custard base, no complicated steps.
- Rich, Creamy Texture — Unlike some no-churn recipes that turn into a block of ice, this one stays scoopable and velvety thanks to the caramel sauce folded right into the cream mixture.
- Perfect Balance of Sweet and Salty — The caramel is deep and buttery, but the flaky salt on top cuts through the sweetness. It hits that craving right where it lives.
I tested this recipe four times before I got it exactly right. The first batch was too sweet. The second one had ice crystals. The third needed more salt. But this version — this is the one I keep making every single week. It’s the kind of recipe that makes you look like a dessert hero without breaking a sweat. Perfect for a hot summer night, a lazy Sunday, or honestly, a random Wednesday when you just need something good.
What Ingredients You Will Need
This easy no-churn salted caramel ice cream uses simple, everyday ingredients that you probably already have in your kitchen. The magic is in how they come together. Let me walk you through each one so you know exactly what to grab at the store.
For the Salted Caramel Sauce
- 1 cup granulated sugar — Regular white sugar works best here. Don’t use brown sugar for the caramel base; it can burn too fast and give a bitter taste.
- 6 tablespoons unsalted butter, cut into small cubes — I use Land O’Lakes because it’s consistent. Make sure it’s unsalted so you control the salt level yourself.
- 1/2 cup heavy cream, at room temperature — Cold cream will seize the caramel and make it lumpy. Let it sit out for 10 minutes before you start.
- 1 teaspoon flaky sea salt, plus more for sprinkling — Maldon is my favorite. The big flakes give you little bursts of salt that make the caramel sing.
- 1 teaspoon vanilla extract — Pure vanilla, not imitation. Trust me on this one.
For the Ice Cream Base
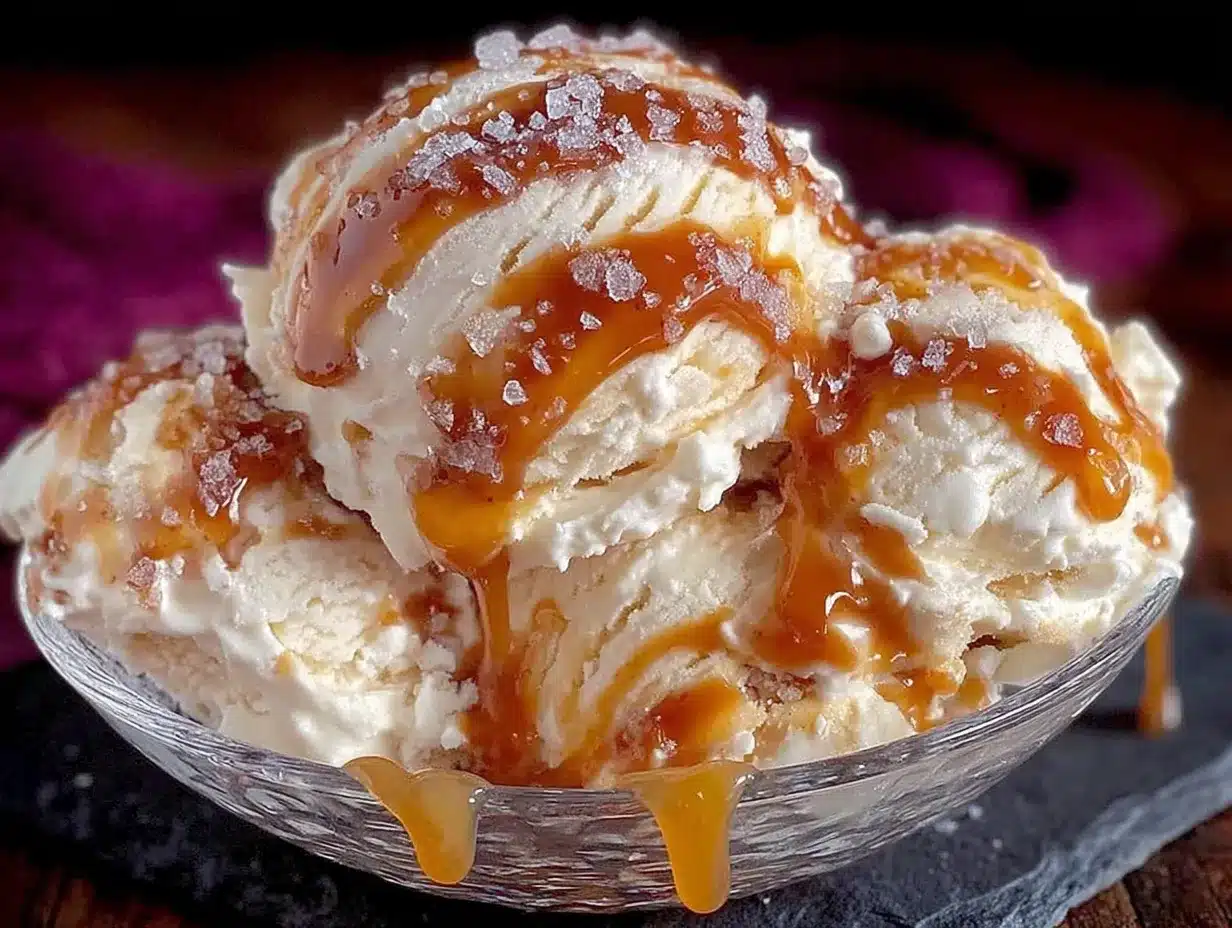
- 2 cups cold heavy cream — This needs to be straight from the fridge. Cold cream whips up much better and gives you that light, airy texture.
- 1 can (14 ounces) sweetened condensed milk — This is the backbone of no-churn ice cream. It adds sweetness and prevents ice crystals. I use Eagle Brand, but any brand works.
- 1 teaspoon vanilla extract — Again, go with pure vanilla if you can.
- 1/2 cup salted caramel sauce (from the recipe above) — You’ll fold this into the base and also swirl it on top.
One thing I learned the hard way — don’t skip letting the caramel cool down before you add it to the cream mixture. I was impatient on my second batch and poured warm caramel right in. It melted the whipped cream into a sad puddle. Let it cool to room temperature, about 20 minutes, and you’ll get those beautiful ribbons of caramel running through the ice cream instead of a muddy mess.
If you want to use store-bought caramel sauce to save time, go for it. Just look for one that’s thick and not too sweet. I’ve tried a few brands, and honestly, homemade is better here because you control the salt level. But I won’t judge you for taking a shortcut — we’re all busy.
Equipment Needed
You don’t need much for this recipe, which is part of why I love it so much. Here’s what you’ll need:
- Medium saucepan — For making the caramel sauce. A light-colored pan is best so you can see the color change as the sugar melts.
- Large mixing bowl — For whipping the cream. Make sure it’s big enough to hold everything without splashing.
- Hand mixer or stand mixer — You can whisk by hand if you have strong arms, but a hand mixer makes it so much faster. I use my KitchenAid hand mixer for this.
- Rubber spatula — For folding the caramel into the cream mixture without deflating it.
- Loaf pan (9×5 inches) — This is the perfect size for no-churn ice cream. Line it with parchment paper for easy removal.
- Plastic wrap or wax paper — To cover the surface of the ice cream directly and prevent freezer burn.
If you don’t have a loaf pan, you can use an 8×8 square dish or even a metal bowl. Just make sure whatever you use is freezer-safe. I once used a glass casserole dish and forgot to let it come to room temperature first — it cracked right down the middle. Learn from my mistakes, friends.
Preparation Method
Let’s make some ice cream. I promise this is easier than you think. Take it step by step and you’ll have a creamy, dreamy dessert waiting for you in the freezer.
Step 1: Make the Salted Caramel Sauce
Place your saucepan over medium heat and pour in the granulated sugar. Don’t stir it yet — just let it sit and start melting around the edges. After about 3 minutes, you’ll see liquid gold forming. Gently swirl the pan (don’t use a spoon yet) to help the sugar melt evenly. Keep going until the sugar is completely melted and turns a deep amber color, like a copper penny. This takes about 6 to 8 minutes total. Watch it carefully — caramel can go from perfect to burnt in seconds.
Once it’s that beautiful amber color, remove the pan from the heat and immediately add the cubed butter. It will bubble up and steam — that’s normal. Whisk vigorously until the butter is fully melted and incorporated. The mixture will look smooth and glossy.
Slowly pour in the room-temperature heavy cream while whisking constantly. Again, it will bubble up. Keep whisking until everything is smooth and combined. Stir in the vanilla extract and the flaky sea salt. Let the caramel cool in the pan for about 20 minutes. It will thicken as it cools.
Step 2: Whip the Cream
Pour the cold heavy cream into your large mixing bowl. Using a hand mixer or stand mixer fitted with the whisk attachment, beat the cream on medium-high speed until stiff peaks form. This takes about 3 to 4 minutes. You’re looking for peaks that stand up straight when you lift the beaters — not droopy, not butter. Stop before it turns into butter. I’ve done that before and trust me, it’s not salvageable.
Step 3: Combine the Base
In a separate small bowl, whisk together the sweetened condensed milk and vanilla extract until smooth. Gently fold this mixture into the whipped cream using a rubber spatula. Use a light hand here — you want to keep as much air in the cream as possible. Fold until just combined, with no white streaks remaining.
Step 4: Add the Caramel
Take your cooled caramel sauce and measure out 1/2 cup. Reserve the rest for drizzling later. Drizzle about half of that 1/2 cup over the cream mixture. Use your spatula to fold it in with just 3 or 4 strokes — you want streaks of caramel running through the base, not a uniform color. This is what gives you those gorgeous ribbons in every scoop.
Step 5: Layer and Freeze
Line your loaf pan with parchment paper, leaving some overhang on the sides. Spoon half of the ice cream mixture into the pan and spread it evenly. Drizzle a little more caramel sauce on top. Add the remaining ice cream mixture and spread it smooth. Drizzle the last bit of caramel on top and use a knife or skewer to swirl it gently. Don’t over-swirl or you’ll lose the distinct layers.
Sprinkle a generous pinch of flaky sea salt over the top. Cover the surface directly with plastic wrap or wax paper — this prevents ice crystals from forming. Then cover the whole pan with another layer of foil or plastic wrap. Freeze for at least 6 hours, but overnight is better. The longer it freezes, the creamier it gets.
Cooking Tips & Techniques
I’ve made this easy no-churn salted caramel ice cream more times than I can count, and I’ve learned a few things along the way. Let me save you some trouble.
Don’t rush the caramel. I know it’s tempting to crank up the heat and get it done faster, but medium heat is your friend. High heat will burn the sugar before it even melts. Be patient. The first time I made caramel, I walked away to check my phone and came back to a blackened mess. Set a timer if you need to.
Room temperature ingredients matter. The cream needs to be cold for whipping, but the caramel needs room-temperature cream to stay smooth. If your cream is too cold when you add it to the caramel, it will seize up into hard lumps. Let the cream sit out for 10 minutes before you pour it in.
Whip the cream to stiff peaks, not beyond. If you over-whip, you’ll end up with butter chunks in your ice cream. Not the end of the world, but not ideal either. Watch for the peaks to stand up straight and then stop immediately.
Fold gently. This is not the time for aggressive mixing. Use a light hand and fold until just combined. Every stroke deflates a little air, and air is what gives you that creamy, scoopable texture.
Let it soften before scooping. When you’re ready to serve, let the ice cream sit at room temperature for about 5 to 10 minutes. It will scoop much easier and the texture will be silkier. I forgot this step once and ended up with bent spoons and frustration.
Variations & Adaptations
This recipe is super flexible. Here are a few ways I’ve changed it up depending on what I’m craving or what I have in the pantry.
Chocolate Swirl Salted Caramel — Melt 1/2 cup of dark chocolate chips and let it cool slightly. Drizzle it into the ice cream along with the caramel. The chocolate and caramel together are absolutely dangerous. I made this for a party and it disappeared in 10 minutes.
Vegan Version — Use full-fat coconut cream instead of heavy cream. Chill two cans of coconut cream overnight, scoop out the solid cream, and whip it just like you would regular cream. Use a dairy-free sweetened condensed coconut milk and vegan butter. The texture is a little different — slightly icier — but the flavor is still amazing.
Salted Caramel Coffee Crunch — Add 2 teaspoons of instant espresso powder to the cream mixture before folding. Then fold in 1/2 cup of crushed chocolate-covered espresso beans at the end. The little crunchy bits are so good against the creamy caramel.
Nutty Caramel — Toast 1/2 cup of chopped pecans or walnuts in a dry pan over medium heat for about 3 minutes until fragrant. Let them cool completely, then fold them into the ice cream before freezing. The toasted nuts add a warm, buttery crunch that pairs perfectly with the caramel.
I’ve also tried swapping the vanilla for almond extract once — it was good but a little too floral for my taste. Stick with vanilla unless you’re feeling adventurous.
Serving & Storage Suggestions
This easy no-churn salted caramel ice cream is best served straight from the freezer after a 5-minute rest on the counter. Scoop it into bowls or cones and drizzle with extra caramel sauce and a pinch of flaky salt. It’s also amazing on top of a warm brownie or a slice of apple pie. The hot-and-cold thing is just unbeatable.
For storage, keep the ice cream in the loaf pan with the plastic wrap pressed directly against the surface. This is the most important step — if air touches the ice cream, it will develop ice crystals. I learned this the hard way when I just put the lid on and called it done. The top layer was frosty and sad the next day.
The ice cream will keep in the freezer for up to 2 weeks. After that, the texture starts to get a little icy. But honestly, it never lasts that long in my house. The flavor actually deepens after the first 24 hours — the caramel and salt meld together and get even better.
If you’re making this ahead for a party, make it at least a day in advance. It gives the flavors time to settle and the texture time to set properly. Just don’t forget to take it out 10 minutes before serving.
Nutritional Information & Benefits
Let’s be real — this is a treat. But knowing what’s in it helps you enjoy it mindfully. Here’s the approximate breakdown per serving (based on 8 servings):
| Nutrient | Amount Per Serving |
|---|---|
| Calories | 410 |
| Total Fat | 28g |
| Saturated Fat | 17g |
| Cholesterol | 95mg |
| Sodium | 280mg |
| Total Carbohydrates | 38g |
| Sugars | 35g |
| Protein | 4g |
The heavy cream provides calcium and vitamin A, and the caramel has a tiny bit of iron from the molasses in the brown sugar. The salt isn’t just for flavor — it helps balance electrolytes, especially on a hot day when you’re sweating. But honestly, I eat this because it makes me happy. Life’s too short to count calories on dessert.
This recipe contains dairy and gluten (if you add the cookie crunch variation). It’s not suitable for vegans unless you make the substitutions I mentioned above.
Conclusion
This easy no-churn salted caramel ice cream is the kind of recipe that proves you don’t need fancy equipment or hours in the kitchen to make something truly special. It’s creamy, it’s salty-sweet, and it comes together in under 15 minutes of active work. I’ve made it for summer barbecues, lazy Sunday afternoons, and random Tuesday nights when I just needed a little something good. Every single time, people ask for the recipe.
I love that this recipe is forgiving. You can tweak the salt level, add mix-ins, or double the batch for a crowd. It’s your ice cream now — make it your own. And if you do, I’d love to hear about it. Drop a comment below and tell me how yours turned out, or tag me in your photos. There’s nothing better than seeing someone else fall in love with a recipe the same way I did.
Go ahead, grab your ingredients, and make some magic. Your freezer is about to become your favorite place in the kitchen.
Frequently Asked Questions
Can I use store-bought caramel sauce instead of making my own?
Yes, you absolutely can. Just use a thick, high-quality caramel sauce that isn’t too runny. Thin caramel will sink to the bottom of the ice cream instead of creating those beautiful swirls. I recommend trying it with homemade at least once though — the flavor is noticeably richer and you control the salt level.
Why did my ice cream turn out icy?
Ice crystals usually happen when the cream isn’t whipped enough or when air gets to the surface during freezing. Make sure you whip the cream to stiff peaks, and always press plastic wrap directly against the surface of the ice cream before covering the pan. Also, don’t open the freezer too often while it’s setting — temperature fluctuations cause ice crystals too.
How long does this ice cream need to freeze?
At least 6 hours, but overnight is best. The longer it freezes, the creamier and more scoopable it gets. If you’re in a hurry, you can eat it after 4 hours, but it will be softer and a little more like soft-serve. That’s not a bad thing, honestly.
Can I make this without a hand mixer?
Yes, but your arm will get a workout. You can whip the cream by hand using a whisk, but it takes about 8 to 10 minutes of steady whisking. If you have a stand mixer, that works great too. I’ve even used a food processor with the whisk attachment in a pinch — it worked, but the texture wasn’t quite as fluffy.
Can I double this recipe?
Absolutely. Just double all the ingredients and use a larger container for freezing. A 9×13 baking dish works well, or you can split it between two loaf pans. Just make sure your mixing bowl is big enough to hold the whipped cream — it doubles in volume when you whip it.
Pin This Recipe!
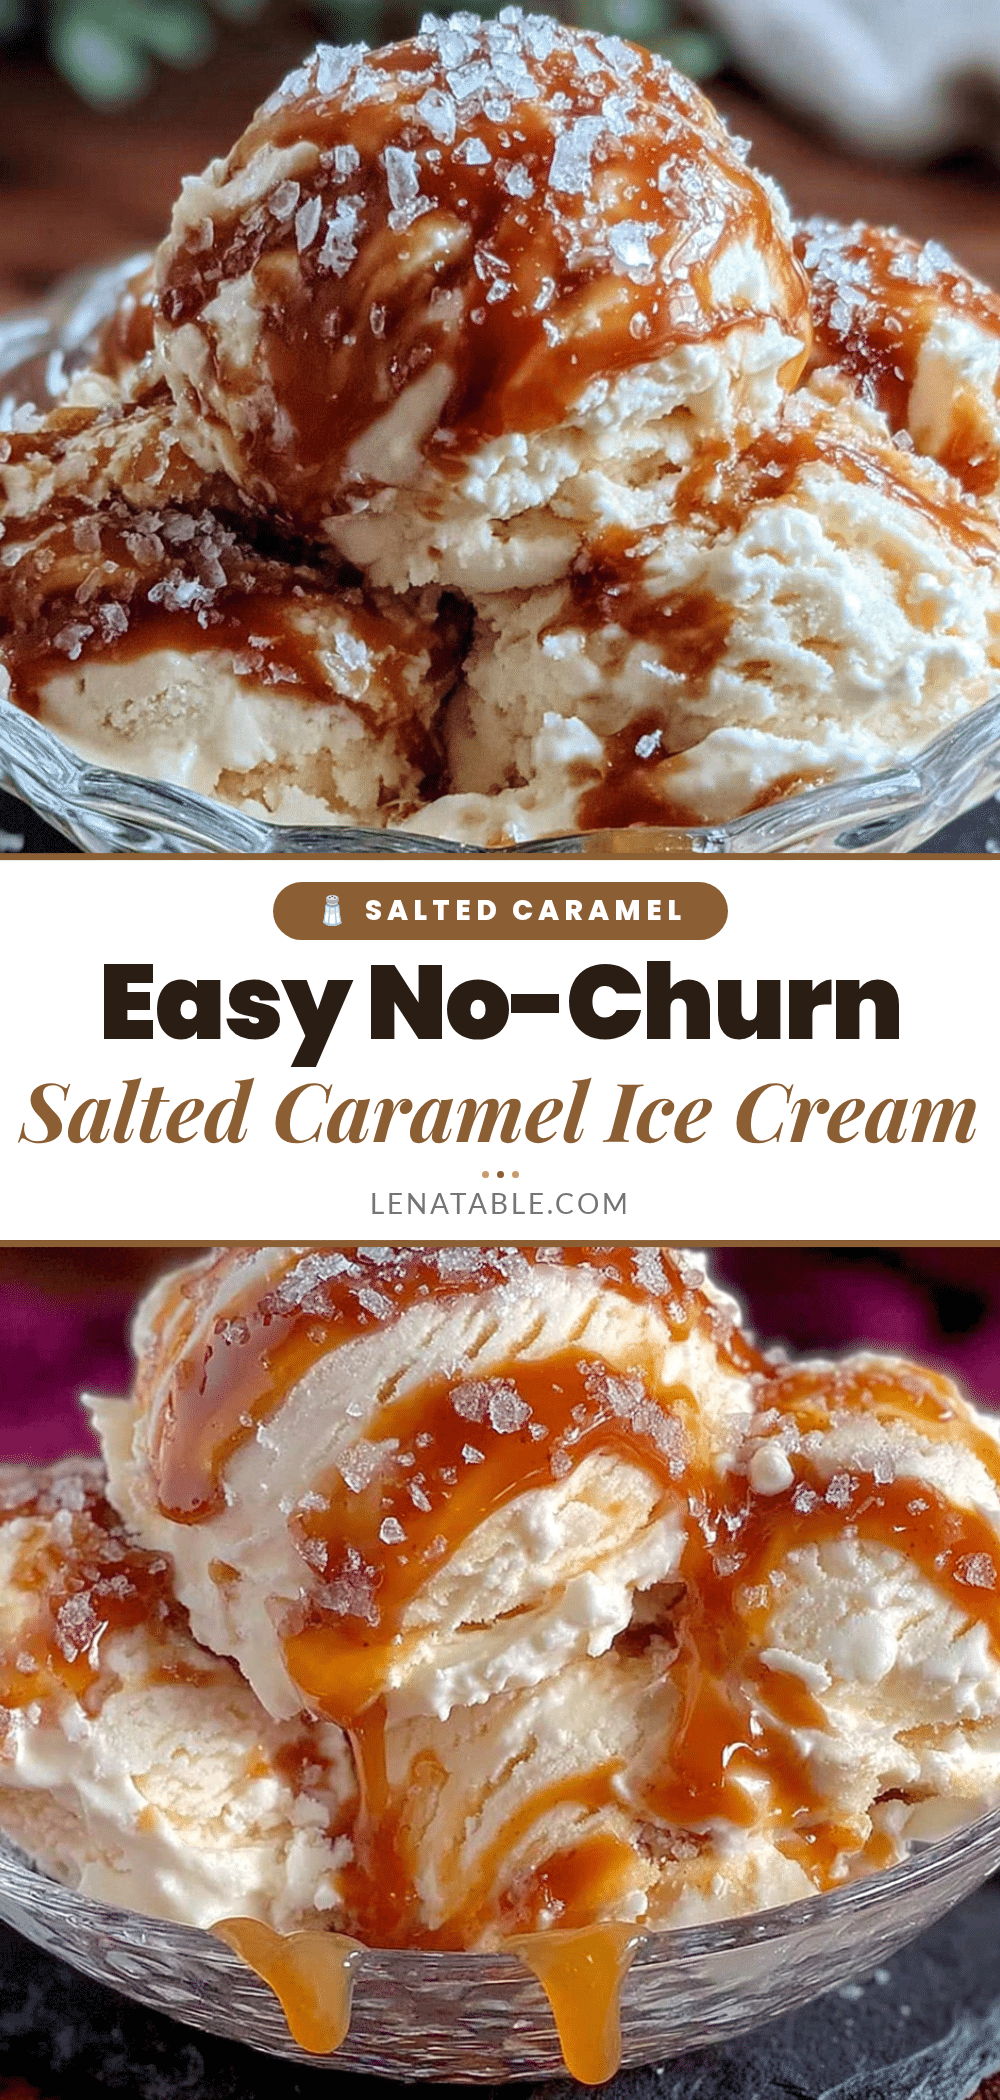
Easy No-Churn Salted Caramel Ice Cream: Best Homemade Recipe

This easy no-churn salted caramel ice cream is creamy, salty-sweet, and comes together in under 15 minutes of active work. No ice cream maker needed, just simple pantry ingredients for a rich, velvety frozen dessert.
- Prep Time: 15 minutes
- Cook Time: 10 minutes
- Total Time: 6 hours 25 minutes (including freezing)
- Yield: 8 servings 1x
- Category: Dessert
- Cuisine: American
Ingredients
- 1 cup granulated sugar
- 6 tablespoons unsalted butter, cut into small cubes
- 1/2 cup heavy cream, at room temperature
- 1 teaspoon flaky sea salt, plus more for sprinkling
- 1 teaspoon vanilla extract
- 2 cups cold heavy cream
- 1 can (14 ounces) sweetened condensed milk
- 1 teaspoon vanilla extract
- 1/2 cup salted caramel sauce (from the recipe above)
Instructions
- Make the Salted Caramel Sauce: Place a saucepan over medium heat and pour in the granulated sugar. Let it melt without stirring for about 3 minutes, then gently swirl the pan until the sugar is completely melted and turns a deep amber color (6-8 minutes total). Remove from heat, add the cubed butter, and whisk vigorously until melted and smooth. Slowly pour in the room-temperature heavy cream while whisking constantly. Stir in the vanilla extract and flaky sea salt. Let cool for 20 minutes.
- Whip the Cream: Pour the cold heavy cream into a large mixing bowl. Using a hand mixer or stand mixer, beat on medium-high speed until stiff peaks form (3-4 minutes).
- Combine the Base: In a separate small bowl, whisk together the sweetened condensed milk and vanilla extract until smooth. Gently fold this mixture into the whipped cream using a rubber spatula until just combined.
- Add the Caramel: Drizzle about half of the 1/2 cup cooled caramel sauce over the cream mixture. Fold with just 3-4 strokes to create streaks.
- Layer and Freeze: Line a 9×5-inch loaf pan with parchment paper. Spoon half of the ice cream mixture into the pan and spread evenly. Drizzle a little more caramel sauce on top. Add the remaining ice cream mixture and spread smooth. Drizzle the last bit of caramel on top and swirl gently with a knife or skewer. Sprinkle with flaky sea salt. Cover the surface directly with plastic wrap or wax paper, then cover the whole pan with foil or plastic wrap. Freeze for at least 6 hours, preferably overnig…
Notes
Let the caramel cool to room temperature before adding to the cream mixture to avoid melting the whipped cream. For best texture, freeze overnight. Let the ice cream sit at room temperature for 5-10 minutes before scooping.
Nutrition
- Serving Size: 1 serving (about 1/2
- Calories: 410
- Sugar: 35
- Sodium: 280
- Fat: 28
- Saturated Fat: 17
- Carbohydrates: 38
- Protein: 4
Keywords: no-churn ice cream, salted caramel, homemade ice cream, easy dessert, no ice cream maker


