Love this? Save it for later!
Share the inspiration with your friends
I was standing in line at the hardware store, clutching a roll of painter’s tape and trying to remember if I needed a new showerhead, when the woman behind me—an older lady with bright purple glasses and a shopping cart full of potting soil—started talking about Halloween. Not about costumes or candy, but about cookies. She told me her grandkids were “too healthy” for store-bought treats now, and she was on a mission to find a sugar cookie recipe that didn’t use a whole bag of white flour. She was almost apologetic about it, like she was betraying some sacred baking code. I told her I was a food blogger, and her eyes lit up. She pulled a crumpled, handwritten card from her purse, covered in soil smudges and what looked like dried basil. “This is my grandma’s sugar cookie base,” she said, “but I’ve been trying to make it with spelt flour and coconut sugar.” We stood there for ten minutes, me holding the painter’s tape, her holding the recipe card, trying to figure out how to make a classic cookie feel a little less like a sugar bomb. Honestly, it was the last place I expected to find baking inspiration for Halloween, but that chance encounter is exactly how these Wholesome Chocolate Spider Web Sugar Cookies were born. I went home, swapped the white sugar for coconut sugar, used whole wheat pastry flour, and added a dark chocolate drizzle for that spooky web effect. The result? A cookie that actually makes me feel good about eating three of them in one sitting. Maybe you’ve been there—looking for a Halloween treat that doesn’t leave you with a weird, shaky sugar crash. These cookies are it.
Why You’ll Love This Recipe
Let’s be real—most Halloween cookies are a sugar overload. They look cute, but you eat one and immediately regret your life choices. These Wholesome Chocolate Spider Web Sugar Cookies are different. They’re the kind of cookie you can serve at a party and actually enjoy eating yourself. I’ve tested this recipe about seven times to get the texture just right, and I can honestly say it’s my favorite Halloween creation to date.
- Naturally Sweetened: Using coconut sugar instead of refined white sugar gives these cookies a deeper, almost caramel-like flavor. You don’t miss the white sugar here, I promise.
- Whole Grain Goodness: Whole wheat pastry flour adds fiber and a subtle nuttiness without making the cookies taste like cardboard. It’s a swap that actually works.
- Fun to Decorate: The chocolate spider web design looks super impressive but is honestly foolproof. Even if you mess up, it still looks cool.
- Perfect for Halloween Parties: These cookies are sturdy enough to pack in lunchboxes or stack on a platter for a potluck. They won’t fall apart or get mushy.
- Kid-Approved but Parent-Approved: My neighbor’s kids devoured a batch in under ten minutes, and their mom thanked me for not sending them home bouncing off the walls.
What really sets this recipe apart is the texture. Most whole grain sugar cookies turn out dry or crumbly, but the combination of butter, a bit of yogurt, and the right flour blend keeps these soft and tender. They have that perfect slight crunch on the outside with a chewy center. It’s not just another healthy version of a classic—it’s the version I actually reach for first, even when I have regular sugar cookies in the house.
What Ingredients You Will Need
This recipe uses simple, wholesome ingredients that you probably already have in your pantry. The goal here is to build flavor and texture without relying on refined sugar or processed flours. Each ingredient plays a specific role, so let’s break it down.
For the Cookie Dough
- 1 cup unsalted butter, softened (I use Kerrygold for its rich flavor, but any good-quality butter works. Make sure it’s truly softened—not melted—for the best texture.)
- ¾ cup coconut sugar (This adds sweetness with a lower glycemic impact. It won’t dissolve as completely as white sugar, so you’ll get tiny, lovely specks throughout the dough.)
- 1 large egg, room temperature (Cold eggs will seize the butter. Let it sit out for 30 minutes before baking.)
- 1 teaspoon vanilla extract (Pure vanilla, not imitation. It makes a difference in the overall warmth of the cookie.)
- 2 cups whole wheat pastry flour (You can substitute all-purpose flour if needed, but the pastry flour gives a lighter crumb. I buy mine from Bob’s Red Mill.)
- ½ teaspoon baking powder (Make sure it’s fresh—old baking powder leads to flat cookies.)
- ¼ teaspoon salt (I use fine sea salt. It balances the sweetness beautifully.)
- 2 tablespoons plain Greek yogurt, full-fat (This is my secret ingredient for moisture. It keeps the cookies from drying out without adding extra butter.)
For the Chocolate Spider Web
- ½ cup dark chocolate chips (at least 60% cacao) (I prefer Ghirardelli or Enjoy Life for dairy-free options. The darker chocolate offsets the sweetness of the cookie perfectly.)
- 1 teaspoon coconut oil (This helps the chocolate melt smoothly and gives it a nice sheen when it sets.)
Ingredient Selection Tips: When choosing coconut sugar, look for one that’s finely ground—coarse crystals can make the dough gritty. For the whole wheat pastry flour, store it in the freezer if you don’t bake often, as whole grain flours can go rancid faster than white flour. And for the dark chocolate, skip anything with added milk solids—you want a clean, intense chocolate flavor for the web design.
Substitution Guidance: If you’re dairy-free, use a high-quality vegan butter and a dairy-free yogurt. I’ve tested this with Miyoko’s butter and it works well. For a gluten-free version, swap the whole wheat pastry flour with a 1:1 gluten-free baking blend that contains xanthan gum. The texture will be slightly different—a bit more delicate—but still delicious.
Equipment Needed
- Stand mixer or hand mixer: A stand mixer with the paddle attachment makes creaming the butter and sugar effortless. If you’re using a hand mixer, just be prepared to hold it for a few minutes—your arm might get a little tired.
- Baking sheets: I use two light-colored, rimmed baking sheets. Dark sheets can cause the bottoms of the cookies to brown too quickly.
- Parchment paper or silicone baking mats: Silicone mats are my go-to because they distribute heat evenly and the cookies slide right off. Parchment works great too.
- Round cookie cutter (2.5 to 3 inches): A simple round cutter is all you need. If you don’t have one, you can use a drinking glass with a thin rim.
- Piping bag or small zip-top bag: For the chocolate spider web. A piping bag with a tiny round tip gives you more control, but a zip-top bag with a tiny corner snipped off works perfectly well.
- Wire cooling rack: Essential for letting the cookies cool completely before you add the chocolate. If you try to pipe the web on warm cookies, it’ll just melt into a puddle.
- Small microwave-safe bowl: For melting the chocolate. Glass or ceramic works best.
Budget-Friendly Alternatives: If you don’t own a piping bag, don’t run out and buy one. A zip-top bag is honestly just as effective. And if you don’t have a round cookie cutter, the rim of a mason jar lid works beautifully.
Preparation Method
This recipe comes together in about 45 minutes, including chilling time. The key is not to rush the butter-sugar creaming step—that’s where the texture starts.
- Cream the butter and coconut sugar. In the bowl of your stand mixer (or a large bowl with a hand mixer), beat the softened butter and coconut sugar together on medium speed for about 3-4 minutes. You’re looking for a light, fluffy, almost pale mixture. The coconut sugar won’t dissolve completely, but it should look well-incorporated. Scrape down the sides of the bowl halfway through. Personal tip: If your butter isn’t soft enough, you’ll end up with lumps. Give it an extra 10 minutes on the counter if needed.
- Add the egg and vanilla. Crack the egg into a small bowl first (just in case you get any shell) and add it to the butter mixture along with the vanilla extract. Beat on medium speed for another 1-2 minutes until everything is smooth and combined. The mixture might look slightly curdled at this point—don’t panic, that’s normal when using coconut sugar.
- Add the yogurt. Toss in the Greek yogurt and beat for another 30 seconds until it’s fully incorporated. This is where the dough gets its moisture boost. I used to skip this step, and my cookies were always a little dry.
- Combine the dry ingredients. In a separate bowl, whisk together the whole wheat pastry flour, baking powder, and salt. Make sure there are no lumps—baking powder loves to clump up.
- Mix the dry into the wet. With the mixer on low speed, gradually add the flour mixture to the butter mixture. Mix just until the flour disappears—about 30 seconds. Overmixing at this stage will develop gluten and make the cookies tough. Warning: The dough will be soft and slightly sticky. That’s exactly what you want.
- Chill the dough. Scrape the dough onto a piece of plastic wrap, flatten it into a disk about 1 inch thick, and wrap it tightly. Refrigerate for at least 30 minutes. If you skip this step, the dough will spread into flat, sad puddles in the oven. I once tried to rush this and ended up with cookie frisbees. Don’t be like me.
- Preheat and prepare. Preheat your oven to 350°F (175°C). Line two baking sheets with parchment paper or silicone mats.
- Roll and cut. Lightly flour your work surface and rolling pin. Roll the chilled dough to about ¼-inch thickness. Use your round cookie cutter to cut out shapes, and transfer them to the prepared baking sheets, spacing them about 2 inches apart. Sensory cue: The dough should feel cool and firm, not sticky. If it starts sticking to the rolling pin, dust with a little more flour.
- Bake. Bake for 10-12 minutes, rotating the pans halfway through. The edges should be just barely golden brown—the centers will look slightly underdone. That’s fine; they’ll continue to set as they cool. Let the cookies cool on the baking sheet for 5 minutes, then transfer them to a wire rack to cool completely. Do not skip this cooling step. If you try to pipe chocolate on warm cookies, you’ll end up with a mess.
- Make the chocolate web. While the cookies cool, melt the dark chocolate chips and coconut oil together in a microwave-safe bowl. Microwave in 30-second bursts, stirring after each, until smooth. Let it cool for 2-3 minutes—you want it warm but not hot.
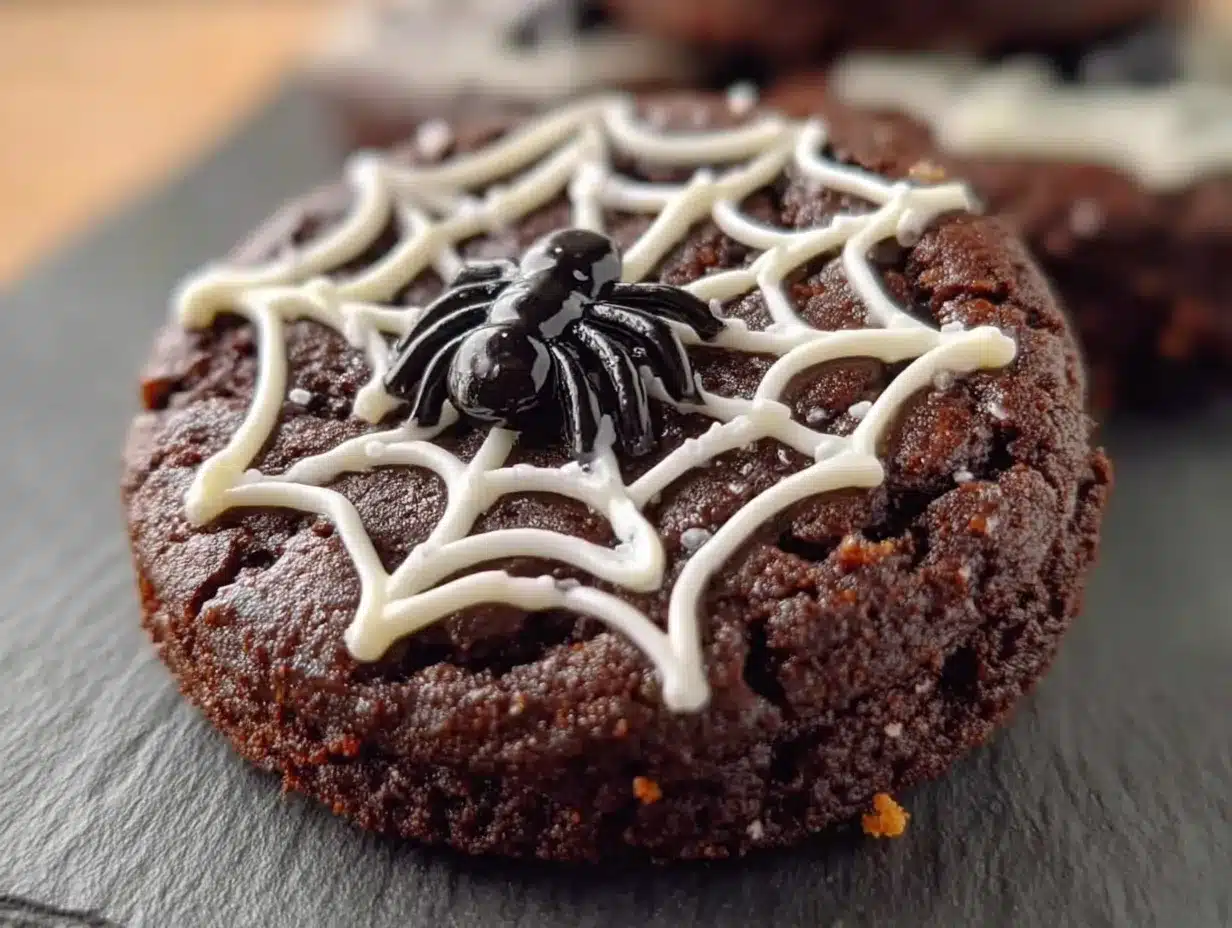
- Pipe the web. Transfer the melted chocolate to a piping bag or a zip-top bag with a tiny corner snipped off. Starting from the center of each cookie, pipe a small dot. Then, pipe concentric circles around that dot, spacing them about ½ inch apart. Don’t worry about perfection—the organic look is part of the charm.
- Create the web lines. Using a toothpick or a skewer, gently drag from the center outward through the chocolate circles, creating the web pattern. Wipe the toothpick clean between each drag for clean lines. Repeat for all cookies.
- Set the chocolate. Let the cookies sit at room temperature until the chocolate is fully set, about 30-45 minutes. If you’re impatient (like me), pop them in the fridge for 15 minutes.
Cooking Tips & Techniques
I’ve made these cookies about a dozen times now, and I’ve learned a few things the hard way. Let me save you some trouble.
Don’t skip the chill. I know it’s tempting to just roll and bake, but the chill time is non-negotiable. The coconut sugar and whole wheat flour absorb liquid differently than white sugar and all-purpose flour, so the dough needs that rest to firm up. If you skip it, your cookies will spread into thin, crispy messes that don’t hold the chocolate web well.
Use a light hand with the flour. When rolling out the dough, only dust your surface with a tiny bit of flour. Too much, and the cookies will taste dry and floury. I use a fine-mesh sieve to sprinkle it evenly—it’s a small thing that makes a big difference.
Watch the oven like a hawk. Whole wheat pastry flour browns faster than all-purpose flour. Start checking your cookies at the 9-minute mark. You want the edges to be just set and barely golden. If they look fully baked in the oven, they’ll be overdone by the time they cool.
The chocolate web trick. If your melted chocolate is too thick to pipe, add another ½ teaspoon of coconut oil. If it’s too thin, let it cool for a few more minutes. The perfect consistency is like warm honey—it should flow smoothly but hold its shape when piped. I once used chocolate that was too hot and it just bled into the cookie instead of staying in a web pattern. Total disaster.
Multitasking strategy: While the dough chills, clean up your workspace and melt your chocolate. That way, when the cookies come out of the oven, you’re ready to decorate. I like to set up a little assembly line—cookies on one side, piping bag on the other, toothpick in hand.
Variations & Adaptations
One of the best things about this recipe is how flexible it is. Here are a few ways I’ve adapted it for different occasions and dietary needs.
Vegan Version: Substitute the butter with a high-quality vegan butter (I like Miyoko’s), use a flax egg (1 tablespoon ground flaxseed mixed with 3 tablespoons water, let sit for 5 minutes), and swap the Greek yogurt with a dairy-free yogurt like coconut or oat-based. The texture will be slightly less tender, but still delicious.
Gluten-Free Option: Use a 1:1 gluten-free baking blend that contains xanthan gum. I’ve tested this with King Arthur’s Measure for Measure flour and it worked well. The cookies will be a bit more delicate, so handle them gently when transferring to the cooling rack.
Spooky Color Twist: Add a few drops of natural orange or purple food coloring to the dough for a festive look. I’ve used beet powder for a subtle pinkish hue, but be careful—too much will affect the flavor. For a more intense color, use a gel-based natural food coloring.
White Chocolate Web: If dark chocolate isn’t your thing, swap it for white chocolate chips. The sweetness will be more pronounced, but it pairs beautifully with the coconut sugar flavor. Just make sure to use a high-quality white chocolate that melts smoothly—some cheap brands seize up.
Spiced Version: Add ½ teaspoon of cinnamon and a pinch of nutmeg to the dry ingredients. It gives the cookies a warm, cozy fall flavor that’s perfect for Halloween. I tried this last year and it was a huge hit at our neighborhood potluck.
Serving & Storage Suggestions
These cookies are best served at room temperature. The chocolate web should be fully set and snappy, not sticky. I like to arrange them on a flat platter in a circular pattern, with the webs facing up so everyone can see the design. They make a great centerpiece for a Halloween dessert table.
Complementary Pairings: Serve these cookies with a glass of cold almond milk or a warm cup of spiced chai. For a more indulgent treat, sandwich two cookies with a scoop of vanilla ice cream—it’s like a healthier ice cream sandwich. I also love crumbling one over a bowl of plain Greek yogurt for a quick dessert.
Storage Instructions: Store the cookies in an airtight container at room temperature for up to 5 days. Layer them between sheets of parchment paper to prevent the chocolate webs from sticking together. Do not refrigerate them—the cookies will dry out and the chocolate may bloom (get white streaks).
Freezer Tips: You can freeze the unbaked cookie dough for up to 3 months. Wrap the disk tightly in plastic wrap and then foil. When you’re ready to bake, thaw it in the fridge overnight, then proceed with rolling and cutting. Baked cookies can also be frozen (without the chocolate web) for up to 2 months. Thaw at room temperature and add the chocolate web after they’ve fully defrosted.
Flavor Development: Honestly, these cookies taste even better the day after baking. The coconut sugar flavor deepens, and the texture becomes slightly chewier. If you can resist eating them all on day one, you’ll be rewarded on day two.
Nutritional Information & Benefits
I’m not a nutritionist, but I do pay attention to what goes into my food. Here’s a rough estimate per cookie (based on a 2.5-inch cookie, makes about 24):
| Nutrient | Amount per Cookie |
|---|---|
| Calories | 145 |
| Total Fat | 8g |
| Saturated Fat | 5g |
| Carbohydrates | 17g |
| Fiber | 2g |
| Sugar | 9g |
| Protein | 2g |
Health Benefits: Coconut sugar contains small amounts of inulin, a type of fiber that may help slow glucose absorption. Whole wheat pastry flour provides more fiber and nutrients than refined white flour, including B vitamins and iron. The dark chocolate in the web is rich in antioxidants called flavonoids, which are linked to heart health. And the Greek yogurt adds a bit of protein and calcium—every little bit helps.
Dietary Considerations: This recipe is vegetarian and can easily be made vegan or gluten-free (see variations above). It contains dairy and gluten in its standard form. The sugar content is about half of what you’d find in a traditional sugar cookie, making it a better option for those watching their sugar intake.
My personal take? These cookies are a treat, no doubt about it. But they’re a treat that doesn’t leave me feeling sluggish or guilty. I can have two with my afternoon coffee and still feel good about my choices. That’s a win in my book.
FAQs
Can I use all-purpose flour instead of whole wheat pastry flour?
Absolutely. Swap it 1:1. The cookies will be slightly less nutritious and a bit more tender, but they’ll still be delicious. You might need to add an extra tablespoon of flour if the dough feels too sticky.
My dough is too sticky to roll out. What did I do wrong?
This usually happens if the dough wasn’t chilled long enough, or if you added too much yogurt. Pop it back in the fridge for another 15-20 minutes. If it’s still sticky after that, dust your rolling pin and surface with a little extra flour. My whole wheat sugar cookie recipe has a similar dough consistency if you want to practice.
Can I use milk chocolate instead of dark chocolate for the web?
You can, but milk chocolate has a higher sugar content and lower cocoa butter content, which means it won’t set as firmly. The web might be a bit softer to the touch. If you do use milk chocolate, add an extra teaspoon of coconut oil to help it set.
How do I prevent the chocolate web from breaking when I stack the cookies?
Make sure the chocolate is fully set before stacking—at least 45 minutes at room temperature. Then, place a piece of parchment paper between each layer. If you’re transporting them, arrange them in a single layer in a shallow container. These healthy Halloween dessert ideas might help with presentation tips.
Can I make these cookies ahead of time for a party?
Yes! Bake the cookies up to 2 days in advance and store them in an airtight container. Add the chocolate web the morning of your party or the night before. The chocolate stays snappy for about 24 hours before it starts to soften slightly. I’ve done this for three Halloween parties now and it works perfectly.
Conclusion
These Wholesome Chocolate Spider Web Sugar Cookies are proof that you don’t have to choose between healthy and delicious, especially during the Halloween season. They’re fun to make, even more fun to decorate, and they actually taste like a real cookie—not a sad, dry healthified version of one. The coconut sugar gives them a warmth that pairs perfectly with the dark chocolate, and the whole wheat pastry flour keeps them tender without weighing you down.
I love that this recipe came from a random conversation in a hardware store. It’s a reminder that good ideas show up when you least expect them. So go ahead—make a batch for your next Halloween party, or just for a Tuesday night when you need a little something sweet. Customize them however you like, and don’t stress about making the webs perfect. The imperfect ones have the most personality, honestly.
If you try this recipe, I’d love to hear about it. Drop a comment below and let me know how your spider webs turned out—did you go classic dark chocolate, or did you try a twist? And if you’re looking for more wholesome treats, my collection of healthy fall baking recipes has plenty of options to keep your kitchen busy all season long. Happy Halloween, and happy baking!
Pin This Recipe!

Wholesome Chocolate Spider Web Sugar Cookies: Easy Halloween Recipe

These Wholesome Chocolate Spider Web Sugar Cookies are a healthier Halloween treat made with coconut sugar and whole wheat pastry flour, topped with a dark chocolate spider web design. They’re naturally sweetened, fun to decorate, and perfect for parties without the sugar crash.
- Prep Time: 15 minutes
- Cook Time: 12 minutes
- Total Time: 45 minutes
- Yield: 24 servings 1x
- Category: Dessert
- Cuisine: American
Ingredients
- 1 cup unsalted butter, softened
- ¾ cup coconut sugar
- 1 large egg, room temperature
- 1 teaspoon vanilla extract
- 2 cups whole wheat pastry flour
- ½ teaspoon baking powder
- ¼ teaspoon salt
- 2 tablespoons plain Greek yogurt, full-fat
- ½ cup dark chocolate chips (at least 60% cacao)
- 1 teaspoon coconut oil
Instructions
- Cream the butter and coconut sugar in a stand mixer or with a hand mixer on medium speed for 3-4 minutes until light and fluffy. Scrape down the sides halfway through.
- Add the egg and vanilla extract, beating on medium speed for 1-2 minutes until smooth and combined. The mixture may look slightly curdled.
- Add the Greek yogurt and beat for 30 seconds until fully incorporated.
- In a separate bowl, whisk together the whole wheat pastry flour, baking powder, and salt.
- With the mixer on low speed, gradually add the dry ingredients to the wet mixture, mixing just until the flour disappears (about 30 seconds). Do not overmix.
- Scrape the dough onto plastic wrap, flatten into a 1-inch thick disk, wrap tightly, and refrigerate for at least 30 minutes.
- Preheat oven to 350°F (175°C). Line two baking sheets with parchment paper or silicone mats.
- Lightly flour a work surface and rolling pin. Roll the chilled dough to ¼-inch thickness. Cut out rounds with a 2.5 to 3-inch cookie cutter and place on prepared baking sheets, spacing 2 inches apart.
- Bake for 10-12 minutes, rotating pans halfway through, until edges are just barely golden. Centers will look slightly underdone. Cool on baking sheet for 5 minutes, then transfer to a wire rack to cool completely.
- While cookies cool, melt dark chocolate chips and coconut oil in a microwave-safe bowl in 30-second bursts, stirring after each, until smooth. Let cool for 2-3 minutes.
- Transfer melted chocolate to a piping bag or zip-top bag with a tiny corner snipped off. Pipe a small dot in the center of each cookie, then pipe concentric circles around it, spacing about ½ inch apart.
- Using a toothpick or skewer, gently drag from the center outward through the chocolate circles to create a web pattern. Wipe the toothpick clean between each drag.
- Let cookies sit at room temperature until chocolate is fully set, about 30-45 minutes (or refrigerate for 15 minutes).
Notes
Don’t skip the chill time—it prevents spreading. Use a light hand with flour when rolling. Watch the oven closely as whole wheat pastry flour browns faster. For the chocolate web, ensure chocolate is warm but not hot; if too thick, add more coconut oil. Cookies taste even better the next day.
Nutrition
- Serving Size: 1 cookie
- Calories: 145
- Sugar: 9
- Sodium: 50
- Fat: 8
- Saturated Fat: 5
- Carbohydrates: 17
- Fiber: 2
- Protein: 2
Keywords: Halloween cookies, sugar cookies, whole wheat, coconut sugar, spider web, healthy dessert, chocolate


