Love this? Save it for later!
Share the inspiration with your friends
This was supposed to be a simple veggie platter for a Halloween party. You know the kind—carrot sticks, celery, maybe some ranch dip in the middle. Nothing fancy, nothing memorable. I had the cutting board out and was mentally preparing for twenty minutes of chopping when my three-year-old decided to “help.” He grabbed the broccoli and started arranging it in a circle. Then he stuck a baby carrot in the middle. “Look, Mama, a pumpkin!” he said, pointing at this lopsided, slightly tragic pile of vegetables. Honestly, I laughed. It looked nothing like a pumpkin. But the idea stuck in my head. What if I actually tried to make a veggie tray that looked like a pumpkin patch? A real one, not a toddler’s abstract interpretation?
So there I was, on a Tuesday afternoon, surrounded by bell peppers and cauliflower, trying to figure out how to make vegetables look like gourds. I won’t pretend the first attempt was pretty. The ranch dip leaked out the bottom. The “pumpkins” looked more like deformed potatoes. But by the third try, something clicked. I figured out the right shape, the perfect dip consistency, and how to arrange everything so it actually looked like a tiny farm scene. And you know what? It was better than any regular veggie tray I’d ever made. It was fun. It was festive. And my kids actually ate broccoli without complaining. I mean, that alone felt like a Halloween miracle.
This Healthy Halloween Veggie Tray Pumpkin Patch became my go-to party trick. It’s the kind of thing that makes people do a double-take. “Wait, that’s all vegetables?” they ask, reaching for a “pumpkin” and dipping it in the savory ranch. It’s sneaky, in the best way possible. If you’ve ever been to a Halloween party where the only healthy option is a sad bowl of pretzels, you understand why this tray matters. It gives people permission to snack on something fresh without feeling like they’re missing out on the fun. And honestly, it’s just ridiculously cute. So if you’re ready to impress your guests without spending hours in the kitchen, keep reading. This one’s for you.
Why You’ll Love This Recipe
Let me tell you why this veggie tray has become my secret weapon for every Halloween gathering. It’s not just about the visual payoff—though, honestly, that alone is worth it. Here’s what makes this recipe a total winner:
- Quick & Easy: You can put this together in under 30 minutes. Seriously. No cooking, no baking, just chopping and arranging. Perfect for those last-minute party invites.
- Simple Ingredients: Everything here is stuff you probably already have in your fridge. Bell peppers, broccoli, cauliflower, carrots—basic produce that won’t require a special trip to the store.
- Perfect for Parties: Whether it’s a classroom celebration, a family gathering, or a spooky movie night, this tray fits right in. It’s festive without being fussy.
- Crowd-Pleaser: I’ve brought this to three different parties now, and every single time, the tray was empty before the chips were. Kids and adults both go for it—there’s something about the novelty that makes people grab a veggie without hesitation.
- Unbelievably Delicious: The combination of crunchy vegetables with a creamy ranch dip is classic comfort food. But the presentation? That’s what takes it from “snack” to “conversation starter.”
What makes this version different from just another veggie platter is the attention to detail. I spent a good hour figuring out the best way to shape the bell pepper “pumpkins” so they actually look like mini gourds. The trick is using small, squat peppers and cutting them just right. And the dip? I’ve tested three different ranch recipes before landing on this one—it’s thick enough to hold its shape but still creamy and flavorful. This isn’t just a veggie tray you throw together. It’s a veggie tray that makes people smile. And when you see your guests reaching for another “pumpkin” stem made of celery, you’ll know exactly what I mean.
What Ingredients You Will Need
This recipe is all about using simple, fresh ingredients that work together to create something visually stunning and genuinely tasty. You don’t need anything fancy—just good produce and a couple of pantry staples. Here’s what you’ll need to gather:
For the Pumpkin Patch Base
- Large round platter or cutting board (at least 12 inches across) – This is your “field” for the pumpkin patch. A wooden board or a white platter works best for contrast.
- Ranch dip or hummus (about 1 cup) – This acts as the “dirt” or base. I recommend using a thick, creamy ranch. My personal go-to is Litehouse Homestyle Ranch because it’s thick enough to hold shape without being gloopy. For a healthier option, try Sabra Roasted Red Pepper Hummus—it adds a beautiful orange tint that fits the theme.
- Fresh broccoli florets (about 2 cups) – These become the “bushes” or “vines” scattered around the patch. Look for florets that are roughly the same size for consistency.
- Cauliflower florets (about 1 cup) – These add texture and visual contrast. They can double as “clouds” or “fog” if you want to get creative with the layout.
- Cherry tomatoes (1 cup) – These are optional but work great as “mini pumpkins” or “berries” scattered around the scene.
For the Bell Pepper Pumpkins
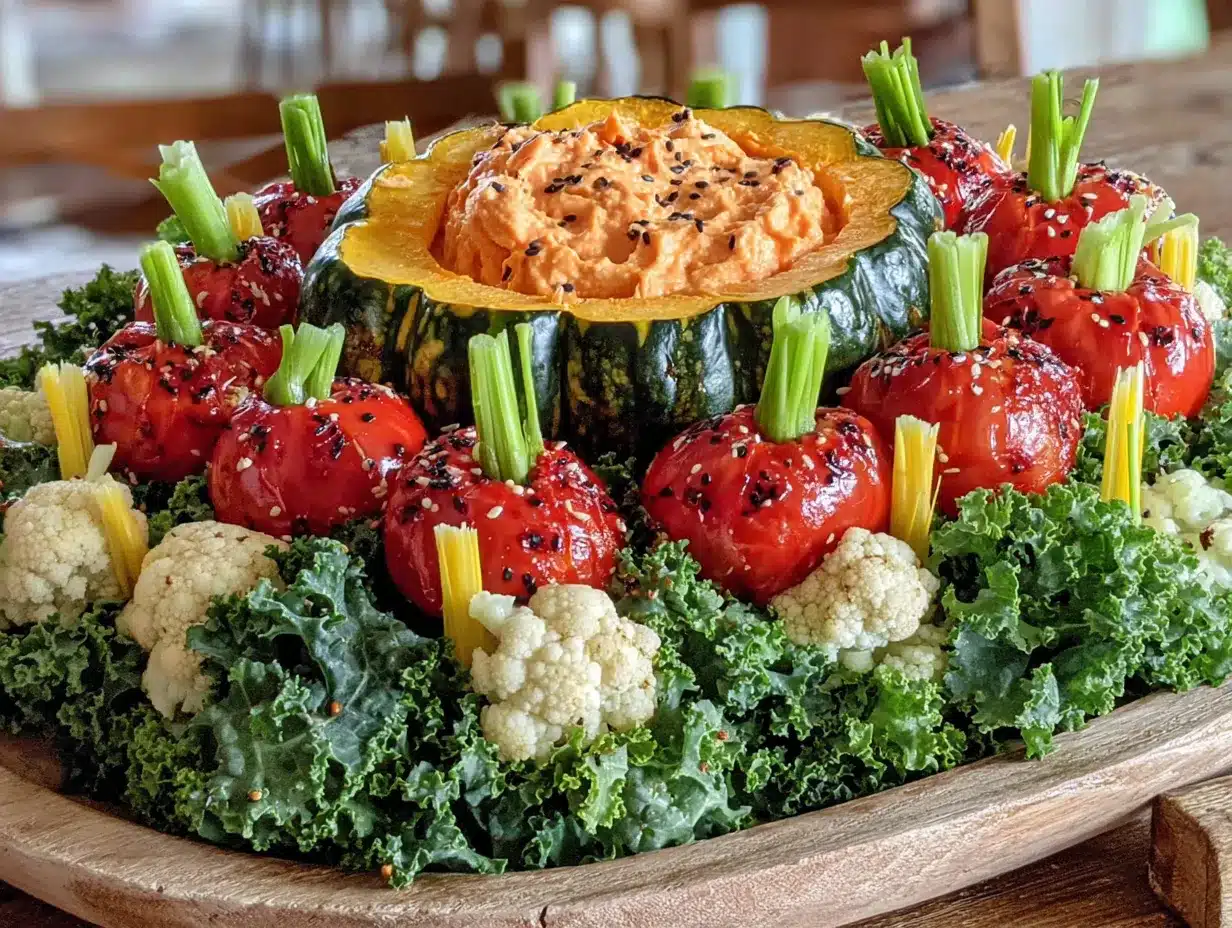
- Small orange bell peppers (4-6 peppers) – These are the stars of the show. Look for peppers that are squat and round rather than tall and pointy. The shape matters more than the color, but orange gives the best pumpkin effect. I’ve found that mini bell peppers work perfectly for this—they’re naturally the right size and shape.
- Celery sticks (2-3 stalks) – Cut into small 1-inch pieces, these become the pumpkin stems. You want pieces that are thick enough to stand upright but not so wide they look awkward.
- Toothpicks (optional) – If your peppers are wobbly, a toothpick through the bottom can help them stay put. I don’t always need them, but they’re good to have on hand.
For the Dip (Homemade Ranch)
If you want to go the extra mile, making your own ranch dip is surprisingly easy and tastes so much better than store-bought. Here’s what you need:
- 1 cup plain Greek yogurt (full-fat or 2% works best for thickness)
- 1/2 cup sour cream (adds richness; you can use dairy-free if needed)
- 1 packet ranch seasoning mix (I prefer Hidden Valley for the classic flavor)
- 1 tablespoon fresh dill, chopped (optional but recommended for freshness)
- 1 teaspoon garlic powder
- 1/2 teaspoon onion powder
- Salt and pepper to taste
Ingredient Selection Tips: When choosing bell peppers, give them a gentle squeeze. You want firm peppers with smooth skin—no wrinkles or soft spots. For the broccoli, look for florets that are dark green and tightly closed. Yellowing florets mean they’re past their prime. And for the dip, if you’re using Greek yogurt, make sure it’s plain and unsweetened. Vanilla yogurt will ruin the flavor completely. Trust me on that one—I learned the hard way.
Substitution Guidance
- For a dairy-free version: Use a dairy-free ranch dip or hummus. Kite Hill makes a great almond milk-based ranch that’s thick and creamy.
- For a gluten-free version: This recipe is naturally gluten-free, but double-check your ranch seasoning mix—some brands contain wheat starch.
- For a low-carb version: Swap the cherry tomatoes for radishes or cucumber slices. The bell peppers are already low-carb, so this works perfectly.
- For a nut-free version: Avoid using hummus made with tahini (sesame paste) if you have a sesame allergy. Use a bean-free dip like guacamole instead.
Equipment Needed
You don’t need a lot of fancy tools for this recipe, which is part of its charm. Here’s what you’ll want to have on hand:
- Large platter or wooden cutting board (12-16 inches) – This is your canvas. A white platter makes the colors pop, but a wooden board gives it a rustic, farm-like feel. Either works.
- Sharp chef’s knife – A good knife makes all the difference when cutting bell peppers. You want clean cuts, not ragged edges. I use a Wusthof Classic 8-inch chef’s knife and it glides through peppers like butter.
- Cutting board (separate from your serving board) – You’ll need this for prep work. A large plastic or wooden board is fine.
- Small bowl or ramekin – For holding the dip. You want something that fits snugly in the center of your platter. A 4-ounce ramekin works perfectly.
- Toothpicks – Optional, but helpful for securing pepper stems if they’re wobbly.
- Paper towels – For drying the vegetables after washing. Wet veggies make the dip slide around.
Budget-Friendly Options: If you don’t have a large platter, a baking sheet lined with parchment paper works just as well. And you definitely don’t need a fancy chef’s knife—any sharp knife will do. The key is keeping it sharp. A dull knife will crush the bell peppers instead of cutting them cleanly.
Preparation Method
Alright, let’s get into the nitty-gritty. This recipe is more about assembly than cooking, but there are a few tricks to make it look professional. Follow these steps, and you’ll have a pumpkin patch that’ll make your guests do a double-take.
- Prepare the dip base: In a small bowl, mix together the Greek yogurt, sour cream, ranch seasoning, fresh dill, garlic powder, onion powder, salt, and pepper. Stir until smooth and well-combined. Taste it and adjust the seasoning if needed. You want it to be flavorful but not overpowering. Cover and refrigerate while you prep the vegetables. This gives the flavors time to meld. (Time: 5 minutes)
- Wash and dry all vegetables: Rinse the bell peppers, broccoli, cauliflower, celery, and cherry tomatoes under cold water. Pat them completely dry with paper towels. This step is crucial—any moisture on the veggies will make the dip slide around and the arrangement look messy. Take your time here. (Time: 5 minutes)
- Cut the bell pepper pumpkins: Take each small orange bell pepper and lay it on its side. Using a sharp knife, cut off the top quarter of the pepper (the stem end). Set the top aside. Remove the seeds and white membranes from inside the pepper. Now, take the top piece and cut a small slit in the center. Insert a 1-inch piece of celery into the slit to create the stem. Place the pepper back on its base so it stands upright. Repeat with the remaining peppers. If any peppers are wobbly, insert a toothpick through the bottom to anchor them. (Time: 10 minutes)
- Prepare the broccoli and cauliflower: Cut the broccoli and cauliflower into small, bite-sized florets. Try to keep them roughly the same size—about 1 to 1.5 inches across. This makes the arrangement look more intentional. If you have larger florets, you can break them down by hand. (Time: 5 minutes)
- Prepare the celery stems: Cut the celery stalks into 1-inch pieces. You’ll need one piece for each bell pepper pumpkin. If you want extra “stems” for decoration, cut a few more. Set them aside. (Time: 2 minutes)
- Assemble the pumpkin patch: Place your large platter or cutting board on a flat surface. Spoon the ranch dip into the center of the platter, using the back of a spoon to spread it into a rough oval shape. This is your “dirt” patch. Now, arrange the bell pepper pumpkins around the dip, spacing them evenly. Place the broccoli and cauliflower florets around the pumpkins to look like bushes or vines. Scatter the cherry tomatoes randomly for pops of color. If you have extra celery pieces, tuck them in among the vegetables to look like fallen stems. (Time: 5 minutes)
- Final touches: Step back and look at your arrangement. Does it look balanced? Are there any empty spots? Fill them in with extra florets or tomatoes. If you want to add a “fence” effect, use carrot sticks or cucumber slices along the edge of the platter. Once you’re happy with the look, serve immediately or cover with plastic wrap and refrigerate until ready to serve. (Time: 3 minutes)
Sensory Cues: At each step, pay attention to how things should look and feel. When cutting the bell peppers, you should hear a clean crunch. If you hear a squish, your knife is dull. The dip should be thick enough that it doesn’t run when you spread it—if it’s too thin, add more Greek yogurt. And when you arrange the vegetables, step back and look at the overall picture. It should feel like a tiny farm scene, not just a pile of veggies.
Cooking Tips & Techniques
I’ve made this veggie tray at least a dozen times now, and I’ve learned a few things the hard way. Here are my top tips to make sure your pumpkin patch turns out perfect every time:
- Choose the right peppers: Not all bell peppers are created equal. Look for mini bell peppers or small, squat orange peppers. The tall, pointy ones don’t look like pumpkins no matter how you cut them. If you can only find large peppers, cut them in half horizontally and use the bottom half only. You’ll get two pumpkins from one pepper.
- Dry your veggies thoroughly: I cannot stress this enough. Wet vegetables make the dip slide around and create a watery mess. After washing, lay the veggies out on a clean kitchen towel and pat them dry. Let them air dry for a few minutes if you have time.
- Make the dip ahead of time: The ranch dip actually tastes better if you make it a few hours in advance. The flavors have time to meld and deepen. I usually make it the morning of the party and let it sit in the fridge until I’m ready to assemble.
- Use a template for the dip: If you want a perfect oval or circle for the “dirt” patch, use a small bowl or ramekin as a guide. Place it upside down on the platter and spread the dip around it. Then lift the bowl off. You’ll have a clean, defined shape.
- Don’t overcrowd the platter: Leave some negative space around the vegetables. A crowded platter looks messy and less like a pumpkin patch. Think of it as a scene—you need room for the “field” to breathe.
Common Mistakes and How to Avoid Them: The biggest mistake I see people make is using too much dip. A little goes a long way. If you spread it too thin, it looks like a puddle. Keep it thick and contained. Another mistake is cutting the celery stems too thin. They should be sturdy enough to stand upright in the peppers. If they’re too thin, they’ll flop over. And finally, don’t assemble this too far in advance. The vegetables will start to wilt after a few hours. If you need to prep ahead, cut all the veggies and store them separately in the fridge. Assemble just before serving.
Variations & Adaptations
One of the best things about this recipe is how flexible it is. You can adapt it to fit different dietary needs, seasons, or just your personal taste. Here are a few variations I’ve tried and loved:
- Seasonal Variation: In the fall, swap the cherry tomatoes for pomegranate seeds. They look like little jewels scattered around the patch. In the summer, use fresh berries like blueberries or raspberries for a pop of color. Just keep in mind that berries are softer, so they might get squished if the platter is jostled.
- Dietary Variation: For a vegan version, use a dairy-free ranch dip or a hummus base. I’ve tried Hope Foods Spicy Avocado Hummus and it works beautifully—the green color actually adds to the “field” effect. For a keto-friendly version, skip the cherry tomatoes and use cucumber slices or radishes instead. The bell peppers are already low-carb, so you’re good there.
- Flavor Variation: If you’re not a ranch fan, try using a different dip. Guacamole works surprisingly well—the green color looks like grass. Or try a beet hummus for a deep purple “soil” that’s totally unexpected. I once made a batch of roasted red pepper hummus and it looked amazing against the orange peppers.
- Method Variation: If you don’t have time to make individual pumpkin peppers, you can use small orange bell peppers whole. Just cut a small slit in the top and insert a celery stem. They won’t be hollowed out, but they’ll still look cute. Another option is to use mini pumpkins (the edible kind) instead of peppers. Just hollow them out and fill with dip. It’s a bit more work, but the presentation is stunning.
Personal Variation I’ve Tried: Last Halloween, I made a “pumpkin patch” that doubled as a crudité platter. Instead of using a single dip, I placed three small ramekins in the center—one ranch, one hummus, and one guacamole. I arranged the bell pepper pumpkins around the dips and filled the rest of the platter with broccoli, cauliflower, carrots, and snap peas. It was a hit. Everyone loved having options, and the different colors made the platter look even more festive.
Serving & Storage Suggestions
This veggie tray is best served fresh, but there are a few things you can do to keep it looking good for longer. Here’s what I recommend:
Serving Temperature: Serve the platter chilled or at room temperature. If you’ve refrigerated it, take it out about 15 minutes before serving to take the chill off. The flavors are more pronounced at room temperature. For the dip, I prefer it cold—it stays thicker and holds its shape better.
Presentation Tips: To make the pumpkin patch look even more realistic, sprinkle some chopped chives or parsley over the “dirt” dip to look like grass. You can also add a few small gourds or decorative mini pumpkins (the inedible kind) around the edges of the platter for extra flair. Just make sure your guests know not to eat them! I like to use a wooden cutting board as the base—it gives the whole thing a rustic, farm-to-table feel.
Complementary Dishes: This veggie tray pairs beautifully with other Halloween snacks. Try serving it alongside a bowl of popcorn “ghosts” (popcorn tossed with a little garlic powder and parmesan) or some “mummy” hot dogs (pigs in a blanket with mustard eyes). For drinks, a warm apple cider or a pumpkin spice latte fits the theme perfectly.
Storage Instructions: If you have leftovers, remove the dip and store it separately in an airtight container in the fridge. The vegetables can be stored in a sealed bag or container for up to 2 days. The bell pepper pumpkins will stay fresh for about a day, but they’ll start to soften after that. I don’t recommend freezing this dish—the vegetables will turn mushy when thawed.
Reheating Tips: This is a cold dish, so no reheating needed. But if you’re using a dip that’s been refrigerated, let it sit at room temperature for 10 minutes before serving. It’ll be easier to scoop.
How Flavors Develop Over Time: The dip actually gets better after a few hours in the fridge. The herbs and spices meld together, creating a more complex flavor. The vegetables, though, are best eaten within a few hours of assembly. They start to lose their crunch after about 4 hours. So if you’re making this for a party, assemble it as close to serving time as possible.
Nutritional Information & Benefits
This veggie tray is not just cute—it’s genuinely good for you. Here’s a rough breakdown of what you’re getting:
| Nutrient | Per Serving (approx. 1 cup veggies + 2 tbsp dip) |
|---|---|
| Calories | 120-150 |
| Protein | 4-6g |
| Fat | 6-8g |
| Carbohydrates | 12-15g |
| Fiber | 3-4g |
| Sugar | 5-7g |
| Sodium | 250-350mg |
Health Benefits of Key Ingredients: Bell peppers are packed with vitamin C—one medium pepper gives you more than 100% of your daily needs. They’re also rich in beta-carotene, which your body converts into vitamin A. Broccoli is a powerhouse of fiber, vitamin K, and sulforaphane, a compound that’s been linked to reduced inflammation. Cauliflower is low in calories but high in choline, which supports brain health. And the Greek yogurt in the dip provides probiotics for gut health and protein for staying full longer.
Dietary Considerations: This recipe is naturally gluten-free and can be made dairy-free with a few simple swaps. It’s also low-carb friendly if you skip the cherry tomatoes. The main allergens to watch out for are dairy (in the ranch dip) and sesame (in some hummus varieties). If you’re serving this at a party, I recommend labeling the dip so guests with allergies know what’s in it.
FAQs
Can I make this veggie tray ahead of time?
You can prep the vegetables and dip a day in advance, but I recommend assembling the platter no more than 2-3 hours before serving. The vegetables start to wilt after a few hours, and the dip can dry out if left exposed too long. Store the cut veggies in separate bags in the fridge and the dip in a sealed container. Assemble just before your guests arrive.
What if I can’t find small orange bell peppers?
No worries! You can use regular-sized orange bell peppers cut in half horizontally. Use the bottom half as the pumpkin and the top half for another purpose (like chopping for a salad). You can also use yellow or red bell peppers—they won’t look exactly like pumpkins, but they’ll still be festive. Another option is to use mini sweet peppers in a mix of colors for a “harvest” look.
How do I keep the dip from sliding around on the platter?
The key is to make sure the dip is thick enough. If it’s too thin, it will spread out and slide. I recommend using Greek yogurt and sour cream in equal parts—this creates a thick, stable base. Also, make sure the platter is completely dry before adding the dip. Any moisture will cause the dip to slip. If you’re still having trouble, spread a thin layer of cream cheese on the platter first, then add the dip on top. The cream cheese acts as an anchor.
Can I use other vegetables for the “pumpkins”?
Absolutely! While bell peppers are the most pumpkin-like, you can use other round vegetables like small tomatoes (for mini pumpkins), radishes (for tiny pumpkins), or even hard-boiled eggs (for a protein boost). Just cut them to shape and add a small piece of chive or parsley for the stem. The key is to keep the size small so they look like mini gourds.
How long does this veggie tray last at a party?
If left out at room temperature, the vegetables will stay fresh for about 2-3 hours. After that, they’ll start to wilt and the dip may separate. If you’re serving this outdoors or in a warm room, I recommend placing the platter on a bed of ice to keep everything cool. Just put a layer of ice in a larger tray and set the platter on top. This will keep the veggies crisp for hours.
Conclusion
This Healthy Halloween Veggie Tray Pumpkin Patch is proof that healthy eating doesn’t have to be boring—especially on a holiday known for candy and sugar. It’s fun, it’s festive, and it genuinely makes people smile. I’ve seen grown adults light up when they realize the “pumpkins” are just bell peppers. And honestly, that’s what I love most about this recipe. It turns something ordinary into something special without any complicated techniques or fancy ingredients.
I hope you give this a try for your next Halloween party. Don’t be afraid to make it your own—swap in your favorite veggies, try a different dip, or add your own creative touches. The beauty of this recipe is that it’s forgiving. Even if your pumpkins look a little lopsided or your dip spreads a bit too far, it’ll still be delicious. And your guests will appreciate the effort. So go ahead, grab some bell peppers and a cutting board, and create your own pumpkin patch. Trust me, it’s worth it.
Have you made this veggie tray? I’d love to hear how it turned out! Drop a comment below and let me know what variations you tried. And if you snapped a photo, share it on Pinterest and tag me—I’m always looking for new inspiration. Happy Halloween, and happy snacking!
Pin This Recipe!
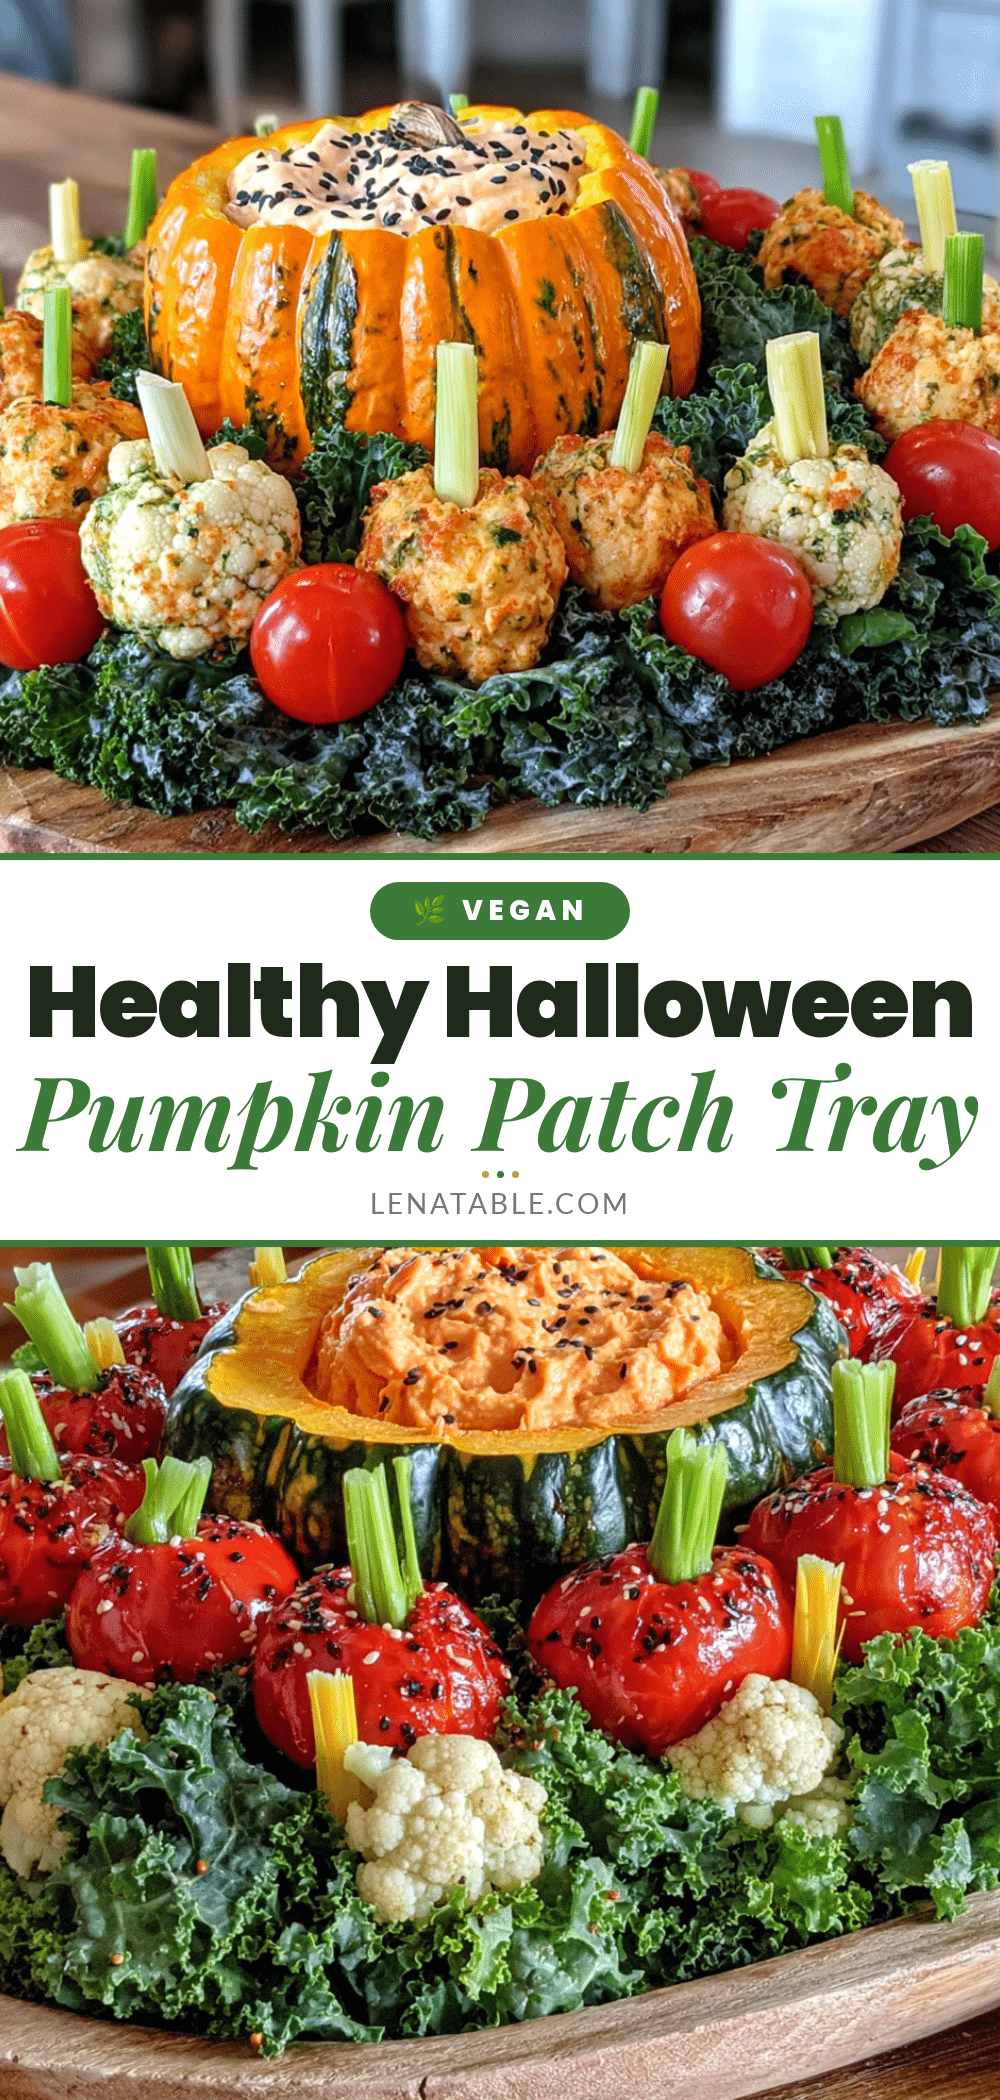
Healthy Halloween Veggie Tray Pumpkin Patch
A festive and fun Halloween veggie tray that looks like a pumpkin patch, featuring bell pepper ‘pumpkins’, broccoli ‘bushes’, and a creamy ranch dip. Perfect for parties and a crowd-pleaser that makes healthy snacking exciting.
- Prep Time: 20 minutes
- Cook Time: 0 minutes
- Total Time: 20 minutes
- Yield: 8 servings 1x
- Category: Appetizer
- Cuisine: American
Ingredients
- 1 cup plain Greek yogurt (full-fat or 2%)
- 1/2 cup sour cream
- 1 packet ranch seasoning mix (e.g., Hidden Valley)
- 1 tablespoon fresh dill, chopped (optional)
- 1 teaspoon garlic powder
- 1/2 teaspoon onion powder
- Salt and pepper to taste
- 4–6 small orange bell peppers (squat and round)
- 2–3 celery stalks, cut into 1-inch pieces
- 2 cups fresh broccoli florets
- 1 cup cauliflower florets
- 1 cup cherry tomatoes
- Toothpicks (optional, for stability)
Instructions
- Prepare the dip base: In a small bowl, mix together the Greek yogurt, sour cream, ranch seasoning, fresh dill, garlic powder, onion powder, salt, and pepper. Stir until smooth and well-combined. Cover and refrigerate while you prep the vegetables.
- Wash and dry all vegetables: Rinse the bell peppers, broccoli, cauliflower, celery, and cherry tomatoes under cold water. Pat them completely dry with paper towels.
- Cut the bell pepper pumpkins: Lay each small orange bell pepper on its side. Cut off the top quarter (the stem end) and set aside. Remove seeds and white membranes. Cut a small slit in the center of the top piece and insert a 1-inch piece of celery to create the stem. Place the pepper back on its base so it stands upright. Repeat with remaining peppers. If wobbly, insert a toothpick through the bottom to anchor.
- Prepare the broccoli and cauliflower: Cut into small, bite-sized florets (about 1 to 1.5 inches across).
- Prepare the celery stems: Cut celery stalks into 1-inch pieces. You’ll need one piece per bell pepper pumpkin.
- Assemble the pumpkin patch: Place a large platter or cutting board on a flat surface. Spoon the ranch dip into the center and spread into a rough oval shape (the ‘dirt’ patch). Arrange the bell pepper pumpkins around the dip, spacing them evenly. Place broccoli and cauliflower florets around the pumpkins to look like bushes or vines. Scatter cherry tomatoes randomly for pops of color. Tuck in extra celery pieces to look like fallen stems.
- Final touches: Step back and check the arrangement. Fill any empty spots with extra florets or tomatoes. For a ‘fence’ effect, use carrot sticks or cucumber slices along the edge. Serve immediately or cover with plastic wrap and refrigerate until ready to serve.
Notes
Choose small, squat orange bell peppers for the best pumpkin shape. Dry vegetables thoroughly to prevent dip from sliding. Make dip ahead of time for better flavor. Assemble no more than 2-3 hours before serving to keep vegetables crisp. For a dairy-free version, use dairy-free ranch or hummus. For a vegan version, use dairy-free ranch or hummus base.
Nutrition
- Serving Size: 1 cup vegetables wit
- Calories: 135
- Sugar: 6
- Sodium: 300
- Fat: 7
- Saturated Fat: 3
- Carbohydrates: 14
- Fiber: 3.5
- Protein: 5
Keywords: Halloween, veggie tray, pumpkin patch, healthy snack, party appetizer, bell pepper pumpkins, ranch dip, gluten-free, vegetarian


