Love this? Save it for later!
Share the inspiration with your friends
My sister-in-law, Chloe, had claimed to hate pumpkin desserts for as long as I’d known her. Years. Every Thanksgiving, she’d pass the pie with a theatrical shudder, muttering something about “that weird squash taste.” Then, last October, I made this no-bake pumpkin cheesecake with a gingersnap crust just for myself—a little treat to enjoy while the kids carved pumpkins on the back porch. I turned around from the sink to grab a paper towel, and there she was. Standing at the kitchen island, fork in hand, staring at me with an expression that was equal parts guilty and defiant. She’d cut herself a second slice. “Okay,” she said, pointing the fork at me, “this doesn’t count. This is different.” And honestly? She wasn’t wrong.
This isn’t your typical pumpkin dessert. It doesn’t have that heavy, spiced-to-death thing going on. It’s light. Creamy. Almost mousse-like, with a tang from the cream cheese that cuts right through the sweetness. The gingersnap crust isn’t just a crust—it’s a crunchy, molasses-y foundation that makes every single bite feel intentional. I mean, I’ve made a lot of pumpkin things over the years, but this one? This one made a convert out of a sworn hater. And let me tell you, that’s not easy to do.
Maybe you’ve been there—someone in your life who turns up their nose at a whole category of food, and you just quietly prove them wrong with a really good recipe. That’s what this cheesecake is. It’s my quiet little victory, and now it can be yours, too. Perfect for your next fall gathering when you want to impress without spending hours in the kitchen. No oven required. Just a little patience while it chills, and you’ve got a dessert that steals the whole dang table.
Why You’ll Love This Recipe
Look, I’ve tested a lot of no-bake cheesecakes in my time. Some are too soft, some never set up right, and some just taste like sweetened cream cheese with a sad, soggy crust. This one is different. It’s been tested by my family, my book club, and a very skeptical sister-in-law. Here’s why it works:
- No Oven Required: Perfect for when your oven is full of casseroles or you just don’t want to turn it on. This is a true no-bake situation—just mix, pour, and chill.
- Simple Ingredients: You probably have most of these in your pantry right now. No weird extracts or hard-to-find items. Just real, honest ingredients.
- Perfect for Fall Gatherings: This is the dessert you bring to Friendsgiving, Thanksgiving, or a cozy dinner party. It looks fancy, but it’s secretly easy. Your guests will think you slaved over it.
- Crowd-Pleaser: Even the pumpkin skeptics (you know who I’m talking about) will go back for seconds. The creamy texture and spicy crust win everyone over.
- Make-Ahead Friendly: You can make this a full day ahead of time. In fact, it’s better that way. Less stress on the day of your event.
What really sets this recipe apart is the texture. I use a little trick—whipping the cream cheese with a splash of heavy cream until it’s light and fluffy before adding the pumpkin. This gives you that airy, mousse-like consistency that doesn’t feel heavy. And the gingersnap crust? I use store-bought gingersnaps from the grocery store (Nabisco brand works great), but I pulse them myself so I can control the crunch. It’s a small thing, but it makes a big difference.
This recipe isn’t just good—it’s the kind that makes you close your eyes after the first bite. It’s comfort food, reimagined for the modern host who wants to impress without the stress. Perfect for stealing the show at your next gathering.
What Ingredients You Will Need
This recipe uses simple, wholesome ingredients to deliver that rich, creamy, pumpkin-spiced flavor without any fuss. Most of these are pantry staples, especially if you do any fall baking. Let’s break it down.
For the Gingersnap Crust
- 2 cups (about 200g) gingersnap cookie crumbs – I use store-bought gingersnaps. Pulse them in a food processor until you get fine crumbs. Don’t buy the pre-crushed ones; they’re often too dusty.
- 6 tablespoons (85g) unsalted butter, melted – This binds the crust. Use real butter here, not margarine. It adds flavor and helps the crust hold together.
- 2 tablespoons (25g) granulated sugar – Just a little extra sweetness to balance the spicy ginger.
- Pinch of salt – Don’t skip this. Salt makes the crust taste toasty and deep.
For the Pumpkin Cheesecake Filling
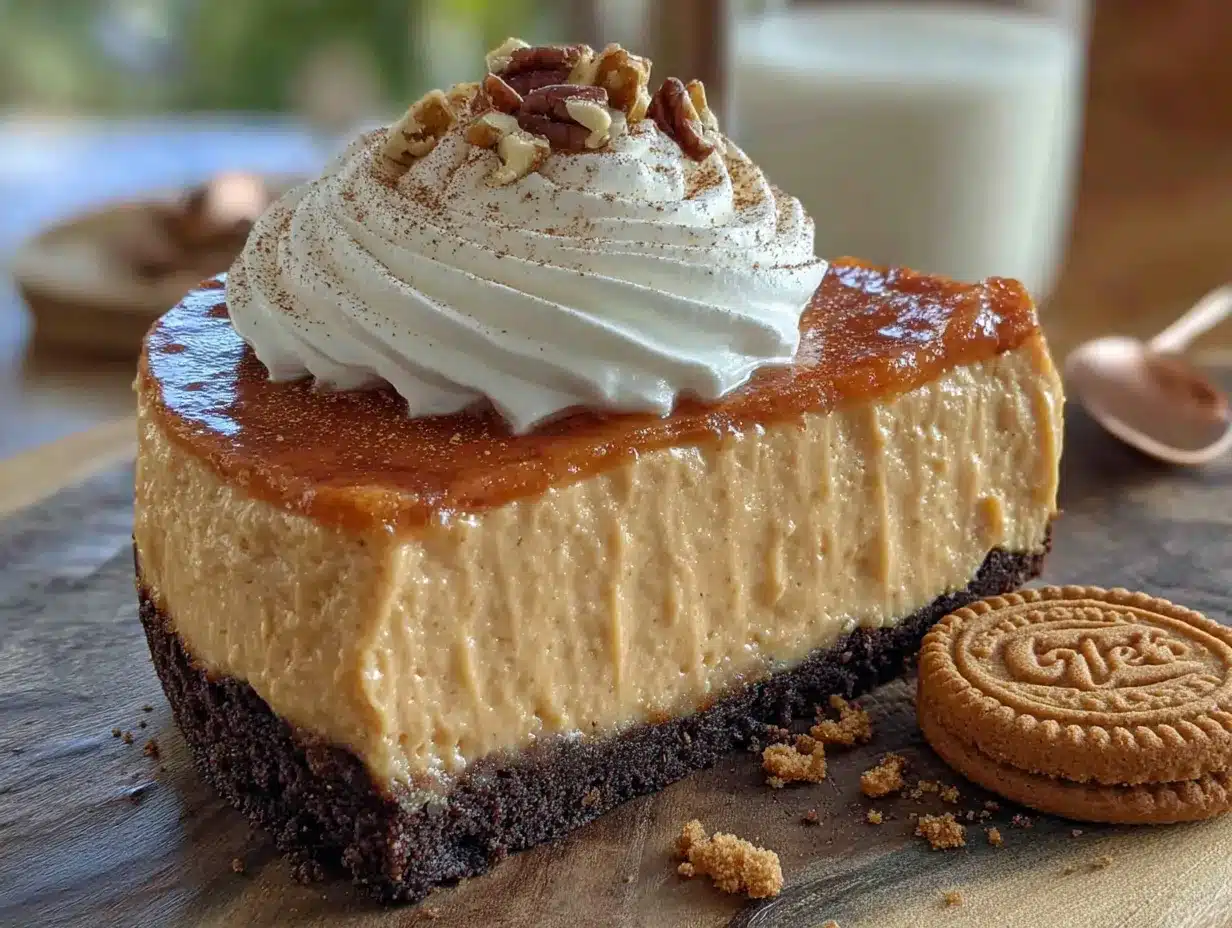
- 16 ounces (450g) full-fat cream cheese, softened – This is non-negotiable. Low-fat cream cheese has too much water and won’t set up properly. Let it sit on the counter for at least an hour before you start.
- 1 cup (200g) granulated sugar – Sweetens the filling without making it cloying.
- 1 cup (240g) canned pumpkin puree – Make sure you get puree, not pumpkin pie filling. The pie filling has sugar and spices already added, which will throw off the balance. Libby’s is my go-to brand.
- 1 teaspoon vanilla extract – Pure vanilla, not imitation. It makes a difference in the depth of flavor.
- 1 teaspoon ground cinnamon – The backbone of pumpkin spice.
- 1/2 teaspoon ground ginger – Adds warmth and a little bite.
- 1/4 teaspoon ground nutmeg – Freshly grated if you have it, but pre-ground works fine.
- 1/4 teaspoon ground cloves – Just a pinch for complexity.
- 1 cup (240ml) heavy whipping cream – This is what makes the filling light and mousse-like. Don’t substitute with milk or half-and-half.
- 1/4 cup (30g) powdered sugar – Helps stabilize the whipped cream.
For the Topping (Optional but Recommended)
- 1 cup (240ml) heavy whipping cream – For the whipped cream topping.
- 2 tablespoons (15g) powdered sugar – To sweeten the whipped cream.
- 1/2 teaspoon vanilla extract – For flavor.
- Crushed gingersnaps and a sprinkle of cinnamon – For garnish.
Equipment Needed
You don’t need a fancy kitchen to pull this off. Here’s what you’ll need:
- 9-inch springform pan – This is key for easy removal. If you don’t have one, you can use a deep-dish pie plate, but the slices won’t be as clean.
- Food processor – For crushing the gingersnaps. You can also use a rolling pin and a zip-top bag, but it takes longer and the crumbs won’t be as even.
- Electric hand mixer or stand mixer – You need this to whip the cream and beat the cream cheese. A whisk and some elbow grease will work, but your arm will be sore.
- Large mixing bowls – At least two. One for the crust, one for the filling.
- Spatula – For scraping down the sides of the bowl.
- Measuring cups and spoons – Accuracy matters in baking, even no-bake baking.
- Plastic wrap – To cover the cheesecake while it chills.
I’ve made this crust with a rolling pin before when my food processor was on the fritz. It worked, but the crumbs were uneven, and the crust was a little patchy. If you’re making this for a dinner party, spring for the food processor. Your future self will thank you.
Preparation Method
Okay, let’s make this happen. The key to this recipe is patience—you need to let the cheesecake chill for at least 6 hours, but overnight is best. Plan ahead, and you’ll be golden.
- Make the crust. In your food processor, pulse the gingersnaps until you have fine, even crumbs. You should have about 2 cups. Transfer the crumbs to a medium bowl. Add the melted butter, sugar, and salt. Stir with a fork until every crumb is moistened. It should look like wet sand. If it’s too dry, add another tablespoon of melted butter.
- Press the crust into the pan. Dump the crumb mixture into your springform pan. Use the bottom of a measuring cup or a flat-bottomed glass to press the crumbs down firmly and evenly. Make sure you go up the sides about an inch if you want a little crust edge. Pop the pan in the fridge while you make the filling. This helps the crust set up.
- Soften the cream cheese. This is crucial. If your cream cheese is cold, you’ll get lumps. Let it sit on the counter for at least an hour. You can also microwave it in 10-second bursts, but be careful not to melt it. You want it soft, not warm.
- Beat the cream cheese. In a large bowl, beat the softened cream cheese with an electric mixer on medium speed until it’s smooth and creamy, about 2 minutes. Scrape down the sides of the bowl. Add the sugar and beat for another 2 minutes until it’s light and fluffy.
- Add the pumpkin and spices. Add the pumpkin puree, vanilla, cinnamon, ginger, nutmeg, and cloves. Beat on medium speed until everything is well combined and smooth. It should look like a thick, orange batter. Set this aside.
- Whip the cream. In a separate, clean bowl (make sure it’s cold—pop it in the fridge for 10 minutes if you can), pour the heavy whipping cream. Add the powdered sugar. Beat on high speed until stiff peaks form. This means when you lift the beaters, the cream stands up in peaks that don’t flop over. Don’t over-whip, or you’ll get butter.
- Fold the whipped cream into the pumpkin mixture. This is the most important step. Take a big dollop of whipped cream and stir it into the pumpkin mixture to lighten it. Then, gently fold in the rest of the whipped cream. Use a spatula and cut through the center, then scrape the bottom and fold over. Do this until no white streaks remain. Be gentle—you want to keep the air in.
- Pour the filling into the crust. Spoon the filling into the chilled crust. Spread it evenly with your spatula. Give the pan a gentle tap on the counter to release any air bubbles.
- Chill. Cover the pan with plastic wrap and refrigerate for at least 6 hours, but overnight is best. The filling needs time to set up. Don’t rush this. If you try to slice it too early, it will be a soupy mess.
- Make the topping. Just before serving, whip the remaining cream with powdered sugar and vanilla until soft peaks form. Spread or pipe it over the cheesecake. Sprinkle with crushed gingersnaps and a dusting of cinnamon.
A little note from my kitchen to yours: I once tried to speed up the chilling process by putting the cheesecake in the freezer for an hour. Don’t do it. The texture gets icy and weird. Just let it do its thing in the fridge. Trust the process.
Cooking Tips & Techniques
I’ve made this cheesecake more times than I can count, and I’ve made every mistake in the book. Let me save you some trouble.
Don’t skip the whipped cream. I know it’s tempting to just mix everything together and pour it in, but the whipped cream is what gives this cheesecake its light, airy texture. Without it, you’ll have a dense, heavy brick of cream cheese and pumpkin. Not good.
Use full-fat everything. This is a dessert, not a diet food. Full-fat cream cheese and heavy cream are essential for the right texture and flavor. Low-fat versions have added water and stabilizers that will make your cheesecake runny. Trust me on this one.
Get those crumbs right. For the crust, you want fine, even crumbs. If you have big chunks, the crust won’t hold together. Pulse the cookies in the food processor until they look like sand. If you’re using a rolling pin, put the cookies in a zip-top bag and crush them until no large pieces remain.
Timing is everything. This is a make-ahead dessert. Don’t try to make it the same day you’re serving it. Make it the night before, or even two nights before. The flavors meld together, and the texture sets up perfectly. It’s actually better on day two.
Room temperature cream cheese is not optional. I cannot stress this enough. Cold cream cheese will give you lumpy filling. Set it out on the counter for at least an hour. If you forget, you can microwave it in 10-second bursts, but watch it carefully. You want it soft, not hot.
Variations & Adaptations
This recipe is super flexible. Here are a few ways to switch it up:
- Gluten-Free Version: Use gluten-free gingersnaps for the crust. Most brands are gluten-free, but double-check the label. The rest of the recipe is naturally gluten-free.
- Dairy-Free Version: Use dairy-free cream cheese (like Kite Hill or Tofutti) and coconut cream instead of heavy cream. The texture will be slightly different, but it’s still delicious. Whip the coconut cream until it’s light and fluffy before folding it in.
- Pumpkin Spice Twist: Add 1/4 cup of caramel sauce to the filling for a pumpkin caramel cheesecake. Drizzle more caramel on top before serving. It’s a whole new level of decadence.
- Chocolate Gingersnap Crust: Swap half the gingersnaps for chocolate wafer cookies. The chocolate and pumpkin combo is surprisingly good.
- Individual Servings: Make these in small mason jars or ramekins instead of a big pan. Layer the crust, filling, and a little whipped cream for a parfait-style dessert. Perfect for parties.
I tried the caramel version last Thanksgiving, and it was gone in ten minutes. Just saying.
Serving & Storage Suggestions
This cheesecake is best served cold, straight from the fridge. Take it out about 15 minutes before slicing to let it soften just a little. Run a knife under hot water, wipe it dry, and then make your slices. This gives you clean, beautiful pieces.
What to serve alongside: A cup of hot coffee or a spiced apple cider pairs beautifully. If you’re hosting a dinner party, serve this after a hearty meal like roasted turkey or butternut squash soup. It’s light enough to not weigh anyone down.
Presentation tip: Before serving, run a thin knife around the edge of the springform pan, then release the latch. Slide the cheesecake off the bottom onto a serving plate. Top with the whipped cream, crushed gingersnaps, and a light dusting of cinnamon. It looks stunning with minimal effort.
Storage: Leftovers (if you have any) keep well in the fridge for up to 5 days. Cover the pan tightly with plastic wrap or transfer slices to an airtight container. The crust might soften a little over time, but the flavor gets even better.
Freezing: You can freeze this cheesecake for up to 2 months. Wrap the entire pan (or individual slices) in plastic wrap, then a layer of foil. Thaw in the fridge overnight before serving. Add the whipped cream topping after thawing, not before.
I’ve frozen slices for a quick dessert when unexpected guests show up. Just pull them out in the morning, and by dinner time, they’re perfect.
Nutritional Information & Benefits
This is a rich dessert, so portions matter. Here’s the approximate nutritional breakdown per slice (based on 12 slices):
- Calories: 420
- Fat: 28g
- Saturated Fat: 16g
- Cholesterol: 95mg
- Sodium: 310mg
- Carbohydrates: 38g
- Fiber: 2g
- Sugar: 28g
- Protein: 6g
On the plus side, pumpkin is packed with vitamin A, which is great for your eyes and immune system. It also has fiber and potassium. The cream cheese provides calcium and protein. Is it a health food? No. But it’s a real-food dessert made with ingredients you can pronounce, and that counts for something.
If you’re watching your sugar, you can reduce the sugar in the filling to 3/4 cup. It’ll be a little less sweet, but the pumpkin and spices still shine.
Conclusion
This no-bake pumpkin cheesecake with gingersnap crust is the dessert that changed my sister-in-law’s mind about pumpkin. And if it can do that, it can win over your guests, too. It’s creamy, spiced just right, and that crust? Honestly, I could eat it by the handful.
I love this recipe because it lets me look like a hero without breaking a sweat. I can make it the night before a party, spend the day of the event actually enjoying my guests, and then pull out a showstopper that makes everyone think I worked magic. And in a way, I did—but it’s magic anyone can do.
So give it a try. Customize it with your favorite toppings—caramel, extra whipped cream, a sprinkle of sea salt. Make it your own. And when your guests ask for the recipe (they will), send them my way. I’d love to hear how it turned out for you.
Happy hosting! And remember, the best dessert is the one you don’t have to bake.
Frequently Asked Questions
Can I use fresh pumpkin instead of canned?
You can, but it’s tricky. Fresh pumpkin has more water than canned, which can make your filling runny. If you want to use fresh, roast the pumpkin, then puree it and strain it through cheesecloth to remove as much liquid as possible. Even then, canned pumpkin is more consistent and reliable for this recipe.
How long does this cheesecake need to chill?
At least 6 hours, but overnight is best. The filling needs time to firm up. If you’re in a hurry, you can try 4 hours, but the slices won’t be as clean. Patience pays off here.
Can I use a different crust?
Absolutely. Graham crackers, vanilla wafers, or even chocolate cookies work well. Just keep the ratios the same: 2 cups of crumbs to 6 tablespoons of melted butter. If you use a sweeter cookie, you can reduce the sugar.
My cheesecake didn’t set. What went wrong?
This usually happens for one of three reasons: the cream cheese was too cold (causing lumps), the whipped cream wasn’t stiff enough, or the cheesecake didn’t chill long enough. Make sure your cream cheese is room temperature, whip the cream to stiff peaks, and give it a full night in the fridge.
Can I make this vegan?
Yes! Use dairy-free cream cheese and coconut cream (chilled and whipped) instead of heavy cream. For the crust, use vegan butter or coconut oil. The texture will be a little different—a bit denser—but it’s still delicious. Just make sure your vegan cream cheese is a block style, not a spreadable tub.
Pin This Recipe!
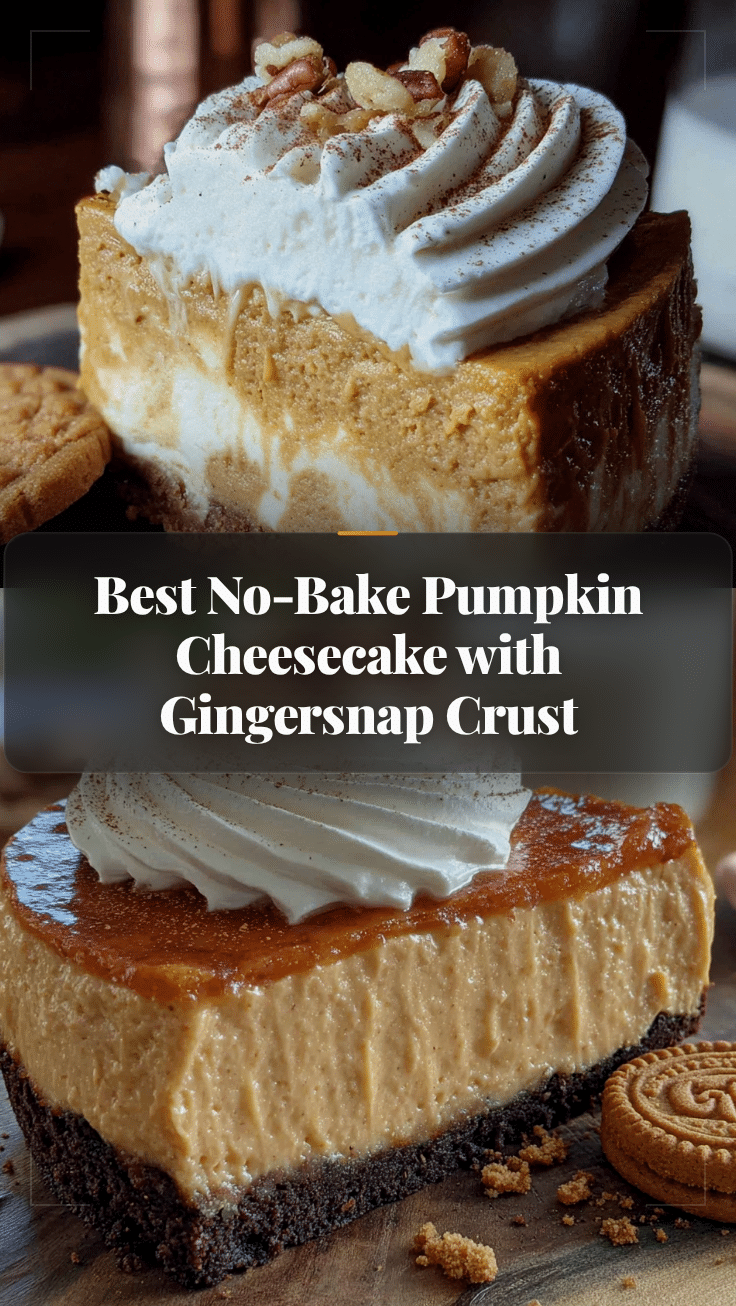
Best No-Bake Pumpkin Cheesecake with Gingersnap Crust (Easy!)
This no-bake pumpkin cheesecake is light, creamy, and mousse-like, with a tangy cream cheese filling and a crunchy gingersnap crust. It’s a make-ahead dessert that wins over even the biggest pumpkin skeptics, perfect for fall gatherings without turning on the oven.
- Prep Time: 30 minutes
- Cook Time: 0 minutes
- Total Time: 6 hours 30 minutes (includes chilling)
- Yield: 12 servings 1x
- Category: Dessert
- Cuisine: American
Ingredients
- 2 cups (about 200g) gingersnap cookie crumbs
- 6 tablespoons (85g) unsalted butter, melted
- 2 tablespoons (25g) granulated sugar
- Pinch of salt
- 16 ounces (450g) full-fat cream cheese, softened
- 1 cup (200g) granulated sugar
- 1 cup (240g) canned pumpkin puree
- 1 teaspoon vanilla extract
- 1 teaspoon ground cinnamon
- 1/2 teaspoon ground ginger
- 1/4 teaspoon ground nutmeg
- 1/4 teaspoon ground cloves
- 1 cup (240ml) heavy whipping cream
- 1/4 cup (30g) powdered sugar
- 1 cup (240ml) heavy whipping cream (for topping)
- 2 tablespoons (15g) powdered sugar (for topping)
- 1/2 teaspoon vanilla extract (for topping)
- Crushed gingersnaps and a sprinkle of cinnamon (for garnish)
Instructions
- Make the crust: In a food processor, pulse gingersnaps into fine, even crumbs (about 2 cups). Transfer to a medium bowl. Add melted butter, sugar, and salt. Stir with a fork until every crumb is moistened (like wet sand). If too dry, add another tablespoon of melted butter.
- Press the crust into a 9-inch springform pan using the bottom of a measuring cup or flat-bottomed glass. Press firmly and evenly, going up the sides about an inch if desired. Refrigerate while making the filling.
- Soften the cream cheese: Let it sit at room temperature for at least 1 hour, or microwave in 10-second bursts until soft but not warm.
- Beat the cream cheese: In a large bowl, beat softened cream cheese with an electric mixer on medium speed until smooth and creamy, about 2 minutes. Scrape down sides. Add sugar and beat for another 2 minutes until light and fluffy.
- Add pumpkin and spices: Add pumpkin puree, vanilla, cinnamon, ginger, nutmeg, and cloves. Beat on medium speed until well combined and smooth (thick orange batter). Set aside.
- Whip the cream: In a separate cold bowl, pour heavy whipping cream and add powdered sugar. Beat on high speed until stiff peaks form (peaks stand up without flopping). Do not over-whip.
- Fold whipped cream into pumpkin mixture: Stir a large dollop of whipped cream into the pumpkin mixture to lighten it. Gently fold in the rest using a spatula, cutting through the center and folding over until no white streaks remain. Be gentle to keep air in.
- Pour filling into crust: Spoon filling into chilled crust and spread evenly. Tap the pan gently on the counter to release air bubbles.
- Chill: Cover with plastic wrap and refrigerate for at least 6 hours, but overnight is best. Do not rush this step.
- Make the topping: Just before serving, whip remaining cream with powdered sugar and vanilla until soft peaks form. Spread or pipe over cheesecake. Sprinkle with crushed gingersnaps and cinnamon.
Notes
Don’t skip the whipped cream—it gives the cheesecake its light, airy texture. Use full-fat cream cheese and heavy cream for best results. Room temperature cream cheese is essential to avoid lumps. Chill overnight for best texture. Do not freeze to speed up chilling; it will make the texture icy. For clean slices, run a knife under hot water, wipe dry, then cut. Leftovers keep in the fridge for up to 5 days. Can be frozen for up to 2 months (wrap tightly, thaw in fridge, add topping after thawing).
Nutrition
- Serving Size: 1 slice
- Calories: 420
- Sugar: 28
- Sodium: 310
- Fat: 28
- Saturated Fat: 16
- Carbohydrates: 38
- Fiber: 2
- Protein: 6
Keywords: no-bake pumpkin cheesecake, gingersnap crust, pumpkin dessert, fall dessert, easy cheesecake, make-ahead dessert, no oven dessert


