Love this? Save it for later!
Share the inspiration with your friends
My neighbor wasn’t trying to impress anyone. I’d stopped by to return her measuring cups—the ones I’d borrowed three weeks prior and kept forgetting to give back—and the smell hit me before I even knocked. It wasn’t the usual scent of her house, which is typically something cozy like simmering soup or fresh laundry. This was different. It was warm, sweet, and buttery, with something floral and almost nostalgic layered underneath. She opened the door with flour on her cheek and a spatula in her hand, completely unbothered. “Oh, those cookies? They’re nothing,” she said, waving her hand. “Just a little something for the kids.” But let me tell you, they were not nothing. They were these incredible, soft, pillowy sugar cookies with this luscious maple cream frosting that tasted like autumn had been distilled into a single bite. I stood there in her doorway, holding my returned measuring cups, and she just handed me a warm cookie on a napkin like it was the most ordinary thing in the world. It wasn’t. It was the start of my obsession with these Cozy Thanksgiving Sugar Cookies with Maple Cream Frosting. Honestly, I think I ate four before I even got back to my car. Maybe you’ve been there—you taste something so unexpectedly perfect that you can’t stop thinking about it for days. That was me. I practically begged her for the recipe, and she scribbled it on a sticky note. That sticky note is now, years later, tucked into my favorite cookbook, stained with butter and vanilla extract. These cookies have become my official kick-off-to-the-holiday-season tradition. Every year, the first weekend of November, I make a batch. And every year, I think about her standing in her kitchen, making something extraordinary look so incredibly easy.
Why You’ll Love This Recipe
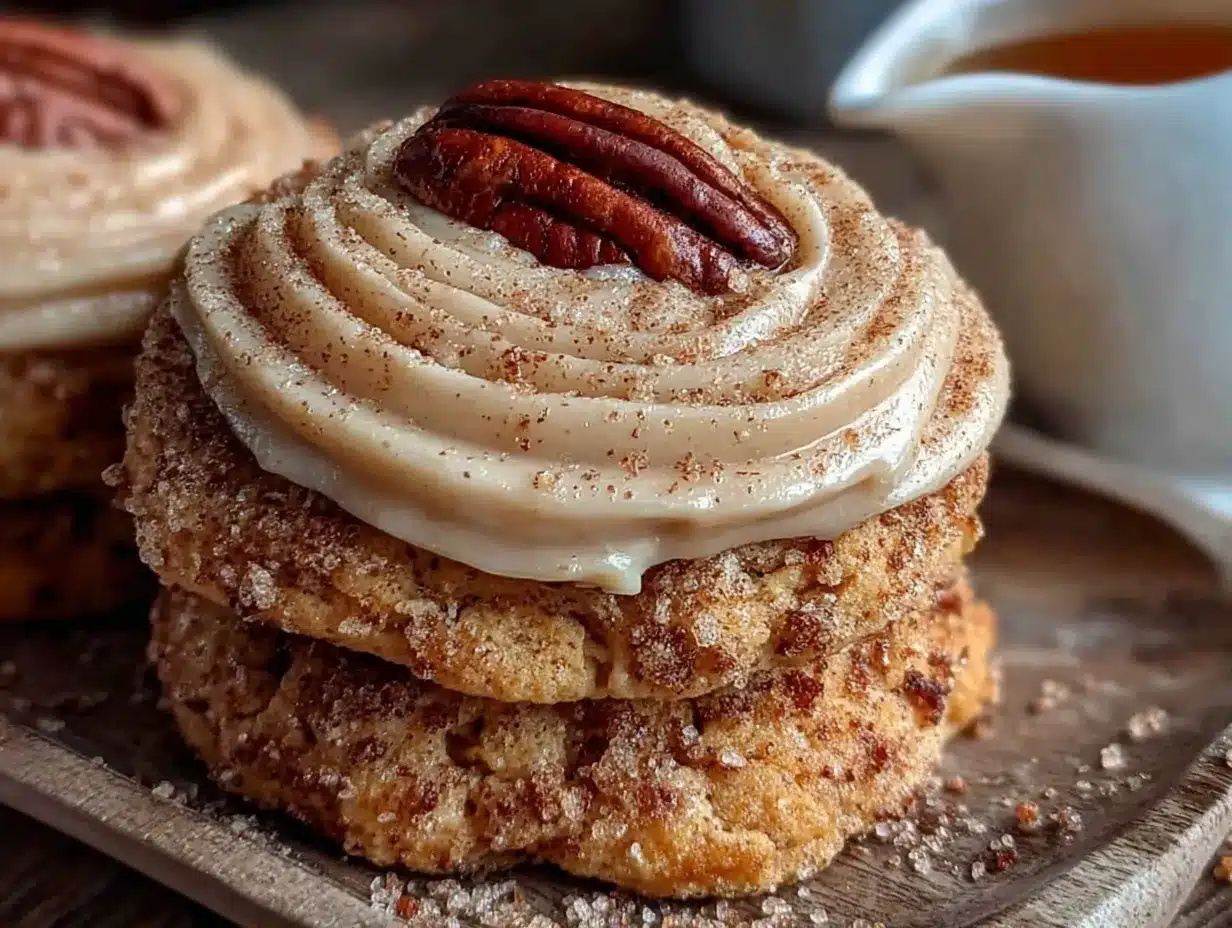
Look, I’ve tested a lot of cookie recipes in my time. Some are too cakey, some are too flat, and some just don’t have that thing that makes you reach for another one. These Cozy Thanksgiving Sugar Cookies? They have all the things. They are the kind of cookie that makes you close your eyes after the first bite. Let me break it down for you.
- Perfectly Soft Texture: These aren’t your typical crunchy sugar cookies. They are thick, soft, and almost cloud-like, with just the slightest chew. The secret is in the cream cheese and the way you handle the dough. I’ve messed this up plenty of times, so trust me when I say this method works.
- That Maple Cream Frosting: Oh, this frosting. It is not just sweet—it is rich, creamy, and has that deep, complex maple flavor that feels like a warm hug. It’s the kind of frosting you want to eat with a spoon. I might or might not have done that. More than once.
- Simple, Everyday Ingredients: No need to hunt down obscure items at a specialty store. You probably have most of this in your pantry right now. The maple syrup is the star, but everything else is a kitchen staple. It makes these cookies feel accessible, not fussy.
- Perfect for Thanksgiving (or Any Cozy Day): These are my go-to for Friendsgiving, the day after Thanksgiving when you need a sweet break from turkey, or any cold afternoon when you just need a little something. They scream “autumn” without being overly complicated.
- Crowd-Pleaser Guaranteed: I have brought these to potlucks, cookie swaps, and family dinners. They disappear. Kids love them, adults love them, and people who claim they “don’t like sweets” suddenly have room for two. It’s a proven fact in my kitchen.
- Make-Ahead Friendly: The dough freezes beautifully, and the cookies themselves stay soft for days. This is a lifesaver during the busy holiday season. You can prep everything ahead and just frost them when you’re ready.
What makes this recipe different from every other sugar cookie out there? It’s the combination of the tangy cream cheese in the dough and that silky, real-maple frosting. It’s not just another version—it is, I think, the best version. It is comfort food reimagined: familiar but somehow more special, simple but deeply satisfying.
What Ingredients You Will Need
This recipe uses simple, wholesome ingredients to deliver that bold maple flavor and satisfyingly soft texture without any fuss. Most of these are pantry staples, which makes these cookies perfect for a spontaneous baking day.
For the Sugar Cookies
- Unsalted butter, softened: 1 cup (2 sticks, 226g). I always use unsalted so I can control the salt level. Let it sit out for about an hour until it’s soft to the touch but not melting. (Adds richness and tenderness.)
- Cream cheese, softened: 4 ounces (113g). This is the secret ingredient. It adds a subtle tang and makes the cookies incredibly soft. Use full-fat block cream cheese for the best texture, not the spreadable kind in a tub.
- Granulated sugar: 1 ½ cups (300g). For sweetness and that classic sugar cookie structure.
- Large egg: 1, at room temperature. It helps bind everything together.
- Vanilla extract: 2 teaspoons. Pure vanilla extract makes a difference here. I prefer Nielsen-Massey for its rich flavor.
- All-purpose flour: 3 cups (360g). Spoon and level it into your measuring cup—don’t scoop directly, or you’ll pack in too much flour and get dense cookies.
- Baking powder: 1 teaspoon. For a little lift.
- Baking soda: ½ teaspoon. Helps with spreading and browning.
- Salt: ½ teaspoon. Balances the sweetness.
For the Maple Cream Frosting
- Unsalted butter, softened: ½ cup (1 stick, 113g). Make sure it’s nice and soft for a smooth, lump-free frosting.
- Cream cheese, softened: 4 ounces (113g). Yes, more cream cheese! It keeps the frosting from being too sweet and gives it a luscious, silky texture.
- Pure maple syrup: ¼ cup (80ml). This is non-negotiable. Do not use pancake syrup or maple-flavored syrup. You want the real deal, Grade A Dark Amber for the most robust flavor. I love Maple Grove Farms for a reliable, affordable option.
- Powdered sugar: 2 ½ cups (300g), sifted. Sifting is key to avoiding tiny lumps in your frosting.
- Milk or heavy cream: 1-2 tablespoons, as needed. To adjust the consistency. Heavy cream makes it extra decadent.
- Pinch of salt: To enhance the maple flavor and cut the sweetness.
Substitution Guidance: For a dairy-free version, you can use a high-quality vegan butter and dairy-free cream cheese. The texture will be slightly different, but still delicious. For a gluten-free option, I’ve had good results using a 1:1 gluten-free baking flour blend, like King Arthur Measure for Measure. Just know the cookies might be a bit more delicate.
Equipment Needed
You don’t need a professional bakery setup for these cookies, but a few key tools will make your life a whole lot easier. Here’s what you’ll need.
- Electric Mixer: A stand mixer with the paddle attachment is ideal, but a hand mixer works perfectly fine. You need something to cream the butter and sugar together until light and fluffy. Doing it by hand is possible, but your arm will get a serious workout.
- Large Mixing Bowls: One for the dry ingredients and one for the wet ingredients. I prefer glass or stainless steel.
- Whisk: For combining the flour, baking powder, baking soda, and salt.
- Rubber Spatula: Essential for scraping down the sides of the bowl and folding in the last bits of flour.
- Cookie Scoop: A 1.5-tablespoon scoop is perfect for getting even-sized cookies that bake uniformly. It’s a game-changer for consistency. (Adds even baking)
- Baking Sheets: I like light-colored, rimmed baking sheets. Dark sheets can cause the bottoms of the cookies to brown too quickly.
- Parchment Paper or Silicone Baking Mat: This prevents sticking and makes cleanup a breeze. I prefer parchment for the crispiest bottoms.
- Wire Cooling Rack: Essential for letting the cookies cool completely before frosting. Frosting on warm cookies is a melted mess—I learned that the hard way.
- Offset Spatula: This makes spreading the frosting so much easier and gives you that beautiful, swoopy look. A butter knife works, but an offset spatula is worth the few dollars it costs.
Preparation Method
Alright, let’s get to the fun part. This recipe is straightforward, but there are a few little tricks to make sure these cookies turn out perfectly every time. Follow these steps, and you’ll be in cookie heaven.
- Cream the Butter and Cream Cheese: In the bowl of your stand mixer (or a large bowl if using a hand mixer), beat the softened butter and cream cheese together on medium speed for about 2-3 minutes, until the mixture is smooth, light, and completely combined. You don’t want any lumps of cream cheese left. Scrape down the sides and bottom of the bowl with your spatula.
- Add the Sugar: Add the granulated sugar and beat on medium-high speed for another 2-3 minutes. The mixture should become pale, fluffy, and almost grainy-looking. This is called “creaming,” and it’s how we get air into the dough for a tender cookie.
- Add the Wet Ingredients: Beat in the egg and the vanilla extract until just combined. Don’t overmix here. Scrape the bowl again to make sure everything is incorporated.
- Whisk the Dry Ingredients: In a separate medium bowl, whisk together the all-purpose flour, baking powder, baking soda, and salt. Whisking ensures the leavening agents are evenly distributed so you don’t get a weird pocket of baking soda in one cookie.
- Combine Wet and Dry: With the mixer on low speed, gradually add the dry ingredients to the wet ingredients. Mix until just combined. You should see a few streaks of flour remaining. Stop the mixer, and use your rubber spatula to fold the dough together gently. Do not overmix at this stage, or your cookies will be tough.
- Chill the Dough: This is the most important step. Cover the bowl with plastic wrap and refrigerate the dough for at least 1 hour, or up to 3 days. Chilling the dough solidifies the butter, which prevents the cookies from spreading too much in the oven and gives them that thick, soft texture. I know it’s hard to wait, but trust me on this. (Pro tip: If you’re in a hurry, you can pop it in the freezer for 20-30 minutes, but the fridge is better.)
- Preheat and Prep: When you’re ready to bake, preheat your oven to 375°F (190°C). Line two baking sheets with parchment paper or silicone mats.
- Scoop and Roll: Use your cookie scoop to portion out the dough. If you don’t have a scoop, use a tablespoon and roll the dough into 1.5-inch balls. Place them on the prepared baking sheets, leaving about 2 inches of space between each one. They will spread a little, but not too much.
- Bake: Bake for 10-12 minutes, or until the edges are just set and lightly golden. The centers will look slightly underdone and puffy—that’s exactly what you want. They will continue to set on the hot baking sheet. Overbaking leads to dry cookies.
- Cool: Let the cookies cool on the baking sheet for 5 minutes. This is crucial for them to firm up. Then, transfer them to a wire cooling rack to cool completely. Do not even think about frosting them until they are 100% cool to the touch.
- Make the Frosting: While the cookies cool, make the frosting. In the bowl of your stand mixer (or a clean bowl with a hand mixer), beat the softened butter and cream cheese together on medium speed until smooth and creamy, about 2 minutes.
- Add the Maple Syrup: Beat in the pure maple syrup and a pinch of salt until combined. The mixture might look a little curdled at this point—that’s normal.
- Add the Powdered Sugar: With the mixer on low speed, gradually add the sifted powdered sugar, about ½ cup at a time. Mix until smooth after each addition. Once all the sugar is added, increase the speed to medium-high and beat for 1-2 minutes, until the frosting is light, fluffy, and spreadable.
- Adjust Consistency: If the frosting is too thick, add a tablespoon of milk or heavy cream. If it’s too thin, add a little more powdered sugar. You want it to be thick enough to hold its shape but soft enough to spread easily.
- Frost the Cookies: Once the cookies are completely cool, use your offset spatula or a butter knife to spread a generous layer of the maple cream frosting on each one. Don’t be shy—this is the best part.
- Optional Garnish: For a pretty finish, sprinkle a tiny pinch of flaky sea salt on top of each frosted cookie. It sounds weird, but the salt really makes the maple flavor pop. You can also add a drizzle of extra maple syrup or some festive sprinkles.
Cooking Tips & Techniques
I’ve made these cookies more times than I can count, and I’ve definitely had my share of failures. Here are the lessons I learned the hard way so you don’t have to.
- Don’t Skip the Chill: I cannot stress this enough. The first time I made these, I was impatient and skipped the chilling step. The cookies spread into flat, greasy discs. They still tasted okay, but they were not the thick, soft beauties I was after. The chill is non-negotiable for the perfect texture.
- Room Temperature Ingredients Matter: Cold butter and cold cream cheese don’t cream together properly. You’ll end up with a lumpy dough and dense cookies. Let your butter and cream cheese sit out on the counter for at least an hour. The egg should also be at room temperature—just place it in a bowl of warm water for 5 minutes if you forgot.
- Measure Your Flour Correctly: The most common mistake in baking cookies is using too much flour. Spoon the flour into your measuring cup and level it off with a knife. Don’t scoop directly from the bag—you’ll pack in up to 25% more flour than the recipe calls for, and your cookies will be dry and cakey.
- The Underbake Trick: Take the cookies out of the oven when the edges are set but the centers still look a little puffy and soft. They will continue to bake on the hot sheet. If you wait until the centers look fully baked, they will be overbaked and dry once they cool. This is the secret to that soft, bakery-style texture.
- Use Real Maple Syrup: Please, for the love of all things cozy, do not use “pancake syrup.” It’s mostly corn syrup and artificial flavoring. Real maple syrup has a complex, woody, caramel-like flavor that is completely irreplaceable. It’s the star of the show, so don’t skimp on it.
- Timing is Everything: I like to make the dough the day before I plan to bake. It chills overnight, which makes it even easier to handle, and the flavors have time to meld. Then, the next day, I just scoop, bake, and frost. It makes the whole process feel less overwhelming.
Variations & Adaptations
One of the best things about this recipe is how easy it is to adapt. Here are a few of my favorite ways to switch it up, depending on my mood or what I have on hand.
- Spiced Maple Cookies: Add 1 teaspoon of ground cinnamon, ½ teaspoon of ground ginger, and ¼ teaspoon of ground nutmeg to the dry ingredients. This gives the cookies a warm, chai-like flavor that is absolutely perfect for fall. It’s like a pumpkin spice latte in cookie form, but better.
- Maple Pecan Crunch: After frosting the cookies, press a few chopped, toasted pecans into the frosting. The nutty crunch is a wonderful contrast to the soft cookie and creamy frosting. Toast the pecans in a dry pan over medium heat for 3-4 minutes until they smell fragrant—it makes a huge difference.
- Gluten-Free Option: I’ve tested this with a 1:1 gluten-free flour blend (like Bob’s Red Mill or King Arthur), and it works beautifully. The cookies might spread just a tiny bit more, so make sure you chill the dough for the full hour. The texture is still soft and tender, not crumbly at all.
- Dairy-Free Adaptation: Use a high-quality vegan butter (I like Miyoko’s) and a dairy-free cream cheese (Kite Hill is my go-to). The dough will be a little softer, so it needs a longer chill time—at least 2 hours. The frosting will also be slightly less firm, but still incredibly delicious.
- Maple Glaze Instead of Frosting: If you want something lighter, skip the cream cheese frosting and make a simple maple glaze. Whisk together 1 cup of powdered sugar, 2 tablespoons of maple syrup, and 1-2 teaspoons of milk until smooth. Drizzle it over the cooled cookies. It’s less decadent but still wonderful.
Serving & Storage Suggestions
These cookies are best enjoyed at room temperature, where the frosting is soft and the cookie is tender. Here’s how to serve and store them for maximum enjoyment.
- Serving Temperature: Serve them at room temperature. If you’ve stored them in the fridge, let them sit out for about 15-20 minutes before serving. The frosting will soften, and the flavor will bloom. They are perfect with a hot cup of coffee, a mug of spiced tea, or a glass of cold milk.
- Presentation: For a Thanksgiving dessert table, arrange them on a beautiful wooden board or a white platter. The golden-brown cookies with the creamy white frosting are so visually appealing. A few fresh sage leaves or small cinnamon sticks make a gorgeous, rustic garnish.
- Storage: Store the frosted cookies in an airtight container in the refrigerator for up to 5 days. The cream cheese frosting needs to be kept cold. Place a layer of parchment paper between the cookies to prevent them from sticking together.
- Freezing: You have two great options here. You can freeze the unbaked cookie dough balls for up to 3 months. Just scoop them, place them on a baking sheet, freeze until solid, then transfer to a freezer bag. Bake from frozen, adding 1-2 minutes to the baking time. Or, you can freeze the baked, unfrosted cookies for up to 3 months. Thaw them at room temperature, then make the frosting fresh. I don’t recommend freezing frosted cookies, as the texture of the frosting can change.
- Reheating: I actually prefer these cookies at room temperature, but if you want a warm cookie, you can microwave one for about 10-15 seconds. Be careful not to melt the frosting! The flavor actually develops over time. I think these cookies are even better on day two, after the maple flavor has had a chance to really sink into the cookie.
Nutritional Information & Benefits
Let’s be real—these are a treat. But that doesn’t mean they can’t have a few redeeming qualities. Here’s a rough estimate of the nutritional breakdown per cookie (based on 24 cookies).
| Nutrient | Amount per Cookie |
|---|---|
| Calories | ~280 |
| Fat | 15g |
| Saturated Fat | 9g |
| Carbohydrates | 35g |
| Sugar | 24g |
| Protein | 3g |
Health Benefits: The cream cheese and butter provide a small amount of calcium and vitamin A. Real maple syrup contains antioxidants and minerals like zinc and manganese, which can support immune function. Plus, there’s something to be said for the mental health benefits of a warm, homemade cookie on a cold day. It’s comfort food, and that has its own kind of value.
Dietary Considerations: This recipe is not gluten-free or dairy-free as written, but I’ve provided easy adaptations above. It is nut-free if you skip the pecan variation. The main allergens are dairy (butter, cream cheese), gluten (flour), and eggs.
Conclusion
So there you have it—the story of a cookie that started on a sticky note and became a full-blown holiday tradition. These Cozy Thanksgiving Sugar Cookies with Maple Cream Frosting are more than just a dessert. They are a moment of pause. They are the smell that fills your kitchen and makes everyone wander in, asking, “What’s baking?” They are the taste of autumn, of gratitude, of slowing down.
I really hope you give them a try. Don’t be afraid to make them your own—add some spices, throw in some pecans, or just keep them classic. The best recipes are the ones that feel like yours. And if you do make them, I would absolutely love to hear about it. Leave a comment below and tell me how they turned out, or share a photo on Pinterest and tag me. It honestly makes my day to see these cookies bringing a little warmth to someone else’s kitchen. Happy baking, friend. You’ve got this.
Frequently Asked Questions
Can I use maple extract instead of real maple syrup?
I wouldn’t recommend it for the frosting. Maple extract can have an artificial, one-note flavor. Real maple syrup provides a deep, complex sweetness that is essential to the recipe. If you’re in a pinch, you can use a combination of maple extract and a simple syrup, but the result won’t be the same.
Why did my cookies spread too much?
This usually happens for one of three reasons: the dough wasn’t chilled long enough, the butter was too soft, or the flour was measured incorrectly. Make sure you chill the dough for at least 1 hour, and spoon and level your flour. If your kitchen is very warm, pop the scooped cookie dough balls back in the fridge for 10 minutes before baking.
Can I make the dough ahead of time?
Absolutely! The dough can be refrigerated for up to 3 days. Just wrap it tightly in plastic wrap. You can also freeze the dough balls for up to 3 months. It’s a great make-ahead option for the busy holiday season.
How do I get my frosting to be perfectly smooth?
The key is to have your butter and cream cheese at the proper room temperature—soft but not melted. Sift your powdered sugar to remove any lumps, and beat the frosting on medium-high for a full 1-2 minutes after adding all the sugar. If it still looks a little lumpy, try warming the bowl slightly by placing it over a pot of warm water for a minute, then beat again.
Can I double this recipe?
Yes, this recipe doubles beautifully. Just make sure you have a large enough mixing bowl. If using a stand mixer, you might need to mix the dough in two batches to avoid overworking the mixer. The baking time will remain the same.
Pin This Recipe!
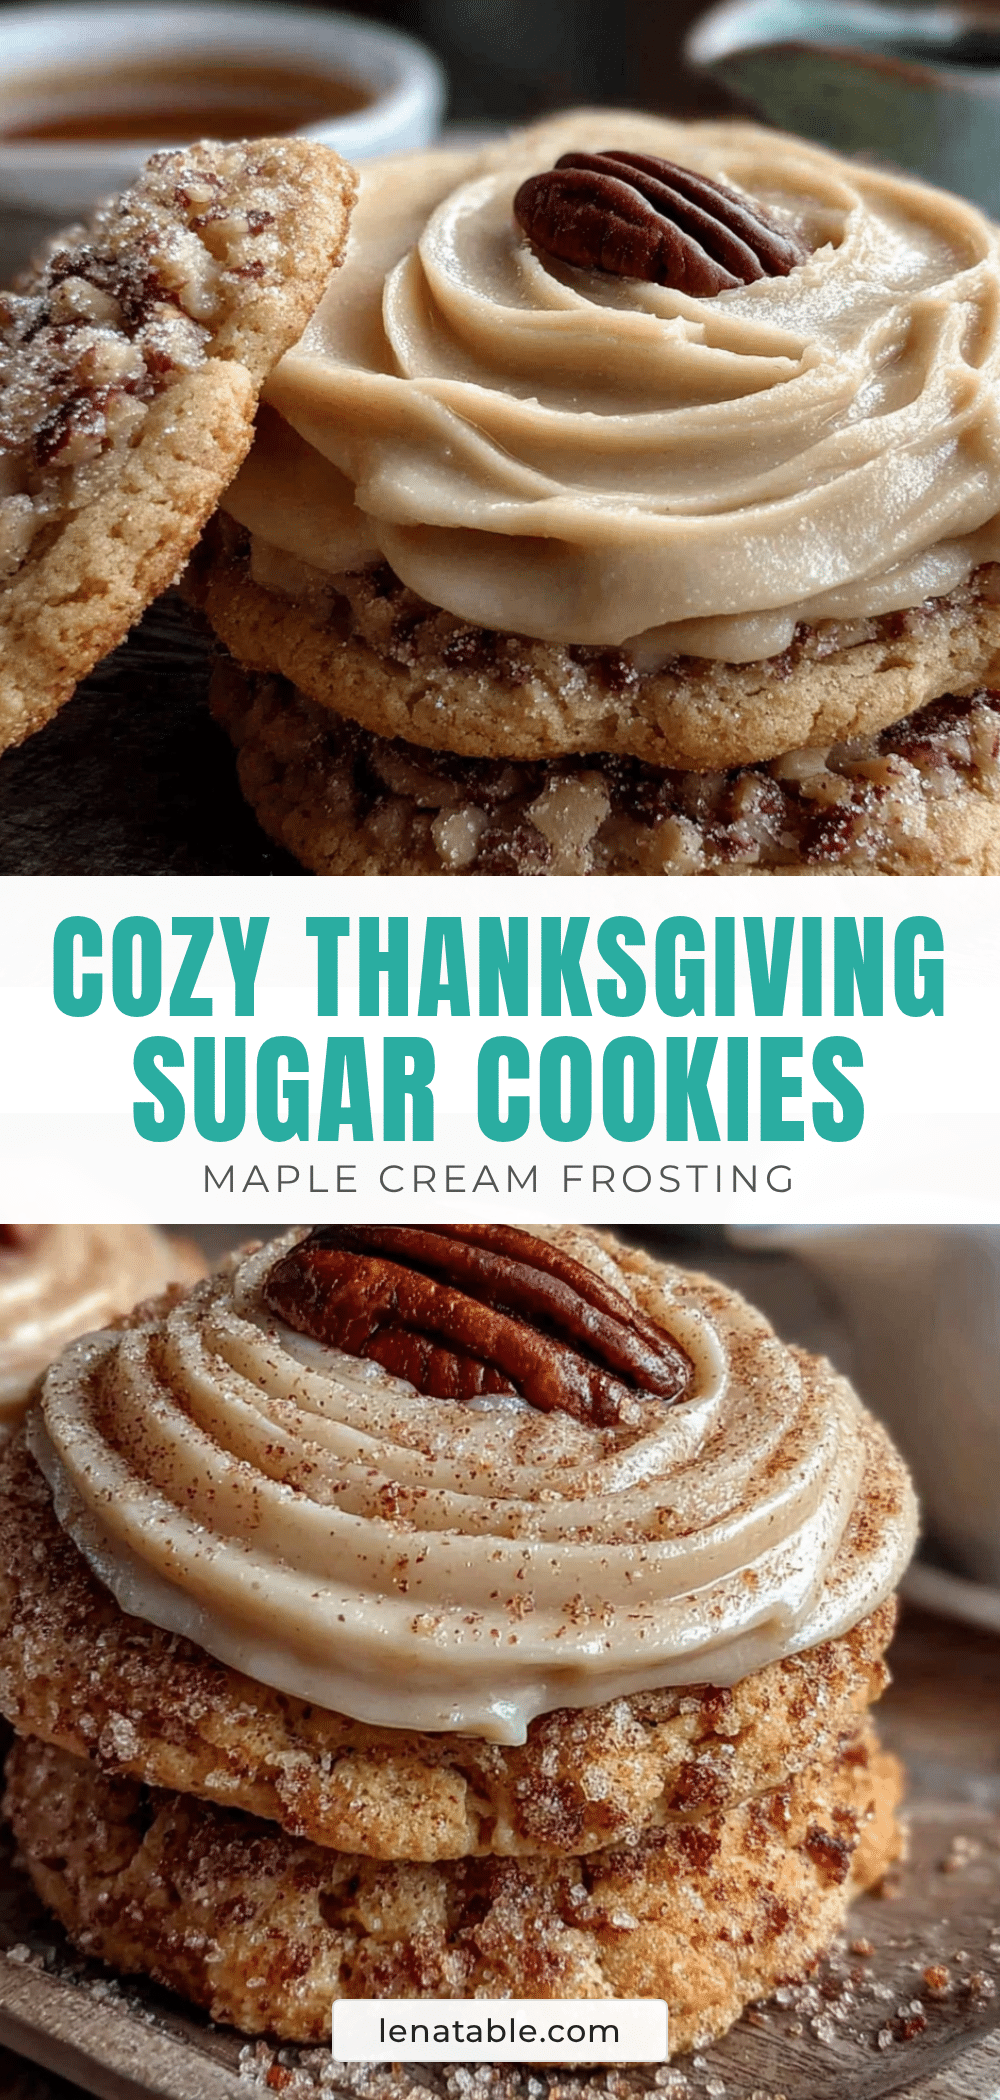
Cozy Thanksgiving Sugar Cookies with Easy Maple Frosting
These soft, pillowy sugar cookies with a luscious maple cream frosting taste like autumn in every bite. Perfect for Thanksgiving or any cozy day, they are a crowd-pleasing treat that’s simple to make.
- Prep Time: 20 minutes
- Cook Time: 12 minutes
- Total Time: 1 hour 32 minutes (includes 1 hour chilling)
- Yield: 24 cookies 1x
- Category: Dessert
- Cuisine: American
Ingredients
- 1 cup (2 sticks, 226g) unsalted butter, softened
- 4 ounces (113g) cream cheese, softened
- 1 ½ cups (300g) granulated sugar
- 1 large egg, at room temperature
- 2 teaspoons vanilla extract
- 3 cups (360g) all-purpose flour
- 1 teaspoon baking powder
- ½ teaspoon baking soda
- ½ teaspoon salt
- ½ cup (1 stick, 113g) unsalted butter, softened (for frosting)
- 4 ounces (113g) cream cheese, softened (for frosting)
- ¼ cup (80ml) pure maple syrup
- 2 ½ cups (300g) powdered sugar, sifted
- 1–2 tablespoons milk or heavy cream (as needed)
- Pinch of salt (for frosting)
Instructions
- Cream the butter and cream cheese: In the bowl of a stand mixer (or large bowl with hand mixer), beat the softened butter and cream cheese together on medium speed for 2-3 minutes until smooth and combined. Scrape down the bowl.
- Add the sugar: Add the granulated sugar and beat on medium-high speed for 2-3 minutes until pale and fluffy.
- Add the wet ingredients: Beat in the egg and vanilla extract until just combined. Scrape the bowl again.
- Whisk the dry ingredients: In a separate bowl, whisk together the flour, baking powder, baking soda, and salt.
- Combine wet and dry: With the mixer on low speed, gradually add the dry ingredients to the wet ingredients, mixing until just combined. Fold gently with a rubber spatula. Do not overmix.
- Chill the dough: Cover the bowl with plastic wrap and refrigerate for at least 1 hour, or up to 3 days.
- Preheat and prep: When ready to bake, preheat oven to 375°F (190°C). Line two baking sheets with parchment paper or silicone mats.
- Scoop and roll: Use a 1.5-tablespoon cookie scoop to portion the dough into balls. Place on prepared baking sheets, 2 inches apart.
- Bake: Bake for 10-12 minutes, until edges are set and lightly golden. Centers should look slightly underdone. Let cool on baking sheet for 5 minutes, then transfer to a wire rack to cool completely.
- Make the frosting: In a clean bowl, beat the softened butter and cream cheese together on medium speed until smooth and creamy, about 2 minutes.
- Add maple syrup: Beat in the pure maple syrup and a pinch of salt until combined (mixture may look curdled).
- Add powdered sugar: With mixer on low, gradually add sifted powdered sugar, ½ cup at a time, mixing until smooth. Increase speed to medium-high and beat for 1-2 minutes until light and fluffy.
- Adjust consistency: If too thick, add 1 tablespoon of milk or heavy cream. If too thin, add more powdered sugar.
- Frost the cookies: Once cookies are completely cool, spread a generous layer of frosting on each using an offset spatula or butter knife.
- Optional garnish: Sprinkle with flaky sea salt, a drizzle of extra maple syrup, or festive sprinkles.
Notes
Chilling the dough is essential to prevent spreading. Use real maple syrup, not pancake syrup. For best texture, do not overbake; centers should look slightly underdone. The dough can be refrigerated for up to 3 days or frozen for up to 3 months.
Nutrition
- Serving Size: 1 cookie
- Calories: 280
- Sugar: 24
- Sodium: 150
- Fat: 15
- Saturated Fat: 9
- Carbohydrates: 35
- Protein: 3
Keywords: Thanksgiving cookies, sugar cookies, maple frosting, soft sugar cookies, fall cookies, cream cheese cookies


