Love this? Save it for later!
Share the inspiration with your friends
I had white chicken chili on my “never making that” list for years. Honestly, I just didn’t get the hype. It always looked like watery soup pretending to be chili, and I’d rather have the real thing—the dark, beefy, almost-black kind that stains your bowl. So when my friend Sarah suggested I bring it to our annual Friendsgiving last November, I laughed. “I don’t make white chicken chili,” I told her. “It’s soup for people who are afraid of flavor.”
Then she showed up at my door the Tuesday before, holding a slow cooker and a bag of groceries. “I bought everything,” she said, pushing past me into the kitchen. “You’re making it anyway.” So I did, mostly to prove my point. I chopped the onions with a little too much attitude, dumped in the beans with a sigh, and figured we’d be ordering pizza later. But somewhere between the first stir and the moment the cumin hit the hot oil, something shifted. The smell alone made my roommate wander out of her room. And when I finally tasted it—after adding a whole extra jalapeño and a splash of lime—I had to sit down.
It was good. No, it was really good. The kind of good that makes you mad because you have to admit you were wrong. I brought it to Friendsgiving that Saturday, and the pot was empty before the turkey even came out of the oven. People were standing around the kitchen island with spoons, dipping chips, asking for the recipe. I mumbled something about finding it online, but the truth is, I’d already started scribbling notes on a napkin. This white chicken chili for Friendsgiving became my thing after that. I’ve made it for three different gatherings since, and every single time, someone asks for the recipe. So here it is—the one that changed my mind.
Why You’ll Love This Recipe
Let me tell you why this white chicken chili for Friendsgiving is different from the rest. I’ve tested this recipe about seven times now, tweaking it after every batch, and I’ve finally landed on a version that hits every single note. It’s not watery, it’s not bland, and it doesn’t need a dozen fancy ingredients to taste amazing.
- Budget-Friendly Ingredients : Everything here costs less than a takeout order. Canned beans, frozen corn, a couple of chicken breasts, and pantry spices. Your wallet will thank you.
- Comes Together in Under an Hour : You can have this on the table in about 45 minutes. Perfect for those Friendsgiving afternoons when everyone shows up early and hungry.
- Picky Eater Approved : My nephew, who “doesn’t like soup” and “hates beans,” ate three bowls. I’m not kidding. Something about the creamy texture and mild heat just works.
- Reheats Like a Dream : This is one of those recipes that actually tastes better the next day. The flavors meld together overnight, making leftovers a serious perk.
- Crowd-Sized Portions : This recipe makes enough for 8 to 10 people. You won’t be scrambling to double it at the last minute.
What makes this version special is the creaminess—without using heavy cream. I figured out that blending a can of white beans with a little broth creates this silky, luscious texture that feels indulgent but isn’t. It’s a trick I picked up from a chef friend, and honestly, it changes everything. You get that rich mouthfeel without the dairy overload, which means your lactose-intolerant friends can eat it too.
This white chicken chili for Friendsgiving has become my go-to for a reason. It’s the dish that makes people close their eyes after the first bite. It’s comfort food that feels a little bit fancy but costs almost nothing. And when you’re hosting a crowd, that’s exactly what you need.
What Ingredients You Will Need
This recipe uses simple, honest ingredients that you probably already have in your pantry. The magic is in how they come together, not in hunting down obscure items. Here’s what you’ll need:
For the Chili Base
- 2 tablespoons olive oil (I use extra virgin, but any neutral oil works)
- 1 large yellow onion, diced (about 1½ cups)
- 4 cloves garlic, minced (don’t skimp here—garlic is your friend)
- 2 jalapeños, seeded and finely diced (leave seeds in if you want more heat)
- 1½ teaspoons ground cumin
- 1 teaspoon dried oregano
- ½ teaspoon smoked paprika (adds a subtle smokiness that’s lovely)
- ½ teaspoon ground coriander (optional, but I love the brightness it brings)
- Salt and black pepper to taste
For the Chicken and Broth
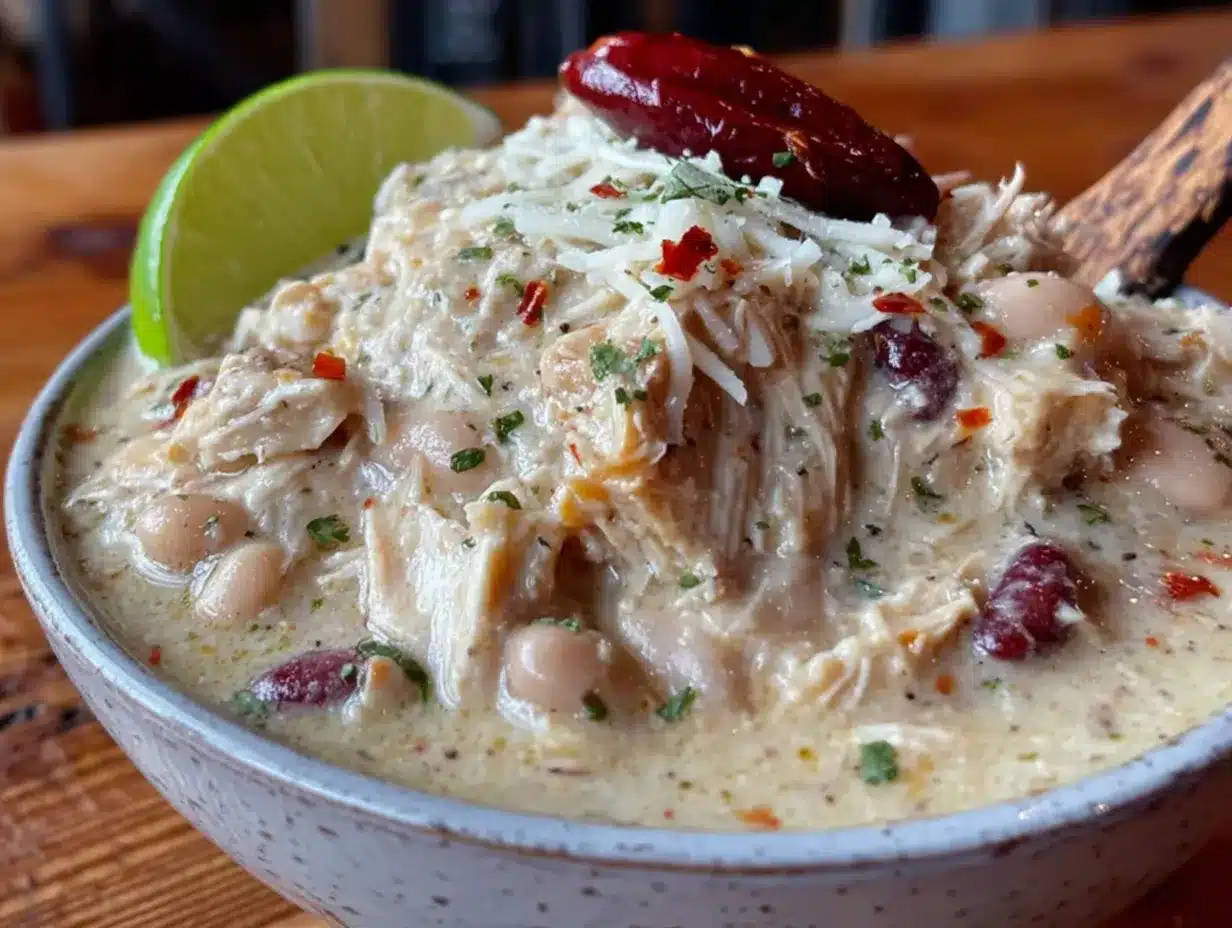
- 1½ pounds boneless, skinless chicken breasts (about 2 large breasts)
- 4 cups low-sodium chicken broth (I prefer Swanson for its clean flavor)
- 2 cans (15 ounces each) cannellini beans, drained and rinsed (Great Northern beans work too)
- 1 can (15 ounces) white corn, drained (or 1½ cups frozen corn, thawed)
- 1 can (4 ounces) diced green chiles (mild or medium, your call)
For the Creamy Finish
- ½ cup sour cream (full-fat works best, but Greek yogurt is a fine substitute)
- ¼ cup heavy cream or half-and-half (optional, for extra richness)
- Juice of 1 lime (about 2 tablespoons)
For Garnish (Optional but Recommended)
- Fresh cilantro, chopped
- Shredded Monterey Jack cheese
- Crushed tortilla chips (I like Tostitos for their sturdy crunch)
- Diced avocado
- Lime wedges
One note about the beans: I always use canned for convenience, but if you want to cook dried beans from scratch, go for it. Just know you’ll need about 1½ cups cooked beans per can. Also, if you’re feeding a vegetarian crowd, swap the chicken for an extra can of beans and use vegetable broth. It’s still fantastic.
Equipment Needed
You don’t need a fancy kitchen to make this white chicken chili for Friendsgiving. Here’s what I use:
- Large Dutch oven or heavy-bottomed pot (5 to 6 quarts is ideal) — I’ve had my Lodge cast iron pot for years, and it’s perfect for this. If you don’t have one, any large soup pot will do.
- Wooden spoon or silicone spatula for stirring — the wooden one won’t scratch your pot.
- Chef’s knife and cutting board — a sharp knife makes dicing onions and jalapeños so much easier.
- Measuring spoons — for the spices. I keep a magnetic set on my fridge so I never lose them.
- Can opener — basic, but essential.
- Blender or immersion blender — this is key for the creamy bean trick. I use a Breville immersion blender, but a regular blender works too. Just be careful blending hot liquid—work in batches and leave the lid slightly open to release steam.
- Large bowl for shredding the chicken.
- Tongs or forks for handling the cooked chicken.
If you don’t have an immersion blender, you can mash the beans with a potato masher or the back of a fork. It won’t be as smooth, but it’ll still taste great. And honestly, I’ve done that more times than I’d like to admit.
Preparation Method
Let’s get cooking. This whole process takes about 45 minutes, and most of it is hands-off. Here’s how I do it:
- Start the aromatics. Heat the olive oil in your Dutch oven over medium heat. Add the diced onion and cook for about 5 minutes, stirring occasionally, until it’s soft and translucent. You want it to smell sweet, not burnt. Add the garlic and jalapeños and cook for another minute until fragrant. The kitchen should start smelling amazing right about now.
- Bloom the spices. Sprinkle in the cumin, oregano, smoked paprika, and coriander. Stir constantly for about 30 seconds until the spices are fragrant and slightly darker. This step is crucial—blooming the spices in oil releases their essential oils and makes the flavor deeper. Don’t skip it.
- Add the liquid and chicken. Pour in the chicken broth and stir, scraping up any browned bits from the bottom of the pot. Nestle the chicken breasts into the liquid. They should be mostly submerged. Bring to a gentle boil, then reduce the heat to low, cover, and simmer for 15 to 18 minutes, or until the chicken is cooked through and reaches 165°F internally. I use a meat thermometer to be sure.
- Shred the chicken. Using tongs, transfer the cooked chicken to a large bowl. Let it rest for a couple minutes, then shred it with two forks. It should pull apart easily. Don’t over-shred—you want some nice chunks for texture. Set the shredded chicken aside.
- Blend for creaminess. While the chicken rests, scoop out 1 cup of the cooked beans and ½ cup of the hot broth from the pot. Transfer to a blender or use an immersion blender in a tall cup. Blend until completely smooth. This is the secret weapon—it thickens the chili without any cream or flour. Pour the bean puree back into the pot and stir.
- Add the remaining ingredients. Stir in the shredded chicken, remaining whole beans, drained corn, and diced green chiles. Bring the chili back to a gentle simmer and cook for 10 minutes, stirring occasionally. The flavors need this time to meld. You’ll notice the chili thickening slightly as it cooks.
- Finish with cream and lime. Remove the pot from the heat. Stir in the sour cream, heavy cream (if using), and lime juice. Taste and adjust salt and pepper. The sour cream adds tang and richness, while the lime brightens everything up. Don’t add them too early or they might curdle.
- Rest and serve. Let the chili sit for 5 minutes before serving. This allows the flavors to settle and the texture to thicken a bit more. Ladle into bowls and top with your favorite garnishes.
One thing I learned the hard way: taste as you go. I once added too much cumin because I wasn’t paying attention, and the chili tasted like a spice cabinet. Start with the amounts listed, then adjust at the end. You can always add more, but you can’t take it out.
Cooking Tips & Techniques
After making this white chicken chili for Friendsgiving about a dozen times, I’ve picked up a few tricks that make a real difference. Let me share them so you don’t have to learn the hard way.
Don’t rush the aromatics. I know it’s tempting to crank up the heat and get through the onion step faster, but low and slow is the way to go. If you burn the garlic, it turns bitter, and that bitterness will linger in the whole pot. Take the 5 minutes. Your patience pays off.
Use low-sodium broth. This is non-negotiable for me. Regular broth can make the chili overly salty, especially since the beans and green chiles already have some salt. You can always add salt at the end, but you can’t take it away. I learned this after serving a batch that was borderline briney.
Shred chicken while it’s warm. Cold chicken shreds into sad little strings. Warm chicken shreds into fluffy, tender pieces that hold their shape in the chili. If you let it cool completely, you’ll be fighting with it. Trust me.
Toast your spices. That 30-second bloom step I mentioned earlier? It’s not just for show. Toasting cumin and coriander in hot oil transforms them from dusty and flat to warm and complex. It’s the difference between a chili that tastes “homemade” and one that tastes like it came from a can.
Let it sit before serving. This is the hardest tip to follow because you’ll want to eat it immediately. But giving the chili 5 to 10 minutes off the heat allows the starches from the beans to thicken the broth naturally. It also lets the flavors settle into each other. The first bowl is always good. The second bowl, after it’s rested, is even better.
Make it ahead. Here’s a pro tip: make this chili the day before your Friendsgiving. Refrigerate it overnight, then reheat gently on the stovetop. The flavors meld together in a way that’s almost magical. I’ve done side-by-side taste tests, and the day-old version always wins. Plus, it takes one thing off your plate on the day of the party.
Variations & Adaptations
One of the best things about this white chicken chili for Friendsgiving is how flexible it is. Here are some ways to make it your own:
Vegetarian Version : Omit the chicken and use vegetable broth instead of chicken broth. Add an extra can of beans (chickpeas work great here) and a diced zucchini for bulk. The texture will be slightly different, but the flavor is still outstanding. I’ve made this for a vegetarian friend, and she asked for the recipe immediately.
Spicy Version : If you like heat, keep the seeds in the jalapeños, or add a diced serrano pepper with the aromatics. You can also stir in ½ teaspoon of cayenne pepper with the spices, or add a splash of your favorite hot sauce at the end. My brother-in-law adds a whole chopped habanero, but I can’t handle that level of heat.
Slow Cooker Method : Sauté the aromatics and bloom the spices on the stovetop first, then transfer everything except the sour cream, heavy cream, and lime juice to a slow cooker. Cook on low for 6 hours or high for 3 hours. Shred the chicken, stir in the dairy and lime, and serve. It’s a great option if you’re hosting and want the chili ready when guests arrive.
Dairy-Free Adaptation : Skip the sour cream and heavy cream. Instead, blend an extra ½ cup of beans with ¼ cup of unsweetened cashew milk or oat milk. The texture won’t be quite as rich, but it’s still creamy and delicious. I’ve tested this for a friend with a dairy allergy, and it works beautifully.
Add More Veggies : Sometimes I throw in a diced bell pepper with the onions, or a handful of chopped spinach at the end. You can also stir in a cup of frozen corn instead of canned. The vegetables add color and nutrition without overpowering the chili.
Serving & Storage Suggestions
This white chicken chili for Friendsgiving is incredibly versatile when it comes to serving. Here’s how I like to do it:
Serving Temperature : Serve it piping hot, straight from the pot. Ladle into wide, shallow bowls so you can pile on the toppings. The chili should be thick enough to coat a spoon but still brothy enough to dip a tortilla chip.
Toppings Bar : Set up a small toppings station so guests can customize their bowls. I put out shredded Monterey Jack cheese, fresh cilantro, diced avocado, crushed tortilla chips, lime wedges, and a bottle of hot sauce. It makes the meal feel interactive and fun.
What to Serve With It : A simple green salad with a tangy vinaigrette cuts through the richness. Cornbread is also a classic pairing—I like to make a batch of classic cornbread and serve it with honey butter. If you want something lighter, warm flour tortillas on the side work perfectly.
Storage Instructions : Let the chili cool completely, then transfer it to an airtight container. It will keep in the refrigerator for up to 4 days. The flavors actually get better after a day or two, so don’t be afraid to make it ahead.
Freezing Instructions : This chili freezes beautifully. Portion it into freezer-safe containers or zip-top bags, leaving about an inch of headroom for expansion. It will keep for up to 3 months. Thaw overnight in the refrigerator before reheating.
Reheating Tips : Reheat the chili gently on the stovetop over medium-low heat, stirring occasionally. If it’s too thick after refrigerating, add a splash of chicken broth or water to loosen it up. Avoid microwaving in large batches—it heats unevenly and can make the dairy separate. If you must use the microwave, do it in short 30-second bursts, stirring between each.
Nutritional Information & Benefits
This white chicken chili for Friendsgiving isn’t just delicious—it’s also surprisingly nutritious. Here’s a rough breakdown per serving (based on 8 servings, without toppings):
- Calories: 320
- Protein: 28g
- Fat: 12g
- Carbohydrates: 28g
- Fiber: 7g
- Sugar: 4g
- Sodium: 580mg
The cannellini beans are a fantastic source of fiber and plant-based protein, which helps keep you full and supports healthy digestion. Chicken provides lean protein that’s essential for muscle repair and overall health. The garlic and onions are packed with antioxidants and have anti-inflammatory properties. And the lime juice adds a boost of vitamin C.
If you’re watching your sodium intake, use no-salt-added canned beans and broth, and skip the salt until the very end. You can also use Greek yogurt instead of sour cream to reduce the fat content while keeping the creamy texture. This chili is naturally gluten-free and can be made dairy-free with the substitutions I mentioned earlier.
I’m not a nutritionist, but I do pay attention to what I eat. This chili feels like comfort food without the guilt. It’s hearty enough to be a main dish but light enough that you don’t feel weighed down after a bowl. That balance is hard to find, which is another reason I keep coming back to this recipe.
Conclusion
I never thought I’d be the person evangelizing white chicken chili, but here we are. This recipe changed my mind, and I think it might change yours too. It’s proof that sometimes the dishes we overlook are the ones that surprise us the most.
This white chicken chili for Friendsgiving has become my signature dish, and I’m honestly a little proud of that. It’s affordable, it’s easy, and it makes people happy. Every time I bring it to a gathering, I watch the pot empty and listen to the compliments, and I think about how I almost refused to make it that first time. Funny how things work out.
I’d love to hear how this turns out for you. Did you add any twists? Did your picky eaters surprise you? Drop a comment below and let me know. And if you try this recipe for your own Friendsgiving, tag me in your photos—I want to see your chili in all its glory. Until next time, happy cooking, and don’t be afraid to prove yourself wrong every once in a while.
Frequently Asked Questions
Can I use chicken thighs instead of chicken breasts?
Absolutely. Chicken thighs are actually more forgiving because they stay moist even if you cook them a little longer. Use boneless, skinless thighs and follow the same cooking time. You might need to add an extra minute or two since thighs are slightly thicker.
How can I make this chili thicker?
If you want an even thicker chili, mash another cup of beans with a fork before adding them to the pot. You can also let the chili simmer uncovered for an extra 10 to 15 minutes to reduce the liquid. Just stir occasionally so it doesn’t stick to the bottom.
Can I use rotisserie chicken instead of cooking my own?
Yes, and it’s a great time-saver. Shred about 3 cups of rotisserie chicken meat and add it in step 6 after the bean puree. You’ll skip the step of cooking and shredding the chicken breasts. Just be mindful of the salt content—rotisserie chicken can be salty, so adjust your seasoning accordingly.
What’s the best way to reheat leftovers without the dairy separating?
Reheat gently on the stovetop over medium-low heat, stirring frequently. If you’re in a hurry, you can use the microwave, but do it in 30-second bursts and stir between each. Adding a splash of broth or milk can help bring the texture back. Avoid boiling the chili, as high heat can cause the dairy to curdle.
Can I make this chili in an Instant Pot?
Yes, and it’s a great option for busy days. Use the sauté function to cook the aromatics and bloom the spices. Add the broth, chicken, and whole beans (not the puree). Pressure cook on high for 12 minutes, then do a quick release. Shred the chicken, blend 1 cup of beans with broth for creaminess, stir in the remaining ingredients, and finish with the dairy and lime.
Pin This Recipe!

Easy White Chicken Chili for Friendsgiving Crowd

This creamy white chicken chili is made with budget-friendly ingredients, comes together in under an hour, and is perfect for feeding a crowd. It’s a crowd-pleaser that reheats beautifully and will change your mind about white chicken chili.
- Prep Time: 15 minutes
- Cook Time: 30 minutes
- Total Time: 45 minutes
- Yield: 8 servings 1x
- Category: Main Course
- Cuisine: American
Ingredients
- 2 tablespoons olive oil
- 1 large yellow onion, diced (about 1½ cups)
- 4 cloves garlic, minced
- 2 jalapeños, seeded and finely diced
- 1½ teaspoons ground cumin
- 1 teaspoon dried oregano
- ½ teaspoon smoked paprika
- ½ teaspoon ground coriander (optional)
- Salt and black pepper to taste
- 1½ pounds boneless, skinless chicken breasts (about 2 large breasts)
- 4 cups low-sodium chicken broth
- 2 cans (15 ounces each) cannellini beans, drained and rinsed
- 1 can (15 ounces) white corn, drained (or 1½ cups frozen corn, thawed)
- 1 can (4 ounces) diced green chiles
- ½ cup sour cream
- ¼ cup heavy cream or half-and-half (optional)
- Juice of 1 lime (about 2 tablespoons)
- Fresh cilantro, chopped (for garnish)
- Shredded Monterey Jack cheese (for garnish)
- Crushed tortilla chips (for garnish)
- Diced avocado (for garnish)
- Lime wedges (for garnish)
Instructions
- Heat the olive oil in a Dutch oven over medium heat. Add the diced onion and cook for about 5 minutes, stirring occasionally, until soft and translucent.
- Add the garlic and jalapeños and cook for another minute until fragrant.
- Sprinkle in the cumin, oregano, smoked paprika, and coriander. Stir constantly for about 30 seconds until the spices are fragrant.
- Pour in the chicken broth and stir, scraping up any browned bits from the bottom of the pot. Nestle the chicken breasts into the liquid. Bring to a gentle boil, then reduce heat to low, cover, and simmer for 15 to 18 minutes, or until the chicken is cooked through (165°F internally).
- Using tongs, transfer the cooked chicken to a large bowl. Let it rest for a couple minutes, then shred with two forks. Set aside.
- Scoop out 1 cup of the cooked beans and ½ cup of the hot broth from the pot. Transfer to a blender or use an immersion blender and blend until completely smooth. Pour the bean puree back into the pot and stir.
- Stir in the shredded chicken, remaining whole beans, drained corn, and diced green chiles. Bring to a gentle simmer and cook for 10 minutes, stirring occasionally.
- Remove the pot from the heat. Stir in the sour cream, heavy cream (if using), and lime juice. Taste and adjust salt and pepper.
- Let the chili sit for 5 minutes before serving. Ladle into bowls and top with your favorite garnishes.
Notes
For a thicker chili, mash another cup of beans before adding. To make ahead, refrigerate overnight and reheat gently. For a dairy-free version, skip the sour cream and heavy cream and blend an extra ½ cup of beans with ¼ cup unsweetened cashew milk or oat milk.
Nutrition
- Serving Size: 1 bowl (about 1.5 cu
- Calories: 320
- Sugar: 4
- Sodium: 580
- Fat: 12
- Saturated Fat: 4
- Carbohydrates: 28
- Fiber: 7
- Protein: 28
Keywords: white chicken chili, Friendsgiving, chili, chicken, easy, crowd-pleaser, creamy