Love this? Save it for later!
Share the inspiration with your friends
The power went out halfway through my first attempt at these cookies. There I was, standing in a suddenly dark kitchen, holding a bowl of crushed Oreos and cream cheese, wondering if this was a sign from the universe to just order pizza instead. But something made me keep going—maybe the stubbornness that kicks in when you’ve already gotten your hands dirty, or maybe the fact that I’d been thinking about these little black cat cookies all week.
I’d gotten the idea from a woman at the community garden, of all places. She was packing up her plot next to mine, and I noticed she had these adorable cat-shaped cookies in her tin. I asked about them, and she just shrugged and said, “Oh, they’re nothing fancy—just Oreo truffles I shaped into cats.” She didn’t even give me a recipe, just a quick description and a “you’ll figure it out.” Honestly, that casual confidence was exactly what I needed. No pressure, no fuss, just a simple idea that stuck with me.
So when the lights came back on twenty minutes later, I finished what I’d started. And let me tell you—those slightly rushed, imperfectly shaped black cat cookies were the most satisfying things I’d made in weeks. Maybe you’ve been there too, where a recipe finds you at just the right moment, when you need something cozy and uncomplicated. These cookies are exactly that. They’re the kind of treat you make when you want to feel like you’ve created something special, even if you only used three ingredients and got chocolate on your countertops. I keep making them because they remind me that good things don’t have to be complicated—they just have to be made with a little bit of heart.
Why You’ll Love These Cozy Black Cat Oreo Truffle Cookies
Look, I’ve tested a lot of cookie recipes over the years, and I can tell you right now—these black cat Oreo truffle cookies are something special. They’re not just cute (though they are seriously adorable), they’re also incredibly forgiving for a beginner baker. I’ve made them with my niece who has zero patience for precise measurements, and they turned out perfect every time.
- Only 3 Ingredients: No fancy grocery trips needed. Oreos, cream cheese, and melting chocolate. That’s it. You probably have most of this stuff in your kitchen right now.
- No Baking Required: These are no-bake cookies, which means you don’t have to worry about oven temperatures, baking times, or burning anything. Perfect for hot days when you don’t want to turn on the oven.
- Perfect for Halloween or Any Cozy Night: Sure, they’re great for Halloween parties, but honestly? I make these year-round. They’re perfect for a rainy afternoon when you need a little pick-me-up.
- Crowd-Pleaser Guaranteed: Every single time I bring these somewhere, people lose their minds. Kids love them, adults love them, and nobody can believe they’re this easy to make.
- Unbelievably Delicious: The texture is what gets me—creamy, fudgy centers with a crisp chocolate shell. It’s like eating a fancy truffle but with that nostalgic Oreo flavor we all grew up loving.
What makes these different from other Oreo truffle recipes is the shape. Most people just roll them into balls, but taking that extra minute to shape them into little cats makes all the difference. It turns a simple dessert into something memorable. And let’s be real—anything shaped like a cat is automatically 50% more fun to eat.
This recipe isn’t just good—it’s the kind that makes you smile after the first bite. It’s comfort food reimagined: no-bake, three-ingredient, and absolutely soul-soothing. Perfect for impressing guests without any stress, or turning a simple Tuesday night into something a little more special.
What Ingredients You Will Need
This recipe uses simple, everyday ingredients to deliver big flavor and adorable results. No hunting down obscure items—just the good stuff you probably already have in your pantry.
For the Cookie Truffle Base
- 1 (14.3 oz) package Oreo cookies (regular, not double stuff—the original cream-to-cookie ratio works best for texture)
- 8 oz cream cheese, softened to room temperature (I prefer Philadelphia brand for consistent results, but any full-fat block cream cheese works)
- 1/4 cup powdered sugar (optional, for a slightly sweeter filling—I usually skip it, but my sister swears by it)
For the Coating
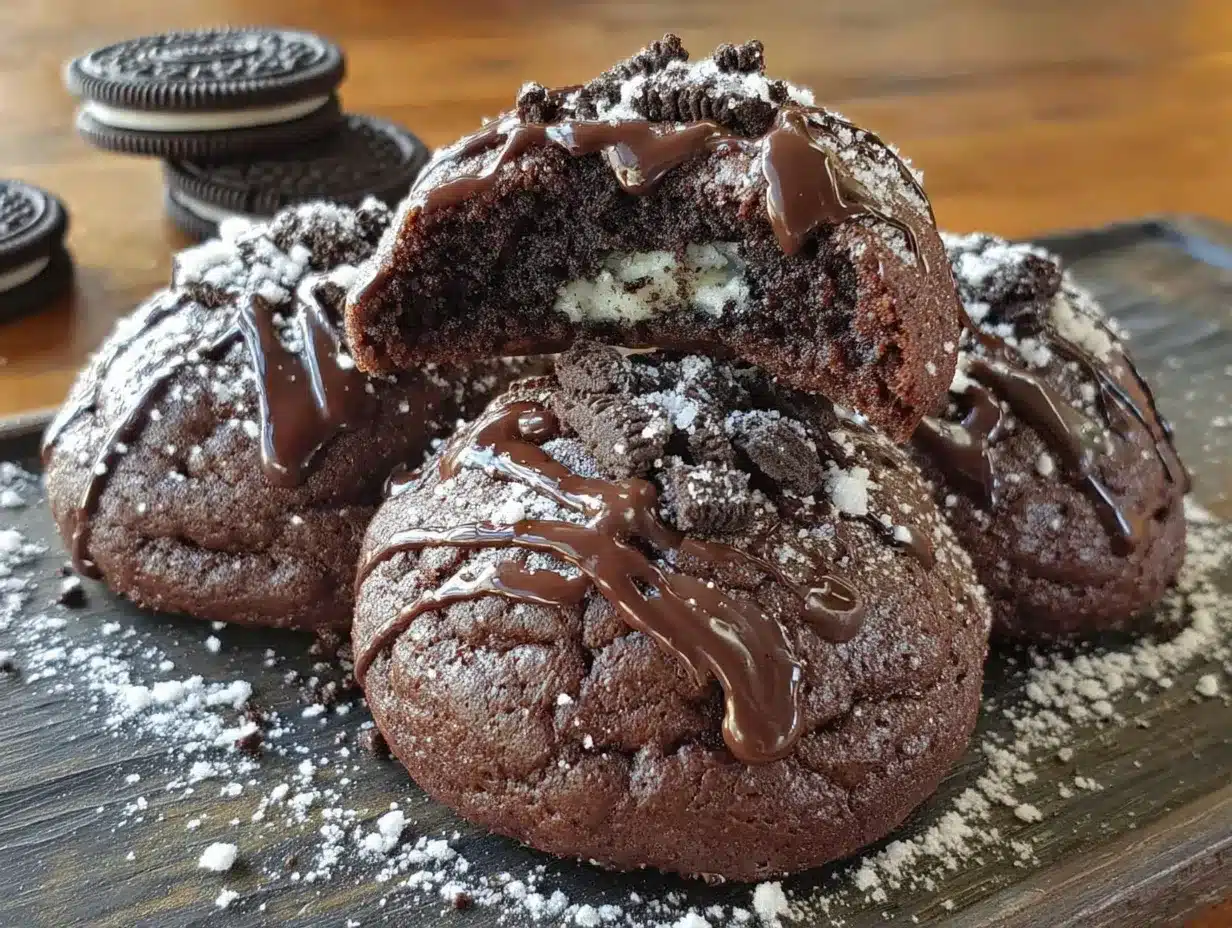
- 12 oz dark or semi-sweet chocolate melting wafers (I use Ghirardelli dark chocolate melting wafers—they melt smoothly and set with a nice shine)
- 1 tsp coconut oil or vegetable shortening (optional, helps thin the chocolate for easier dipping)
For Decoration
- Mini chocolate chips or candy eyes (for the cat faces)
- Black licorice strings or black frosting (for whiskers—I’ve used both, and frosting is easier)
- Small triangular candy pieces or white chocolate (for ears—I like using white chocolate chips cut in half)
Ingredient Tips: Look for Oreos that aren’t too crushed in the package. You want them intact enough to get a consistent crumb. For the cream cheese, make sure it’s truly softened—microwave it for about 10 seconds if you forgot to take it out ahead of time. And please, don’t use low-fat cream cheese here. The full-fat version gives you that rich, fudgy texture that makes these truffles so addictive.
Substitution Guidance: Need a gluten-free option? Use gluten-free Oreos (they work exactly the same). Dairy-free? Use a dairy-free cream cheese alternative and dairy-free chocolate. I’ve tested both swaps, and while the texture is slightly different, they’re still delicious. For a vegan version, just make sure your Oreos are vegan (original ones are!) and use vegan cream cheese and chocolate.
Equipment Needed
The beauty of this recipe is that you don’t need much fancy equipment. Here’s what I use every time:
- Food processor (for crushing the Oreos into fine crumbs—you can also use a zip-top bag and rolling pin, but the food processor is way faster)
- Large mixing bowl (for combining the crumbs and cream cheese)
- Baking sheet lined with parchment paper (for setting the shaped cookies)
- Double boiler or microwave-safe bowl (for melting the chocolate—I’m lazy and use the microwave, just do 30-second intervals)
- Small offset spatula or fork (for dipping the cookies in chocolate)
- Toothpicks or skewers (for adding details like whiskers and eyes while the chocolate is wet)
- Refrigerator space (these need to chill for at least 30 minutes between steps)
If you don’t have a food processor, don’t sweat it. Put the Oreos in a zip-top bag, seal it tight, and go to town with a rolling pin or even a heavy skillet. It’s a great way to work out any frustration, honestly. Just make sure you get them crushed evenly—you don’t want big chunks in your truffle base.
Preparation Method
Let me walk you through this step by step. I’ve made these cookies more times than I can count, so I know exactly where things can go wrong and how to fix them.
- Crush the Oreos: Place the entire package of Oreos (cream filling and all) into your food processor. Pulse until you have fine, sand-like crumbs. This should take about 30-45 seconds. Don’t over-process, or you’ll get Oreo butter (which is delicious but not what we want here). If you’re using the bag method, aim for the same consistency—no chunks bigger than a pea.
- Mix the dough: In your large mixing bowl, combine the Oreo crumbs with the softened cream cheese. Use a spatula or your hands (I prefer my hands—it’s faster and you can feel when it’s fully combined) to mix until everything comes together into a uniform, dark dough. It should look like thick, fudgy cookie dough. If it seems too dry, add a teaspoon of milk. If it’s too sticky, add a few more crushed Oreos.
- Shape the cats: Scoop out about 1.5 tablespoons of dough and roll it into a ball. Then, shape it into a slightly flattened oval—this will be the cat’s body. Pinch two small triangles at the top for ears. Place each shaped cat on your parchment-lined baking sheet. This part takes some practice, but honestly, imperfect cats are the cutest. I’ve made some that looked more like potatoes with ears, and they were still adorable.
- Chill the shaped cookies: Pop the baking sheet into the refrigerator for at least 30 minutes, or up to 2 hours. This step is crucial—the cookies need to be firm before you dip them in chocolate, or they’ll fall apart. I learned this the hard way when I got impatient and ended up with chocolate soup full of cookie crumbs.
- Melt the chocolate: While the cookies are chilling, melt your chocolate wafers. If using the microwave, heat in 30-second intervals, stirring between each, until smooth. Add the coconut oil or shortening if using. The chocolate should be warm but not hot—test it on your wrist like you would for baby formula.
- Dip the cookies: Remove the chilled cookies from the fridge. Working one at a time, place a cookie on a fork or use a toothpick to lower it into the melted chocolate. Spoon chocolate over the top to coat completely. Gently lift it out and tap the fork on the edge of the bowl to remove excess chocolate. Place it back on the parchment paper. Repeat with all cookies.
- Add the faces: While the chocolate is still wet, add the eyes (mini chocolate chips or candy eyes) and any other facial features. For whiskers, use a toothpick dipped in black frosting or carefully place thin strips of licorice. For the ears, press in the triangular candy pieces or white chocolate chips at the top of the head. Work quickly—the chocolate sets fast.
- Final chill: Return the decorated cookies to the refrigerator for another 15-20 minutes, or until the chocolate is completely set. Then they’re ready to serve!
Cooking Tips & Techniques
After making these cookies about a dozen times (and messing them up plenty), here’s what I’ve learned:
Temperature is everything. If your cream cheese is too cold, it won’t mix evenly with the Oreo crumbs and you’ll get white streaks. If it’s too warm, the dough will be sticky and impossible to shape. Let it sit out for about 30 minutes before you start. I once tried to speed things up by microwaving the cream cheese, and let’s just say I ended up with cream cheese soup and a very sad kitchen.
Don’t skip the chilling step. I know it’s tempting to rush, but the first chill is what makes these cookies dip-able. If you try to coat them while they’re still soft, they’ll crumble into the chocolate and you’ll have Oreo-flavored mud. Trust me on this one.
Thin your chocolate. Adding a little coconut oil or shortening to your melted chocolate makes it thinner and easier to dip. It also gives you a smoother, shinier finish. I learned this trick from a pastry chef friend, and it’s been a game-changer.
Work in batches. Only take a few cookies out of the fridge at a time. If you take them all out, they’ll start to warm up and get soft again. Keep the rest chilled until you’re ready to dip them.
Use a toothpick for details. For the cat faces, a toothpick dipped in melted chocolate or frosting is way more precise than trying to pipe things. I use it to draw little whiskers and mouths, and it gives them that cute, handmade look.
Variations & Adaptations
These cookies are super flexible, so don’t be afraid to make them your own. Here are some variations I’ve tried and loved:
- White Chocolate Cats: Swap the dark chocolate for white chocolate melting wafers. The contrast with the dark Oreo filling is gorgeous, and you can use dark chocolate chips for the eyes to make them pop. I made these for a baby shower once, and they were a huge hit.
- Pumpkin Spice Cats: Add 1 tsp pumpkin pie spice and 2 tbsp pumpkin puree to the Oreo mixture. Reduce the cream cheese by 1 tbsp to compensate for the extra moisture. These are perfect for fall and taste like autumn in cookie form.
- Mint Chocolate Cats: Use mint-flavored Oreos (the ones with green filling) and add 1/4 tsp peppermint extract to the cream cheese. Dip in dark chocolate and sprinkle with crushed candy canes. These are dangerously good.
- Vegan Version: Use vegan cream cheese and dairy-free chocolate. The texture will be slightly softer, so chill them a bit longer before dipping. I’ve made these for my vegan friends, and they couldn’t tell the difference.
- Gluten-Free Version: Use gluten-free Oreos. They work exactly the same as regular ones, and nobody will know the difference. Just make sure your chocolate is also gluten-free if that’s a concern.
My personal favorite variation? The pumpkin spice one. I made it last October when I was craving something cozy, and it was exactly what I needed. The pumpkin spice adds this warm, comforting flavor that pairs perfectly with the chocolate. I may or may not have eaten four of them in one sitting.
Serving & Storage Suggestions
These cookies are best served chilled, straight from the fridge. The cold temperature keeps the chocolate shell snappy and the filling fudgy. I like to arrange them on a cute plate with some orange or black napkins for a Halloween vibe, but they look adorable on any serving dish.
For a drink pairing, these go beautifully with a cold glass of milk (obviously), a warm cup of coffee, or even a hot chocolate with extra marshmallows. If you’re serving them at a party, set them out about 10 minutes before you want to serve them—they soften slightly at room temperature, which makes them even more decadent.
Storage Instructions: Keep these cookies in an airtight container in the refrigerator for up to 1 week. I layer them between sheets of parchment paper to prevent them from sticking together. They actually taste better after a day or two—the flavors meld together and the texture gets even more fudgy.
Freezer Instructions: These freeze beautifully! Place the finished cookies in a single layer on a baking sheet and freeze until solid (about 1 hour). Then transfer them to a freezer-safe container or zip-top bag, layering with parchment paper. They’ll keep for up to 3 months. To serve, let them thaw in the refrigerator for about 30 minutes. Don’t thaw them at room temperature, or they’ll get too soft and the chocolate might bloom (get those white streaks).
I always keep a stash in my freezer for unexpected guests or late-night cravings. There’s something wonderful about knowing you have a batch of these little guys waiting for you.
Nutritional Information & Benefits
Let’s be real—these are a treat, not a health food. But knowing what’s in them helps you enjoy them mindfully. Here’s the approximate breakdown per cookie (assuming you get about 18 cookies from this recipe):
- Calories: 220-250
- Fat: 14g
- Carbohydrates: 26g
- Protein: 3g
- Sugar: 18g
Potential Allergens: These cookies contain dairy (cream cheese, chocolate), wheat (Oreos), and soy (in the chocolate). If you have allergies, make sure to use the appropriate substitutions mentioned above.
Health Benefits: Okay, so these aren’t exactly a superfood, but dark chocolate does contain antioxidants and can boost your mood (which is a real thing—chocolate contains compounds that make you feel happy). The cream cheese provides a small amount of protein and calcium. And honestly? Sometimes the mental health benefit of treating yourself to something delicious is worth more than any vitamin. These cookies are about joy, not nutrition, and that’s okay.
I always tell myself that a balanced diet includes room for treats. These cookies are my way of honoring that philosophy—they’re made with love, shared with people I care about, and enjoyed without guilt. That’s a kind of wellness too.
Conclusion
These cozy black cat Oreo truffle cookies are proof that the best recipes don’t need to be complicated. With just three ingredients and a little bit of patience, you can create something that looks impressive, tastes incredible, and brings a smile to everyone who sees them. Whether you’re making them for a Halloween party, a cozy night in, or just because you need a little cat-shaped joy in your life, these cookies deliver every time.
I love this recipe because it reminds me that creativity doesn’t require fancy tools or exotic ingredients. Sometimes the most satisfying things come from the simplest combinations—a childhood cookie, some creamy cheese, and a little bit of imagination. Plus, shaping them into cats never gets old. I still laugh at my own imperfect creations, and I hope you will too.
So go ahead—give these a try. Make them your own. Add sprinkles, change the colors, experiment with flavors. And when you do, I’d love to hear about it. Drop a comment below and tell me how your black cat cookies turned out. Share a photo if you’re feeling brave. And most importantly, enjoy every single bite. You deserve it.
Frequently Asked Questions
Can I use double-stuffed Oreos for this recipe?
You can, but I don’t recommend it. The extra cream filling makes the dough too soft and sticky, which makes it harder to shape and dip. If you only have double-stuffed Oreos, scrape out some of the cream before crushing them, or add a few extra crushed cookies to balance the moisture.
How do I keep the chocolate from cracking when I cut the cookies?
This usually happens if the chocolate is too thick or the cookies are too cold. Let the cookies sit at room temperature for about 5 minutes before cutting or serving. Also, make sure you’re using good-quality melting chocolate—cheap chocolate can be finicky and prone to cracking.
Can I make these cookies ahead of time?
Absolutely! These are actually better made a day ahead. The flavors meld together and the texture gets even more fudgy. Just store them in an airtight container in the refrigerator for up to a week, or freeze them for up to 3 months.
My dough is too sticky to shape. What should I do?
If your dough is too sticky, it usually means the cream cheese was too soft or you added too much. Pop the dough in the refrigerator for 15-20 minutes to firm it up, then try again. If it’s still sticky, add a few more crushed Oreos to absorb the excess moisture.
Can I use milk chocolate instead of dark chocolate?
Yes, you can use milk chocolate if you prefer a sweeter cookie. Just keep in mind that milk chocolate is softer than dark chocolate, so the coating might not be as snappy. You can also use a combination of milk and dark chocolate for the best of both worlds.
Pin This Recipe!
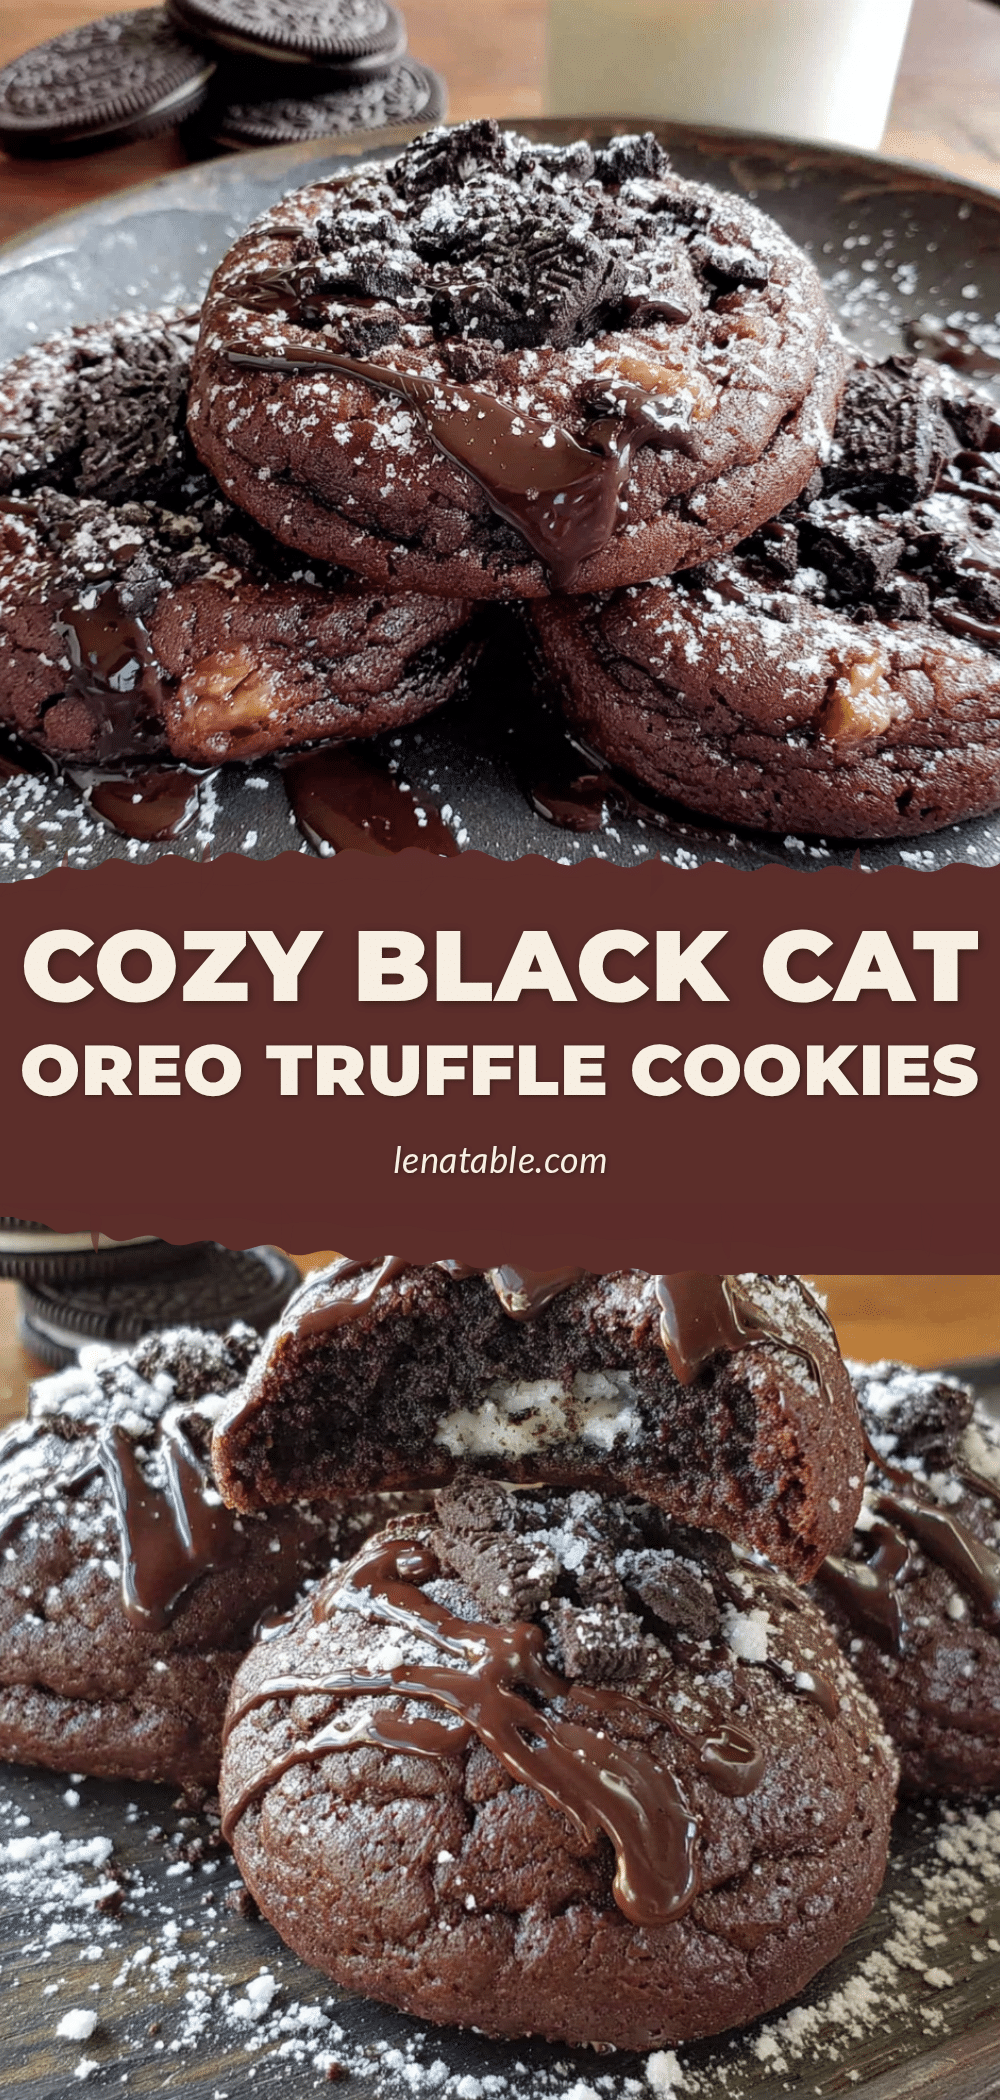
Cozy Black Cat Oreo Truffle Cookies – Easy 3-Ingredient Recipe
These no-bake black cat Oreo truffle cookies are made with just three ingredients and are perfect for Halloween or any cozy night. They feature a creamy, fudgy center with a crisp chocolate shell, shaped into adorable cat faces.
- Prep Time: 30 minutes
- Cook Time: 0 minutes
- Total Time: 1 hour 30 minutes
- Yield: 18 cookies 1x
- Category: Dessert
- Cuisine: American
Ingredients
- 1 (14.3 oz) package Oreo cookies (regular, not double stuff)
- 8 oz cream cheese, softened to room temperature
- 1/4 cup powdered sugar (optional)
- 12 oz dark or semi-sweet chocolate melting wafers
- 1 tsp coconut oil or vegetable shortening (optional)
- Mini chocolate chips or candy eyes (for decoration)
- Black licorice strings or black frosting (for whiskers)
- Small triangular candy pieces or white chocolate (for ears)
Instructions
- Crush the entire package of Oreos in a food processor until you have fine, sand-like crumbs (about 30-45 seconds).
- In a large mixing bowl, combine the Oreo crumbs with the softened cream cheese. Mix with a spatula or your hands until a uniform, dark dough forms.
- Scoop about 1.5 tablespoons of dough and roll into a ball. Shape into a slightly flattened oval, pinching two small triangles at the top for ears. Place on a parchment-lined baking sheet.
- Chill the shaped cookies in the refrigerator for at least 30 minutes, or up to 2 hours.
- Melt the chocolate wafers in a microwave-safe bowl in 30-second intervals, stirring between each, until smooth. Add coconut oil or shortening if using.
- Remove chilled cookies from the fridge. Working one at a time, dip each cookie in melted chocolate using a fork or toothpick. Tap off excess chocolate and place back on parchment paper.
- While the chocolate is still wet, add eyes (mini chocolate chips or candy eyes), whiskers (using a toothpick dipped in black frosting or licorice strips), and ears (triangular candy pieces or white chocolate chips).
- Return decorated cookies to the refrigerator for another 15-20 minutes until the chocolate is completely set. Serve chilled.
Notes
Temperature is everything: cream cheese should be softened but not too warm. Don’t skip the chilling step before dipping. Thin the chocolate with coconut oil for easier dipping. Work in batches to keep cookies cold. Use a toothpick for precise facial details.
Nutrition
- Serving Size: 1 cookie
- Calories: 235
- Sugar: 18
- Sodium: 150
- Fat: 14
- Saturated Fat: 7
- Carbohydrates: 26
- Fiber: 1
- Protein: 3
Keywords: Oreo truffle cookies, black cat cookies, no-bake cookies, Halloween cookies, 3-ingredient recipe, easy dessert