Love this? Save it for later!
Share the inspiration with your friends
I was hauling a bag of charcoal across the parking lot of our local grocery store last fall when the plumber, a quiet guy named Frank who’d fixed our garbage disposal three years ago, stopped me. “You hunt?” he asked, nodding at my flannel shirt. I told him no, but I sure do eat. He laughed, wiped his hands on his coveralls, and said, “Then you need to make chili with the good stuff.” He described how he braises venison low and slow in a cast iron pot, letting the meat get tender enough to fall apart, and then he adds just enough beans to make it a meal. I was holding a bag of charcoal, my dog was pulling on the leash, and there I was, getting a full recipe from a man I only knew as the guy who fixed the kitchen sink. It was the last place I expected cooking advice to come from, but honestly, it was the best tip I’d gotten all year.
I didn’t have any venison that week, but I called my buddy who deer hunts, and he dropped off a few pounds of ground venison in a freezer bag. That weekend, I dug out my old Dutch oven—the one with the chipped lid that my mother-in-law gave me—and got to work. Frank was right about everything. The meat gets this deep, savory richness that beef just can’t match, especially when you brown it properly and let it simmer with onions and garlic. I burned my wrist on the pot handle that first time (learned that lesson fast), but the chili was so good I didn’t even care. Maybe you’ve been there, standing in your kitchen with a spoon in one hand and a dish towel in the other, tasting something you made and thinking, This is it. This is the one.
That’s how this Easy Dutch Oven Venison Chili with Beans became a regular in my weeknight rotation. It’s not fancy, it doesn’t require any special skills, and it comes together in a single pot. The kind of meal you can start after work and have on the table before the second episode of whatever you’re watching. I keep making it because it’s simple, it’s hearty, and it reminds me that sometimes the best recipes come from the most unexpected people.
Why You’ll Love This Recipe
Let’s be real—weeknights are tough. You’re tired, the kitchen is a mess from the morning rush, and everyone is hungry right now. This Easy Dutch Oven Venison Chili with Beans was built for those exact nights. It’s not just another chili recipe; it’s the one you’ll actually want to make after a long day.
- Quick & Easy: From stove to bowl in about 45 minutes. Most of that time is hands-off simmering, so you can unload the dishwasher or just sit down for a minute.
- Simple Ingredients: No trips to a specialty store. Ground venison, canned tomatoes, beans, onion, garlic, and a few pantry spices. That’s it.
- Perfect for Weeknights: This is the definition of a one-pot meal. Less cleanup, more time to relax.
- Crowd-Pleaser: My kids don’t even know it’s venison. They just know it’s “the good chili.” It’s got that familiar, comforting flavor everyone loves.
- Unbelievably Delicious: Venison has a lean, clean taste that soaks up the smoky chili spices beautifully. The texture is tender, not gamey, and the beans make it hearty enough to be a complete meal.
What makes this version different? It’s the technique. Most people either overcook venison until it’s dry, or they try to mask the flavor with too much spice. I’ve tested this method a dozen times—browning the meat in batches, letting the onions get soft and sweet, and simmering the chili just long enough for the flavors to marry without breaking down the beans. It’s a balanced, foolproof recipe that respects your time and your ingredients. This isn’t just another chili recipe; it’s the one I turn to when I need dinner to be good, fast, and stress-free.
What Ingredients You Will Need
This recipe relies on simple, wholesome ingredients that work together to build deep flavor without a lot of fuss. Most of these are pantry staples, which makes this a great option for those weeks when you haven’t been to the store in a while.
- Ground venison (1 ½ pounds): This is the star. Venison is leaner than beef, so it needs a little extra fat or liquid to stay tender. If your venison is very lean (like from a young deer), you can add a tablespoon of olive oil or bacon fat when browning. I get mine from a local hunter, but you can find it at some grocery stores or order it online.
- Olive oil (2 tablespoons): For browning the meat and sautéing the vegetables. Use a good-quality oil; it makes a difference in the base flavor.
- Yellow onion (1 large, diced): Onion adds sweetness and depth. Don’t rush this step—let it cook until it’s soft and translucent, about 5 minutes.
- Garlic (4 cloves, minced): Fresh garlic is non-negotiable here. It adds that pungent, aromatic kick that dried powder just can’t match.
- Green bell pepper (1 medium, diced): Adds a subtle vegetal sweetness and a bit of texture. You can substitute with red or yellow bell pepper if that’s what you have.
- Canned diced tomatoes (1 can, 14.5 ounces, undrained): Use fire-roasted tomatoes if you can find them—they add a smoky depth that pairs beautifully with venison.
- Canned tomato sauce (1 can, 8 ounces): This creates the rich, smooth base of the chili. No need for anything fancy; plain tomato sauce works perfectly.
- Canned kidney beans (1 can, 15 ounces, drained and rinsed): Kidney beans are the classic choice for chili. They hold their shape well during simmering and add a creamy texture. Feel free to substitute with black beans or pinto beans.
- Canned pinto beans (1 can, 15 ounces, drained and rinsed): Pinto beans are creamier than kidney beans and add a nice contrast. Using two types of beans makes the chili more interesting.
- Beef broth (1 cup): Adds moisture and savory flavor. Use low-sodium broth so you can control the salt level. Chicken broth works in a pinch.
- Chili powder (3 tablespoons): This is the backbone of the spice blend. I prefer a mild chili powder for a family-friendly heat. Adjust to your taste.
- Ground cumin (1 tablespoon): Cumin adds warmth and earthiness. It’s what gives chili that classic, cozy aroma.
- Smoked paprika (1 teaspoon): A little goes a long way. Smoked paprika adds a subtle, campfire-like smokiness that makes this chili feel extra special.
- Dried oregano (1 teaspoon): Oregano adds a slightly floral, herbal note that brightens up the heavy flavors.
- Salt and black pepper (to taste): Season as you go. I start with 1 teaspoon of salt and adjust at the end.
- Optional toppings: Shredded cheddar cheese, sour cream, diced avocado, fresh cilantro, sliced jalapeños, or crushed tortilla chips. These are not just garnish—they add texture and flavor contrast.
Equipment Needed
You don’t need a lot of fancy tools for this recipe, which is part of what makes it so great. Here’s what you’ll need:
- Dutch oven (5 to 6 quarts): This is the ideal vessel. It distributes heat evenly, holds a lot of chili, and goes from stovetop to oven if needed. If you don’t have a Dutch oven, a heavy-bottomed stockpot or large saucepan will work.
- Wooden spoon or spatula: For stirring and scraping up the browned bits from the bottom of the pot (that’s flavor!).
- Sharp knife and cutting board: For dicing the onion, bell pepper, and mincing the garlic.
- Can opener: You’ll be opening a few cans, so make sure it’s handy.
- Measuring spoons: For the spices. I like to measure them into a small bowl before I start cooking so I can add them all at once.
- Ladle: For serving the chili into bowls.
If you’re using a Dutch oven for the first time, don’t be intimidated. They’re actually very forgiving. Just make sure you don’t heat it empty—always add oil or liquid first. And watch out for that handle; it gets hot! I keep a pot holder wrapped around mine the whole time I’m cooking.
Preparation Method
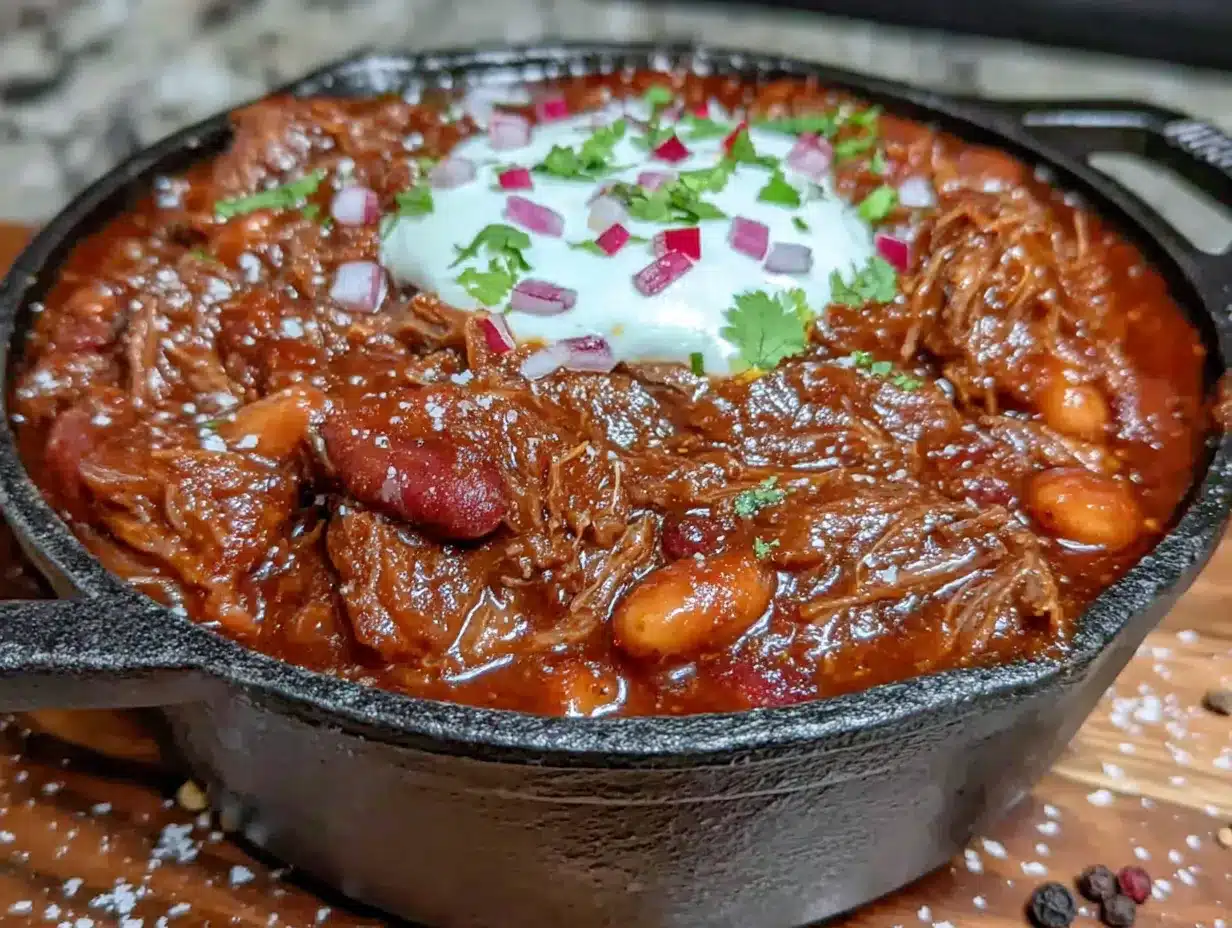
This recipe moves quickly, so I like to have all my ingredients prepped and measured before I start. It makes the whole process smoother and less stressful.
- Prep the ingredients: Dice the onion and bell pepper. Mince the garlic. Drain and rinse both cans of beans. Measure out the spices into a small bowl. Open the cans of tomatoes and tomato sauce. This takes about 10 minutes and saves you from scrambling later.
- Brown the venison: Heat 1 tablespoon of olive oil in your Dutch oven over medium-high heat. Add the ground venison and cook, breaking it apart with a wooden spoon, until it’s browned and no longer pink, about 6 to 8 minutes. Don’t overcrowd the pot—if your venison is very wet, cook it in two batches. Overcrowding will steam the meat instead of browning it, and you’ll miss out on that deep, savory flavor. Once browned, use a slotted spoon to transfer the meat to a plate and set it aside. Leave any rendered fat in the pot.
- Sauté the aromatics: Reduce the heat to medium. Add the remaining 1 tablespoon of olive oil to the pot. Add the diced onion and bell pepper, and cook, stirring occasionally, until they’re soft and the onion is translucent, about 5 minutes. Scrape up any browned bits from the bottom of the pot as you stir—that’s pure flavor. Add the minced garlic and cook for 1 minute more, until fragrant.
- Bloom the spices: Add the chili powder, cumin, smoked paprika, and dried oregano to the pot. Stir constantly for about 30 seconds to 1 minute. This is called blooming the spices, and it wakes up their oils, making them more aromatic and flavorful. Your kitchen will smell amazing right now.
- Combine everything: Return the browned venison to the pot. Add the diced tomatoes (with their juices), tomato sauce, drained beans, and beef broth. Stir everything together until it’s well combined. The liquid should just barely cover the solids. If it looks too thick, add a splash more broth or water.
- Simmer the chili: Bring the chili to a gentle boil, then reduce the heat to low. Cover the pot with the lid slightly ajar to let some steam escape. Let it simmer for 25 to 30 minutes, stirring occasionally. This is where the magic happens—the flavors meld together, the venison becomes incredibly tender, and the chili thickens to a perfect, spoon-coating consistency. If you want a thicker chili, remove the lid for the last 10 minutes.
- Season and rest: After simmering, taste the chili and add salt and black pepper as needed. I usually start with 1 teaspoon of salt and go from there. Let the chili rest off the heat for 5 minutes before serving. This allows the flavors to settle and the chili to thicken slightly more.
Pro tip: If you have time, let the chili cool completely and refrigerate it overnight. The next day, it will taste even better. Something about the flavors marrying overnight makes it next-level good.
Cooking Tips & Techniques
I’ve made this Easy Dutch Oven Venison Chili with Beans at least twenty times now, and I’ve learned a few things along the way. Here are the tips that make the biggest difference.
Don’t skip browning the meat in batches. I know it’s tempting to dump all the venison in at once and save time, but you’ll end up with gray, steamed meat instead of beautifully browned, flavorful chunks. Browning creates the Maillard reaction, which is basically the chemical process that makes food taste savory and delicious. Take the extra 3 minutes to do it right.
Watch your heat when blooming spices. Spices burn quickly. Keep them moving in the pot, and don’t let them sit still for more than a few seconds. If you see any smoke or smell a burnt smell, you’ve gone too far. It’s better to under-toast them than to burn them, because burnt spices will make your chili taste bitter.
Season as you go, not just at the end. This is a mistake I made for years. I’d wait until the chili was finished, then add salt and wonder why it didn’t taste as deep. Seasoning in layers—a little salt when you brown the meat, a little when you sauté the onions, and then the final adjustment at the end—builds complexity. It’s the difference between a flat chili and one that makes people ask for the recipe.
If your chili is too thin, don’t panic. Simply remove the lid and let it simmer uncovered for an extra 10 to 15 minutes. The liquid will evaporate and the chili will thicken naturally. If it’s too thick, add a splash of broth or water until it reaches your desired consistency.
One failure I’ll never forget: I once tried to speed up the simmering process by cranking the heat to high. The chili bubbled over, made a huge mess on the stovetop, and the beans turned into mush. Low and slow is the way to go. Trust the process.
Variations & Adaptations
This recipe is a great starting point, but it’s also easy to customize based on what you have in your pantry or what your family likes. Here are a few variations I’ve tried and loved.
- Spicy Version: For those who like heat, add 1 to 2 diced jalapeños (seeds and membranes removed for less heat, or left in for more) along with the onion and bell pepper. You can also add a pinch of cayenne pepper or a teaspoon of chipotle powder with the other spices.
- Smoky & Hearty: Add 4 ounces of diced bacon or pancetta to the pot before browning the venison. Cook it until crispy, then remove it and proceed with the recipe. Crumble the bacon on top of the finished chili for an extra layer of smoky, salty goodness.
- Bean-Free Version: If you’re not a fan of beans, simply leave them out. Increase the venison to 2 pounds and add an extra cup of beef broth to maintain the liquid level. The chili will be more like a hearty meat stew, and it’s just as delicious.
- Slow Cooker Adaptation: Brown the venison and sauté the aromatics on the stovetop, then transfer everything to a slow cooker. Cook on low for 6 to 8 hours or on high for 3 to 4 hours. This is a great option for busy days when you want dinner ready when you walk in the door.
- Vegetarian Twist: Substitute the venison with 1 ½ pounds of your favorite plant-based ground meat or a combination of lentils and mushrooms. Use vegetable broth instead of beef broth. The cooking method remains the same, and you’ll still get a rich, satisfying chili.
Serving & Storage Suggestions
This chili is incredibly versatile when it comes to serving. Here’s how I like to do it.
Serving temperature: Serve the chili hot, straight from the pot. Ladle it into deep bowls and let everyone add their own toppings. I always set out a little bar of shredded cheddar, sour cream, diced avocado, fresh cilantro, and crushed tortilla chips. It makes dinner feel like an event, even on a Tuesday.
What to serve with it: A side of warm cornbread or crusty bread is perfect for soaking up every last drop of the broth. A simple green salad with a tangy vinaigrette balances the richness of the chili. For drinks, a cold beer or a glass of full-bodied red wine (like a Zinfandel or Syrah) pairs beautifully.
Storage: Leftover chili tastes even better the next day. Let it cool completely, then transfer it to an airtight container. It will keep in the refrigerator for up to 4 days. You can also freeze it for up to 3 months. Portion it into freezer-safe bags or containers for easy single-serving meals.
Reheating: The best way to reheat chili is on the stovetop over medium-low heat, stirring occasionally. Add a splash of broth or water if it has thickened too much. You can also microwave individual portions in 30-second bursts, stirring in between, until hot.
Flavor development: Honestly, this chili is at its absolute best on day two. The flavors have had time to meld and deepen, and the texture is even more velvety. I often make a double batch on Sunday just so we can have it for lunch during the week.
Nutritional Information & Benefits
This Easy Dutch Oven Venison Chili with Beans is not just delicious—it’s also packed with nutrients that make it a smart choice for a weeknight meal.
Estimated nutritional values per serving (based on 6 servings):
- Calories: 380
- Protein: 32g
- Fat: 12g
- Carbohydrates: 35g
- Fiber: 10g
- Sugar: 8g
- Sodium: 780mg (varies based on added salt and broth)
Health benefits: Venison is an excellent source of lean protein, iron, and B vitamins. It’s lower in fat and calories than beef, making it a great option for those watching their intake. The beans add a hefty dose of fiber, which supports digestive health and helps keep you full. Tomatoes are rich in lycopene, an antioxidant that supports heart health. This chili is naturally gluten-free and can be made dairy-free by skipping the cheese and sour cream toppings.
Dietary considerations: This recipe is low in saturated fat, high in protein, and packed with vegetables and legumes. It’s a balanced meal that fits into most healthy eating patterns. If you’re watching your sodium, use low-sodium broth and no-salt-added canned tomatoes and beans.
Conclusion
This Easy Dutch Oven Venison Chili with Beans has earned a permanent spot in my weeknight dinner rotation, and I think it will in yours, too. It’s the kind of recipe that proves you don’t need a lot of time, money, or fancy ingredients to make something truly satisfying. The venison gives it a rich, savory depth that beef can’t match, and the beans make it hearty enough to be a meal on its own. Plus, it all comes together in one pot, which means less time cleaning up and more time enjoying dinner with the people you love.
I’d love to hear how this recipe turns out for you. Did you add any fun toppings? Did you try one of the variations? Leave a comment below and let me know—I read every single one and I love seeing how you make this recipe your own. And if you’re looking for another one-pot wonder, you might enjoy this hearty beef stew for those chilly nights when you want something even more comforting.
Go ahead, grab your Dutch oven, and give this chili a try. I promise, it’s worth every single minute of that 45-minute simmer. Happy cooking!
Frequently Asked Questions
Can I use beef instead of venison?
Absolutely. If you don’t have access to venison, substitute with 1 ½ pounds of ground beef (80/20 is best for flavor). The cooking method is exactly the same. The chili will still be delicious, just with a slightly different flavor profile.
Do I need to soak dried beans for this recipe?
No, this recipe uses canned beans, which are already cooked and ready to go. Just drain and rinse them before adding to the pot. If you prefer to use dried beans, you’ll need to soak and cook them separately before adding them to the chili.
How can I make this chili less spicy for kids?
Use a mild chili powder and omit any extra spicy ingredients like cayenne or jalapeños. You can also serve the chili with a dollop of sour cream or plain yogurt, which helps cool down the heat. My kids love it with a big pile of shredded cheese on top.
Can I make this chili in an Instant Pot?
Yes! Use the sauté function to brown the venison and cook the aromatics, then add the remaining ingredients. Cook on high pressure for 15 minutes, then do a natural release for 10 minutes before quick-releasing the remaining pressure. It’s a great time-saver.
Why is my venison chili dry or tough?
Venison is very lean, so it can dry out if overcooked. The key is to not overcook it during the browning stage—just cook it until it’s no longer pink. The simmering time in the broth will keep it tender. If your chili still seems dry, add a little extra broth or a splash of water.
Pin This Recipe!

Easy Dutch Oven Venison Chili with Beans

A hearty, one-pot venison chili made with ground venison, beans, and a rich blend of spices. Perfect for weeknights, this recipe delivers deep, savory flavor in about 45 minutes.
- Prep Time: 10 minutes
- Cook Time: 35 minutes
- Total Time: 45 minutes
- Yield: 6 servings 1x
- Category: Main Course
- Cuisine: American
Ingredients
- 1 ½ pounds ground venison
- 2 tablespoons olive oil
- 1 large yellow onion, diced
- 4 cloves garlic, minced
- 1 medium green bell pepper, diced
- 1 can (14.5 ounces) diced tomatoes, undrained
- 1 can (8 ounces) tomato sauce
- 1 can (15 ounces) kidney beans, drained and rinsed
- 1 can (15 ounces) pinto beans, drained and rinsed
- 1 cup beef broth
- 3 tablespoons chili powder
- 1 tablespoon ground cumin
- 1 teaspoon smoked paprika
- 1 teaspoon dried oregano
- Salt and black pepper to taste
- Optional toppings: shredded cheddar cheese, sour cream, diced avocado, fresh cilantro, sliced jalapeños, crushed tortilla chips
Instructions
- Prep the ingredients: dice the onion and bell pepper, mince the garlic, drain and rinse the beans, measure out the spices, and open the cans of tomatoes and tomato sauce.
- Heat 1 tablespoon of olive oil in a Dutch oven over medium-high heat. Add the ground venison and cook, breaking it apart, until browned and no longer pink (6–8 minutes). Use a slotted spoon to transfer the meat to a plate; leave any rendered fat in the pot.
- Reduce heat to medium. Add the remaining 1 tablespoon of olive oil. Add the diced onion and bell pepper, and cook until soft and translucent (about 5 minutes), scraping up browned bits. Add the minced garlic and cook for 1 minute more.
- Add the chili powder, cumin, smoked paprika, and dried oregano to the pot. Stir constantly for 30 seconds to 1 minute until fragrant.
- Return the browned venison to the pot. Add the diced tomatoes (with juices), tomato sauce, drained beans, and beef broth. Stir to combine.
- Bring the chili to a gentle boil, then reduce heat to low. Cover the pot with the lid slightly ajar and simmer for 25–30 minutes, stirring occasionally. For a thicker chili, remove the lid for the last 10 minutes.
- Taste and season with salt and black pepper as needed. Let the chili rest off the heat for 5 minutes before serving.
Notes
For best flavor, brown the venison in batches to avoid steaming. Season in layers—add a little salt when browning the meat and sautéing the onions. If the chili is too thin, simmer uncovered for 10–15 minutes. Leftovers taste even better the next day.
Nutrition
- Serving Size: 1 serving (about 1.5
- Calories: 380
- Sugar: 8
- Sodium: 780
- Fat: 12
- Saturated Fat: 3
- Carbohydrates: 35
- Fiber: 10
- Protein: 32
Keywords: venison chili, Dutch oven chili, easy chili recipe, ground venison, one-pot chili, weeknight dinner


