Love this? Save it for later!
Share the inspiration with your friends
There used to be a little diner off Highway 99 called The Rusty Spoon that made this addictive snack mix. When they closed—suddenly, with a handwritten sign taped to the door that just said “Thanks for the memories”—I honestly felt a little lost. That Chex mix was the whole reason my friends and I would meet there after work, especially during the lead-up to Thanksgiving. After twelve tries—some too salty, one that burned so badly I set off the fire alarm—I finally got it. And you know what? This version might actually be better than the original.
I still remember the first batch I made that actually worked. It was a Tuesday night, I was exhausted, and I had a bag of Chex cereal staring at me from the pantry. I figured, why not? My kitchen smelled like a diner crossed with a ranch dressing commercial, and when I brought the finished mix to our Friendsgiving potluck the next night, people actually stopped mid-conversation to ask what it was. “It’s just snack mix,” I said, but we all knew it was more than that. It was that missing piece from The Rusty Spoon, finally back where it belonged.
The best part? This recipe comes together in under 20 minutes. No complicated steps, no fancy ingredients, and definitely no stress. Whether you’re hosting Friendsgiving, need a last-minute snack for game day, or just want something crunchy to get you through the week, this savory ranch Chex mix has your back. Honestly, it’s the kind of recipe that makes you look like you tried way harder than you actually did.
Why You’ll Love This Recipe
Let me tell you why this isn’t just another snack mix recipe floating around the internet. I’ve tested this thing six ways from Sunday, and I mean that literally—I made six batches in one afternoon just to get the seasoning balance right. My kitchen looked like a Chex cereal factory exploded, but it was worth it.
- Quick & Easy: From pantry to bowl in under 20 minutes. Seriously. You can make this during a commercial break or while waiting for water to boil for pasta.
- Simple Ingredients: No weird specialty items here. You probably already have most of what you need in your pantry and spice rack right now.
- Perfect for Friendsgiving: This is the ultimate potluck contribution. It travels well, doesn’t need to be heated up, and everyone can grab a handful between turkey and pie.
- Crowd-Pleaser: I’ve brought this to four different gatherings this fall alone, and every single time, someone asks for the recipe. Kids love it, adults love it, even my picky friend Sarah who “doesn’t do snack mixes” finished half the bowl.
- Unbelievably Delicious: The secret is in the ranch seasoning blend—not too powdery, not too greasy, just perfectly coated on every piece. That first crunch will make you close your eyes, I promise.
What makes this recipe different from the rest? It’s the balance. Most homemade Chex mixes are either drowning in butter or so dry they taste like cardboard. This one hits that sweet spot where every piece is flavorful without being soggy. Plus, I’ve cracked the code on getting the seasoning to actually stick to the cereal instead of falling to the bottom of the bowl. That’s the kind of kitchen wisdom you only get from making a lot of mistakes—and I’ve made plenty.
This isn’t just good snack mix. It’s the kind that makes you remember where you were when you first tasted it. For me, it’s that little diner off the highway. For you, maybe it’ll be your own kitchen, surrounded by friends, right before the holiday chaos begins.
What Ingredients You Will Need
This recipe uses simple, everyday ingredients to deliver that bold ranch flavor and satisfying crunch without any fuss. Most of these are pantry staples, which means you can whip up a batch anytime the craving hits.
For the Base Mix:
- 3 cups Corn Chex cereal (the classic base—holds up well and catches seasoning beautifully)
- 3 cups Rice Chex cereal (adds lightness and a different texture)
- 2 cups Wheat Chex cereal (brings that hearty, nutty flavor—I love this combo)
- 1 cup small pretzel twists (the salt factor is crucial here; I use the mini ones for better distribution)
- 1 cup cheese crackers (like Goldfish or Cheez-Its—adds that savory, cheesy pop)
- 1 cup mixed nuts (I use a salted cocktail mix, but roasted peanuts work great too)
For the Ranch Seasoning Coating:
- 6 tablespoons unsalted butter (melted—this is your flavor carrier, so don’t skimp)
- 2 tablespoons ranch seasoning mix (I prefer Hidden Valley for consistency, but any brand works)
- 1 teaspoon garlic powder (adds depth—don’t skip this even if your ranch mix has garlic)
- 1 teaspoon onion powder (rounds out the savory profile beautifully)
- 1/2 teaspoon smoked paprika (optional but highly recommended—adds a subtle warmth)
- 1/4 teaspoon cayenne pepper (optional—for those who want a little heat)
- 1/2 teaspoon dried dill (this is my secret weapon—it makes the ranch taste fresher and more authentic)
A few notes on ingredients: I’ve tested this with both salted and unsalted butter, and honestly, unsalted gives you more control. If you only have salted, just reduce or skip the extra salt in the seasoning. For the ranch mix, I’ve tried homemade versions, and while they’re lovely, the store-bought packets are just more reliable for this recipe. The texture comes out better every time.
If you’re gluten-sensitive, look for gluten-free Chex varieties (most are labeled) and swap the pretzels for gluten-free pretzel sticks. The cheese crackers can be replaced with gluten-free cheese puffs for a similar effect. For a dairy-free version, use plant-based butter—I’ve had great results with Miyoko’s brand.
One thing I learned the hard way: don’t use stale cereal. I tried to use up an open box that had been sitting in my pantry for a month, and the mix came out soft and sad. Fresh cereal gives you that satisfying crunch that makes this recipe worth making.
Equipment Needed
You don’t need much for this recipe, which is part of why I love it. Here’s what you’ll want to have on hand:
- Large mixing bowl (the bigger, the better—you need room to toss everything without spilling)
- Small microwave-safe bowl (for melting the butter)
- Measuring cups and spoons (precision matters with the seasoning blend)
- Large rimmed baking sheet (a half-sheet pan works perfectly—line it with parchment for easier cleanup)
- Spatula or wooden spoon (for stirring and spreading)
- Oven or microwave (I’ll give you both methods)
- Paper towels (trust me on this—you’ll want them for the cooling step)
If you don’t have a rimmed baking sheet, a 9×13 baking dish works in a pinch. Just know you might need to stir more frequently to prevent burning. I once used a cookie sheet without rims and lost half the mix to the oven floor—learn from my mistakes, friends.
For the microwave method, you’ll also need a large microwave-safe bowl and a plate or another bowl to cover it. Nothing fancy—just something that fits.
Preparation Method
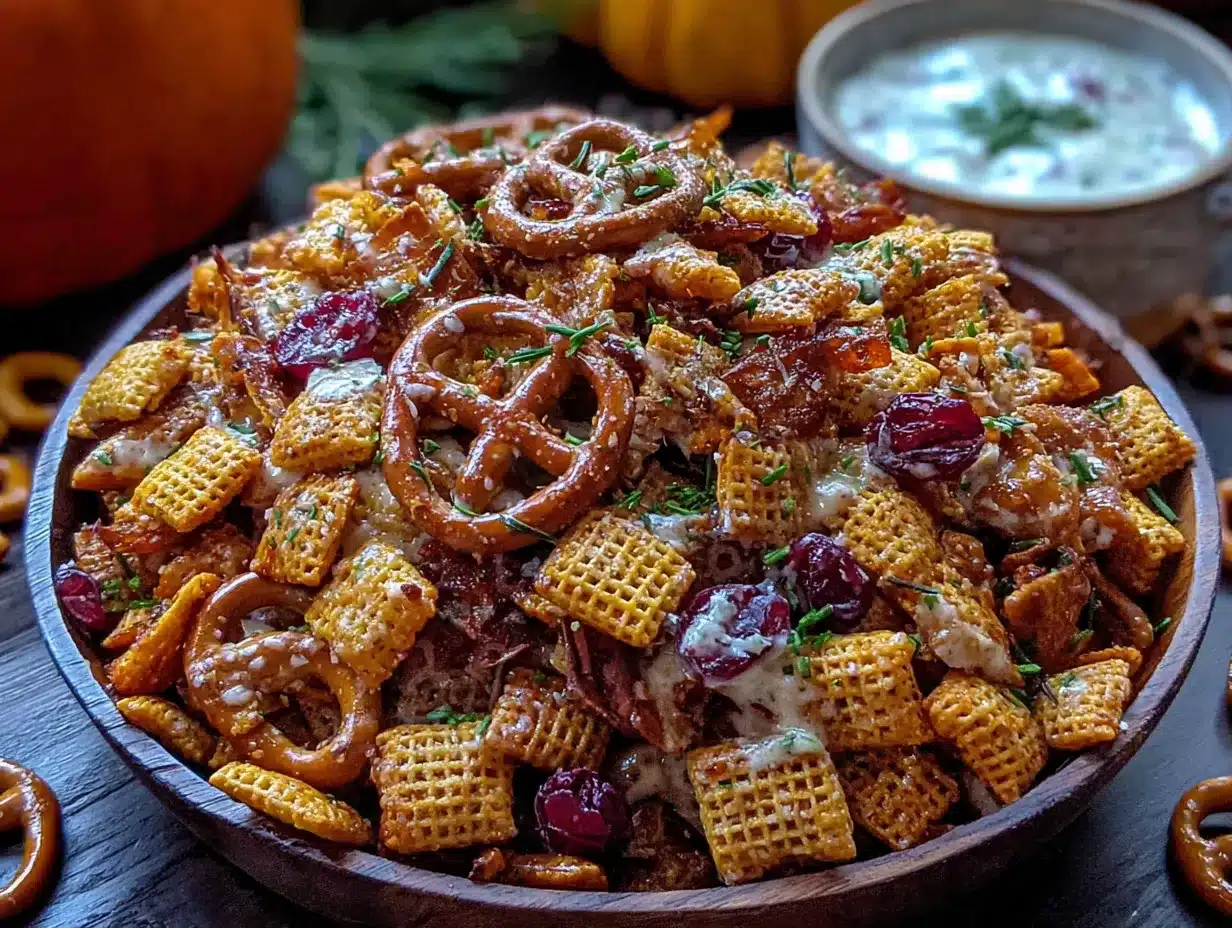
Alright, let’s get to it. This comes together fast, so have everything measured and ready before you start. Trust me, you don’t want to be hunting for the garlic powder while your butter is melting.
- Preheat your oven to 250°F (120°C). If you’re using the microwave method, skip this step—but honestly, the oven gives you a better texture. I’ve tested both ways at least five times each.
- Combine all the dry ingredients in your large mixing bowl. Pour in the Corn Chex, Rice Chex, Wheat Chex, pretzel twists, cheese crackers, and mixed nuts. Give it a gentle toss with your hands to distribute everything evenly. This is also a good time to check for any broken pieces—I like to leave them in because they catch extra seasoning.
- Make the ranch coating. In your small microwave-safe bowl, melt the butter in 20-second intervals until fully liquid. Whisk in the ranch seasoning mix, garlic powder, onion powder, smoked paprika, cayenne (if using), and dried dill. Stir until smooth—it should smell amazing at this point. If it looks separated, just whisk a little harder.
- Pour the butter mixture over the dry ingredients. Drizzle it evenly—don’t just dump it in one spot. Use a spatula to scrape every last bit out of the bowl because that’s where all the flavor lives. Then, using your hands or a large spoon, toss everything together until every piece is coated. This takes about 2-3 minutes of gentle but thorough mixing. You want to see that golden ranch color on every single piece.
- Spread the mixture on your prepared baking sheet. Use a single layer—don’t pile it up or you’ll end up with soggy spots. If you need to use two sheets, do it. I’ve made that mistake before and ended up with half the batch being perfect and the other half being sad and chewy.
- Bake for 45 minutes, stirring every 15 minutes. Set a timer—I’m serious. The first time I made this, I got distracted by a phone call and forgot to stir. The bottom layer burned while the top was still pale. Every 15 minutes, pull the sheet out, give everything a good stir with your spatula, and spread it back into an even layer. This ensures even toasting and that perfect crunch.
- Let it cool completely on the baking sheet. This is the hardest part—you’re going to want to eat it immediately. Don’t. The mix continues to crisp up as it cools, and if you bag it up while it’s still warm, you’ll get steam instead of crunch. I usually let it sit for at least 30 minutes, stirring once halfway through to break up any clumps.
For the microwave method (if you’re in a real hurry): Combine everything in a large microwave-safe bowl. Microwave on high for 5-6 minutes, stirring every minute. Spread on paper towels to cool. It won’t be quite as crispy as the oven method, but it’ll still be delicious and ready in under 10 minutes.
Cooking Tips & Techniques
After making this recipe more times than I care to count, I’ve picked up a few tricks that make a real difference. Let me share the ones that saved my sanity.
The biggest mistake people make is oversaturating the cereal. I learned this the hard way when I doubled the butter thinking “more is better.” Nope. The cereal just gets greasy and heavy, and instead of that light, crispy texture, you get something that feels like a wet paper towel. Stick to the measurements—they work.
Temperature matters more than you think. 250°F is the sweet spot. I tried 300°F once because I was impatient, and the edges burned while the middle was still raw. Low and slow is the way to go here. Think of it as drying out the mix rather than cooking it. That gentle heat is what creates that shatteringly crisp texture.
Stirring isn’t optional—it’s essential. I know it’s annoying to set a timer and interrupt whatever you’re doing, but those 15-minute intervals are non-negotiable. The pieces on the edges of the pan toast faster than the ones in the middle, and if you don’t rotate them, you’ll end up with uneven results. I keep my phone timer right next to me so I don’t forget.
Let it cool completely. I cannot stress this enough. The first time I made this for Friendsgiving, I was in such a hurry that I put the warm mix into a Ziploc bag. By the time I got to the party, it was soft and chewy instead of crispy. Now I lay it out on paper towels after baking and let it sit for a full hour before storing. Patience pays off.
Double the batch if you’re feeding a crowd. This recipe makes about 8 cups, which sounds like a lot until you realize how fast it disappears. For Friendsgiving, I always make a double batch and store it in two separate containers. That way, if one gets demolished early, I have a backup.
Variations & Adaptations
One of the best things about this recipe is how easy it is to customize. Here are some of my favorite variations:
Spicy Ranch Chex Mix: Add 1 teaspoon of cayenne pepper and 1/2 teaspoon of red pepper flakes to the butter mixture. The heat builds slowly and pairs beautifully with the cool ranch flavor. I made this version for a game day party, and it was gone before halftime.
Everything Bagel Ranch Mix: After coating the mix with the ranch butter, sprinkle 2 tablespoons of everything bagel seasoning over the top before baking. The sesame seeds, poppy seeds, garlic, and onion bits add an incredible crunch and flavor boost. This one’s become my go-to for brunch gatherings.
Dill Pickle Ranch Mix: Add 1 tablespoon of dried dill weed and 1 teaspoon of pickle juice (yes, really) to the butter mixture. The pickle juice adds a tangy brightness that’s surprisingly addictive. I was skeptical the first time I tried this, but now I can’t stop making it.
Gluten-Free Version: Use gluten-free Chex varieties and swap the pretzels for gluten-free pretzel sticks. Most cheese crackers have gluten, so use gluten-free cheese puffs or simply add extra nuts. I’ve tested this for a friend with celiac disease, and she said it was better than any store-bought gluten-free snack mix she’s tried.
Sweet & Savory Ranch Mix: Add 1/2 cup of honey-roasted peanuts and 1/4 cup of dried cranberries to the mix after baking. The sweetness balances the savory ranch perfectly. This is dangerous—I can’t stop eating it once I start.
Air Fryer Method: If you have an air fryer, you can make this in about 10 minutes. Set it to 300°F, cook for 5-6 minutes, shaking the basket halfway through. The texture is actually closer to the oven method than the microwave method. Just make sure your air fryer basket isn’t too full—work in batches if needed.
Serving & Storage Suggestions
This Chex mix is best served at room temperature, straight from the bowl. I like to set it out in a big wooden salad bowl or a ceramic serving dish—something that makes it feel special even though it’s just snack mix. For Friendsgiving, I’ll often put it in a few smaller bowls scattered around the room so people can grab handfuls without clustering in one spot.
It pairs beautifully with just about any beverage. Serve it alongside cold beer, sparkling cider, or even a crisp white wine. I’ve also been known to add a bowl to my Thanksgiving cheese board—it’s a great textural contrast to soft brie and sharp cheddar.
Storage is simple: Keep your Chex mix in an airtight container at room temperature. It will stay fresh and crispy for up to two weeks—if it lasts that long. I use glass jars with tight-fitting lids or large Ziploc bags with all the air squeezed out. Don’t refrigerate it, because the moisture in the fridge will make it soft.
For longer storage, you can freeze it. Place the completely cooled mix in a freezer-safe bag or container, and it will keep for up to three months. When you’re ready to eat it, just let it come to room temperature—no need to reheat. The texture stays remarkably good. I always make a double batch in November and freeze one for Christmas snacking.
If your mix does lose its crunch over time, spread it on a baking sheet and warm it in a 250°F oven for 5-10 minutes. Let it cool completely, and it will crisp right back up. This trick has saved many a batch in my kitchen.
One last tip: the flavors actually get better after a day or two. The ranch seasoning has time to meld with the cereal, and the overall taste becomes more cohesive. So don’t be afraid to make this a day ahead of your event—it might even be better that way.
Nutritional Information & Benefits
Let’s be real—this is a treat, not a health food. But I believe in knowing what you’re eating so you can enjoy it mindfully. Here’s the breakdown per 1-cup serving:
| Nutrient | Amount per Serving |
|---|---|
| Calories | 280 |
| Total Fat | 16g |
| Saturated Fat | 7g |
| Cholesterol | 20mg |
| Sodium | 450mg |
| Total Carbohydrates | 30g |
| Dietary Fiber | 3g |
| Sugars | 4g |
| Protein | 5g |
On the plus side, this mix does offer some nutritional benefits. The Chex cereals are fortified with iron and B vitamins. The nuts provide healthy fats, protein, and vitamin E. And the whole grains in the Wheat Chex add fiber that helps keep you full.
If you’re watching your sodium, you can use unsalted nuts and low-sodium pretzels. The ranch seasoning still provides plenty of flavor without the extra salt. For a lower-fat version, reduce the butter to 4 tablespoons—the coating will be less generous, but it still works.
This recipe contains gluten (from the cereals and pretzels), dairy (from the butter), and nuts. If you’re serving a crowd with allergies, consider making a separate batch with the substitutions I mentioned earlier. It’s worth the extra effort to make sure everyone can enjoy it.
Conclusion
This quick savory ranch Chex Mix is more than just a snack—it’s a little piece of nostalgia that brings people together. Whether you’re recreating a memory from a long-gone diner like I did, or starting a new tradition with your own friends, this recipe delivers every single time.
I love that I can make it in under 20 minutes of active time, that it uses ingredients I always have on hand, and that it makes my kitchen smell like the best kind of comfort food. But mostly, I love watching people’s faces when they take that first crunchy, ranch-filled bite. It’s the same look I had at The Rusty Spoon all those years ago.
Now it’s your turn. Make this for your Friendsgiving, your game day party, your Tuesday night snack attack. Customize it, tweak it, make it your own. And when someone asks for the recipe—because they will—send them my way. I’d love to hear how it turned out for you. Drop a comment below and tell me about your favorite snack mix memory. Happy snacking, friends!
Frequently Asked Questions
Can I make this ranch Chex mix ahead of time?
Absolutely! In fact, I recommend it. The flavors meld together beautifully after a day or two, and the mix stays crispy for up to two weeks when stored in an airtight container. Just make sure it’s completely cool before you seal it up.
Can I use a different type of cereal?
Sure thing. The classic Chex trio works best, but you can swap in any crispy cereal you like. Just avoid sugary cereals—they’ll burn faster and throw off the savory balance. I’ve used plain Cheerios in a pinch, and they worked great.
How do I make this recipe dairy-free?
Use plant-based butter instead of regular butter. I’ve tested this with Miyoko’s and Earth Balance, and both worked well. Just make sure to melt it gently and whisk the seasoning in thoroughly before pouring over the cereal.
Why did my Chex mix turn out soggy?
Two most common reasons: either you didn’t let it cool completely before storing, or your oven temperature was too low. Make sure you’re baking at 250°F and letting the mix cool for at least 30 minutes on the baking sheet before transferring to a container.
Can I make this in a slow cooker?
Yes, you can! Combine everything in a slow cooker, set it on low, and cook for 2-3 hours, stirring every 30 minutes. Leave the lid slightly ajar to let steam escape. The texture won’t be quite as crispy as the oven method, but it’s a great hands-off option for parties.
Pin This Recipe!

Best Easy Homemade Ranch Chex Mix for Friendsgiving

This quick and easy homemade ranch Chex Mix is the perfect snack for Friendsgiving, game day, or any gathering. With a perfectly balanced ranch seasoning blend and a satisfying crunch, it’s a crowd-pleaser that comes together in under 20 minutes.
- Prep Time: 10 minutes
- Cook Time: 45 minutes
- Total Time: 55 minutes
- Yield: 8 cups 1x
- Category: Snack
- Cuisine: American
Ingredients
- 3 cups Corn Chex cereal
- 3 cups Rice Chex cereal
- 2 cups Wheat Chex cereal
- 1 cup small pretzel twists
- 1 cup cheese crackers (like Goldfish or Cheez-Its)
- 1 cup mixed nuts (salted cocktail mix or roasted peanuts)
- 6 tablespoons unsalted butter (melted)
- 2 tablespoons ranch seasoning mix
- 1 teaspoon garlic powder
- 1 teaspoon onion powder
- 1/2 teaspoon smoked paprika (optional)
- 1/4 teaspoon cayenne pepper (optional)
- 1/2 teaspoon dried dill
Instructions
- Preheat your oven to 250°F (120°C).
- Combine all the dry ingredients (Corn Chex, Rice Chex, Wheat Chex, pretzel twists, cheese crackers, and mixed nuts) in a large mixing bowl. Toss gently to distribute evenly.
- In a small microwave-safe bowl, melt the butter in 20-second intervals until fully liquid. Whisk in the ranch seasoning mix, garlic powder, onion powder, smoked paprika, cayenne (if using), and dried dill until smooth.
- Pour the butter mixture evenly over the dry ingredients. Use a spatula to scrape every last bit out of the bowl. Toss everything together with your hands or a large spoon until every piece is coated (about 2-3 minutes).
- Spread the mixture in a single layer on a large rimmed baking sheet (use two sheets if needed).
- Bake for 45 minutes, stirring every 15 minutes, until golden and crispy.
- Let the mix cool completely on the baking sheet (at least 30 minutes), stirring once halfway through to break up clumps. Store in an airtight container at room temperature.
Notes
For the microwave method: Combine everything in a large microwave-safe bowl. Microwave on high for 5-6 minutes, stirring every minute. Spread on paper towels to cool. It won’t be quite as crispy as the oven method, but it’s ready in under 10 minutes. The flavors actually get better after a day or two. If the mix loses its crunch, spread it on a baking sheet and warm in a 250°F oven for 5-10 minutes, then cool completely.
Nutrition
- Serving Size: 1 cup
- Calories: 280
- Sugar: 4
- Sodium: 450
- Fat: 16
- Saturated Fat: 7
- Carbohydrates: 30
- Fiber: 3
- Protein: 5
Keywords: ranch Chex mix, homemade snack mix, Friendsgiving snack, easy appetizer, party mix, savory snack