Love this? Save it for later!
Share the inspiration with your friends
I was at the community garden last September, elbow-deep in a tangle of pole beans that had completely taken over their trellis. An older woman named Harriet was tending the plot next to mine, and she watched me wrestling with the vines for a good five minutes before she said anything. “You’re fighting them,” she finally said, not unkindly. “Beans don’t like to be fought.” She walked over and showed me how to follow the vine back to its source, how to coax rather than yank. By the time we finished, we’d filled two baskets, and she invited me to her little kitchen to show me what she did with an abundance of green beans. What came out of that session was a version of classic almondine, but with a crispy, garlicky twist that I swear I dream about. Harriet didn’t call it a recipe—she just said it was “what you do when you’ve got too many beans and a little butter.” I’ve been making it ever since, and honestly, it’s become my go-to side dish for everything from weeknight salmon to Sunday roast chicken. Maybe you’ve been there—staring at a pile of green beans wondering how to make them exciting. This is how.
Why You’ll Love This Recipe
Let me tell you why this crispy garlic green bean almondine has earned a permanent spot in my weekly rotation. I’ve tested this dish more times than I care to count—through burnt garlic disasters and soggy-bean heartbreaks—and what I’m sharing with you is the version that finally made me close my eyes on the first bite.
- Quick & Easy: From start to finish, this comes together in under 25 minutes. Perfect for those evenings when you need a vegetable side dish that doesn’t demand a lot of attention.
- Simple Ingredients: You probably have garlic and butter in your kitchen right now. Green beans and almonds are easy to find at any grocery store. No specialty trips required.
- Perfect for Any Occasion: This dish works for holiday dinners, casual weeknight meals, and everything in between. It looks fancy enough for company but takes almost no effort.
- Crowd-Pleaser: I’ve served this to picky kids and food-snob adults, and somehow it disappears every single time. The crispy texture wins people over.
- Unbelievably Delicious: The combination of nutty browned butter, crispy garlic, and toasted almonds against tender-crisp green beans is honestly next-level comfort food.
What makes this different from other green bean recipes is the technique. Instead of blanching then shocking, we’re using a high-heat sear that gives the beans actual texture. The garlic gets crispy rather than bitter because of how we time the addition. And the almonds? We toast them in the same pan, so they soak up all that buttery garlic flavor. This isn’t just another green bean side dish—it’s the one that will ruin you for all others.
What Ingredients You Will Need
This recipe uses simple, wholesome ingredients to deliver bold flavor and satisfying texture without the fuss. Most of these are pantry staples for me now, and I bet they will be for you too.
- Fresh green beans, 1 pound (450g) — Look for beans that snap cleanly when bent. I prefer thinner beans for this recipe because they get crispier. Trim the stem ends but leave the tails on for a rustic look.
- Unsalted butter, 3 tablespoons (42g) — I use unsalted so I can control the salt level. Kerrygold is my go-to for its richer flavor, but any good butter works.
- Garlic, 4 large cloves, thinly sliced — Slicing rather than mincing is key here. Thin slices get crispy without burning. Use a mandoline if you want perfectly even slices.
- Sliced almonds, 1/3 cup (30g) — Pre-sliced almonds save time, but you can also slice whole almonds yourself. I’ve tried both and honestly, the pre-sliced ones toast more evenly.
- Extra-virgin olive oil, 1 tablespoon (15ml) — This helps the beans sear without burning the butter. Use a good quality one for better flavor.
- Lemon juice, 1 tablespoon (15ml), fresh squeezed — Bottled lemon juice won’t give you the same brightness. Trust me on this one—fresh makes a difference.
- Salt, 1/2 teaspoon (3g), plus more to taste — I use fine sea salt. Diamond Crystal kosher salt works beautifully too.
- Black pepper, 1/4 teaspoon (1g), freshly ground — Freshly ground pepper adds a subtle heat that complements the garlic.
- Red pepper flakes, 1/4 teaspoon (optional) — Adds a gentle warmth without making it spicy. Leave it out if you’re serving kids or heat-sensitive guests.
- Lemon zest, from 1 lemon — This is optional but highly recommended. It adds a fragrant citrus note that brightens the whole dish.
For the best texture, make sure your green beans are thoroughly dried after washing. Any excess water will steam the beans instead of searing them, and we want crispy, not soggy. I usually pat them dry with a clean kitchen towel and then let them sit on paper towels for a few minutes.
Equipment Needed
You don’t need a fancy kitchen to make this crispy garlic green bean almondine shine. Here’s what I use:
- Large cast-iron skillet or heavy-bottomed pan — Cast iron retains heat beautifully and gives you that perfect sear. A stainless steel pan works too, just make sure it’s heavy enough to hold heat.
- Sharp chef’s knife — For slicing garlic paper-thin. A dull knife will crush the garlic and release too much moisture.
- Cutting board — Wood or plastic, whatever you prefer.
- Tongs — For turning the beans without splattering hot butter everywhere. I’ve used a spatula in a pinch, but tongs are much better.
- Small bowl — For holding your prepped ingredients nearby. Mise en place makes everything smoother.
- Microplane or zester — If you’re adding lemon zest. A fine grater works too.
If you don’t have a cast-iron skillet, don’t stress. I’ve made this in a non-stick pan and it still turned out great—just watch the heat because non-stick doesn’t get as hot. A wok actually works surprisingly well too, especially for tossing the beans.
Preparation Method
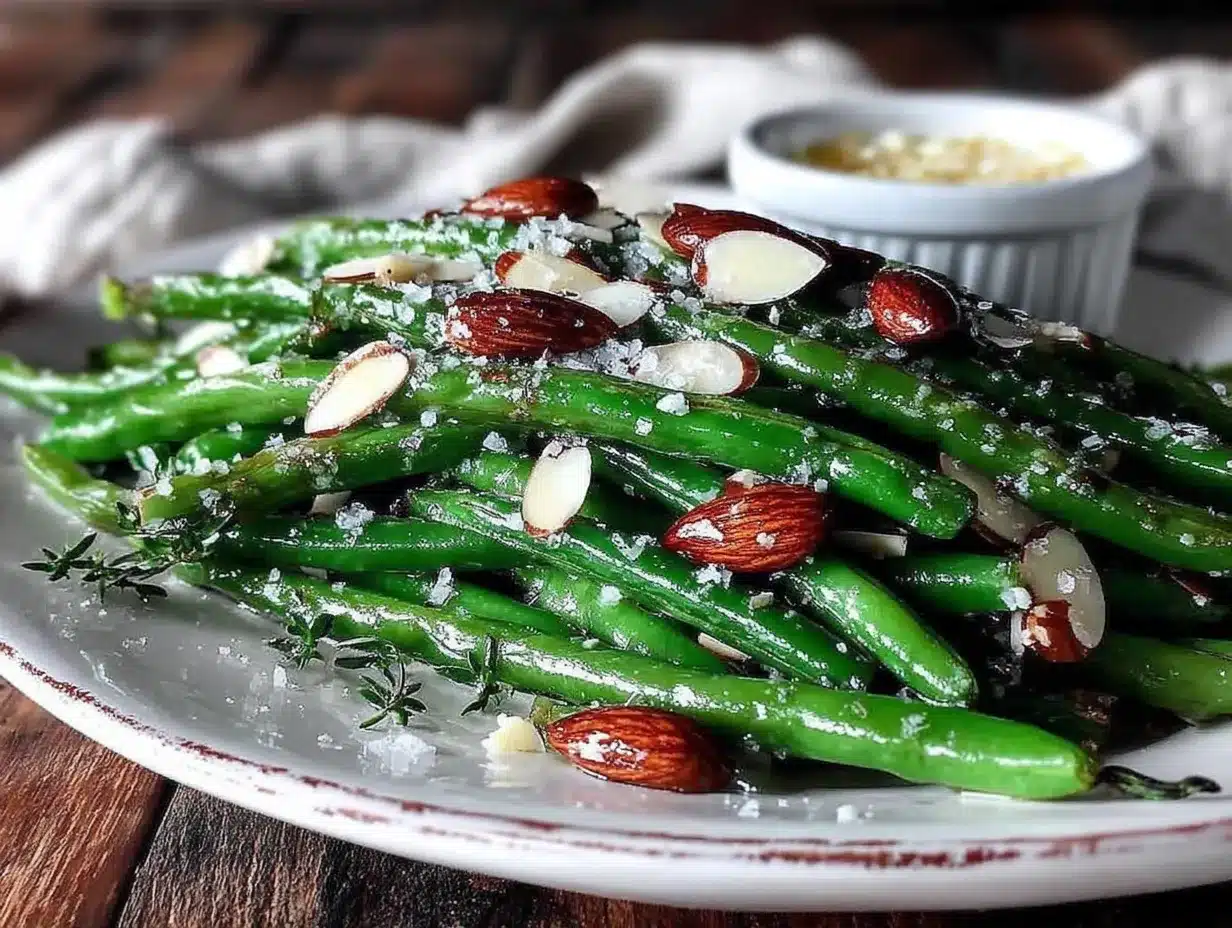
Let me walk you through this step by step. I’ve made this dish more times than I can count, and these are the exact movements that give you the best results.
- Prep your green beans. Wash them thoroughly under cold water, then dry them completely. I cannot stress this enough—wet beans will steam instead of sear. Trim off the stem ends (about 1/4 inch from the top) and leave the curly tails intact. If your beans are particularly long, you can snap them in half, but I prefer keeping them whole for presentation.
- Slice your garlic. Peel 4 cloves of garlic and slice them as thinly as possible. Aim for uniform thickness so they cook evenly. If you’re using a mandoline, watch your fingers—I’ve nicked myself more times than I’d like to admit. Set the slices aside in a small bowl.
- Heat your pan. Place your skillet over medium-high heat and add 1 tablespoon of olive oil. Let it heat for about 30 seconds until it shimmers. The oil should be hot but not smoking.
- Add the butter. Drop in 2 tablespoons of the butter and let it melt, swirling the pan gently. The butter will start to foam and then brown slightly—this is where the magic happens. You’re looking for a nutty aroma and golden-brown specks forming at the bottom of the pan.
- Sear the green beans. Carefully add your dried green beans to the hot pan in a single layer. Don’t overcrowd—if your pan is too small, work in batches. Let them cook undisturbed for 2 minutes. This gives you those gorgeous brown spots. Then toss them with tongs and cook for another 2 minutes. The beans should be bright green with charred edges and still have a slight crunch.
- Add the garlic and almonds. Push the beans to one side of the pan and add the remaining 1 tablespoon of butter. Once it melts, add the sliced garlic and sliced almonds. Stir them in the butter for about 1 minute until the garlic turns golden and the almonds become fragrant. Watch carefully—garlic can go from golden to burnt in seconds.
- Combine everything. Toss the beans with the garlic and almonds so everything is evenly distributed. Cook for another 30 seconds to let the flavors meld.
- Finish with lemon. Remove the pan from heat. Squeeze the lemon juice over the top and add the lemon zest if using. Season with salt, pepper, and red pepper flakes. Toss one final time.
- Serve immediately. Transfer to a serving platter or bowl. The beans are best right out of the pan while they’re still crispy and the garlic is at its crunchiest.
A quick note on timing: The entire cooking process takes about 8-10 minutes once you start. I recommend having all your ingredients prepped and measured before you turn on the heat. There’s no time to chop garlic or measure almonds once the butter starts browning.
Cooking Tips & Techniques
After making this crispy garlic green bean almondine probably fifty times, I’ve collected a few hard-earned lessons. Let me save you some trouble.
The biggest mistake I see people make is overcrowding the pan. I learned this the hard way when I tried to cook two pounds of beans in a single skillet for Thanksgiving. They steamed instead of seared, and I ended up with sad, limp beans. If you’re doubling the recipe, use two pans or cook in batches. The beans need room to make contact with the hot surface.
Patience with the butter is everything. When I first started making this, I would rush through the browning step and end up with butter that wasn’t quite nutty enough. Let it go until you see those golden-brown specks form and you smell that unmistakable toasted aroma. It takes about 2 minutes, but it’s worth every second.
Here’s a trick I figured out by accident: If your garlic starts browning faster than your almonds, add a tiny splash of water to the pan. It lowers the temperature instantly and gives the almonds time to catch up without burning the garlic. I discovered this when I got distracted by my phone ringing and the garlic was about to cross the line.
For consistently crispy results, make sure your beans are at room temperature before they hit the pan. Cold beans straight from the fridge will lower the pan temperature too quickly. Let them sit on the counter for 10 minutes while you prep everything else.
Timing tip: Start your main dish first, then cook the beans right before serving. They really don’t hold well—the crispy texture fades after about 5 minutes. If you need to keep them warm, spread them on a baking sheet in a single layer in a 200°F oven, but honestly, they’re best fresh.
Variations & Adaptations
This recipe is wonderfully adaptable. Here are some variations I’ve tried and loved:
Dietary Adaptations: For a dairy-free version, substitute the butter with a high-quality vegan butter or use all olive oil. I’ve tried this with Miyoko’s cultured vegan butter and it worked surprisingly well—the browning wasn’t quite as deep, but the flavor was still excellent. For a nut-free version, skip the almonds and add toasted pumpkin seeds or sunflower seeds instead. They add the same crunch without the allergen.
Seasonal Variations: In summer, swap the green beans for fresh haricots verts—they’re thinner and cook even faster. In spring, try this with asparagus instead of green beans; just adjust the cooking time to about 4 minutes total. In fall, I sometimes add a handful of sliced mushrooms along with the garlic for an earthier version that pairs beautifully with roasted meats.
Flavor Twists: Add a tablespoon of capers along with the garlic for a briny pop. Or sprinkle in some fresh thyme leaves right at the end for an herby note. I once made this with smoked almonds instead of regular ones, and the smoky flavor was incredible with the garlic. For a touch of sweetness, a tiny drizzle of honey or maple syrup over the finished dish is surprisingly good—just go easy.
Different Cooking Methods: You can make this on a grill by using a cast-iron skillet directly on the grates. The smoky char from the grill adds another layer of flavor. I’ve also made a sheet-pan version by tossing everything with oil and butter and roasting at 425°F for about 12 minutes, though you lose some of that crispy garlic texture.
Serving & Storage Suggestions
This crispy garlic green bean almondine is best served immediately, right when it comes out of the pan. The beans should be warm, the garlic should be crunchy, and the almonds should still have that just-toasted snap. I like to pile them on a platter in a messy, generous heap and sprinkle a little extra lemon zest on top for color.
What to serve with it: This pairs beautifully with almost any protein. I love it alongside roast chicken, grilled salmon, or a simple pan-seared steak. It’s also fantastic with pasta—toss it with some lemon linguine and you’ve got a complete meal. For holiday dinners, it sits perfectly next to mashed potatoes and roasted turkey.
Storage: If you have leftovers (which rarely happens in my house), store them in an airtight container in the refrigerator for up to 2 days. The texture will soften, but the flavor will still be good. I don’t recommend freezing this dish—the beans become mushy when thawed.
Reheating: The best way to revive leftovers is in a hot skillet with a tiny splash of water or broth. Heat it over medium-high heat for about 2 minutes, tossing frequently. This helps restore some of the crispiness. Microwaving will make them soggy, so avoid it if you can. I’ve also reheated them in a 400°F oven on a baking sheet for 5 minutes, and that works reasonably well.
How flavors develop: Interestingly, the garlic flavor actually mellows and becomes sweeter after a day in the fridge. The lemon brightness fades, so if you’re eating leftovers, I recommend adding a fresh squeeze of lemon juice before serving.
Nutritional Information & Benefits
This crispy garlic green bean almondine is as nutritious as it is delicious. Here’s what you’re getting in a serving (about 1/4 of the recipe):
- Calories: Approximately 180
- Fat: 14g (mostly from heart-healthy almonds and butter)
- Carbohydrates: 10g
- Fiber: 4g
- Protein: 4g
- Vitamin K: 25% of daily value (from green beans)
- Vitamin E: 15% of daily value (from almonds)
Health benefits: Green beans are packed with vitamin K, which supports bone health, and vitamin C for immune function. Almonds provide healthy monounsaturated fats and vitamin E, a powerful antioxidant. Garlic has been shown to support heart health and has anti-inflammatory properties. This dish is naturally gluten-free and can be made dairy-free with a simple swap.
Dietary considerations: If you’re watching your sodium, use unsalted butter and go light on the added salt. The almonds and garlic provide plenty of flavor on their own. For a lower-fat version, reduce the butter to 2 tablespoons and use cooking spray for the initial sear—the texture won’t be quite as luxurious, but it’ll still be tasty.
Conclusion
This crispy garlic green bean almondine is the kind of recipe that makes you look like a kitchen hero without actually working that hard. It’s the side dish that steals the show, the vegetable recipe that even self-proclaimed veggie-haters ask for seconds of. Harriet would probably laugh if she knew how many times I’ve made her simple technique into a whole thing, but honestly, that’s what good recipes do—they travel from kitchen to kitchen, picking up little changes along the way.
I encourage you to make this your own. Maybe you’ll add extra garlic like I do, or maybe you’ll discover that a pinch of smoked paprika takes it somewhere amazing. Play with it. That’s the whole point of cooking. And when you do make it, I’d love to hear how it turned out. Drop a comment below or tag me in your photos—I genuinely get excited seeing these beans in other people’s kitchens. Go ahead, give it a try. Your weeknight dinners are about to get a whole lot more interesting.
Frequently Asked Questions
Can I use frozen green beans for this recipe?
I don’t recommend frozen green beans for this recipe. Frozen beans release too much water when they cook, which prevents them from getting crispy. If frozen is all you have, thaw them completely and pat them very dry with paper towels before cooking. The texture won’t be quite as good, but it’ll still be tasty.
How do I keep the garlic from burning?
The key is adding the garlic after the beans have had their initial sear, and keeping the heat at medium rather than high. Stir the garlic constantly once it hits the pan. If it starts browning too quickly, remove the pan from the heat for a few seconds. Thin, even slices also help them cook uniformly.
Can I make this ahead of time for a party?
This dish is best fresh, but you can prep everything ahead. Wash and trim the beans, slice the garlic, and measure your almonds up to a day in advance. Store the prepped ingredients separately in the refrigerator. Then all you have to do is cook them right before serving—it takes less than 10 minutes.
What’s the best way to trim green beans quickly?
Line up a handful of beans on your cutting board with the stem ends aligned. Use your chef’s knife to cut off all the stems at once. This is much faster than trimming them one by one. I learned this trick from a restaurant cook, and it saves so much time.
Can I add other vegetables to this dish?
Absolutely! This technique works well with asparagus, snap peas, or broccolini. Just adjust the cooking time based on the vegetable’s thickness. Thinner vegetables like snap peas need about 4 minutes total, while thicker asparagus might need 6-7 minutes. Keep the garlic and almond proportions the same.
Pin This Recipe!
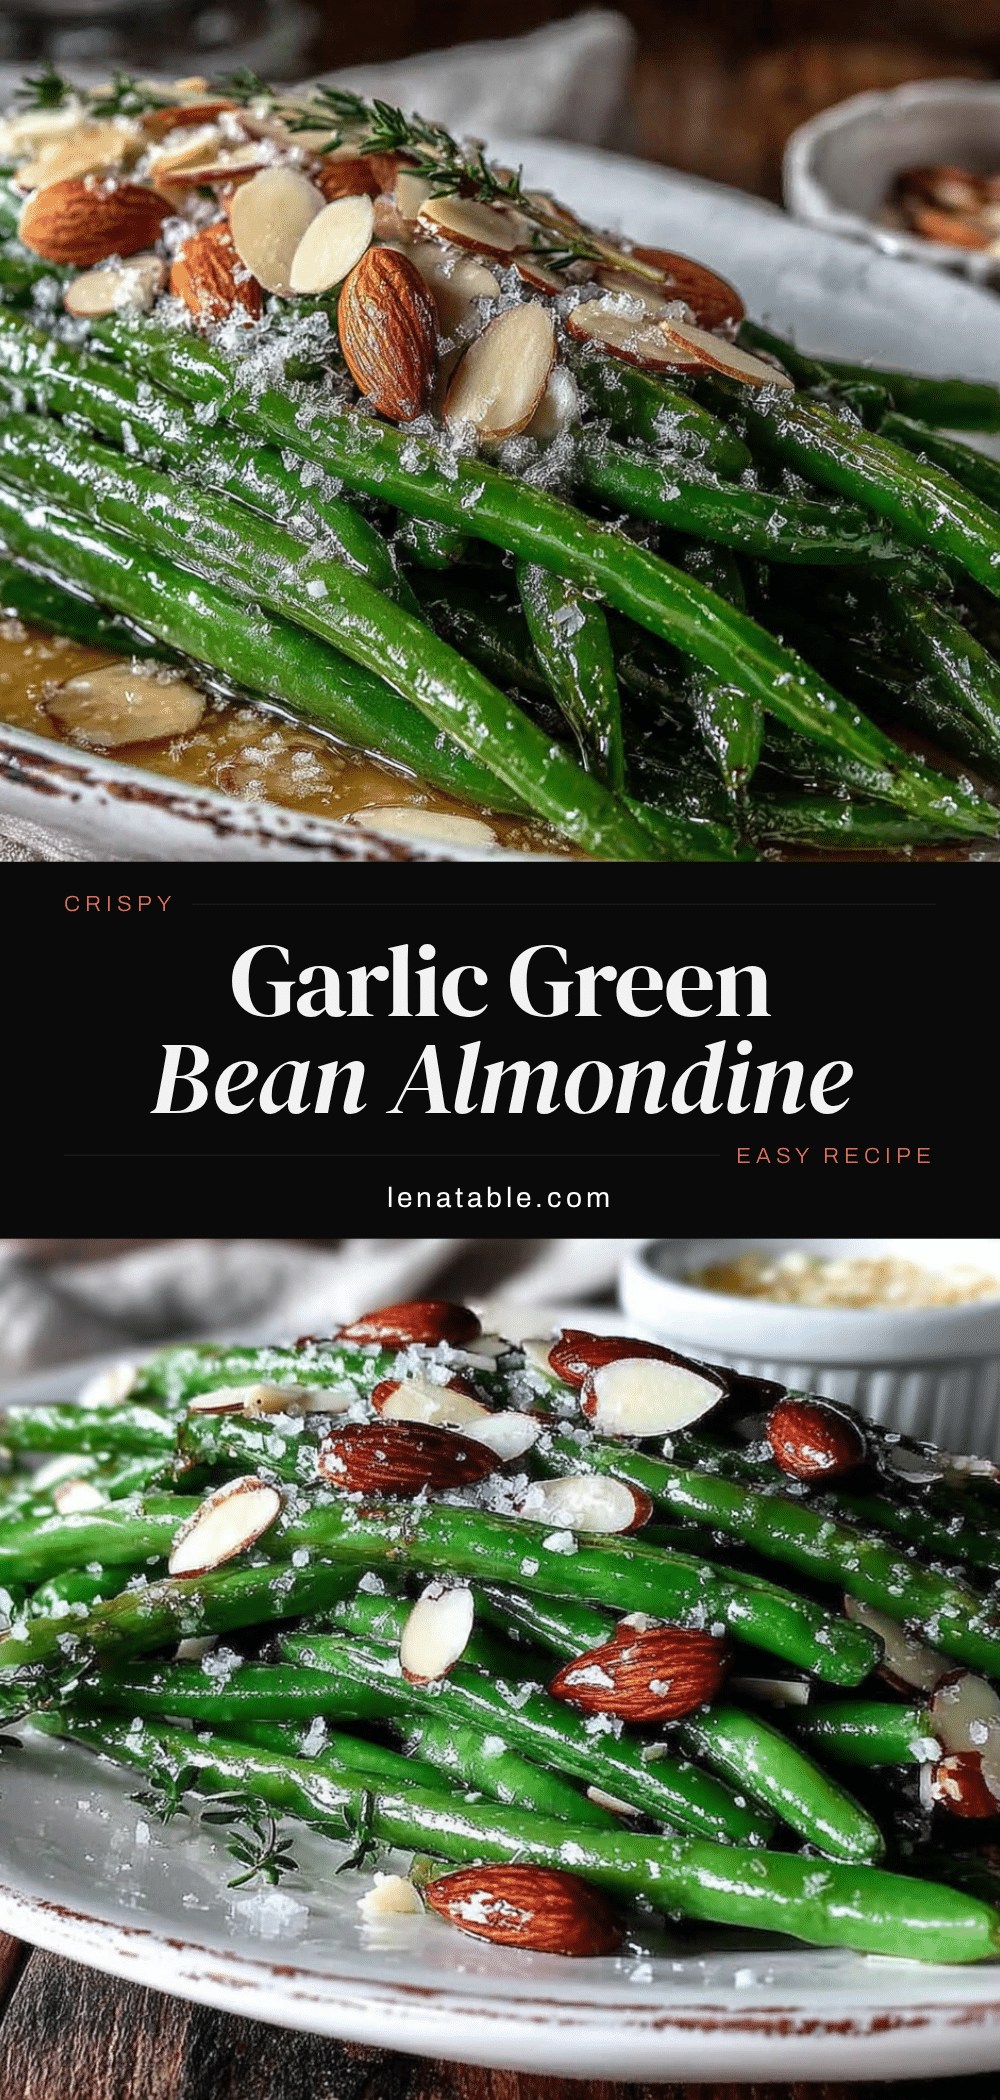
Easy Crispy Garlic Green Bean Almondine Recipe
A quick and easy side dish featuring tender-crisp green beans seared in browned butter with crispy garlic and toasted almonds. Perfect for weeknight dinners or holiday feasts.
- Prep Time: 10 minutes
- Cook Time: 10 minutes
- Total Time: 20 minutes
- Yield: 4 servings 1x
- Category: Side Dish
- Cuisine: American
Ingredients
- 1 pound (450g) fresh green beans, trimmed
- 3 tablespoons (42g) unsalted butter
- 4 large cloves garlic, thinly sliced
- 1/3 cup (30g) sliced almonds
- 1 tablespoon (15ml) extra-virgin olive oil
- 1 tablespoon (15ml) fresh lemon juice
- 1/2 teaspoon (3g) fine sea salt, plus more to taste
- 1/4 teaspoon (1g) freshly ground black pepper
- 1/4 teaspoon red pepper flakes (optional)
- Lemon zest from 1 lemon (optional)
Instructions
- Prep your green beans: Wash and dry thoroughly. Trim stem ends, leaving tails intact. If long, snap in half.
- Slice garlic: Peel and slice 4 cloves as thinly as possible for even cooking.
- Heat pan: Place a large cast-iron skillet over medium-high heat. Add olive oil and heat until shimmering, about 30 seconds.
- Add butter: Add 2 tablespoons butter, swirling until melted and foamy. Cook until nutty aroma and golden-brown specks appear.
- Sear green beans: Add dried beans in a single layer. Cook undisturbed for 2 minutes, then toss and cook another 2 minutes until bright green with charred edges and slight crunch.
- Add garlic and almonds: Push beans to one side. Add remaining 1 tablespoon butter. Once melted, add sliced garlic and almonds. Stir for about 1 minute until garlic is golden and almonds fragrant.
- Combine: Toss beans with garlic and almonds. Cook 30 seconds more.
- Finish with lemon: Remove from heat. Squeeze lemon juice over top, add lemon zest if using. Season with salt, pepper, and red pepper flakes. Toss once more.
- Serve immediately: Transfer to a platter or bowl. Best enjoyed fresh and crispy.
Notes
For best texture, ensure green beans are thoroughly dried before cooking to avoid steaming. Do not overcrowd the pan; cook in batches if needed. Garlic can burn quickly, so watch carefully. Serve immediately for maximum crispiness. Leftovers can be stored in an airtight container in the refrigerator for up to 2 days; reheat in a hot skillet with a splash of water or broth.
Nutrition
- Serving Size: 1/4 of recipe
- Calories: 180
- Sugar: 4
- Sodium: 300
- Fat: 14
- Saturated Fat: 6
- Carbohydrates: 10
- Fiber: 4
- Protein: 4
Keywords: green bean almondine, crispy garlic green beans, easy green bean recipe, quick side dish, holiday side dish, gluten-free, vegetarian