Love this? Save it for later!
Share the inspiration with your friends
My neighbor, a retired schoolteacher named Carol, wasn’t trying to impress anyone that Tuesday. I had stopped by to return her hedge clippers, and the smell hit me before I even made it to her screen door. It was this rich, savory, almost nutty aroma that stopped me mid-stride. I stood there for a second, just breathing it in, wondering if she’d taken up professional cooking as a hobby. When she opened the door, she was wiping her hands on a dish towel and looked almost annoyed at the interruption. “Oh, it’s nothing,” she said when I asked what smelled so incredible. “Just some chicken thighs I’m throwing together. Takes twenty minutes.” She said it like it was a chore, like she was just trying to get dinner on the table before her nightly crossword puzzle. But let me tell you, that “nothing” was everything. I watched her move around her tiny kitchen, tossing a few things into a pan with the kind of casual confidence you only get from years of practice. She wasn’t measuring, wasn’t stressing. She was just… cooking. And the result was the most flavorful, juicy chicken I’d had in months. I practically begged her for the rough idea of what she did, and honestly, I’ve been making some version of it ever since. Maybe you’ve been there—you stumble upon a dish that’s so simple, so unassuming, yet it becomes a permanent fixture in your weekly rotation. That’s what this Easy One-Pan Garlic Butter Chicken Thighs recipe is for me. It’s the weeknight hero I didn’t know I needed, born from a neighbor’s casual Tuesday night dinner.
Why You’ll Love This Recipe
Let’s be real for a second. After a long day, the last thing you want is a recipe with a mile-long ingredient list and a sink full of dirty dishes. This recipe was born from that exact reality. I’ve tested it a dozen times, tweaking the heat levels and the garlic quantity, to make sure it’s absolutely foolproof for even the most exhausted cook. It’s the kind of meal that makes you feel like you’ve got your life together, even if you’re eating it straight out of the pan while standing at the counter.
- Quick & Easy: From start to finish, you’re looking at about 30 minutes. Perfect for those nights when you walk in the door and need dinner on the table, like, yesterday.
- Simple Ingredients: This is a pantry-friendly champion. Chicken, butter, garlic, and a few basic seasonings are all you need. No fancy grocery store trips required.
- Perfect for Busy Weeknights: This is the definition of a low-effort, high-reward meal. It’s designed for the 6 PM scramble when energy is low and hunger is high.
- Crowd-Pleaser: The rich, savory flavor of garlic butter is universally loved. Even picky eaters tend to go back for seconds.
- Unbelievably Delicious: The chicken skin gets perfectly crispy, while the meat stays juicy and tender. The pan sauce is liquid gold, perfect for sopping up with crusty bread or rice.
What makes this different from every other chicken thigh recipe out there? It’s the technique. By searing the chicken skin-side down first without moving it, you build an incredible crust. Then, you finish it all in one pan, letting the garlic butter sauce infuse every bite. It’s not just another version—it’s the version that respects your time and your taste buds. This is the recipe you’ll turn to when you need a guaranteed win on a Tuesday night.
What Ingredients You Will Need
This recipe relies on a handful of quality ingredients to create something truly special. The magic is in the simplicity, so each component plays a key role in building that rich, savory flavor.
- Bone-in, Skin-on Chicken Thighs (4-6 thighs, about 2 lbs / 900g): This is non-negotiable for the best results. The bone keeps the meat moist during cooking, and the skin renders fat that becomes gloriously crispy. I recommend looking for thighs that are roughly the same size so they cook evenly. If you only have boneless, skinless thighs, reduce the cooking time by about 5-7 minutes, but you’ll miss out on that amazing crispy skin.
- Unsalted Butter (4 tablespoons / 56g): We’re using unsalted so we can control the salt level. The butter is the base of our sauce and adds incredible richness. I’ve tested this with salted butter in a pinch, and it works fine—just be careful with how much extra salt you add.
- Garlic (6-8 cloves, minced): Fresh garlic is a must here. Pre-minced garlic from a jar won’t give you the same punch of flavor. We’re using a generous amount because it mellows and sweetens as it cooks in the butter, creating a sauce that’s deeply aromatic.
- Chicken Broth (½ cup / 120ml): This deglazes the pan, lifting up all those delicious browned bits from the bottom. It creates the foundation for our pan sauce. Use a low-sodium broth if you can, so you have more control over the final saltiness.
- Fresh Parsley (2 tablespoons, chopped): A sprinkle of fresh parsley at the end adds a pop of color and a fresh, clean flavor that cuts through the richness of the butter and garlic. It’s a small touch that makes a big difference.
- Salt and Black Pepper (to taste): Simple seasonings are all you need. Don’t be shy with the salt and pepper on the chicken skin—it’s what helps create that perfect crust.
- Optional: Red Pepper Flakes (¼ teaspoon): If you like a little heat, add a pinch of red pepper flakes along with the garlic. It adds a subtle warmth without making the dish spicy.
- Optional: Lemon Juice (1 tablespoon): A squeeze of fresh lemon juice right at the end can brighten up the whole dish. I often do this if I’m serving it with something rich like mashed potatoes.
Equipment Needed
One of the best things about this recipe is that it doesn’t require a lot of fancy equipment. I’ve made it in several different kitchens, and the results are always great as long as you have the right pan.
- Large Oven-Safe Skillet (10-12 inches / 25-30cm): A cast-iron skillet is my first choice because it holds heat so well and gives you that beautiful sear. A heavy-bottomed stainless steel pan works perfectly too. Avoid non-stick skillets if you can—they don’t get hot enough for a good sear.
- Tongs: You’ll need these to flip the chicken and handle it in the hot pan. They give you much better control than a fork, which can tear the skin.
- Cutting Board and Chef’s Knife: For mincing the garlic and chopping the parsley. A sharp knife makes this prep work quick and painless.
- Measuring Spoons and Liquid Measuring Cup: For accuracy, especially with the broth and butter. I’ve eyeballed the broth before, and the sauce ended up too thin.
- Meat Thermometer (optional but recommended): This takes the guesswork out of cooking chicken. The USDA recommends an internal temperature of 165°F (74°C) for chicken thighs, though I often pull them at 170-175°F (77-80°C) for the most tender texture.
Preparation Method
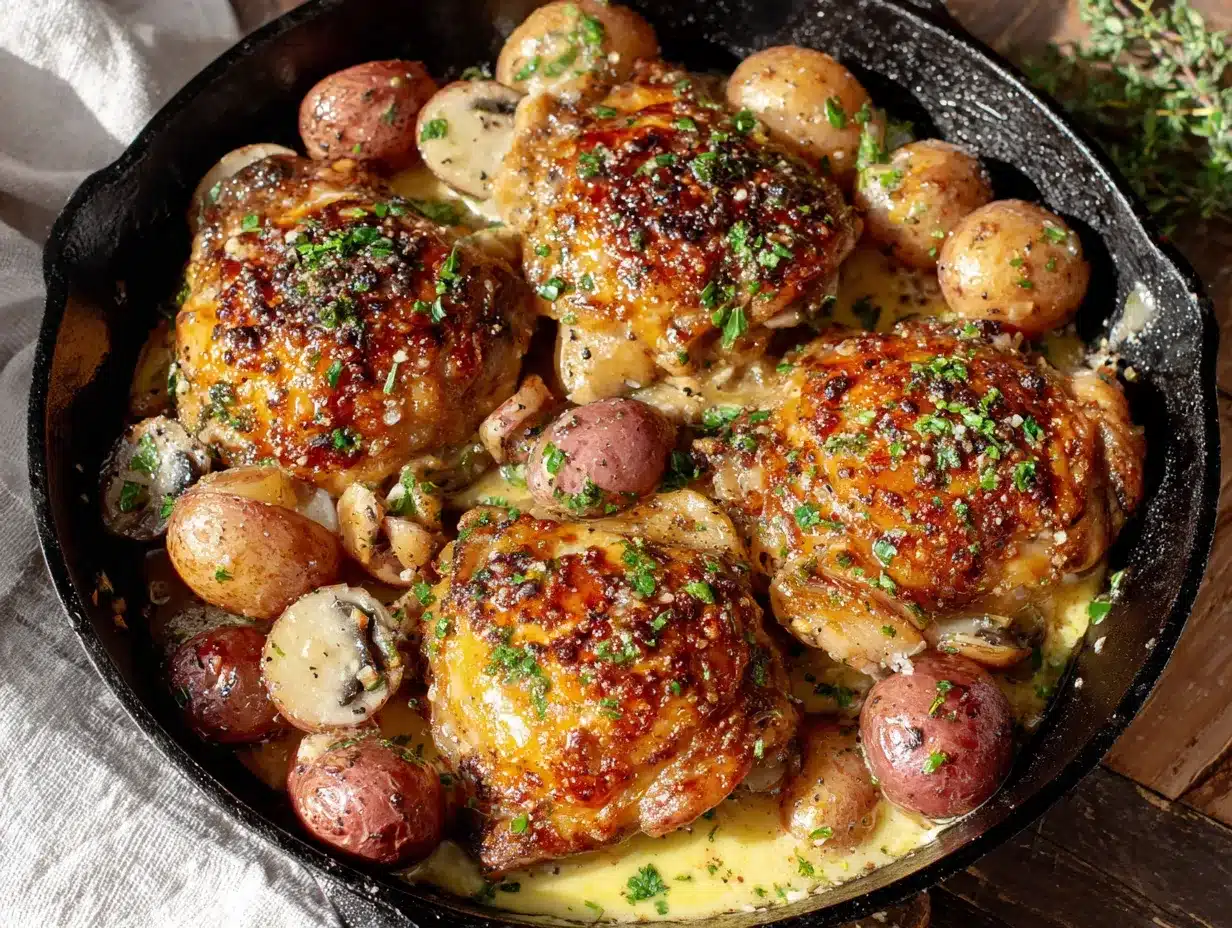
Alright, let’s get cooking. This comes together fast, so I like to have everything prepped and ready to go before I turn on the heat. Trust me, once that chicken hits the pan, you won’t want to be running around looking for the pepper grinder.
- Prep the Chicken (5 minutes): Take your chicken thighs out of the fridge about 15 minutes before you start cooking to take the chill off. Pat them very dry with paper towels—this is the most important step for crispy skin. Season generously on all sides with salt and black pepper. Don’t be shy here; most of the seasoning will stay in the pan.
- Start the Sear (10 minutes): Place your large skillet over medium-high heat and let it get hot for a good 2-3 minutes. Add 1 tablespoon of the butter and let it melt and sizzle. Carefully place the chicken thighs skin-side down in the pan. Important: Do not move them! Let them cook undisturbed for 6-8 minutes. You’ll see the skin turn a deep golden brown. This is where all the flavor is built. The sizzle should be steady but not violent—if it’s smoking, your heat is too high.
- Flip and Finish (10 minutes): Using your tongs, flip the chicken thighs over. The skin should be a beautiful mahogany color. Add the remaining 3 tablespoons of butter to the pan around the chicken. Once it melts, add the minced garlic (and red pepper flakes if using). Cook for about 30 seconds until fragrant, stirring the garlic into the butter. Be careful not to burn the garlic! Pour in the chicken broth. Let the sauce come to a simmer. Reduce the heat to medium-low, cover the pan, and let the chicken cook for another 8-10 minutes, or until it reaches an internal temperature of 170-175°F (77-80°C). The sauce will reduce slightly and become glossy.
- Rest and Garnish (5 minutes): Once the chicken is cooked through, remove the pan from the heat. Let the chicken rest in the pan for 5 minutes. This allows the juices to redistribute back into the meat. Spoon some of that glorious pan sauce over the top of each thigh. Sprinkle with the fresh chopped parsley and a squeeze of lemon juice if you’re using it. The sauce should be thick enough to coat the back of a spoon. If it’s too thin, you can simmer it for a minute or two without the lid on after you remove the chicken.
- Troubleshooting Tips: If your skin isn’t browning after 8 minutes, your pan might not have been hot enough. Next time, let it heat longer. If the garlic is burning before the chicken is done, your heat is too high—turn it down and add a splash more broth to cool things down. If the sauce looks greasy, it’s likely because the butter separated—whisk in a teaspoon of cold water or a tiny bit of Dijon mustard to emulsify it.
Cooking Tips & Techniques
I’ve learned a few things the hard way so you don’t have to. Let me share some hard-won wisdom from my many batches of this chicken.
- The Dry Skin Secret: I cannot stress this enough—pat those chicken thighs bone-dry. Even a little bit of moisture will create steam instead of a sear, and you’ll end up with pale, rubbery skin. I’ve literally left the chicken uncovered in the fridge for an hour before cooking to dry out the skin. It makes a world of difference.
- Don’t Crowd the Pan: If your skillet is too small and the thighs are touching, they’ll steam instead of sear. Use a pan that’s large enough to give each thigh a little breathing room. If you’re cooking for a crowd, sear the chicken in two batches. I learned this lesson when I tried to cram eight thighs into a 10-inch pan. The result was a sad, soggy mess.
- Master the “No-Touch” Rule: When you put the chicken in the pan skin-side down, walk away. Don’t poke it, don’t peek, don’t move it. The Maillard reaction (the browning process) needs uninterrupted contact with the hot pan to happen. If you try to flip it too early, the skin will tear and stick. You’ll know it’s ready when it releases easily from the pan.
- Timing is Everything: I like to start my side dish right after I flip the chicken. If I’m making rice, I’ll start it when the chicken goes in the pan. If I’m roasting vegetables, I’ll pop them in the oven when I start the sear. This way, everything finishes at the same time, and dinner is a seamless process.
- The Garlic Trick: Garlic can go from fragrant to burnt in about 15 seconds. I always have my broth measured and ready to go before I add the garlic. That way, I can pour it in immediately after the garlic becomes fragrant, stopping the cooking process and preventing any bitterness.
Variations & Adaptations
This recipe is a fantastic base, and I’ve played around with it quite a bit. Here are a few of my favorite twists when I’m in the mood for something a little different.
- Herb & Lemon Version: Add 2 sprigs of fresh rosemary and 3-4 sprigs of thyme to the pan along with the garlic. Replace half the chicken broth with fresh lemon juice. The herbs infuse the butter with an earthy, aromatic flavor that pairs beautifully with the lemon. I made this for Easter brunch once, and it was a huge hit.
- Creamy Garlic Butter Chicken: After the chicken is cooked and resting, remove it from the pan. Stir in ¼ cup (60ml) of heavy cream into the pan sauce. Let it simmer for 2-3 minutes until it thickens into a luscious, creamy gravy. Return the chicken to the pan to coat. This version is incredibly indulgent and perfect for a cold winter night.
- Spicy Honey Garlic Chicken: Add 1 tablespoon of honey and ½ teaspoon of cayenne pepper (or more to taste) to the pan sauce along with the broth. The sweetness of the honey balances the heat from the cayenne, creating a sticky, sweet-spicy glaze on the chicken. This is my go-to when I’m craving something with a little kick.
- One-Pan Veggie Addition: After flipping the chicken, add 2 cups of halved Brussels sprouts or green beans to the pan around the chicken. They’ll cook in the rendered chicken fat and garlic butter sauce, becoming tender and caramelized. This turns the dish into a complete one-pan meal with zero extra cleanup.
- Dairy-Free Adaptation: Substitute the butter with a high-quality vegan butter or ghee (if lactose is the issue). Use olive oil for the initial sear and add the vegan butter with the garlic. The flavor profile will change slightly, but it’s still incredibly delicious.
Serving & Storage Suggestions
This chicken is incredibly versatile when it comes to serving. I’ve eaten it alongside everything from simple steamed rice to a fancy arugula salad.
- Serving Temperature and Presentation: Serve the chicken hot, straight from the pan. I like to arrange the thighs on a platter and spoon the remaining pan sauce over the top. A sprinkle of fresh parsley and a few lemon wedges on the side make for a beautiful, rustic presentation. The sizzling sound when you pour the sauce over the chicken is pure dinner theater.
- What to Serve With It: The pan sauce is begging for something to soak it up. Mashed potatoes are my top choice—the creamy texture is a perfect match for the rich sauce. Crusty bread for dipping is a close second. For a lighter option, serve it over a bed of fluffy rice, quinoa, or alongside roasted asparagus or a simple green salad with a lemon vinaigrette.
- Storage Instructions: Store any leftovers in an airtight container in the refrigerator for up to 3 days. The flavors actually meld together overnight, making the leftovers even more delicious. I’ve been known to make a double batch just for this reason.
- Reheating Methods: The best way to reheat is in a skillet over medium-low heat. Add a splash of chicken broth or water to the pan to refresh the sauce, cover, and heat for 5-7 minutes, flipping halfway through. This method helps the skin re-crisp a bit. Avoid the microwave if you can—it will make the skin soggy and the chicken tough.
- Freezer Instructions: You can freeze the cooked chicken and sauce for up to 3 months. Let it cool completely, then transfer to a freezer-safe container. To thaw, place it in the refrigerator overnight. Reheat using the skillet method described above. The texture of the skin won’t be as crispy after freezing, but the flavor will still be fantastic.
Nutritional Information & Benefits
While this is definitely a comfort food dish, it does have some surprising nutritional benefits, especially if you’re mindful of your portions.
- Estimated Nutritional Values (per serving, based on 4 servings): Calories: 450-550, Fat: 35g, Saturated Fat: 15g, Protein: 35g, Carbohydrates: 4g, Fiber: 0g, Sugar: 1g, Sodium: 600-800mg (depending on broth and added salt).
- Health Benefits of Key Ingredients: Chicken thighs are a great source of high-quality protein, which is essential for muscle repair and satiety. They also contain iron and zinc. Garlic is well-known for its immune-boosting properties and contains compounds that may help reduce blood pressure. Butter, in moderation, provides fat-soluble vitamins like A, D, and E.
- Dietary Considerations: This recipe is naturally gluten-free and low-carb/keto-friendly. For a lower-fat option, you can use boneless, skinless chicken thighs and reduce the butter to 2 tablespoons, but you’ll lose some of the richness and crispy skin. As noted in the variations, it can be made dairy-free with a simple swap.
- Potential Allergens: This recipe contains dairy (butter). It is free from nuts, eggs, soy, and gluten (if using a gluten-free broth). Always check your specific ingredient labels to be sure.
- My Wellness Perspective: I believe in balance. This isn’t a “health food,” but it’s a real, satisfying meal made from whole ingredients. Cooking with butter and enjoying a rich sauce is part of a healthy relationship with food. The key is portion control and pairing it with a generous serving of vegetables.
Frequently Asked Questions
Can I use chicken breasts instead of thighs?
Yes, you can, but you’ll need to adjust the cooking time. Boneless, skinless chicken breasts will cook much faster, about 5-7 minutes per side. Be very careful not to overcook them, as they can dry out quickly. I recommend using a meat thermometer and pulling them at 160°F (71°C), as they will continue to cook while resting.
My chicken skin isn’t getting crispy. What did I do wrong?
The most common culprit is moisture. Make sure you pat the chicken thighs extremely dry with paper towels before seasoning. Another reason could be that your pan wasn’t hot enough when you added the chicken. Let the pan heat over medium-high heat for a full 2-3 minutes before adding the butter and chicken. Finally, don’t crowd the pan—the chicken needs space to sear, not steam.
Can I make this recipe in advance?
Absolutely. You can cook the chicken completely, let it cool, and store it in the fridge for up to 3 days. The flavors will deepen overnight. To reheat, follow the skillet method I described in the storage section. It’s a fantastic meal prep option for busy weeks.
How do I prevent the garlic from burning?
Garlic burns very quickly in hot butter. The key is to add it to the pan only after you’ve flipped the chicken and the heat is lowered. Cook it for just 30 seconds until it’s fragrant, then immediately add the chicken broth. The liquid will stop the cooking process and prevent the garlic from turning bitter and black.
Can I add vegetables to make it a complete one-pan meal?
Yes! This is one of my favorite ways to use this recipe. After you flip the chicken and add the garlic and broth, toss in some hardy vegetables like halved Brussels sprouts, green beans, or thickly sliced zucchini. They’ll cook in the delicious pan juices and become perfectly tender. Just make sure you cut them into uniform sizes so they cook evenly.
Conclusion
Honestly, this Easy One-Pan Garlic Butter Chicken Thighs recipe is the kind of dish that makes you feel like a kitchen hero with almost no effort. It’s simple, it’s fast, and it delivers flavor that tastes like it took hours. I love it because it gets me out of the kitchen and back to my family in under 30 minutes, with a meal that everyone actually gets excited about. The crispy skin, the juicy meat, that glossy garlic butter sauce—it’s weeknight perfection. I hope you give it a try and make it your own. Maybe you’ll add a little more garlic (I always do), or a squeeze of lemon, or serve it over your favorite pasta. Whatever you do, let me know how it turns out! Drop a comment below, share a photo of your creation, or tell me your favorite side dish to serve with it. I love hearing from you and seeing how these recipes come to life in your kitchens. Happy cooking!
Pin This Recipe!

Easy One-Pan Garlic Butter Chicken Thighs

This Easy One-Pan Garlic Butter Chicken Thighs recipe is the weeknight hero you didn’t know you needed. It’s a simple, fast, and flavorful dish with crispy skin, juicy meat, and a glossy garlic butter sauce, all made in one pan in about 30 minutes.
- Prep Time: 5 minutes
- Cook Time: 25 minutes
- Total Time: 30 minutes
- Yield: 4 servings 1x
- Category: Main Course
- Cuisine: American
Ingredients
- 4–6 bone-in, skin-on chicken thighs (about 2 lbs / 900g)
- 4 tablespoons (56g) unsalted butter
- 6–8 cloves garlic, minced
- ½ cup (120ml) low-sodium chicken broth
- 2 tablespoons fresh parsley, chopped
- Salt and black pepper to taste
- ¼ teaspoon red pepper flakes (optional)
- 1 tablespoon lemon juice (optional)
Instructions
- Prep the Chicken (5 minutes): Take chicken thighs out of the fridge 15 minutes before cooking. Pat very dry with paper towels. Season generously on all sides with salt and black pepper.
- Start the Sear (10 minutes): Place a large oven-safe skillet over medium-high heat for 2-3 minutes. Add 1 tablespoon butter and let it melt. Place chicken thighs skin-side down in the pan. Do not move them. Cook undisturbed for 6-8 minutes until skin is deep golden brown.
- Flip and Finish (10 minutes): Flip chicken thighs. Add remaining 3 tablespoons butter to the pan. Once melted, add minced garlic (and red pepper flakes if using). Cook for 30 seconds until fragrant. Pour in chicken broth. Bring to a simmer. Reduce heat to medium-low, cover, and cook for 8-10 minutes until internal temperature reaches 170-175°F (77-80°C).
- Rest and Garnish (5 minutes): Remove pan from heat. Let chicken rest in pan for 5 minutes. Spoon pan sauce over each thigh. Sprinkle with fresh parsley and lemon juice if using.
Notes
Pat chicken thighs bone-dry for crispy skin. Do not crowd the pan. Do not move chicken while searing. Have broth ready before adding garlic to prevent burning. For a dairy-free version, substitute butter with vegan butter or ghee.
Nutrition
- Serving Size: 1 serving (1-2 thigh
- Calories: 500
- Sugar: 1
- Sodium: 700
- Fat: 35
- Saturated Fat: 15
- Carbohydrates: 4
- Protein: 35
Keywords: garlic butter chicken, one-pan chicken, chicken thighs, easy weeknight dinner, crispy chicken, garlic butter sauce


