Love this? Save it for later!
Share the inspiration with your friends
“I wasn’t actually planning on baking biscuits that afternoon,” I admit. It was a lazy Sunday in early spring, and the power had flickered off just as I was about to dive into a novel. The kitchen was quiet except for the faint ticking of the old wall clock—one of those moments where you just want something comforting without fuss. That’s when I found a crumpled, flour-dusted recipe card tucked inside a battered cookbook I’d grabbed from a garage sale months ago. It was titled simply: ‘Grandma’s Buttermilk Biscuits.’ Honestly, I wasn’t expecting much. But as I mixed the dough with my hands, feeling that familiar cold butter crumble into the flour, something told me these biscuits would be special.
Maybe it was the way the dough felt, cool and slightly sticky, or the way the kitchen started to smell warm and buttery, but when these biscuits came out golden and fluffy, I knew they were going to be a keeper. Let me tell you, the first bite was like a soft cloud with a hint of tangy buttermilk that made me close my eyes in sheer delight. The recipe promised biscuits that would rise perfectly every time, and it didn’t lie. I’ve made countless biscuits before, but these? They stole the show. If you’ve ever struggled with flat, tough biscuits, maybe you’ve been there—frustrated and wondering if that perfect fluffy biscuit was just a myth. Well, this recipe changed all that for me, and I bet it will for you too.
So, here I am, sharing this gem that feels like a secret handshake among biscuit lovers. It’s simple, reliable, and honestly, a little bit addictive. I hope as you read through, you’ll feel like you’re right there in the kitchen with me, getting that warm, buttery comfort you just can’t get enough of.
Why You’ll Love This Recipe
Having tested many biscuit recipes in my years of kitchen adventures, I can say this one stands out for a few solid reasons. It’s not just another buttermilk biscuit recipe—it’s a tried-and-true formula that nails that perfect rise and fluffy texture every single time. Whether you’re a biscuit rookie or a seasoned pro, this recipe will win you over with its consistent results.
- Quick & Easy: Coming together in under 30 minutes, it’s perfect for those busy mornings or last-minute brunch plans.
- Simple Ingredients: No fancy or hard-to-find items here—you probably have everything on hand already, which is a huge win.
- Perfect for Cozy Gatherings: Whether it’s a family breakfast or a casual weekend potluck, these biscuits always impress without the stress.
- Crowd-Pleaser: Kids, adults, even picky eaters tend to ask for seconds—there’s something about that fluffy, buttery bite they just can’t resist.
- Unbelievably Delicious: The balance of tender crumb and flaky layers makes it a comforting treat that you’ll want to make again and again.
What makes this recipe different? It’s the method—folding in cold butter just right and using buttermilk’s tang to activate the leavening agents gently but effectively. No weird shortcuts or gimmicks, just a classic approach that works. Honestly, this recipe isn’t just food—it’s a little moment of joy, one biscuit at a time.
What Ingredients You Will Need
This recipe calls for straightforward, wholesome ingredients that come together to create that perfect fluffy texture and rich flavor. Most of these are pantry staples, so you won’t need a special trip to the store.
- All-Purpose Flour – 2 cups (240g), sifted for lightness (I prefer King Arthur for consistent results)
- Baking Powder – 1 tablespoon (acts as a primary leavening agent)
- Baking Soda – ½ teaspoon (works with buttermilk for rise)
- Salt – 1 teaspoon (balances the flavors)
- Unsalted Butter – ½ cup (113g), very cold and cut into small cubes (cold butter is key for flaky layers)
- Buttermilk – ¾ cup (180ml), cold (the acid reacts with baking soda for tender biscuits)
- Optional: Honey or Sugar – 1 teaspoon (for a touch of sweetness, but I usually skip it)
You can swap all-purpose flour for a gluten-free blend if needed, though the texture will vary slightly. For dairy-free options, try coconut oil in place of butter and use almond or oat milk with a splash of vinegar instead of buttermilk. But honestly, the traditional combo is hard to beat.
Equipment Needed
- Mixing Bowl: A large bowl for combining dry and wet ingredients comfortably.
- Biscuit Cutter: A 2.5-inch round cutter works best for uniform biscuits. No cutter? Use a glass with a sharp edge.
- Pastry Blender or Fork: To cut cold butter into the flour. I’ve also used two knives crossed, and it works fine!
- Baking Sheet: A rimmed sheet lined with parchment paper or a silicone mat to prevent sticking.
- Oven: Preheated and reliable heat is essential for the biscuits to rise perfectly.
If you don’t have a pastry blender, your clean hands can work too—just be sure to keep the butter cold to get those flaky layers. And honestly, a good biscuit cutter makes the process feel a little more special, but improvising with kitchen tools is part of the fun.
Preparation Method
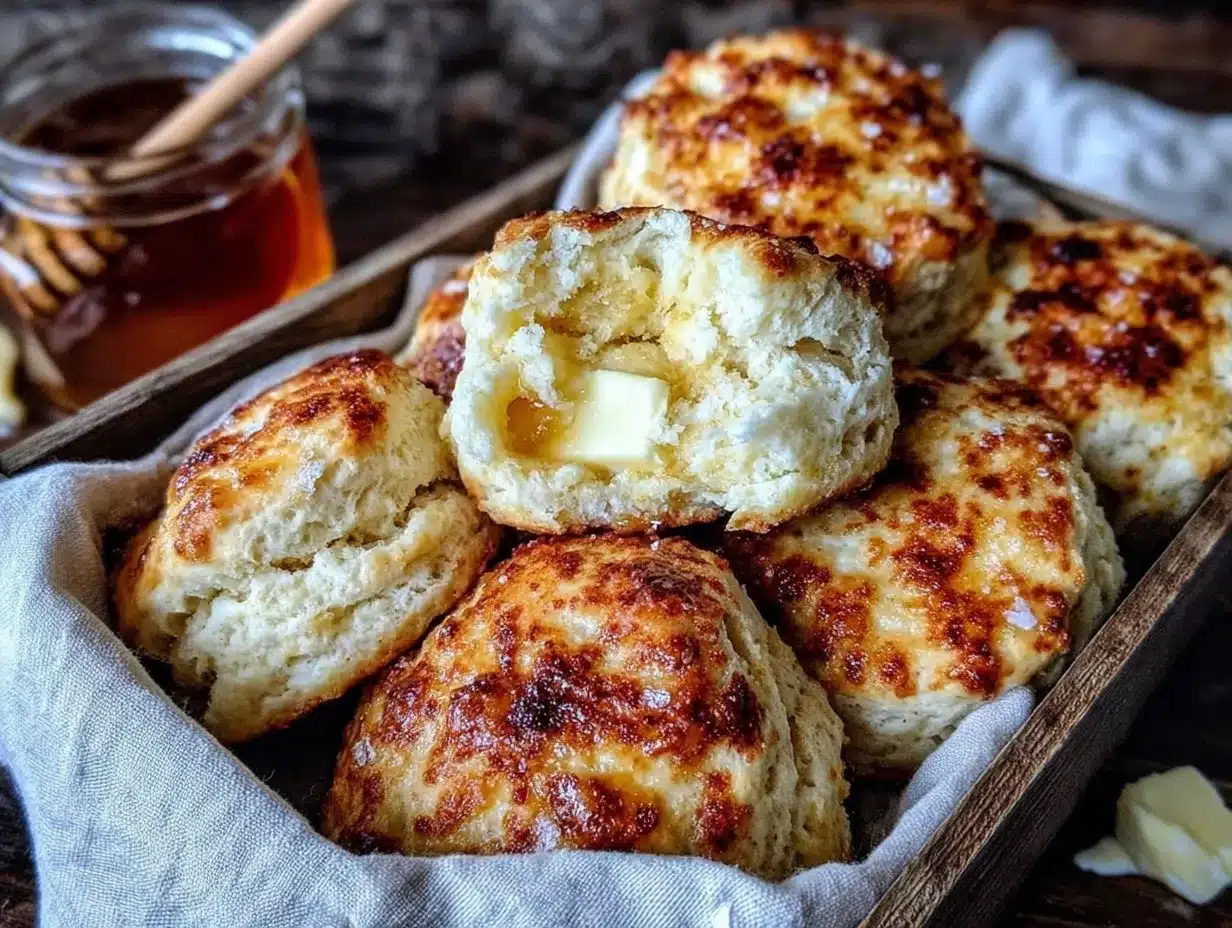
- Preheat your oven to 425°F (220°C). Place a rack in the middle position. This ensures consistent heat for that golden crust.
- Mix Dry Ingredients: In your large mixing bowl, sift together 2 cups (240g) all-purpose flour, 1 tablespoon baking powder, ½ teaspoon baking soda, and 1 teaspoon salt. Stir well to distribute everything evenly. This step helps the biscuits rise uniformly.
- Cut in the Butter: Add the cold, cubed ½ cup (113g) unsalted butter to the flour mixture. Using a pastry blender or fork, quickly cut the butter into the flour until the mixture resembles coarse crumbs, with pea-sized bits of butter visible. Don’t overwork it—you want some larger chunks for flakiness.
- Add the Buttermilk: Pour in ¾ cup (180ml) cold buttermilk all at once (add 1 teaspoon honey or sugar here if you like a hint of sweetness). Stir gently with a wooden spoon or spatula until the dough just comes together. It will look shaggy and a bit sticky, and that’s exactly right.
- Turn Out and Fold: Dump the dough onto a lightly floured surface. Using your hands, gently fold the dough over itself 3 to 4 times. Press it into a roughly 1-inch thick rectangle. This folding builds layers without overworking the dough, keeping the biscuits tender.
- Cut the Biscuits: Use a floured 2.5-inch biscuit cutter to press straight down into the dough without twisting (twisting seals the edges and can prevent rising). Gather scraps, gently re-fold once, and cut out more biscuits until dough is used.
- Place on Baking Sheet: Arrange the biscuits close but not touching on your parchment-lined baking sheet. This helps the sides stay soft while the tops get golden.
- Bake: Slide the tray into your preheated oven. Bake for 12-15 minutes, or until tops are golden brown and biscuits have puffed up beautifully.
- Cool Slightly and Serve: Remove from oven and let rest for 5 minutes. These are best served warm, slathered with butter or your favorite jam.
If your biscuits don’t rise perfectly the first time, don’t be discouraged—oven temperatures vary, and overmixing can toughen dough. Just handle it gently next time, and you’ll get there. I once forgot to preheat my oven properly, and the biscuits came out a bit flat, but the flavor was still there!
Cooking Tips & Techniques
One key to fluffy grandma’s buttermilk biscuits is the cold butter. If it melts before baking, biscuits turn dense. I always chill my butter and even pop the dough in the fridge for 10 minutes if my kitchen is warm. This helps keep those flaky layers intact.
Another tip: don’t twist your biscuit cutter when cutting. Twisting seals the dough edges, which can stop the biscuits from rising properly. Instead, press straight down and lift the cutter up cleanly.
Also, handle the dough as little as possible. Overworking activates gluten, making biscuits tough rather than tender. Folding the dough just a few times creates layers but keeps it light.
Keep an eye on baking time. Biscuits can go from golden to burnt quickly, so set your timer and watch the first batch carefully. If you want extra crisp tops, brush the biscuits with a little melted butter right after baking.
When multitasking, prep your dry ingredients ahead and keep butter chilled until mixing. It saves time and keeps your dough from warming too much. Honestly, this recipe is forgiving, but small details like these make a big difference in consistency.
Variations & Adaptations
Want to switch things up? Here are some simple ideas I’ve tried or recommend:
- Cheddar and Chive Biscuits: Fold in ½ cup shredded sharp cheddar and 2 tablespoons chopped fresh chives for a savory twist. Perfect for brunch or alongside chili.
- Gluten-Free Option: Swap all-purpose flour with a gluten-free blend suitable for baking. Texture will be slightly different, but still tasty and fluffy.
- Herb-Infused: Add 1 teaspoon dried rosemary or thyme to the dry mix for a fragrant biscuit that pairs wonderfully with roasted meats.
- Dairy-Free Version: Use coconut oil or vegan butter in place of butter, and substitute buttermilk with almond milk plus a tablespoon of lemon juice.
I once tried adding a spoonful of honey to the dough for a subtle sweetness, and it was a hit with my kids. Feel free to experiment! Just remember to keep the dough cool and handle gently so your biscuits rise perfectly every time.
Serving & Storage Suggestions
Grandma’s buttermilk biscuits are best served warm from the oven, slathered with butter, honey, or your favorite jam. They make an excellent side for breakfast dishes like scrambled eggs or crispy bacon, and pair beautifully with hearty stews or fried chicken for dinner.
To store, place cooled biscuits in an airtight container. They keep well at room temperature for up to two days or can be frozen for up to 3 months. When freezing, wrap them individually in plastic wrap and place in a freezer bag.
To reheat, pop frozen biscuits in a 350°F (175°C) oven for 10-12 minutes until warmed through and slightly crisp on the outside. Microwaving works in a pinch but can make them a bit chewy.
Flavors tend to deepen after a day or two, so if you can resist eating them all at once, leftovers can be even better.
Nutritional Information & Benefits
Each fluffy buttermilk biscuit contains approximately:
| Nutrient | Amount per Biscuit |
|---|---|
| Calories | 180-200 kcal |
| Fat | 9-11g (mostly from butter) |
| Carbohydrates | 22-25g |
| Protein | 3-4g |
| Sodium | 350-400mg |
Buttermilk adds a boost of calcium and probiotics, which can aid digestion, while butter contributes fat-soluble vitamins like A and D. If you’re watching carbs or dairy, consider the variations mentioned earlier. Overall, these biscuits strike a nice balance between indulgence and wholesome comfort.
Conclusion
Fluffy Grandma’s Buttermilk Biscuits are a timeless classic that brings a little piece of warmth and joy to any meal. This recipe is straightforward enough for beginners but yields results that even seasoned bakers will appreciate. What I love most is how it turns a few simple ingredients into golden, tender biscuits that rise perfectly every time—no guesswork, just good food.
Feel free to tweak the flavors or add your own twist, but trust me when I say, the basics here are magic. So, roll up your sleeves, grab your cold butter, and get ready to fill your kitchen with the smell of comforting, flaky goodness. And hey, once you’ve made these, you might find yourself reaching for the recipe card more often than you’d expect.
Don’t forget to share your biscuit stories or any fun variations you try—I’d love to hear how this recipe fits into your kitchen adventures!
FAQs
What makes these biscuits rise so well every time?
The combination of cold butter, proper folding technique, and the reaction between buttermilk and baking soda/powder creates the perfect rise and flaky texture.
Can I make the dough ahead of time?
Yes! You can mix the dough, shape the biscuits, then cover and refrigerate for up to 24 hours before baking. Just add a couple of extra minutes to the baking time if baking from cold.
How do I store leftover biscuits?
Keep them in an airtight container at room temperature for up to two days or freeze for longer storage. Reheat in the oven for best results.
Is there a substitute for buttermilk?
Yes, you can make a simple buttermilk substitute by adding 1 tablespoon of lemon juice or white vinegar to ¾ cup of milk and letting it sit for 5 minutes before using.
Why shouldn’t I twist the biscuit cutter?
Twisting seals the dough edges, which can stop biscuits from rising properly. Press straight down and lift straight up for the best rise.
Pin This Recipe!
Fluffy Grandma’s Buttermilk Biscuits

A classic, easy-to-make buttermilk biscuit recipe that yields perfectly fluffy, golden biscuits every time. Ideal for breakfasts, brunches, or cozy gatherings.
- Prep Time: 10 minutes
- Cook Time: 15 minutes
- Total Time: 25 minutes
- Yield: 8-10 biscuits 1x
- Category: Breakfast
- Cuisine: American
Ingredients
- 2 cups (240g) all-purpose flour, sifted
- 1 tablespoon baking powder
- ½ teaspoon baking soda
- 1 teaspoon salt
- ½ cup (113g) unsalted butter, very cold and cut into small cubes
- ¾ cup (180ml) cold buttermilk
- Optional: 1 teaspoon honey or sugar
Instructions
- Preheat your oven to 425°F (220°C). Place a rack in the middle position.
- In a large mixing bowl, sift together the flour, baking powder, baking soda, and salt. Stir well to combine.
- Add the cold, cubed butter to the flour mixture. Using a pastry blender or fork, cut the butter into the flour until the mixture resembles coarse crumbs with pea-sized bits of butter visible.
- Pour in the cold buttermilk all at once (add honey or sugar if using). Stir gently until the dough just comes together; it will be shaggy and slightly sticky.
- Turn the dough out onto a lightly floured surface. Gently fold the dough over itself 3 to 4 times and press into a roughly 1-inch thick rectangle.
- Use a floured 2.5-inch biscuit cutter to cut out biscuits by pressing straight down without twisting. Gather scraps, gently re-fold once, and cut more biscuits until dough is used.
- Place the biscuits close but not touching on a parchment-lined baking sheet.
- Bake for 12-15 minutes until the tops are golden brown and biscuits have puffed up.
- Remove from oven and let rest for 5 minutes before serving warm.
Notes
Keep butter very cold to ensure flaky layers. Do not twist the biscuit cutter when cutting to allow proper rising. Handle dough gently and fold only a few times to avoid tough biscuits. Optionally chill dough for 10 minutes if kitchen is warm.
Nutrition
- Serving Size: 1 biscuit
- Calories: 190
- Sugar: 1
- Sodium: 375
- Fat: 10
- Saturated Fat: 6
- Carbohydrates: 24
- Fiber: 1
- Protein: 3.5
Keywords: buttermilk biscuits, fluffy biscuits, homemade biscuits, easy biscuit recipe, southern biscuits, breakfast biscuits


