Love this? Save it for later!
Share the inspiration with your friends
“I don’t do no-bake desserts,” my friend Mark used to claim every time I’d suggest something chilled and easy. For years, he insisted that a dessert without the oven’s heat just couldn’t be worth the fuss. Then one Saturday afternoon, armed only with a reckless craving and a box of Oreos, I whipped up these Delicious No-Bake Oreo Cheesecake Brownies just for myself. A few hours later, I caught Mark sneaking back to the fridge—again and again—fork in hand, eyes wide with surprise. Honestly, watching him quietly devour these brownies was like witnessing a tiny personal victory. No fanfare, just a guy admitting, without words, that maybe, just maybe, no-bake desserts could win him over.
Maybe you’ve been there—skeptical of a recipe until it quietly proves you wrong. The magic here isn’t just in the creamy cheesecake layer or the rich brownie base; it’s in the way these layers come together without ever needing an oven. I remember the little mess I made trying to crush Oreos by hand (lesson learned: a zip-top bag and rolling pin are best friends), and how the kitchen filled with the sweet scent of crushed cookies and cream. This recipe stuck around because it’s simple, indulgent, and perfect for those days when you want something impressive but can’t face turning on the oven. Let me tell you, it’s the kind of dessert that sneaks up on you and steals the show every time.
Why You’ll Love This Recipe
After testing countless no-bake desserts, this recipe for Delicious No-Bake Oreo Cheesecake Brownies stands out for several reasons. It’s tried and true, family-approved, and chef-tested in my own kitchen (with a few messes along the way). Here’s why it could become your next go-to dessert:
- Quick & Easy: Comes together in under 30 minutes, making it perfect for busy weeknights or last-minute gatherings.
- Simple Ingredients: No fancy or hard-to-find items—just classic pantry staples and Oreos, which you probably already have lying around.
- Perfect for Any Occasion: Whether it’s a casual potluck, a holiday dessert table, or a weekend treat, these brownies fit right in.
- Crowd-Pleaser: Kids, adults, and even the notoriously picky dessert skeptics give it rave reviews.
- Unbelievably Delicious: The creamy cheesecake layer meets the fudgy brownie crust with crunchy Oreo pieces for a texture and flavor combo that’s seriously addictive.
What sets this recipe apart is that it balances indulgence with ease. The cheesecake layer is ultra-smooth thanks to a simple cream cheese and whipped topping blend, while the brownie base is rich yet light, avoiding any heavy or cakey textures. Plus, the Oreo pieces add that nostalgic crunch everyone loves. Honestly, it’s like comfort food with a fresh twist—no oven, no stress, just pure satisfaction every time.
What Ingredients You Will Need
This recipe uses simple, wholesome ingredients to deliver bold flavor and satisfying texture without the fuss. Most are pantry staples, and the Oreos add that signature cookie charm. Here’s what you’ll need:
- For the Brownie Base:
- Unsalted butter, melted (1/2 cup / 115g) – adds richness and helps bind the base
- Granulated sugar (1 cup / 200g) – for sweetness
- All-purpose flour (3/4 cup / 95g) – the structure of the brownie
- Cocoa powder, unsweetened (1/3 cup / 35g) – for that deep chocolate flavor, I recommend Ghirardelli
- Salt (1/4 teaspoon) – balances the sweetness
- Vanilla extract (1 teaspoon) – enhances the overall flavor
- For the Cheesecake Layer:
- Cream cheese, softened (8 oz / 225g) – use Philadelphia for best results
- Powdered sugar (1 cup / 120g) – for smooth sweetness
- Heavy whipping cream (1 cup / 240ml) – whipped to soft peaks for airy texture
- Vanilla extract (1 teaspoon) – for a gentle flavor lift
- For the Oreo Pieces:
- Oreos, roughly chopped (about 15 cookies) – classic or Double Stuf, based on your preference; I like Double Stuf for extra creaminess
If you prefer a dairy-free version, swap cream cheese with a vegan alternative and use coconut cream instead of heavy whipping cream. For gluten-free, you can substitute all-purpose flour with a gluten-free blend, though the texture will be slightly different. During summer, feel free to add fresh berries on top for a seasonal twist.
Equipment Needed
To make these Delicious No-Bake Oreo Cheesecake Brownies, you’ll need a handful of basic kitchen tools:
- 8×8 inch (20×20 cm) square baking pan – lined with parchment paper for easy removal
- Mixing bowls – one large for the batter, one medium for the cheesecake layer
- Electric mixer or stand mixer – highly recommended to whip the cream smoothly
- Spatula – for folding and spreading layers evenly
- Measuring cups and spoons – for precise ingredient amounts
- Rolling pin and zip-top bag (optional) – to crush Oreos easily without making a mess
If you don’t have an electric mixer, a sturdy whisk can work, but be prepared for a workout! For budget-friendly options, a hand mixer like the Hamilton Beach model is reliable and affordable. To keep your parchment paper from sliding, lightly grease the pan first. I’ve learned the hard way that a well-prepped pan makes all the difference when you’re not baking these brownies.
Preparation Method
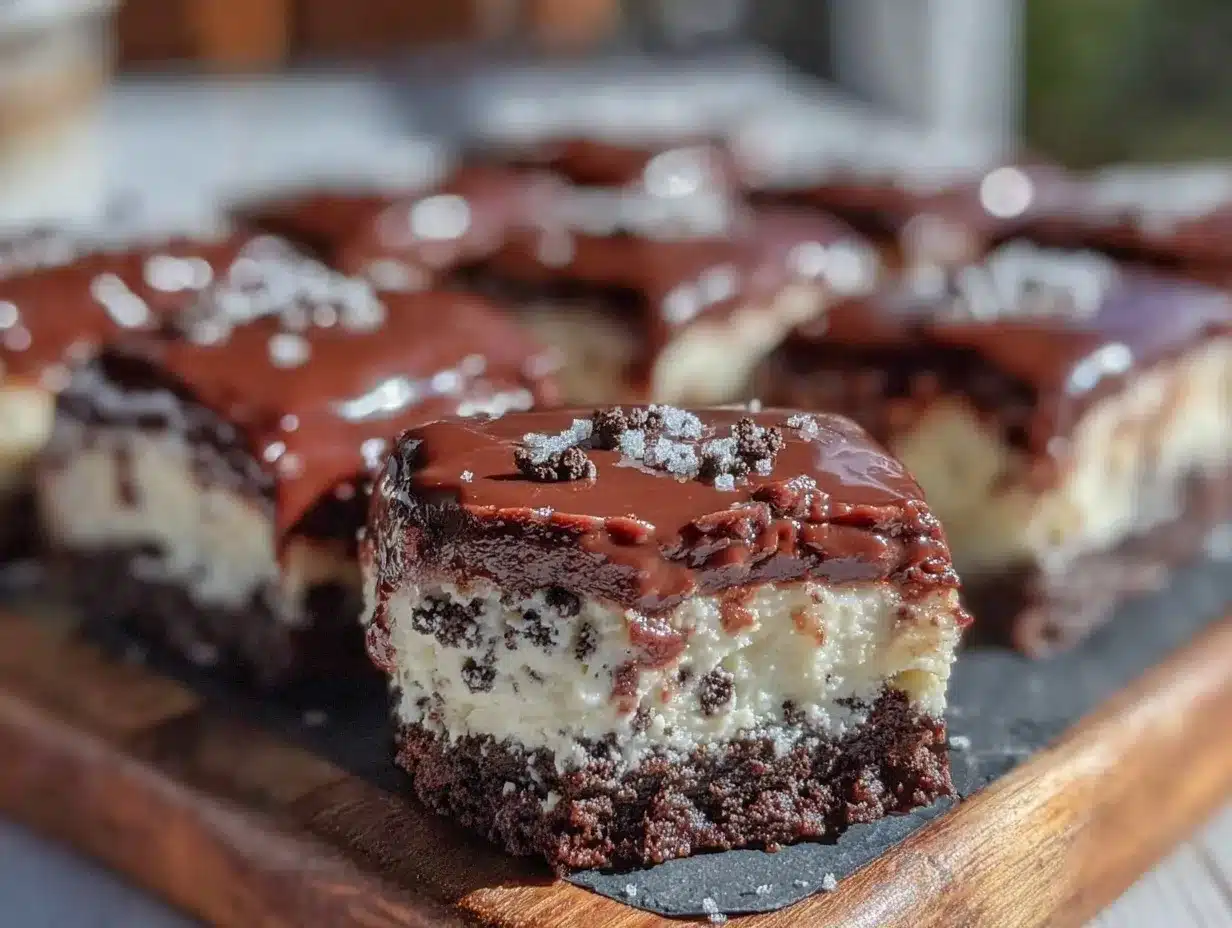
- Prepare the Brownie Base: In a large mixing bowl, combine 1/2 cup (115g) melted unsalted butter and 1 cup (200g) granulated sugar. Stir until smooth and glossy, about 2 minutes. Add 1 teaspoon vanilla extract and mix well.
- Add Dry Ingredients: Sift together 3/4 cup (95g) all-purpose flour, 1/3 cup (35g) unsweetened cocoa powder, and 1/4 teaspoon salt. Gradually fold the dry mix into the wet mixture using a spatula, mixing just until no streaks remain. Avoid overmixing to keep the base tender.
- Spread the Base: Pour the batter into your parchment-lined 8×8 inch pan and smooth the surface with the spatula. This step usually takes about 5 minutes. Place the pan in the refrigerator to chill while you prepare the cheesecake layer.
- Whip the Cream: In a medium bowl, beat 1 cup (240ml) heavy whipping cream with an electric mixer until soft peaks form. This should take about 3-4 minutes on medium-high speed. Be careful not to overwhip; the cream should be light and fluffy, not grainy.
- Mix the Cheesecake Layer: In a separate large bowl, beat 8 oz (225g) softened cream cheese with 1 cup (120g) powdered sugar and 1 teaspoon vanilla extract until smooth and creamy, roughly 2-3 minutes. Slowly fold the whipped cream into the cream cheese mixture, using a spatula and gentle motions to maintain airiness.
- Add Oreo Pieces: Reserve about 1/3 of your roughly chopped Oreos. Fold the remaining Oreo pieces into the cheesecake batter to distribute the cookie bits evenly.
- Assemble the Layers: Remove the brownie base from the fridge. Spread the cheesecake mixture evenly over the chilled base. Sprinkle the reserved Oreo pieces on top for a crunchy finish. This assembly takes roughly 10 minutes.
- Chill & Set: Cover the pan with plastic wrap and refrigerate for at least 4 hours or overnight. The chilling time is essential for the cheesecake layer to firm up and the flavors to meld beautifully.
- Serve: When ready, cut into squares using a sharp knife (warm the blade under hot water and dry it for cleaner cuts). Expect about 12 generous servings.
If you notice the cheesecake layer is too soft or runny before chilling, double-check that your cream cheese was fully softened and that the cream was whipped to the right consistency. Also, don’t rush the chilling step—patience here pays off big time.
Cooking Tips & Techniques
Mastering this recipe is mostly about timing and texture. Here’s what I’ve learned through trial, error, and a few happy accidents:
- Softening Cream Cheese: Let it sit out for at least 30 minutes before mixing. Cold lumps can ruin the smoothness.
- Whipping Cream Properly: Start slow, then increase speed gradually. Stop whipping as soon as soft peaks form; otherwise, it can turn grainy or butter-like.
- Crushing Oreos: Use a rolling pin inside a sealed bag for even chunks. Too fine, and they’ll disappear; too big, and the texture will be uneven.
- Layering: Spread the cheesecake batter gently over the brownie base to avoid mixing the two layers. A light hand keeps those distinct textures.
- Cutting Brownies: Warming the knife blade is a game-changer for clean slices without crumbling.
One time I skipped chilling the brownie base first and ended up with a soggy cheesecake layer—lesson learned! Also, multitasking by whipping cream while the base chills saves time. If you’re making these for a crowd, doubling the recipe and using a 9×13 pan works well, just adjust chilling time accordingly.
Variations & Adaptations
These Delicious No-Bake Oreo Cheesecake Brownies are pretty flexible, so you can try these twists to suit your taste or dietary needs:
- Peanut Butter Swirl: Add dollops of creamy peanut butter on top of the cheesecake layer before chilling. Swirl lightly with a toothpick for a nutty surprise.
- Mint Oreo Version: Swap classic Oreos for mint-flavored ones. It creates a refreshing, cool contrast that’s especially nice after a heavy meal.
- Gluten-Free Option: Use a gluten-free flour blend in the brownie base and certified gluten-free Oreos. The texture may be slightly different but still delicious.
- Dairy-Free Adaptation: Replace cream cheese with vegan cream cheese and use coconut cream whipped to soft peaks instead of heavy cream.
- Chocolate Ganache Topping: For extra indulgence, pour a thin layer of warm chocolate ganache over the top before chilling. It adds a shiny, rich finish.
I once tried adding crushed pretzels to the brownie base for a salty crunch, and it was unexpectedly fantastic—feel free to experiment with your favorite mix-ins!
Serving & Storage Suggestions
These brownies are best served chilled, straight from the refrigerator. The cheesecake layer has the perfect creamy firmness, and the brownie base stays fudgy and moist. For presentation, I like to garnish with a few whole Oreo cookies or a light dusting of cocoa powder.
They pair wonderfully with a cold glass of milk, a cup of strong coffee, or even a scoop of vanilla ice cream for an extra indulgent treat. If you’re serving at a party, consider arranging them on a platter with fresh berries or mint leaves to brighten the look.
Store leftovers in an airtight container in the fridge for up to 4 days. For longer storage, these brownies freeze beautifully—wrap individual squares in plastic wrap and place in a freezer-safe container for up to 2 months. Thaw overnight in the fridge to maintain texture.
When reheating (if you prefer them a bit softer), let them sit at room temperature for 20 minutes or warm gently in the microwave for 10 seconds. Keep in mind that chilling overnight improves the flavor as the layers meld together, so plan accordingly.
Nutritional Information & Benefits
Each serving of these Delicious No-Bake Oreo Cheesecake Brownies is roughly:
| Calories | 280-320 kcal |
|---|---|
| Fat | 18g (mostly from cream cheese and butter) |
| Carbohydrates | 30g (includes sugar and Oreos) |
| Protein | 3g |
While these brownies aren’t a health food, the cream cheese adds a bit of calcium and protein, and the recipe uses real ingredients without artificial additives. For those mindful of gluten or dairy, the variations section offers handy alternatives. I like to think of this treat as a well-earned indulgence—perfect for a special occasion or when you need a sweet pick-me-up without fuss.
Conclusion
If you’ve ever been skeptical about no-bake desserts, these Delicious No-Bake Oreo Cheesecake Brownies are here to quietly change your mind. They bring together the best of creamy cheesecake, rich brownie, and crunchy Oreos in a way that’s both effortless and undeniably tasty. Customize the layers, swap in your favorite Oreo flavors, or add a swirl of peanut butter—the recipe is forgiving and fun to make.
I keep coming back to this one because it feels like a little celebration in every bite, and honestly, it’s one of those recipes that makes hosting stress-free while still impressing guests. I’d love to hear how you make it your own or what twist you try next—drop a comment below and share your experience!
Go ahead, make a batch, and quietly catch someone enjoying it in secret—you’ll know exactly what I mean.
Frequently Asked Questions
Can I use a different cookie instead of Oreos?
Yes! You can swap Oreos for any sandwich cookie you like. Graham crackers or chocolate chip cookies also work but will change the texture and flavor.
Do I have to refrigerate the brownies overnight?
Chilling for at least 4 hours is necessary to set the cheesecake layer properly, but overnight chilling yields the best texture and flavor.
Can I make these vegan?
Absolutely! Use vegan cream cheese and coconut cream whipped to soft peaks. Be sure to pick vegan-friendly cookies too.
How long will these brownies keep in the fridge?
Stored in an airtight container, they stay fresh for up to 4 days. After that, texture and flavor start to decline.
Is it possible to freeze these brownies?
Yes, wrap individual pieces tightly and freeze for up to 2 months. Thaw in the fridge overnight before serving for best results.
Pin This Recipe!
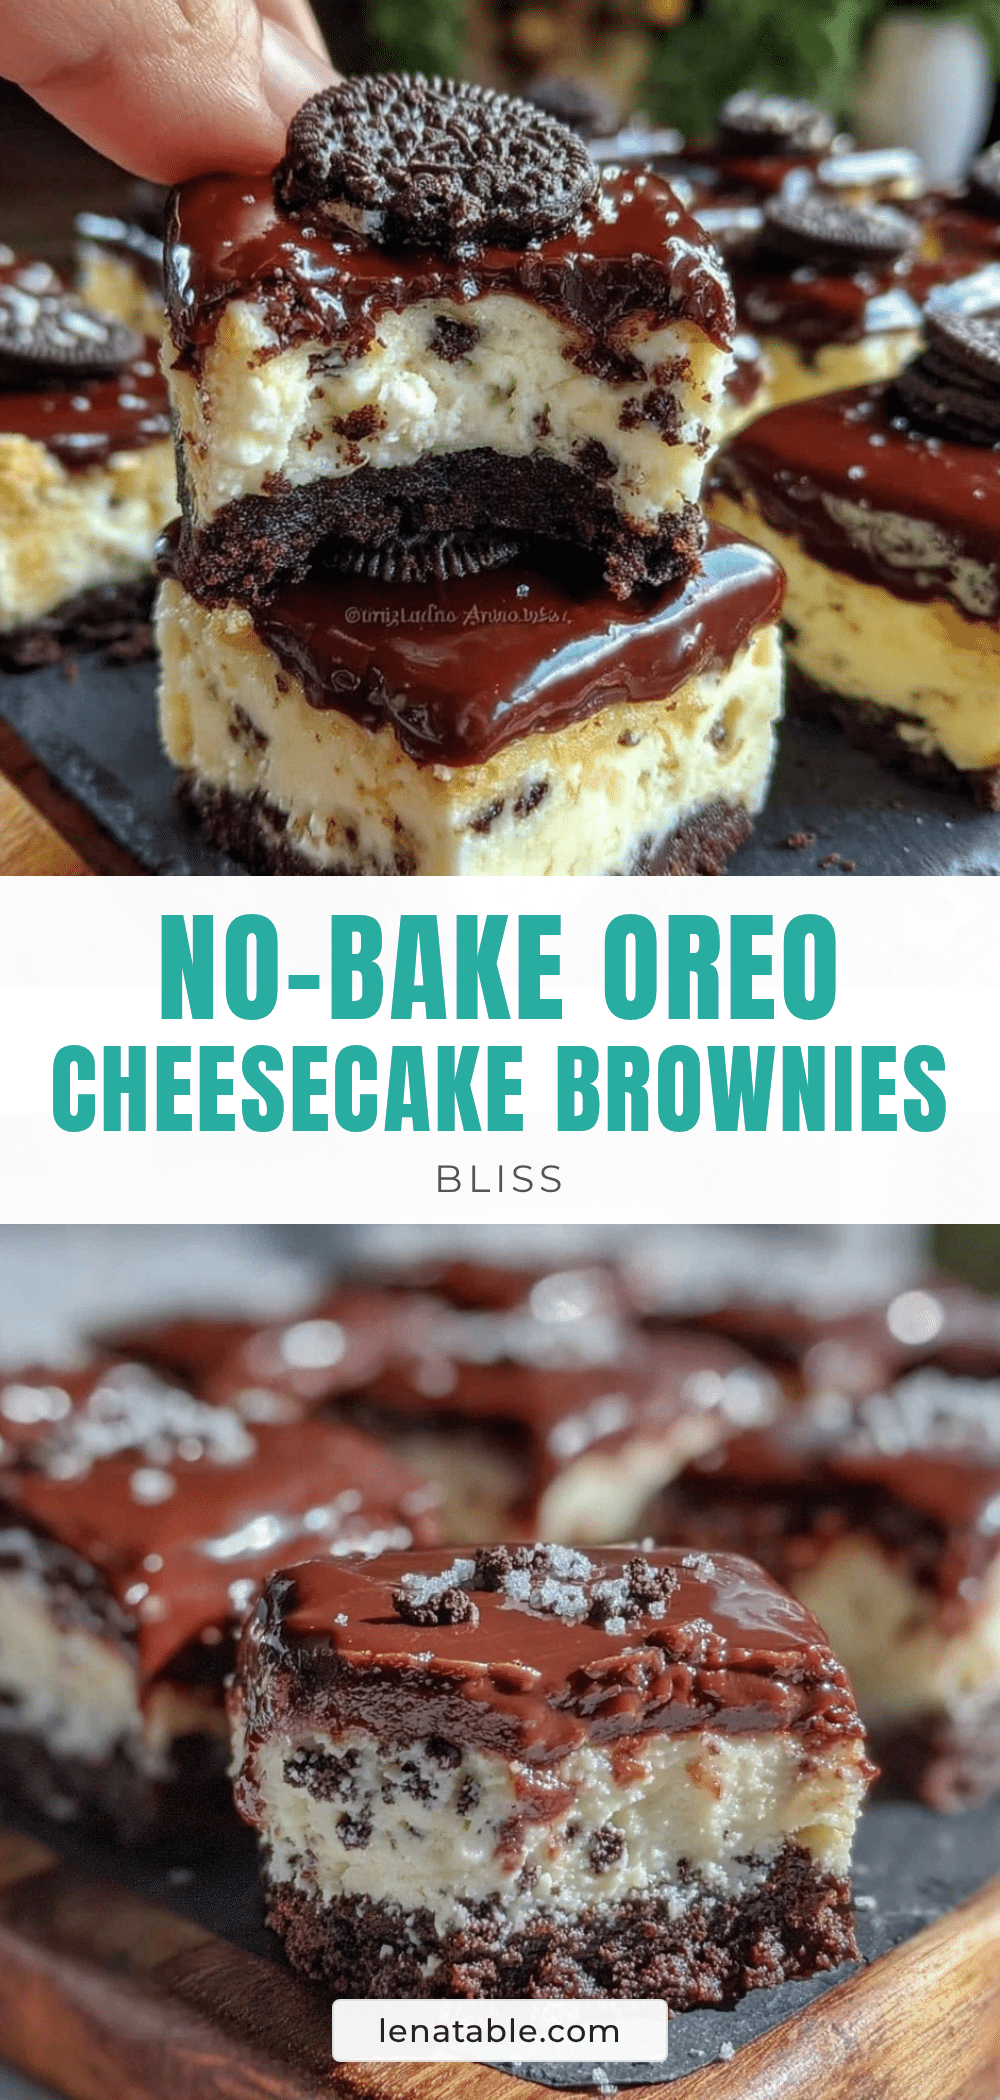
Delicious No-Bake Oreo Cheesecake Brownies
A quick and easy no-bake dessert featuring a fudgy brownie base, creamy cheesecake layer, and crunchy Oreo pieces. Perfect for any occasion and loved by all ages.
- Prep Time: 20 minutes
- Cook Time: 0 minutes
- Total Time: 4 hours 20 minutes
- Yield: 12 servings 1x
- Category: Dessert
- Cuisine: American
Ingredients
- 1/2 cup (115g) unsalted butter, melted
- 1 cup (200g) granulated sugar
- 3/4 cup (95g) all-purpose flour
- 1/3 cup (35g) unsweetened cocoa powder
- 1/4 teaspoon salt
- 1 teaspoon vanilla extract
- 8 oz (225g) cream cheese, softened
- 1 cup (120g) powdered sugar
- 1 cup (240ml) heavy whipping cream
- 1 teaspoon vanilla extract
- About 15 Oreos, roughly chopped
Instructions
- In a large mixing bowl, combine 1/2 cup melted unsalted butter and 1 cup granulated sugar. Stir until smooth and glossy, about 2 minutes. Add 1 teaspoon vanilla extract and mix well.
- Sift together 3/4 cup all-purpose flour, 1/3 cup unsweetened cocoa powder, and 1/4 teaspoon salt. Gradually fold the dry mix into the wet mixture using a spatula, mixing just until no streaks remain. Avoid overmixing.
- Pour the batter into a parchment-lined 8×8 inch (20×20 cm) square baking pan and smooth the surface with a spatula. Refrigerate to chill while preparing the cheesecake layer.
- In a medium bowl, beat 1 cup heavy whipping cream with an electric mixer until soft peaks form, about 3-4 minutes.
- In a separate large bowl, beat 8 oz softened cream cheese with 1 cup powdered sugar and 1 teaspoon vanilla extract until smooth and creamy, about 2-3 minutes. Slowly fold the whipped cream into the cream cheese mixture gently.
- Reserve about 1/3 of the roughly chopped Oreos. Fold the remaining Oreo pieces into the cheesecake batter evenly.
- Remove the brownie base from the fridge. Spread the cheesecake mixture evenly over the chilled base. Sprinkle the reserved Oreo pieces on top.
- Cover the pan with plastic wrap and refrigerate for at least 4 hours or overnight to set.
- Cut into about 12 squares using a sharp knife warmed under hot water and dried for clean cuts. Serve chilled.
Notes
Let cream cheese soften for at least 30 minutes before mixing. Whip cream to soft peaks without overwhipping. Use a rolling pin inside a sealed bag to crush Oreos evenly. Chill the brownie base before adding cheesecake layer to avoid sogginess. Warm knife blade for clean cuts. Recipe can be doubled for larger pans.
Nutrition
- Serving Size: 1 brownie square
- Calories: 280320
- Fat: 18
- Carbohydrates: 30
- Protein: 3
Keywords: no-bake, Oreo, cheesecake, brownies, easy dessert, quick dessert, no oven, creamy, fudgy, crowd-pleaser


