Love this? Save it for later!
Share the inspiration with your friends
I used to think lunchboxes were a lost cause. Honestly. For years, I packed the same sad rotation of sandwiches, chips, and a mushy apple, convincing myself that variety was a myth invented by Pinterest moms with way too much time on their hands. My neighbor, Sarah, swore by her elaborate bento boxes, and I’d nod along while secretly thinking, “That’s not happening in my kitchen.”
Then I found her. Sarah. Standing in my own kitchen, mid-afternoon, eating one of these mini caprese skewers right off the cutting board. She had stopped by to borrow a cup of sugar, and there she was, caught red-handed, a little mozzarella ball and a cherry tomato speared on a toothpick, looking sheepish but not sorry. “I couldn’t help it,” she mumbled through a mouthful of basil. “These are ridiculous.”
That was the moment. The one where you realize you’ve accidentally stumbled onto something that actually works. I wasn’t even trying to make a lunchbox masterpiece. I was just trying to use up the last of the cherry tomatoes and that tub of ciliegine mozzarella before it went bad. But the way she reacted—like I had discovered fire—made me stop and pay attention.
These aren’t fancy. They aren’t complicated. But this easy mini caprese skewers and hummus lunchbox combo is the kind of thing that makes you feel like you’ve got your act together, even on a Tuesday when you haven’t washed your hair in two days. Maybe you’ve been there, staring at the fridge, wondering what you can possibly pack that won’t end up in the trash. This is it. This is the one that stuck.
Why You’ll Love This Recipe
Let me tell you why this particular lunchbox setup is different from every other salad-in-a-box you’ve tried. It’s not just about the ingredients—it’s about the experience of eating it. I’ve tested this on my own kids, on picky adult friends, and on myself during a particularly grumpy Monday. It passed every test.
- Quick & Easy: You can assemble this entire lunchbox in under 10 minutes. No cooking required. No hot pans. Just a little skewering action and a dollop of hummus.
- Simple Ingredients: You likely have cherry tomatoes and a block of mozzarella in your fridge right now. Hummus is a pantry staple for most of us. This is a no-fuss, no-grocery-run situation.
- Perfect for Lunchboxes: Whether it’s for school, work, or a picnic, these skewers hold up beautifully. They don’t get soggy, they don’t leak, and they actually look appealing when you open the container.
- Crowd-Pleaser: I’ve yet to meet someone who turns down a caprese skewer. Kids love the fun “food on a stick” factor, and adults appreciate the fresh, classic flavor combo.
- Unbelievably Delicious: The combination of creamy mozzarella, sweet tomatoes, and peppery basil, dipped into smooth, savory hummus, is next-level. It’s a flavor party, and everyone’s invited.
What makes this version special is the hummus. Instead of a separate balsamic glaze or a drizzle of oil, the hummus acts as the creamy, protein-packed dip that ties everything together. It’s a clever shortcut that adds substance and flavor without any extra work. This isn’t just a salad on a stick—it’s a complete, satisfying meal that feels like a treat. It’s the kind of lunch that makes you close your eyes after the first bite, even if you’re just sitting at your desk.
What Ingredients You Will Need
This recipe uses simple, fresh ingredients that come together to create a surprisingly complex and satisfying lunch. You don’t need anything exotic—just good-quality basics that you can find at any grocery store.
- Cherry Tomatoes: Look for firm, ripe tomatoes. Grape tomatoes work well too, but cherry tomatoes have a sweeter, juicier pop. (I prefer the mixed-color ones for a prettier lunchbox.)
- Fresh Mozzarella Balls (Ciliegine): These are the small, bite-sized mozzarella balls. If you can only find larger ones (bocconcini), just cut them into smaller chunks. For best texture, use the ones packed in water or brine, not the dry, pre-shredded kind.
- Fresh Basil Leaves: The heart of any caprese. Use medium-sized leaves that are flexible enough to fold around the cheese and tomato. Avoid wilted or bruised leaves.
- Hummus: Use your favorite store-bought brand (I love the roasted red pepper or classic original from Sabra or Cedar’s for a smooth, creamy dip). You can also use homemade hummus if you’re feeling ambitious.
- Olive Oil (Optional): A light drizzle over the assembled skewers adds a touch of richness. It’s not strictly necessary, but it does make things feel a little more luxurious.
- Salt and Black Pepper: A tiny pinch of flaky sea salt and a crack of fresh pepper on each skewer makes a world of difference. Don’t skip it.
- Balsamic Glaze (Optional): If you want a more traditional caprese flavor, a tiny drizzle of balsamic glaze on the side or over the skewers is amazing. It’s not included in the main recipe, but it’s a fantastic variation.
- Toothpicks or Small Skewers: These are your assembly tools. Use short, sturdy toothpicks or 4-inch cocktail skewers. Bamboo ones are perfect.
Substitution Guidance: For a dairy-free version, use vegan mozzarella-style cheese (look for one that melts well, though you won’t be melting it here). For a lower-option, you can use smaller amounts of cheese, but honestly, the protein in the mozzarella and hummus makes this a balanced meal. If you can’t find fresh basil, a small handful of arugula or even mint leaves can work in a pinch, though the flavor profile changes completely.
Equipment Needed
You don’t need a fancy kitchen to pull this off. In fact, I’ve made this lunchbox in a hotel room with a Swiss Army knife and a plastic fork. But here’s what makes life easier:
- Cutting Board: A medium-sized board for prepping the tomatoes and cheese.
- Sharp Knife: A small paring knife works best for halving tomatoes if they’re large, but a chef’s knife is fine too.
- Small Bowl: For holding your assembled skewers before they go into the lunchbox.
- Lunchbox Container: A bento-style box with separate compartments is ideal. If you don’t have one, a standard container with a small silicone cup or a piece of parchment paper to separate the hummus from the skewers works perfectly.
- Toothpicks or Cocktail Skewers: The star of the show. I’ve tried using regular wooden skewers cut in half, but the short, 3-inch toothpicks are the perfect size for a single bite.
Budget-Friendly Tip: Don’t have a bento box? Use a standard Tupperware and put the hummus in a small reusable silicone muffin liner or even a washed-out yogurt cup. It’s not glamorous, but it works. I’ve been using the same set of mismatched containers for years, and they’ve never let me down.
Preparation Method
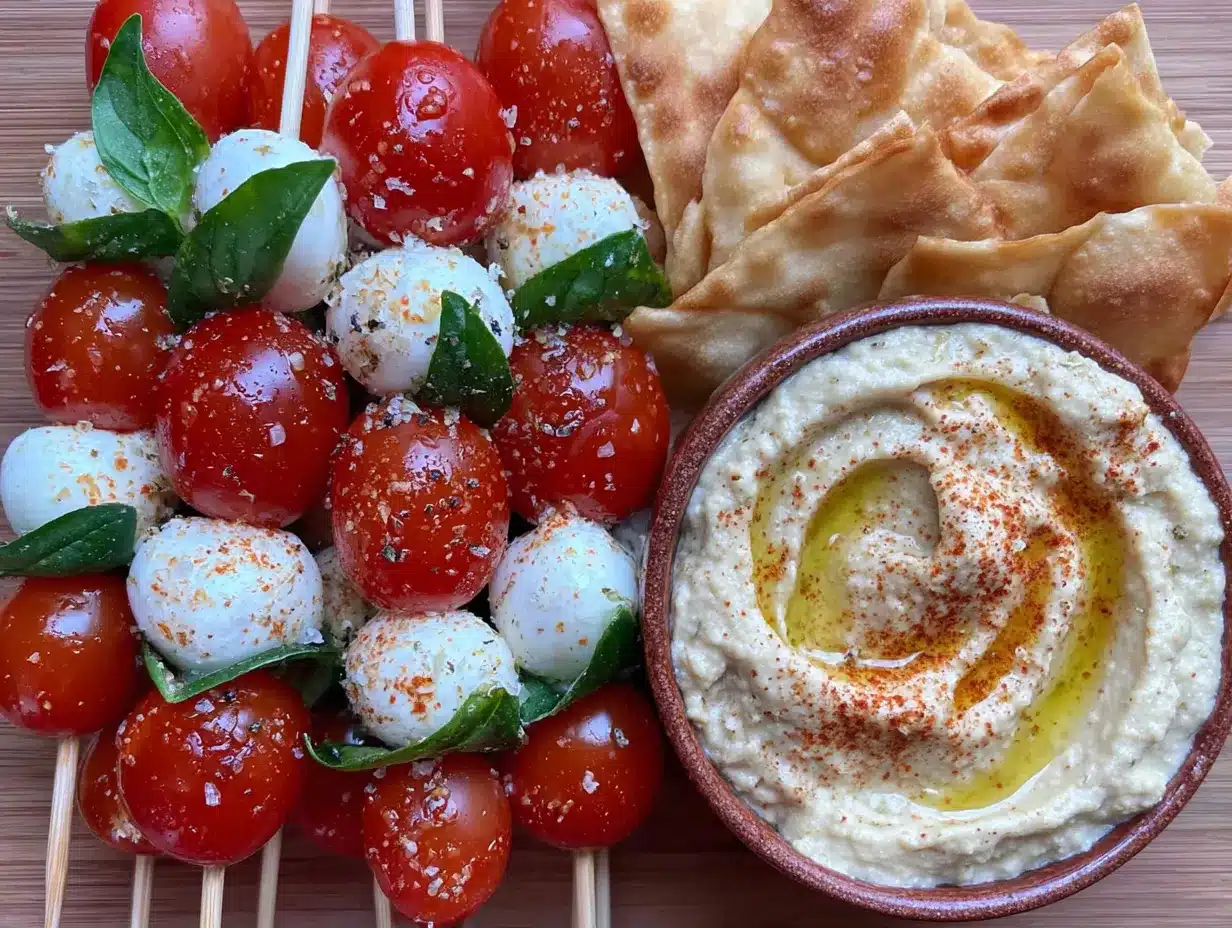
- Prep Your Ingredients (5 minutes): Rinse your cherry tomatoes and pat them dry. If they are very large, slice them in half. If they are small, leave them whole. Drain your mozzarella balls and pat them dry with a paper towel. (Wet cheese makes for slippery skewers!) Pick the basil leaves off the stems. You want leaves that are roughly the same size as your tomatoes or a little larger.
- Assemble the Skewers (5 minutes): This is the fun part. Take a toothpick and thread on one basil leaf, folding it slightly if it’s big. Then add one cherry tomato (or half a tomato). Then add one mozzarella ball. The order matters a little—the basil acts as a cushion between the tomato and the cheese, preventing the tomato juice from making the cheese slippery. Push everything together gently but snugly. Repeat until you have 6-8 skewers per lunchbox.
- Season the Skewers (1 minute): Lay the finished skewers on a plate or in your lunchbox container. Sprinkle them very lightly with a pinch of flaky sea salt and a crack of fresh black pepper. If you’re using olive oil, drizzle a tiny bit over the tops. This step is easy to skip, but it’s what transforms a good skewer into a great one.
- Portion the Hummus (1 minute): Spoon about 1/4 cup of hummus into a small, leak-proof container or a compartment of your lunchbox. If you want to be fancy, use the back of a spoon to create a little swirl on top and drizzle it with a drop of olive oil and a sprinkle of paprika. I rarely do this, but it looks beautiful for photos.
- Pack the Lunchbox (2 minutes): Arrange the skewers neatly in one compartment. If you’re worried about them sliding around, you can lay a piece of parchment paper or a lettuce leaf underneath them. Place the hummus container in the other compartment. Add any other sides you like (cucumber slices, crackers, fruit). Close the lid and refrigerate until you’re ready to go.
Troubleshooting Tip: If your mozzarella balls are very soft and keep sliding off the toothpick, try patting them dry more aggressively. You can also chill them in the fridge for 10 minutes before skewering—they firm up just enough to hold their shape. I learned this the hard way after a particularly frustrating lunchbox session where I ended up with a pile of cheese and tomatoes on the cutting board and a very sad toothpick in my hand.
Cooking Tips & Techniques
This isn’t really a “cooking” recipe, but there are a few tricks I’ve picked up that make the process smoother and the final result better.
- Don’t Overcrowd the Skewer: One tomato, one basil leaf, one cheese ball. That’s the perfect bite. If you try to cram on two tomatoes, the skewer becomes unwieldy and the flavors don’t balance as well. Trust the ratio.
- Make Ahead for the Week: You can assemble the skewers up to 24 hours in advance. Store them in an airtight container in the fridge, but don’t season them with salt until just before packing. Salt draws moisture out of the tomatoes and makes everything soggy overnight.
- The Basil Trick: If your basil leaves are very large, tear them in half instead of trying to fold them. A folded leaf can sometimes split when you push the toothpick through. A torn leaf lays flat and stays put.
- Hummus as a Glue: If you’re packing the skewers and the hummus together, you can put a tiny dollop of hummus on the bottom of the container to anchor the skewers in place. It’s a neat trick that prevents them from rolling around and getting bruised.
- Room Temperature is Better: This lunchbox is best enjoyed at room temperature. If you’re packing it for a school lunch, it will be perfect by lunchtime. If you’re taking it to work, let it sit on your desk for 15 minutes before you eat. The mozzarella gets creamier, and the tomatoes release more of their juice.
Variations & Adaptations
One of the best things about this recipe is how easy it is to tweak. Here are a few of my favorite spins:
- Mediterranean Twist: Swap the basil for fresh mint leaves and add a small cube of feta cheese to each skewer. Use a lemon-herb hummus or a tzatziki dip instead of plain hummus. It’s a completely different flavor profile that feels like a vacation.
- Protein Boost: Add a small piece of grilled chicken or a slice of salami to each skewer. Thread the meat onto the toothpick first, then add the basil, tomato, and cheese. It turns a snack into a full meal that will keep you full for hours.
- Vegetable Swap: Not a fan of cherry tomatoes? Use roasted red pepper strips or grilled zucchini slices instead. The texture changes, but the flavor is still amazing. I’ve also used marinated artichoke hearts in a pinch, and it was fantastic.
- Dairy-Free Version: Use a good quality vegan mozzarella. I’ve tried several brands, and the one made from cashew milk works best for this application. It has a similar creamy texture and doesn’t fall apart on the toothpick.
- Balsamic Drizzle: For a more traditional caprese experience, pack a small container of balsamic glaze on the side. Dip the skewers in the glaze before the hummus, or drizzle it right over the top. It adds a sweet, tangy kick that’s hard to beat.
Serving & Storage Suggestions
This lunchbox is best served cold or at room temperature. I prefer it at room temperature, as the flavors really open up. If you’re serving it for a party or a picnic, arrange the skewers on a platter around a bowl of hummus. It’s a stunning presentation that requires almost no effort.
Storage: The assembled skewers can be stored in an airtight container in the refrigerator for up to 24 hours. The hummus should be stored separately to prevent the skewers from getting soggy. If you’ve already packed them together, try to eat them within 4-6 hours for the best texture.
Freezing: I don’t recommend freezing the assembled skewers. The tomatoes will become mushy and watery when thawed, and the basil will turn black. However, you can freeze the mozzarella balls (in their liquid) and the hummus separately for up to 3 months. Thaw them in the fridge overnight before using.
Reheating: There’s no need to reheat this lunchbox. In fact, I strongly advise against it. The mozzarella will melt and become rubbery, and the tomatoes will burst. Just take it out of the fridge 15 minutes before eating and enjoy it as is.
One thing I love about this recipe is how the flavors develop over time. The tomatoes release a little juice that mixes with the salt and pepper, creating a tiny bit of marinade on the skewers. It’s even better the next day, if you can believe it.
Nutritional Information & Benefits
This lunchbox is a nutritional powerhouse disguised as a fun snack. Here’s a rough estimate for one serving (6-8 skewers with 1/4 cup hummus):
- Calories: Approximately 350-400
- Protein: 18-22 grams
- Fat: 20-25 grams (mostly healthy fats from the olive oil and cheese)
- Carbohydrates: 15-20 grams
- Fiber: 4-6 grams
The mozzarella provides high-quality protein and calcium for strong bones. The cherry tomatoes are packed with lycopene, a powerful antioxidant that supports heart health. The basil is rich in vitamin K and has anti-inflammatory properties. And the hummus? It’s a fantastic source of plant-based protein and fiber from the chickpeas, plus healthy fats from the tahini.
Dietary Considerations: This recipe is naturally vegetarian and can be made gluten-free (just double-check your hummus brand). It’s also low in added sugar and can be part of a balanced, low-carb diet if you skip any crackers or bread on the side. The main allergen is dairy, but as mentioned, a vegan cheese works beautifully as a substitute.
I personally love that this lunchbox keeps my energy steady through the afternoon. No crash, no cravings—just a satisfied, happy stomach.
Conclusion
So there you have it. The lunchbox that changed my mind about lunchboxes. It’s not fancy, it’s not complicated, and it certainly doesn’t require a culinary degree. It’s just good, honest food that happens to look beautiful and taste incredible.
I hope you give this easy mini caprese skewers and hummus lunchbox a try. Don’t be afraid to make it your own—swap the herbs, change the dip, add your favorite protein. The beauty of this recipe is its flexibility. It’s a template, not a rulebook.
I’d love to hear how it goes. Did your kids love it? Did your coworkers ask for a bite? Did you discover a new favorite variation? Drop a comment below and let me know. And if you’re feeling generous, share this recipe with a friend who needs a little lunchbox inspiration. Trust me, they’ll thank you.
Happy packing, and remember—sometimes the best meals are the ones you don’t have to cook.
Frequently Asked Questions
Can I use a different type of cheese?
Absolutely. Fresh mozzarella is the classic choice, but you can use bocconcini (larger balls, cut in half), feta (for a saltier, tangier flavor), or even small cubes of provolone. Just make sure the cheese is soft enough to bite through easily when cold.
How far in advance can I make these skewers?
You can assemble the skewers up to 24 hours in advance. Store them in an airtight container in the fridge. However, wait to add the salt and pepper until just before you pack them to prevent the tomatoes from getting watery.
Can I use a different dip instead of hummus?
Yes! This recipe is very flexible. Try tzatziki, baba ganoush, a creamy ranch dip, or even a simple balsamic vinaigrette. The hummus is just my personal favorite for the protein and creaminess it adds.
How do I keep the basil from turning black?
Basil can oxidize and turn black when cut or exposed to air. To minimize this, pat the basil leaves completely dry before using them. Also, avoid crushing or bruising the leaves when you thread them onto the toothpick. If you’re making them well in advance, you can also blanch the basil leaves in boiling water for 5 seconds, then plunge them into ice water—this stops the oxidation process.
Are these skewers safe for a school lunch?
Yes, with one caveat. Check your school’s policy on toothpicks or skewers. Some schools have strict rules about sharp objects. If that’s the case, you can simply layer the ingredients in a small container without the toothpick—it’s still delicious, just a little less fun to eat. You can also use short, blunt cocktail picks that are safer for little hands.
Pin This Recipe!
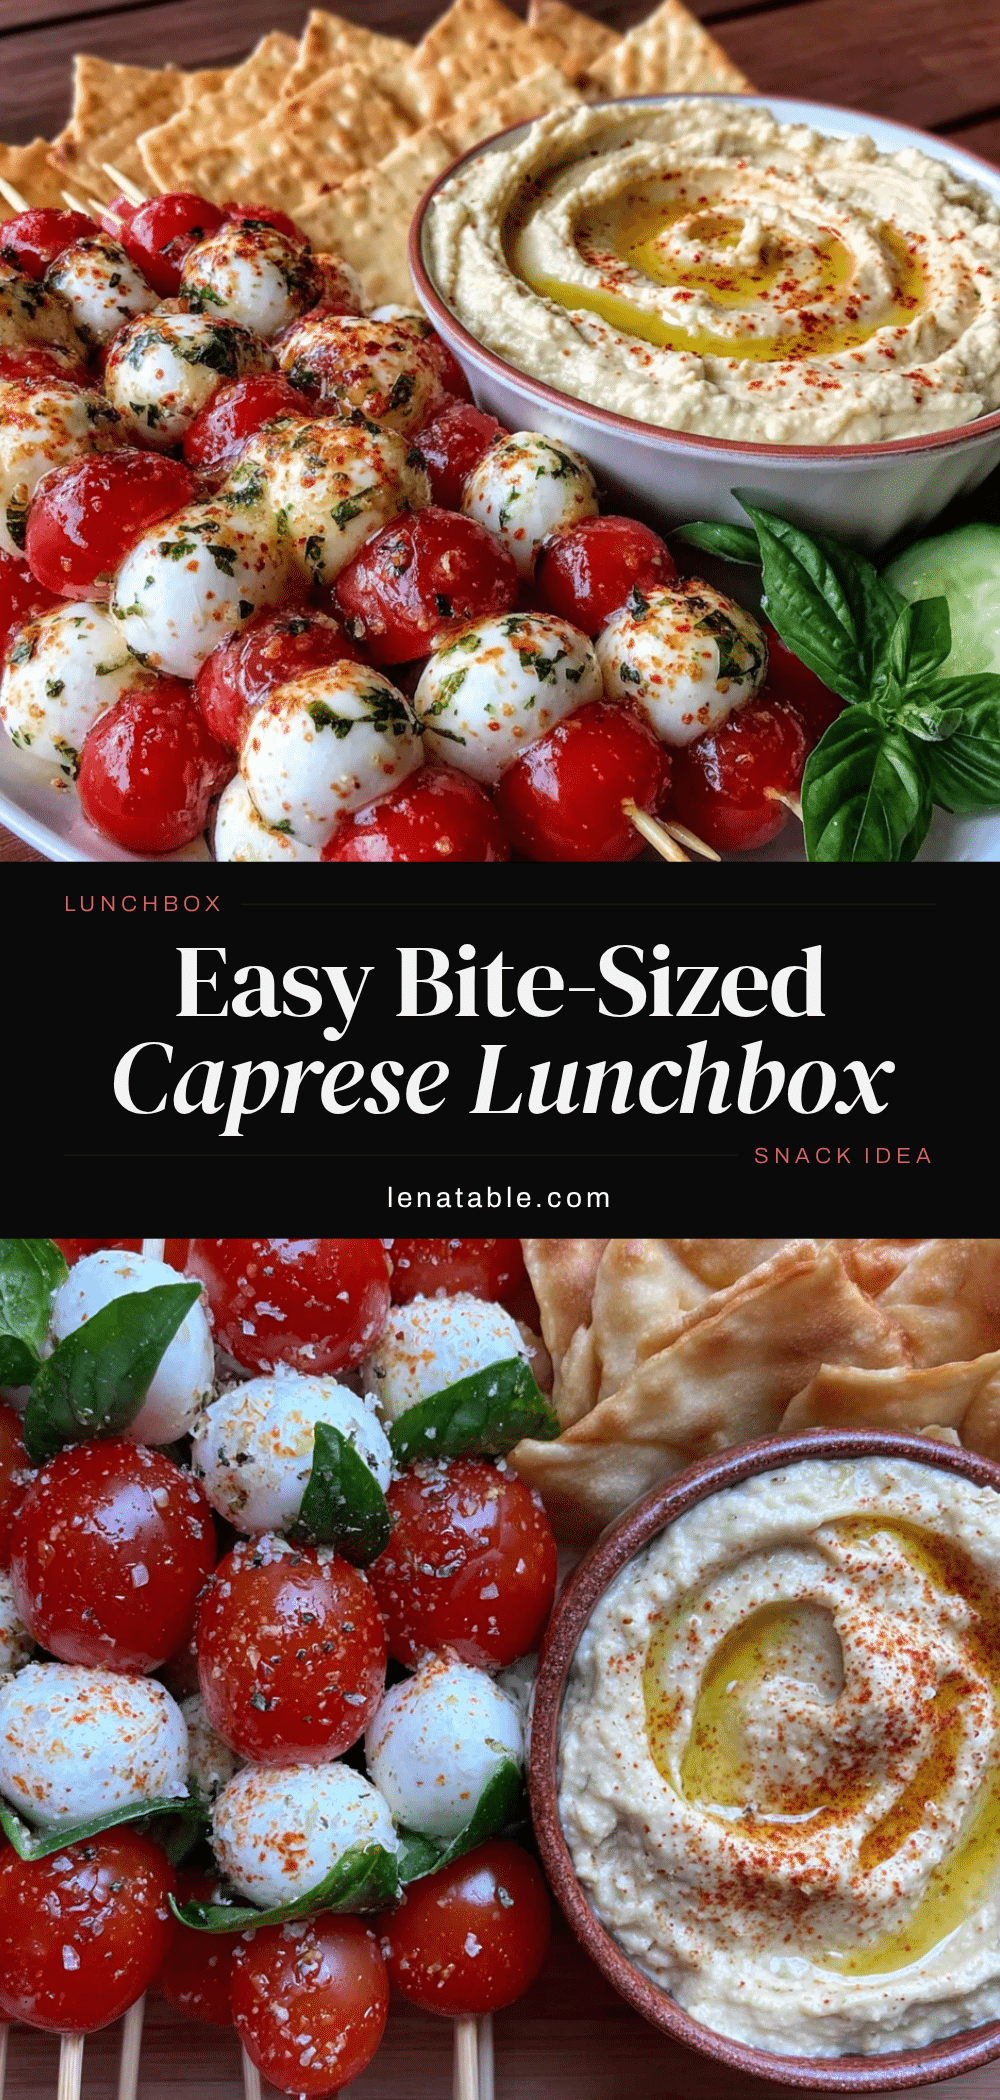
Easy Mini Caprese Skewers Lunchbox with Hummus

These easy mini caprese skewers paired with creamy hummus make a perfect, no-cook lunchbox that’s ready in under 10 minutes. Fresh mozzarella, cherry tomatoes, and basil on a stick, dipped into hummus, create a satisfying and delicious meal.
- Prep Time: 10 minutes
- Cook Time: 0 minutes
- Total Time: 10 minutes
- Yield: 4 servings 1x
- Category: Lunch
- Cuisine: Italian
Ingredients
- 1 cup cherry tomatoes (mixed colors if available)
- 8 oz fresh mozzarella balls (ciliegine), drained
- 20–24 fresh basil leaves
- 1/2 cup hummus (store-bought or homemade)
- 1 tbsp olive oil (optional)
- Flaky sea salt, to taste
- Freshly ground black pepper, to taste
- Balsamic glaze (optional, for serving)
- 20–24 toothpicks or small cocktail skewers
Instructions
- Rinse cherry tomatoes and pat dry. If large, slice in half; if small, leave whole. Drain mozzarella balls and pat dry with paper towels. Pick basil leaves off stems.
- Thread one basil leaf onto a toothpick, folding slightly if large. Add one cherry tomato (or half), then one mozzarella ball. Push together gently. Repeat for 6-8 skewers per serving.
- Lay skewers on a plate or in lunchbox container. Sprinkle lightly with flaky sea salt and fresh black pepper. Drizzle with olive oil if using.
- Spoon about 1/4 cup hummus into a small leak-proof container or lunchbox compartment.
- Arrange skewers in one compartment and hummus in another. Add optional sides like cucumber slices or crackers. Refrigerate until ready to pack.
Notes
Assemble skewers up to 24 hours in advance, but add salt and pepper just before packing to prevent tomatoes from getting watery. For best flavor, let lunchbox sit at room temperature for 15 minutes before eating. If basil leaves are large, tear in half instead of folding to prevent splitting. To keep skewers from sliding, place a tiny dollop of hummus on the bottom of the container to anchor them.
Nutrition
- Serving Size: 6-8 skewers with 1/4
- Calories: 375
- Sugar: 4
- Sodium: 450
- Fat: 22
- Saturated Fat: 8
- Carbohydrates: 18
- Fiber: 5
- Protein: 20
Keywords: caprese skewers, lunchbox, hummus, no-cook, easy lunch, vegetarian, kid-friendly