Love this? Save it for later!
Share the inspiration with your friends
I was digging through the back of my pantry last October, searching for a specific cookie cutter I swore I owned—you know, the ghost-shaped one I bought on a whim three years ago—when a burst of orange zest hit me from somewhere. It wasn’t from a fruit. It was from a forgotten box of orange extract, tucked behind the vanilla, and suddenly I was twelve years old, standing on a stepstool in my Aunt Rita’s cramped kitchen, watching her roll out sugar cookie dough that smelled like sunshine and mischief. She always made these for the neighborhood Halloween block party, and she’d let me press the cutters into the dough while she hummed along to some oldies station on a crackly radio. She passed away a few years back, and honestly, I hadn’t thought about those cookies in ages. But that one whiff of orange extract? It hit me like a freight train of nostalgia.
I sat there on the kitchen floor for a good five minutes, just holding the bottle. I mean, it’s funny how a scent can do that, right? You can’t force the memory—it just shows up, uninvited but welcome. I knew right then I had to try and make those cookies again. Not her exact recipe (that went with her, as these things always do), but my own version. Something that captured that same bright, buttery, slightly spooky feeling. And because I’m me, I couldn’t just make a plain sugar cookie. I had to stuff it with a creamy, dreamy filling and turn it into a sandwich. Because everything is better as a sandwich, let’s be honest. That’s how these Perfect Halloween Orange Sugar Cookie Sandwiches were born—from a dusty bottle of orange extract and a ghost-shaped cookie cutter I never did find.
Why You’ll Love This Recipe
These aren’t your average, run-of-the-mill Halloween cookies. They’re a full-on experience. After about six test batches (someone had to eat the failures, and it was me, I ate them), I landed on a combination that hits every single note. Here’s why these little guys are going to steal the show at your Halloween gathering:
- Bold Orange Flavor: We’re not messing around with a hint of citrus. Fresh zest and a touch of extract give these cookies a bright, sunny flavor that cuts through all the usual heavy, chocolate-heavy Halloween treats.
- Perfectly Soft & Chewy: The secret is a tiny bit of cream cheese in the dough. It keeps the cookies tender for days, not hard and crunchy like some cut-out cookies can get.
- That Dreamy Filling: A simple buttercream gets a tangy twist with a splash of orange juice. It’s not too sweet, and it holds the sandwich together without squishing out the sides.
- Customizable Shapes: Pumpkins, ghosts, bats, cats—use any Halloween cutter you have. The dough is sturdy enough for detailed shapes but soft enough to be tender.
- Make-Ahead Friendly: The dough chills for an hour, but you can make it a day or two ahead. The baked cookies also freeze beautifully, making this perfect for busy Halloween week.
- Kid-Approved & Adult-Loved: I brought a batch to my neighbor’s Halloween party, and they vanished in fifteen minutes. The kids loved the fun shapes, and the adults kept asking for the recipe.
This isn’t just another sugar cookie recipe. It’s the one that makes people close their eyes after the first bite. It’s Halloween comfort food—fun, festive, and filled with a little bit of magic.
What Ingredients You Will Need
This recipe uses simple, wholesome ingredients that come together to create something truly special. Most of these are pantry staples, but a few key players do the heavy lifting for that signature orange flavor and perfect texture.
For the Orange Sugar Cookies:
- Unsalted butter, softened: 1 cup (2 sticks). Using unsalted butter lets us control the salt level. I always use Kerrygold for its rich flavor, but any good-quality butter works.
- Cream cheese, softened: 2 ounces. This is my secret weapon. It adds a slight tang and ensures a soft, chewy texture that doesn’t spread too much in the oven.
- Granulated sugar: 1 cup. Standard white sugar gives the cookies a nice, clean sweetness and a slightly crisp edge.
- Large egg: 1, at room temperature. A room-temperature egg incorporates into the creamed butter much more smoothly, creating a better emulsion.
- Orange zest: 2 tablespoons from about 2 large oranges. Do not skip this. The zest holds all the aromatic oils that give these cookies their bright, authentic orange flavor.
- Orange extract: 1 teaspoon. Pure vanilla extract is great, but for an intense orange punch, you need this. I prefer the brand LorAnn for its potency.
- All-purpose flour: 2 ½ cups, spooned and leveled. Too much flour makes tough cookies, so be gentle when measuring.
- Baking powder: ½ teaspoon. This gives the cookies a little lift without making them puffy.
- Salt: ¼ teaspoon. It balances the sweetness and enhances the orange flavor.
For the Orange Buttercream Filling:
- Unsalted butter, softened: ½ cup (1 stick). Again, soft butter is key for a smooth, lump-free frosting.
- Powdered sugar: 2 cups, sifted if it’s lumpy. Sifting prevents those annoying little white clumps in your frosting.
- Orange juice: 2 tablespoons, fresh-squeezed. The acid in the juice cuts the sweetness of the buttercream and reinforces the orange theme.
- Orange zest: 1 teaspoon. A little more zest in the filling makes the flavor pop.
- Pinch of salt: Just a tiny one, to balance the sugar.
For Decoration (Optional but Fun):
- Orange sanding sugar or sprinkles: For rolling the cookie edges before baking. It adds a lovely sparkle and crunch.
- Black gel food coloring: For making a spiderweb design on top of the filled cookies. Totally optional, but very Halloween.
Equipment Needed
You don’t need a professional bakery setup for these, but a few specific tools will make your life a whole lot easier. I learned the hard way that trying to roll dough with a wine bottle is a recipe for uneven cookies.
- Electric stand mixer or hand mixer: Creaming the butter and sugar by hand is possible but exhausting. A mixer saves your arm and ensures a light, fluffy dough.
- Rolling pin: A standard rolling pin with adjustable thickness rings is a game-changer for even cookies. If you don’t have one, just use even pressure and check the thickness with your fingers.
- Halloween cookie cutters: Any shapes you like! Pumpkins, ghosts, bats, and cats are classics. I found a great set on Amazon for under ten bucks.
- Baking sheets: Two large, rimmed baking sheets. Line them with parchment paper or a silicone baking mat for easy cleanup and even baking.
- Parchment paper or silicone baking mat: Non-stick is non-negotiable for cut-out cookies.
- Cooling rack: A wire rack allows the cookies to cool completely and evenly, which is crucial before you add the filling.
- Piping bag with a round tip (or a zip-top bag): For neatly filling the cookies. A zip-top bag with a tiny corner snipped off works perfectly in a pinch.
- Offset spatula: Great for spreading the filling if you don’t want to pipe it.
Preparation Method
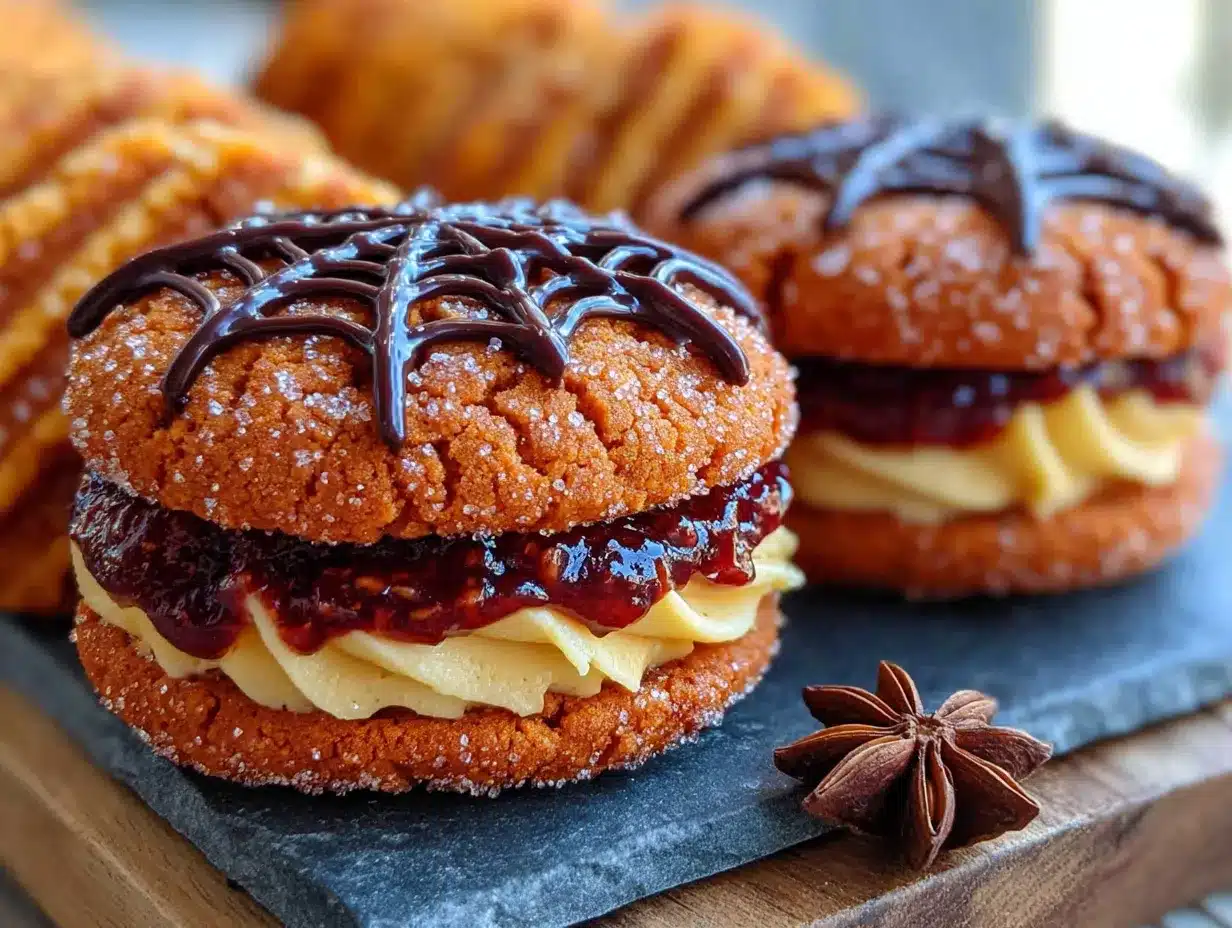
Alright, let’s get to the fun part. This process has a few steps, but I’ve broken it down so it feels manageable. Trust me, the payoff is worth every second. The key is to not rush the chilling time—that’s what makes these cookies so perfect.
- Cream the Butter and Sugars: In the bowl of your stand mixer fitted with the paddle attachment, beat the softened butter, cream cheese, and granulated sugar together on medium speed until light, fluffy, and pale in color. This takes about 3-4 minutes. Scrape down the sides of the bowl halfway through. You want it to look like a soft, spreadable cloud.
- Add the Wet Ingredients: Beat in the egg, orange zest, and orange extract until just combined. Don’t overmix here, or the dough can get tough. The mixture might look a little curdled at this point—that’s totally normal, don’t panic.
- Mix the Dry Ingredients: In a separate medium bowl, whisk together the flour, baking powder, and salt. With the mixer on low speed, gradually add the dry ingredients to the wet ingredients. Mix until just combined. You should see a few streaks of flour remaining. Stop the mixer and finish folding it together with a rubber spatula. The dough will be soft and slightly sticky.
- Chill the Dough: Divide the dough in half, shape each half into a flat disc about 1-inch thick, and wrap each disc tightly in plastic wrap. Refrigerate for at least 1 hour, or up to 2 days. This step is non-negotiable. Chilled dough is much easier to roll out and holds its shape better when cut. I once tried to rush this, and my pumpkins turned into sad, blobby circles.
- Preheat and Prep: When you’re ready to bake, preheat your oven to 350°F (175°C). Line two baking sheets with parchment paper or silicone mats.
- Roll and Cut: On a lightly floured surface, roll out one disc of dough to about ¼-inch thickness. If the dough cracks at the edges, let it sit at room temperature for 5 minutes to soften slightly. Use your Halloween cookie cutters to cut out shapes. Re-roll the scraps and cut more shapes. For sandwiches, you’ll need an even number of cookies. I usually aim for about 24-30 cookies (12-15 sandwiches).
- Bake: Place the cookies about 1 inch apart on the prepared baking sheets. If you want sparkly edges, gently press the cut-out dough into a bowl of orange sanding sugar before placing it on the sheet. Bake for 9-11 minutes, or until the edges are just barely golden brown. The centers will still look soft and slightly puffy. They will continue to set as they cool on the baking sheet.
- Cool Completely: Let the cookies cool on the baking sheet for 5 minutes, then carefully transfer them to a wire rack to cool completely. This is crucial. If you try to fill them while they’re even a little warm, the buttercream will melt into a sad puddle.
- Make the Filling: While the cookies cool, make the buttercream. In a clean mixer bowl, beat the softened butter on medium speed until smooth and creamy. Gradually add the powdered sugar, about ½ cup at a time, beating on low speed until incorporated. Add the orange juice, orange zest, and a pinch of salt. Increase the speed to medium-high and beat for 2-3 minutes until the frosting is light, fluffy, and spreadable.
- Assemble the Sandwiches: Pair up your cooled cookies by size and shape. Transfer the buttercream to a piping bag fitted with a round tip (or a zip-top bag with a snipped corner). Pipe a generous swirl of frosting onto the flat side of one cookie. Gently press the flat side of its matching cookie on top. Don’t squish it too hard, or the filling will ooze out the sides.
- Decorate (Optional): For a fun Halloween touch, use a tiny bit of black gel food coloring mixed with a drop of water to pipe a simple spiderweb or a spooky face on the top of each sandwich. Let the decorating icing set for about 15 minutes before serving or storing.
Cooking Tips & Techniques
I’ve made a lot of sugar cookies in my day, and I’ve made just about every mistake you can imagine. Here are the hard-earned lessons I’ve learned so you don’t have to repeat them.
- Don’t Overwork the Dough: This is the number one rule of tender cookies. Once you add the flour, mix only until it disappears. Over-mixing develops gluten, which makes cookies tough and bread-like. We want them tender and melt-in-your-mouth.
- The Importance of Chilling: I cannot stress this enough. A warm dough will spread into a flat, shapeless blob in the oven. A chilled dough holds its shape perfectly. If your kitchen is warm, pop the cut-out shapes on the baking sheet back in the fridge for 10 minutes before baking. It makes a huge difference.
- Check Your Oven Temperature: Ovens lie. They just do. My old oven ran 25 degrees hot. An inexpensive oven thermometer is your best friend for baking. It ensures your cookies bake at the correct temperature and don’t burn on the bottom.
- Even Thickness is Key: If your cookies are uneven in thickness, some will be overdone while others are underdone. Using rolling pin rings is the easiest way to get a consistent ¼-inch thickness. If you’re rolling by hand, roll in one direction, then rotate the dough 90 degrees and roll again. Check the thickness with your fingers.
- Cooling is a Process: Don’t skip the 5-minute rest on the hot baking sheet. The cookies are still baking from the residual heat, and they’re too fragile to move right away. Then, let them cool completely on a wire rack. Trapped steam on a solid surface can make the bottoms soggy.
Variations & Adaptations
One of the best things about this recipe is how flexible it is. Don’t be afraid to make it your own. Here are a few ways I’ve played around with it.
- Gluten-Free Version: I made a batch for a friend with celiac disease using a 1:1 gluten-free baking flour blend (like Bob’s Red Mill or King Arthur). The texture was slightly more crumbly but still delicious. Just be sure to chill the dough for a full 2 hours, as gluten-free doughs can be stickier.
- Different Citrus Twist: Not an orange fan? Swap the orange zest and extract for lemon or lime. You’ll get a bright, zesty cookie that’s perfect for a spring or summer party. A lemon version with a lemon buttercream would be killer.
- Chocolate Orange: For a more decadent twist, add ½ cup of mini chocolate chips to the dough. Then, instead of the orange buttercream, fill the sandwiches with a simple chocolate ganache (melted chocolate and heavy cream). The combination of orange and chocolate is a classic for a reason.
- Spooky Spice: Add 1 teaspoon of pumpkin pie spice to the dry ingredients. It gives the cookies a warm, autumnal flavor that pairs beautifully with the orange. It’s like a pumpkin-orange hug in cookie form.
- No-Fuss Version: Don’t want to deal with sandwiching? Just bake the cookies as is and drizzle them with a simple glaze made from powdered sugar and orange juice. They’re still incredibly delicious and much faster to make.
Serving & Storage Suggestions
These cookies are best served at room temperature, which lets the filling soften to a perfectly creamy consistency. I like to arrange them on a platter with some extra orange sprinkles scattered around for a festive look. They’re fantastic on their own, but they also pair beautifully with a glass of cold milk, a warm cup of spiced apple cider, or even a scoop of vanilla bean ice cream for a truly decadent dessert.
As for storage, these sandwiches are actually better the next day. The flavors meld together, and the cookie softens ever so slightly from the moisture in the filling. Store them in an airtight container at room temperature for up to 3 days. If you stack them, place a sheet of parchment paper between each layer to prevent them from sticking.
You can also freeze the unfilled cookies for up to 3 months. Just bake and cool them completely, then place them in a freezer-safe bag or container with parchment between layers. When you’re ready to serve, thaw them at room temperature, make the fresh buttercream, and assemble. Fresh filling is always best, so I don’t recommend freezing the assembled sandwiches.
Nutritional Information & Benefits
Let’s be real—these are a treat, not a health food. But that doesn’t mean they can’t have a few redeeming qualities! The nutritional values below are estimates for one sandwich cookie.
| Nutrient | Approximate Value Per Sandwich |
|---|---|
| Calories | 280-320 |
| Fat | 16g |
| Saturated Fat | 10g |
| Carbohydrates | 36g |
| Sugar | 24g |
| Protein | 3g |
On the bright side, the orange zest provides a small dose of vitamin C and antioxidants. The cream cheese adds a bit of calcium and protein compared to using all butter. And honestly, there’s a huge mental health benefit to enjoying a delicious, homemade treat with the people you love. A little indulgence is good for the soul.
For those with dietary restrictions, please note this recipe contains gluten (from the flour), dairy (from the butter and cream cheese), and eggs. It is not suitable for vegans or those with celiac disease without the modifications listed above.
Conclusion
So there you have it—my Perfect Halloween Orange Sugar Cookie Sandwiches. They’re more than just a pretty face at the party. They’re a little bit of nostalgia, a whole lot of buttery, citrusy goodness, and a guaranteed way to make people smile. I love that they capture that specific feeling of Halloween—the fun, the spooky, the sweet—all in one perfect bite.
I really hope you give these a try. Don’t be afraid to get creative with your shapes and decorations. Make them your own. And when you do, I’d love to hear about it. Leave a comment below and tell me what shapes you used, or tag me in your photos on social media. Your kitchen adventures make my day. Happy Halloween, and happy baking!
Frequently Asked Questions
Can I use orange juice instead of orange extract?
You can, but the flavor will be much milder. Orange extract is highly concentrated, so it gives a strong, true orange taste without adding extra liquid to the dough. If you only have orange juice, you might need to add a bit more zest to compensate, and the dough might be slightly stickier.
My dough is too sticky to roll out. What did I do wrong?
Don’t worry, this happens often! It usually means the dough hasn’t chilled long enough. Pop it back in the fridge for another 30 minutes. You can also lightly flour your rolling pin and work surface, but be careful not to add too much extra flour, as it can make the cookies dry.
Can I make the dough ahead of time?
Absolutely! The dough can be refrigerated for up to 2 days. Just make sure it’s tightly wrapped in plastic wrap so it doesn’t dry out or absorb any weird fridge smells. You can also freeze the discs of dough for up to 3 months. Thaw them overnight in the refrigerator before rolling and baking.
My cookies spread too much in the oven. How can I fix that?
This is almost always a temperature issue. The dough was too warm when it went into the oven. Next time, make sure your butter and cream cheese are just softened, not melted. Also, try chilling the cut-out shapes on the baking sheet for 10-15 minutes before baking. It really helps them hold their shape.
Can I use a different frosting for the filling?
Of course! A simple cream cheese frosting would be amazing with the orange flavor. You could also use a white chocolate ganache, a marshmallow fluff filling, or even a lemon curd for a totally different taste. Just make sure whatever you use is thick enough to hold the sandwich together without squishing out.
Pin This Recipe!

Perfect Halloween Orange Sugar Cookie Sandwiches

These soft and chewy orange sugar cookies are filled with a creamy orange buttercream, making them the perfect Halloween treat. They’re fun, festive, and filled with a bright citrus flavor that stands out from the usual chocolate-heavy sweets.
- Prep Time: 20 minutes
- Cook Time: 10 minutes
- Total Time: 1 hour 30 minutes (includes 1 hour chilling)
- Yield: 12-15 sandwich cookies 1x
- Category: Dessert
- Cuisine: American
Ingredients
- 1 cup (2 sticks) unsalted butter, softened
- 2 ounces cream cheese, softened
- 1 cup granulated sugar
- 1 large egg, at room temperature
- 2 tablespoons orange zest (from about 2 large oranges)
- 1 teaspoon orange extract
- 2 ½ cups all-purpose flour, spooned and leveled
- ½ teaspoon baking powder
- ¼ teaspoon salt
- ½ cup (1 stick) unsalted butter, softened (for filling)
- 2 cups powdered sugar, sifted if lumpy
- 2 tablespoons fresh orange juice
- 1 teaspoon orange zest (for filling)
- Pinch of salt (for filling)
- Orange sanding sugar or sprinkles (optional, for decoration)
- Black gel food coloring (optional, for decoration)
Instructions
- Cream the butter and sugars: In the bowl of a stand mixer fitted with the paddle attachment, beat the softened butter, cream cheese, and granulated sugar together on medium speed until light, fluffy, and pale in color, about 3-4 minutes. Scrape down the sides of the bowl halfway through.
- Add the wet ingredients: Beat in the egg, orange zest, and orange extract until just combined. The mixture might look slightly curdled; that’s normal.
- Mix the dry ingredients: In a separate medium bowl, whisk together the flour, baking powder, and salt. With the mixer on low speed, gradually add the dry ingredients to the wet ingredients. Mix until just combined, with a few streaks of flour remaining. Finish folding together with a rubber spatula. The dough will be soft and slightly sticky.
- Chill the dough: Divide the dough in half, shape each half into a flat disc about 1-inch thick, and wrap each disc tightly in plastic wrap. Refrigerate for at least 1 hour, or up to 2 days.
- Preheat and prep: When ready to bake, preheat oven to 350°F (175°C). Line two baking sheets with parchment paper or silicone mats.
- Roll and cut: On a lightly floured surface, roll out one disc of dough to about ¼-inch thickness. Use Halloween cookie cutters to cut out shapes. Re-roll scraps and cut more shapes. Aim for about 24-30 cookies (12-15 sandwiches).
- Bake: Place cookies about 1 inch apart on prepared baking sheets. If desired, gently press cut-out dough into orange sanding sugar before placing on sheet. Bake for 9-11 minutes, until edges are just barely golden brown. Centers will still look soft and slightly puffy.
- Cool completely: Let cookies cool on baking sheet for 5 minutes, then transfer to a wire rack to cool completely.
- Make the filling: In a clean mixer bowl, beat softened butter on medium speed until smooth and creamy. Gradually add powdered sugar, about ½ cup at a time, beating on low speed. Add orange juice, orange zest, and a pinch of salt. Increase speed to medium-high and beat for 2-3 minutes until light, fluffy, and spreadable.
- Assemble the sandwiches: Pair up cooled cookies by size and shape. Transfer buttercream to a piping bag fitted with a round tip (or a zip-top bag with a snipped corner). Pipe a generous swirl of frosting onto the flat side of one cookie. Gently press the flat side of its matching cookie on top.
- Decorate (optional): For a fun Halloween touch, use a tiny bit of black gel food coloring mixed with a drop of water to pipe a simple spiderweb or spooky face on top of each sandwich. Let decorating icing set for about 15 minutes before serving or storing.
Notes
The dough must be chilled for at least 1 hour to prevent spreading. For best results, chill cut-out shapes on the baking sheet for 10 minutes before baking. Cookies are better the next day as flavors meld. Store in an airtight container at room temperature for up to 3 days. Unfilled cookies can be frozen for up to 3 months.
Nutrition
- Serving Size: 1 sandwich cookie
- Calories: 300
- Sugar: 24
- Sodium: 95
- Fat: 16
- Saturated Fat: 10
- Carbohydrates: 36
- Protein: 3
Keywords: Halloween cookies, orange sugar cookies, cookie sandwiches, buttercream, fall baking, spooky treats


