Love this? Save it for later!
Share the inspiration with your friends
It was 11:47 PM on a random Wednesday, and I had a desperate need for a warm chocolate chip cookie. Not the kind of need you can ignore, you know? The kind that sits in your chest and won’t let you fall asleep. I didn’t have the energy for a full batch of dough—honestly, who does at that hour?—but I had one egg, a half-stick of butter, and a memory of my grandmother’s trick for making cookies taste like they’d been baked in a bakery. She always said the secret was letting the dough rest for just ten minutes, even when you were impatient. That night, with the kitchen lit only by the stove light, I decided to test if a tiny batch could deliver the same soul-soothing magic as a dozen. Maybe you’ve been there, standing in front of the pantry at a ridiculous hour, wondering if a single cookie is worth turning the oven on for. Let me tell you, it absolutely is. This recipe was born from that late-night craving, and I keep making it because it never fails to feel like a small, secret victory—a perfect little moment of joy that doesn’t require a crowd or a big production.
Why You’ll Love This Recipe
This isn’t just another cookie recipe. It’s the answer to that specific, almost urgent craving for a warm, gooey chocolate chip cookie when you don’t want a dozen leftovers tempting you from the counter. I’ve tested this small-batch formula more times than I can count, tweaking the butter-to-flour ratio until it was just right. Here’s why it works so beautifully:
- Quick & Easy: From craving to cookie in under 30 minutes. No chilling required, though a short rest helps.
- Simple Ingredients: You probably have everything in your kitchen right now. No weird flours or obscure extracts.
- Perfect for Date Night: It’s the ultimate treat for a cozy night in, a movie marathon, or a quiet evening with your favorite person.
- No Waste: Makes exactly two generous cookies. You get the satisfaction without the temptation of a full batch.
- Unbelievably Delicious: The texture is a perfect balance—crispy edges with a soft, chewy center that’s studded with melty chocolate.
What makes this recipe different from the rest? It’s the technique. I use a slightly higher ratio of brown sugar to white sugar to guarantee that deep, caramel-like chewiness. Plus, I add a tiny pinch of flaky salt on top right before baking. It’s a small touch, but it makes the chocolate taste richer and more complex. This is the kind of cookie that makes you close your eyes after the first bite. It’s comfort food, perfected for two.
What Ingredients You Will Need
This recipe relies on a handful of pantry staples to create something truly special. Each ingredient plays a specific role in achieving that perfect texture and flavor.
- Unsalted Butter: 2 tablespoons, softened to room temperature. Using unsalted butter lets you control the salt level. I prefer Kerrygold for its rich flavor, but any good-quality butter works.
- Granulated Sugar: 2 tablespoons. Adds sweetness and helps create those crispy, golden edges.
- Light Brown Sugar: 2 tablespoons, packed. This is the key to a chewy, moist cookie. It adds a subtle molasses flavor that pairs perfectly with chocolate.
- Large Egg Yolk: 1 yolk (save the white for another use, like scrambled eggs). The yolk provides richness and tenderness. Using only the yolk prevents the dough from being too wet.
- Vanilla Extract: 1/2 teaspoon. Pure vanilla extract makes a difference. Avoid imitation if you can.
- All-Purpose Flour: 1/3 cup (about 40 grams). Spoon and level it for accuracy—don’t scoop directly from the bag.
- Baking Soda: 1/4 teaspoon. Helps the cookies spread and become slightly chewy.
- Salt: 1/4 teaspoon, plus a pinch of flaky sea salt for topping. Salt balances the sweetness and enhances the chocolate flavor.
- Semi-Sweet Chocolate Chips: 1/3 cup. I use Ghirardelli or Guittard for a deep, not-too-sweet chocolate flavor. You can also chop a good-quality chocolate bar for bigger puddles of chocolate.
Substitution Tips: For a dairy-free version, use vegan butter sticks (like Earth Balance). The texture will be slightly different, but still delicious. If you only have salted butter, reduce the added salt to 1/8 teaspoon. You can also swap the semi-sweet chips for dark chocolate, milk chocolate, or even white chocolate chips depending on your mood.
Equipment Needed
The beauty of this recipe is that it doesn’t require any fancy gadgets. You likely have everything you need already.
- Small Mixing Bowl: For creaming the butter and sugars.
- Medium Mixing Bowl: For combining the dry ingredients.
- Whisk: For mixing the dry ingredients and the wet ingredients.
- Rubber Spatula or Wooden Spoon: For folding everything together.
- Baking Sheet: A small one works perfectly. I use a quarter-sheet pan.
- Parchment Paper or Silicone Baking Mat: Essential for easy cleanup and preventing sticking.
- Cookie Scoop (Optional): A 1.5-tablespoon scoop helps portion the dough evenly, but two spoons work just fine.
- Cooling Rack: For letting the cookies cool slightly before devouring.
Preparation Method
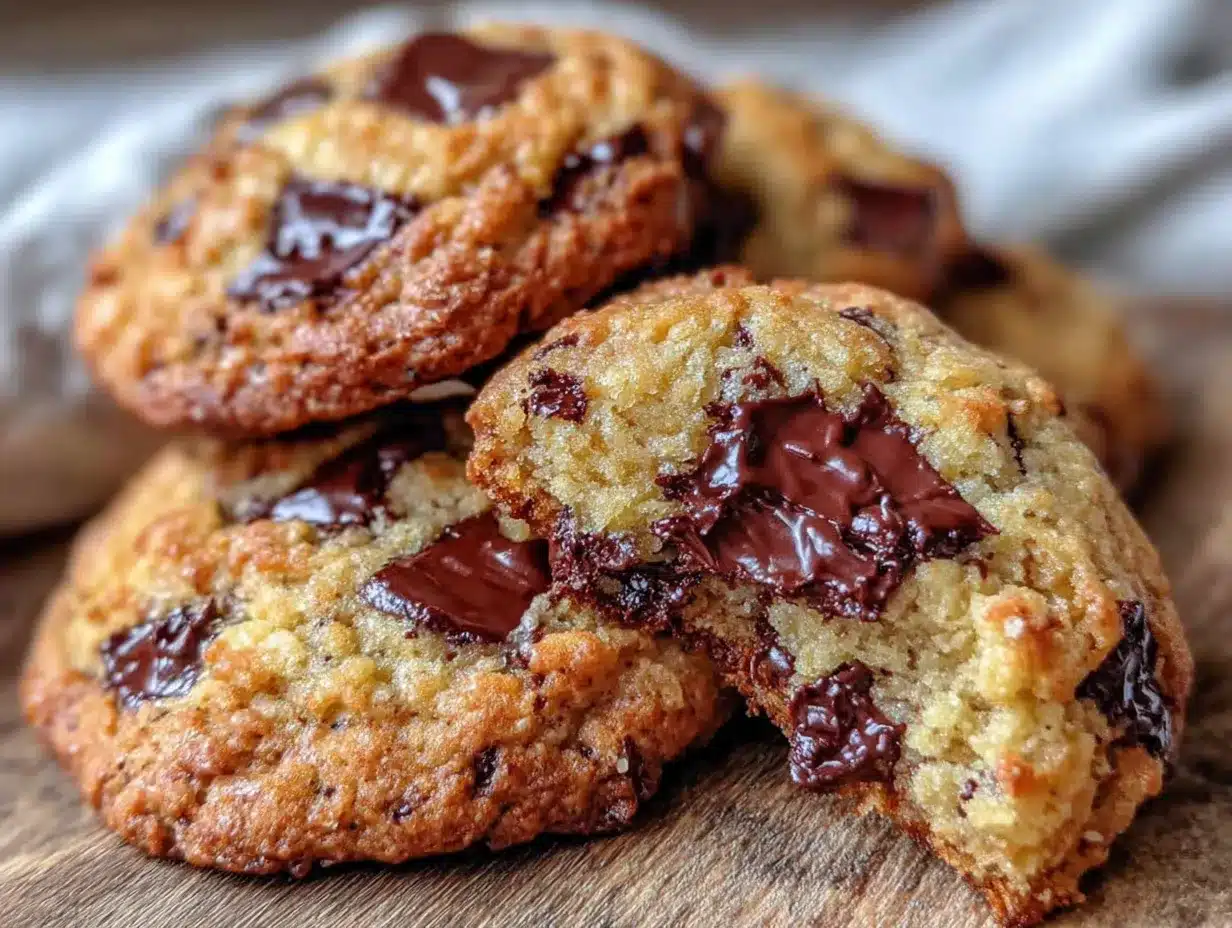
Follow these steps carefully, and you’ll have two perfect cookies in no time. The key is to not overmix the dough once the flour is added.
- Preheat and Prep: Preheat your oven to 350°F (175°C). Line your baking sheet with parchment paper or a silicone mat. This ensures the cookies don’t stick and the bottoms bake evenly.
- Cream Butter and Sugars: In your small mixing bowl, combine the softened butter, granulated sugar, and packed brown sugar. Use a fork or a small whisk to cream them together until the mixture is light, fluffy, and pale in color. This should take about 2 minutes. Scrape down the sides of the bowl once. (Note: if your butter is too cold, it won’t cream properly. If it’s too soft, the cookies will spread too thin. Room temperature is key!)
- Add Wet Ingredients: Add the egg yolk and vanilla extract to the butter-sugar mixture. Whisk vigorously until everything is fully combined and the mixture looks smooth and glossy. It might look a little separated at first, but keep whisking—it will come together.
- Combine Dry Ingredients: In the medium bowl, whisk together the all-purpose flour, baking soda, and salt. This ensures the baking soda and salt are evenly distributed throughout the flour, which prevents a pocket of salt in one cookie.
- Mix Dry into Wet: Add the dry ingredients to the wet ingredients. Use your rubber spatula to fold everything together gently. Stir just until no streaks of flour remain. A few small lumps are okay. Do not overmix, or the cookies will be tough. The dough will be quite thick and slightly sticky.
- Fold in Chocolate Chips: Add the semi-sweet chocolate chips to the dough. Fold them in with your spatula until they are evenly distributed. You might feel like there aren’t enough chips, but trust the process—they will be perfectly studded throughout each cookie.
- Portion the Dough: Using a cookie scoop or two spoons, divide the dough into two equal portions. They should be about 2-3 tablespoons each. Place them on the prepared baking sheet, leaving at least 3 inches of space between them. They will spread!
- Rest (Optional but Recommended): If you have the patience, let the dough balls rest on the baking sheet for 10 minutes. This allows the flour to fully hydrate and the sugars to dissolve a bit, resulting in a chewier, more flavorful cookie. I learned this trick the hard way after many flat cookies.
- Bake: Place the baking sheet on the middle rack of your preheated oven. Bake for exactly 10-12 minutes. The cookies are done when the edges are golden brown and the centers look slightly under-baked and puffy. They will continue to cook on the hot sheet as they cool.
- Add Flaky Salt: As soon as you pull the cookies from the oven, sprinkle a tiny pinch of flaky sea salt over the top of each one. This is non-negotiable! It balances the sweetness and makes the chocolate taste incredible.
- Cool on Pan: Let the cookies cool on the baking sheet for 5 minutes. This is crucial for them to set up properly. If you try to move them too soon, they will fall apart.
- Transfer and Serve: After 5 minutes, use a thin spatula to transfer the cookies to a cooling rack. Let them cool for another 2-3 minutes (if you can wait that long). They are best enjoyed warm, with a glass of cold milk.
Cooking Tips & Techniques
Over the years, I’ve made a lot of mistakes with small-batch cookies. Here are the lessons I learned so you don’t have to repeat them.
- The Butter Temperature Trap: I once used melted butter because I was in a hurry. The cookies spread into flat, greasy discs. Softened butter is non-negotiable for the right texture. Take it out of the fridge 30 minutes before you start.
- The Overmixing Disaster: One of my first attempts at this recipe resulted in hockey pucks. I had mixed the dough until it was perfectly smooth, which developed too much gluten. Mix just until the flour disappears—a little shaggy is better than a lot tough.
- Watch the Oven: Every oven runs a little differently. My old oven would burn the bottoms at 350°F. If your oven runs hot, check the cookies at 9 minutes. You want the edges set and golden, but the center should still look soft and slightly underdone.
- The Resting Game: I know it’s hard to wait, but that 10-minute rest for the dough balls is a game-changer. It allows the butter to solidify slightly, which prevents the cookies from spreading too much and gives them a thicker, chewier center.
- Use a Kitchen Scale: For the most consistent results, weigh your flour. A cup of flour can vary from 120 to 150 grams depending on how you scoop it. For this recipe, 40 grams of flour is the sweet spot.
Variations & Adaptations
This base recipe is incredibly versatile. Once you master it, you can play around with different flavors and add-ins.
- The Double Chocolate Twist: Replace 1 tablespoon of the all-purpose flour with 1 tablespoon of unsweetened cocoa powder. Add a handful of white chocolate chips along with the semi-sweet chips. It’s a rich, fudgy variation that feels extra decadent.
- The Nutty Crunch: Add 2 tablespoons of toasted, chopped walnuts or pecans along with the chocolate chips. Toast them in a dry pan over medium heat for 2-3 minutes until fragrant. It adds a wonderful crunchy texture and a warm, nutty flavor.
- The Peanut Butter Swirl: Before baking, drop a small teaspoon of creamy peanut butter on top of each dough ball and gently swirl it in with a toothpick. The peanut butter gets slightly caramelized in the oven and pairs beautifully with the chocolate.
- Gluten-Free Option: Substitute the all-purpose flour with a good 1:1 gluten-free baking flour blend (like King Arthur Measure for Measure). The texture will be slightly more tender, but the cookies will still be deliciously chewy.
- Vegan Adaptation: Use vegan butter sticks and replace the egg yolk with 1 tablespoon of aquafaba (the liquid from a can of chickpeas) mixed with 1/2 teaspoon of flaxseed meal. Let it sit for 5 minutes to thicken before adding it to the butter mixture.
Serving & Storage Suggestions
These cookies are best enjoyed fresh from the oven, but here’s how to make the most of them.
Serving: Serve these cookies warm, ideally within 15 minutes of baking. The chocolate should still be slightly melty. A glass of cold milk is the classic pairing, but a scoop of vanilla ice cream sandwiched between the two cookies is a next-level dessert. For a cozy winter treat, serve them with a mug of hot cocoa or a warm chai latte.
Storage: If you somehow have any leftovers (unlikely, but possible), store the cookies in an airtight container at room temperature. They will stay soft and chewy for up to 2 days. Do not refrigerate them, as the fridge will dry them out.
Reheating: To bring back that just-baked magic, pop a cookie in the microwave for 10-15 seconds. For a crispier edge, reheat it in a toaster oven at 300°F (150°C) for 3-4 minutes. The flavors actually develop a bit overnight, so day-old cookies are still incredibly satisfying.
Freezing the Dough: This is my favorite trick. You can freeze the portioned dough balls on a baking sheet until solid, then transfer them to a freezer bag. When a craving hits, bake one or two directly from frozen—just add 2-3 minutes to the baking time. It’s the ultimate emergency cookie solution.
Nutritional Information & Benefits
While these are definitely a treat, knowing what’s in them helps you enjoy them mindfully. The nutritional values are estimated for one cookie (half the recipe).
Estimated Per Cookie: Calories: 285 | Fat: 16g | Saturated Fat: 10g | Cholesterol: 75mg | Sodium: 210mg | Carbohydrates: 35g | Fiber: 2g | Sugar: 24g | Protein: 4g
Health Highlights: Dark chocolate (semi-sweet) is rich in antioxidants called flavonoids, which can support heart health. Using a single egg yolk instead of a whole egg reduces the cholesterol content slightly compared to a full-egg recipe. The butter provides a small amount of vitamin A. This recipe is also portion-controlled, which can help with mindful eating—you get the satisfaction of a homemade cookie without the temptation of a dozen sitting on the counter.
Dietary Considerations: This recipe is vegetarian. It can be made gluten-free and vegan with the substitutions listed above. It contains dairy, eggs, and gluten (unless modified).
Conclusion
This small-batch chocolate chip cookie recipe is more than just a quick dessert—it’s a little ritual. It’s proof that you don’t need a big occasion or a full pantry to create something truly wonderful. Whether you’re baking for a quiet night in with your partner, treating yourself after a long day, or surprising a friend with a warm, homemade gift, these two cookies deliver a disproportionate amount of joy. I love this recipe because it’s forgiving, fast, and always, always hits the spot. So go ahead, preheat that oven, and give it a try. I promise you won’t be disappointed. And when you take that first bite, with the crisp edge giving way to a soft, chocolatey center, you’ll understand exactly why this recipe has earned a permanent spot in my kitchen. If you make them, I’d love to hear how they turned out—leave a comment below or tag me in your photos. Happy baking!
Frequently Asked Questions
Can I double this recipe to make four cookies?
Absolutely! Simply double every ingredient. The baking time and temperature remain the same. Just make sure to use a larger bowl and give the cookies plenty of space on the baking sheet.
Why did my cookies spread too much?
This usually happens for one of three reasons: your butter was too soft or melted, you didn’t measure your flour correctly (too little flour), or your baking sheet was too hot from a previous batch. Make sure your butter is just softened, not greasy, and let the baking sheet cool completely between batches.
Can I use a whole egg instead of just the yolk?
You can, but the texture will be different. Using a whole egg adds more moisture, which will make the cookies slightly cakier and less chewy. If you only have a whole egg, use just half of it (whisk it first and then measure out half) for the best results.
What if I don’t have brown sugar?
You can make a quick substitute by mixing 2 tablespoons of granulated sugar with 1 teaspoon of molasses. If you don’t have molasses, you can use all granulated sugar, but the cookies will be less chewy and won’t have that deep caramel flavor.
Can I make the dough ahead of time?
Yes! You can prepare the dough, portion it into balls, and store them in the refrigerator for up to 48 hours. Let the dough balls sit at room temperature for 10 minutes before baking. You can also freeze the dough balls for up to 3 months and bake them directly from frozen, adding 2-3 minutes to the baking time.
Pin This Recipe!

Perfect Small-Batch Chocolate Chip Cookies for Two

This recipe delivers two perfectly chewy, gooey chocolate chip cookies with crispy edges, ideal for a late-night craving or a cozy date night. It uses simple ingredients and comes together in under 30 minutes.
- Prep Time: 10 minutes
- Cook Time: 12 minutes
- Total Time: 22 minutes
- Yield: 2 cookies 1x
- Category: Dessert
- Cuisine: American
Ingredients
- 2 tablespoons unsalted butter, softened
- 2 tablespoons granulated sugar
- 2 tablespoons light brown sugar, packed
- 1 large egg yolk
- 1/2 teaspoon vanilla extract
- 1/3 cup all-purpose flour (about 40 grams)
- 1/4 teaspoon baking soda
- 1/4 teaspoon salt
- 1/3 cup semi-sweet chocolate chips
- Flaky sea salt for topping
Instructions
- Preheat oven to 350°F (175°C). Line a baking sheet with parchment paper or a silicone mat.
- In a small mixing bowl, cream together the softened butter, granulated sugar, and brown sugar until light, fluffy, and pale (about 2 minutes).
- Add the egg yolk and vanilla extract; whisk vigorously until smooth and glossy.
- In a medium bowl, whisk together the flour, baking soda, and salt.
- Add the dry ingredients to the wet ingredients; fold gently with a rubber spatula until just combined. Do not overmix.
- Fold in the chocolate chips until evenly distributed.
- Divide the dough into two equal portions (about 2-3 tablespoons each). Place them on the prepared baking sheet, leaving at least 3 inches of space.
- Optional: Let the dough balls rest for 10 minutes for a chewier texture.
- Bake for 10-12 minutes, until edges are golden brown and centers look slightly under-baked and puffy.
- Immediately sprinkle a tiny pinch of flaky sea salt over each cookie.
- Let cookies cool on the baking sheet for 5 minutes, then transfer to a cooling rack. Serve warm.
Notes
For best results, use room temperature butter and do not overmix the dough. A 10-minute rest for the dough balls enhances chewiness. Flaky sea salt on top is highly recommended.
Nutrition
- Serving Size: 1 cookie
- Calories: 285
- Sugar: 24
- Sodium: 210
- Fat: 16
- Saturated Fat: 10
- Carbohydrates: 35
- Fiber: 2
- Protein: 4
Keywords: small batch chocolate chip cookies, cookies for two, easy cookie recipe, late night snack, date night dessert


