Love this? Save it for later!
Share the inspiration with your friends
It was 10:47 PM on a random Tuesday in October, and I had a very specific, slightly ridiculous craving: ghost-shaped meringue cookies. Not the complicated, piping-bag-perfect kind you see on fancy baking blogs, but the kind that look like tiny, adorable ghosts. The problem was, I didn’t have cream of tartar, and I was definitely not about to run to the store at that hour. But I did have a carton of egg whites leftover from a pasta dinner, a bag of powdered sugar that was probably older than my relationship with my blender, and a wild idea. What if I just… whipped them up anyway? No cream of tartar, no fuss, just pure, last-minute Halloween magic.
I mean, honestly, the best kitchen experiments happen when you’re too tired to overthink. I grabbed my stand mixer, cracked the eggs with a little more force than necessary (one shell bit did fall in—I fished it out with a fork, no big deal), and just went for it. The apartment was quiet, the only light coming from the stove hood, and I felt like a mad scientist creating something from nothing. Maybe you’ve been there—that late-night urge to make something cute and fun, even when logic says “go to bed.” This is why this recipe stuck with me. It’s not just a cookie; it’s a testament to the fact that you can make something really special with what you already have, even at 11 PM on a Tuesday.
Why You’ll Love This Recipe
Let’s be real—weeknights are a battlefield. You’re tired, the kids are hungry, and the last thing you want is a project that takes three hours. These ghost meringue cookie pops are the opposite of that. They are the quick, no-stress win you need this Halloween season.
- Quick & Easy: From start to finish, these are on the table in about 30 minutes. The active prep time is maybe 10 minutes, and the oven does the rest. Perfect for a last-minute Halloween treat or a fun after-school activity.
- Simple Ingredients: You likely have everything in your kitchen right now. Egg whites, sugar, a pinch of salt, and some chocolate chips for the eyes. No fancy extracts or specialty flours needed.
- Perfect for Halloween: These are the ultimate spooky snack for Halloween parties, classroom treats, or just a fun weekend bake. They look impressive but are secretly super simple.
- Crowd-Pleaser: Kids absolutely love them because they look like little ghosts. Adults love them because they are light, airy, and not overly sweet. A total win-win.
- Unbelievably Delicious: The texture is what gets me every time. A crisp, melt-in-your-mouth exterior with a soft, marshmallowy center. It’s like eating a cloud with a chocolate chip smile.
What makes this recipe different? It’s the speed. Most meringue recipes have you bake them low and slow for an hour or more. This one uses a slightly higher temperature and a shorter time, so you get that perfect ghostly shape without the wait. It’s my best version for a busy world.
This is the kind of recipe that makes you close your eyes after the first bite. It’s pure comfort food, but lighter and faster. Perfect for impressing your kids without stressing yourself out, or turning a simple Tuesday night into a little bit of magic.
What Ingredients You Will Need
This recipe uses the most basic of baking staples to create something truly special. The magic is all in the technique, not the grocery list. Here is everything you need to summon your own little ghostly army.
- 3 Large Egg Whites: (Room temperature is best, but cold from the fridge will work in a pinch if you’re in a hurry). The egg whites are the structural backbone of the meringue. For best results, make sure no yolk gets into the bowl—it will prevent the whites from whipping up properly. I recommend using fresh eggs; the carton kind can sometimes be finicky.
- ¾ Cup Granulated Sugar: (150 grams). This is not just for sweetness. The sugar stabilizes the egg whites and gives the meringue its glossy, crisp texture. You can use superfine sugar if you have it, but regular granulated works perfectly.
- 1 Teaspoon Vanilla Extract: (Pure vanilla is best, but imitation is fine). This adds a lovely warmth and depth of flavor. Don’t skip it—it makes the meringue taste like a real treat, not just sweet air.
- ⅛ Teaspoon Salt: A tiny pinch is all you need. Salt balances the sweetness and helps the egg whites hold their structure. I use fine sea salt for this.
- ¼ Cup Mini Chocolate Chips: (For the ghost faces). You will use two per ghost for the eyes, and sometimes a little dot for a mouth if you’re feeling fancy. Dark chocolate chips create a nice contrast, but milk or white chocolate work too.
- Optional: 6-8 Lollipop Sticks: These turn the cookies into “pops,” which is what makes them so fun for kids. If you don’t have them, you can just pipe the ghosts directly onto the baking sheet as free-form cookies.
Ingredient Selection Tips: I always use large eggs from a brand I trust, like Eggland’s Best. For the vanilla, Nielsen-Massey is my go-to, but store-brand pure vanilla is perfectly fine. For the chocolate chips, I love Ghirardelli mini chips because they are small and cute on the ghosts, but any mini chip will do.
Substitution Guidance: If you are worried about raw eggs, you can use pasteurized egg whites from a carton. They whip up just fine, though the texture might be slightly less stable. For a vegan option, you can try aquafaba (the liquid from a can of chickpeas), but the texture and baking time will change significantly—this recipe is really designed for real egg whites.
Equipment Needed
You don’t need a professional pastry kit to make these ghost meringue cookie pops. Here is the simple setup that gets the job done, even on a chaotic weeknight.
- Electric Stand Mixer or Hand Mixer: Whipping egg whites by hand is a workout. A stand mixer with the whisk attachment is the easiest, but a hand mixer works just as well. I have used my trusty KitchenAid for years, and it never lets me down.
- Large Mixing Bowl: Make sure it is spotlessly clean and completely dry. Any trace of grease or water will prevent the egg whites from whipping up. Glass or metal bowls are best; plastic can sometimes hold onto oils.
- Baking Sheet: A standard half-sheet pan is perfect. Line it with parchment paper—do not use wax paper or foil, as the meringues will stick.
- Piping Bag with a Round Tip: A piping bag makes shaping the ghosts much easier. If you don’t have one, a sturdy zip-top bag with the corner snipped off works beautifully. A ½-inch round tip is ideal, but you can just snip the bag.
- Lollipop Sticks: Optional but highly recommended for the “pop” effect. You can find them at craft stores or online. If you don’t have them, just skip them—the ghosts are still adorable.
- Spatula: For scraping down the bowl. A silicone spatula is best because it’s flexible and won’t scratch your bowls.
Budget-Friendly Options: If you don’t have a stand mixer, a hand mixer is a cheap and effective alternative. If you don’t have a piping bag, a zip-top bag is free and works like a charm. I have made these many times with just a hand mixer and a plastic bag, and they came out perfect every time.
Preparation Method
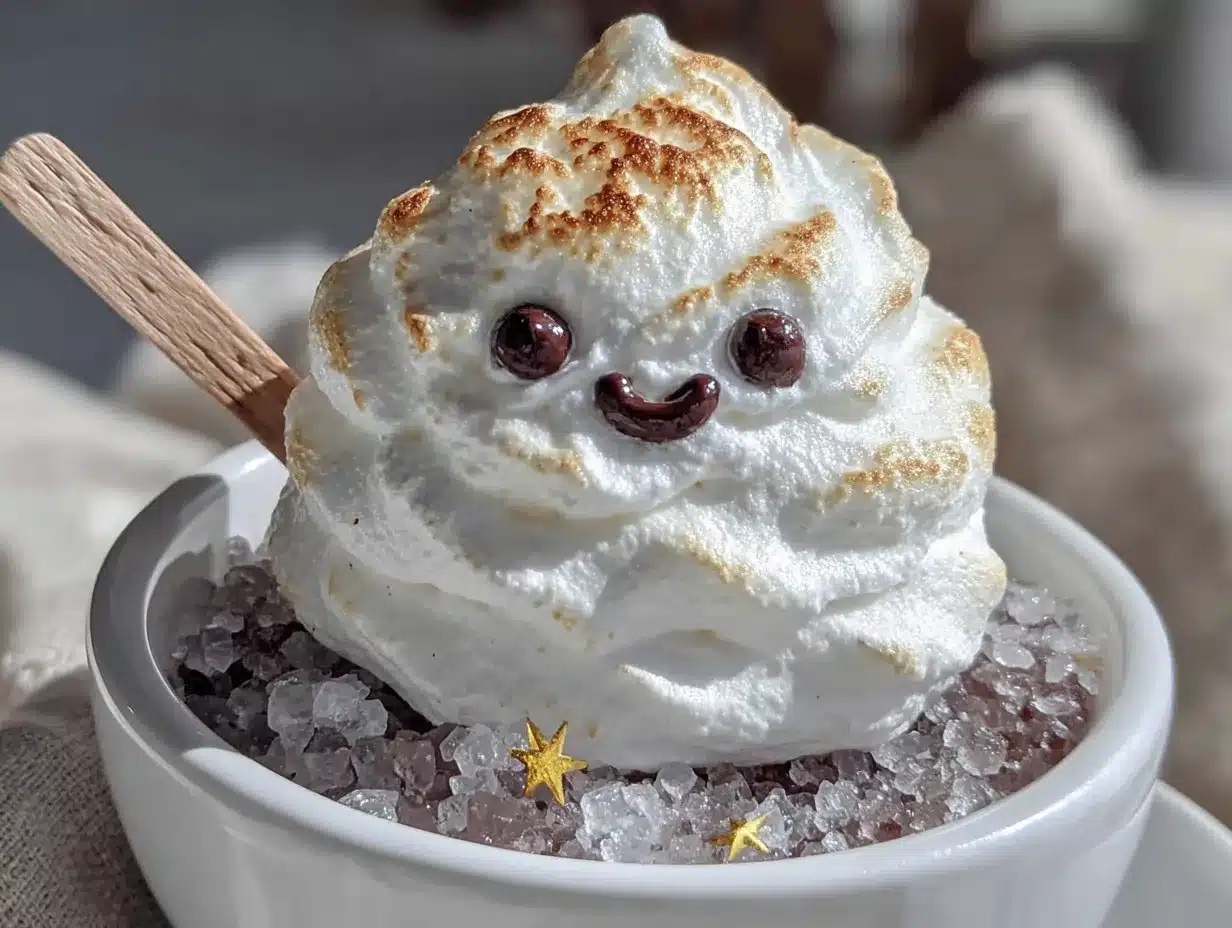
Alright, let’s get these ghosts made. This whole process is faster than you think—I promise. Just follow these steps, and you will have a tray of adorable ghost pops in no time.
- Preheat and Prep: Preheat your oven to 350°F (175°C). Line a large baking sheet with parchment paper. If you are using lollipop sticks, lay them out on the parchment, spacing them about 2 inches apart. You will pipe the ghosts right over the top of the sticks.
- Whip the Egg Whites: In your completely clean, dry mixing bowl, add the 3 room-temperature egg whites. Beat them on medium speed (speed 4 on a KitchenAid) until they become frothy and bubbly, about 30 seconds. You will see large bubbles forming—this is good.
- Add the Salt and Vanilla: With the mixer still running on medium, add the ⅛ teaspoon of salt and the 1 teaspoon of vanilla extract. This helps stabilize the foam early on.
- Gradually Add the Sugar: This is the most important step. With the mixer running on medium-high speed (speed 6-8), start adding the ¾ cup of granulated sugar, one tablespoon at a time. Wait about 15 seconds between each addition. This slow addition is what creates a stable, glossy meringue. Do not dump it all in at once—you will end up with a flat, sad mixture.
- Whip to Stiff Peaks: Once all the sugar is added, increase the speed to high (speed 10) and whip for another 3-5 minutes. You are looking for stiff, glossy peaks. This means when you lift the whisk, the meringue stands straight up without falling over. The mixture should look like thick, shiny shaving cream. If it is still runny, keep whipping. A good test: rub a tiny bit between your fingers—if it feels gritty, the sugar hasn’t dissolved yet. Keep whipping until it feels smooth.
- Transfer to Piping Bag: Spoon the meringue into your piping bag fitted with a round tip (or your snipped zip-top bag). Twist the top of the bag to seal it, and get ready to pipe.
- Pipe the Ghosts: Hold the piping bag straight up and down, about ½ inch above the parchment paper. For each ghost, squeeze out a round base, about 1.5 inches wide. Then, as you lift the bag straight up, reduce the pressure slightly to create a tall, pointy peak. This is the ghost’s head. Release the pressure and pull the bag away cleanly. If you are using lollipop sticks, pipe the base of the ghost directly over the top of the stick, making sure the meringue completely covers the stick.
- Add the Faces: Immediately after piping each ghost, gently press two mini chocolate chips into the meringue for the eyes. You can also add a tiny dot for a mouth, but I find the eyes alone are cuter. Work quickly, as the meringue will start to set.
- Bake: Place the baking sheet in the preheated oven. Immediately turn the oven temperature DOWN to 200°F (90°C). This is the trick! The initial blast of heat sets the outside, and then the low heat dries them out. Bake for 25-30 minutes, until the ghosts are firm to the touch and easily peel off the parchment. They should be dry on the outside but still slightly soft in the center.
- Cool Completely: Let the ghosts cool on the baking sheet for at least 10 minutes. They will continue to firm up as they cool. Do not try to move them while they are hot—they are fragile! Once cool, they are ready to serve or store.
Sensory Cues: When you whip the meringue, listen for the sound change. It starts as a sloshy, liquid sound and becomes a thick, silent, “thwapping” sound as it reaches stiff peaks. When you pipe the ghosts, the meringue should hold its shape without spreading. If it spreads, it is under-whipped. The baked ghosts will look slightly cracked on the outside—this is perfectly normal and gives them a rustic, ghostly charm!
Cooking Tips & Techniques
I have made these ghost meringue cookie pops more times than I can count, and I have definitely learned a few things the hard way. Here are my best tips to ensure your ghosts are spooky and perfect, not flat and sad.
- Bowl Hygiene is Everything: This is the number one mistake people make. If your bowl or whisk has even a tiny speck of grease or yolk, your egg whites will not whip up. Wash your bowl and whisk with hot, soapy water, then dry them thoroughly with a clean towel. A little lemon juice or vinegar on a paper towel wiped around the bowl can also help remove any lingering fat.
- Don’t Over-Bake: Meringues are very sensitive to heat. If you bake them at too high a temperature, they will brown and become weepy. The low-and-slow method (200°F) is the key to a dry, crisp exterior and a soft center. If your oven runs hot, you can even crack the door open slightly for the last 10 minutes.
- Humidity is Your Enemy: Meringues do not like humid days. The sugar absorbs moisture from the air, making them sticky and soft. If you live in a humid climate, try to make these on a dry day, or store them in an airtight container immediately after cooling.
- Patience with Peaks: I have definitely under-whipped my meringue before, and the ghosts spread into flat puddles. It is so disappointing! Take your time with the whipping. When you think it’s done, whip it for another minute. You want those stiff, glossy peaks that hold their shape perfectly.
- Quick Face Assembly: The meringue sets quickly once it’s piped. If you are making a big batch, pipe all the ghosts first, then go back and add the chocolate chip eyes. This will give you the most consistent results.
Variations & Adaptations
One of the best things about this recipe is how easy it is to customize. Here are a few of my favorite ways to change it up, depending on the occasion or what I have on hand.
- Spooky Flavor Twist: Add ¼ teaspoon of peppermint extract along with the vanilla for a “candy cane ghost” vibe. You can also add a drop of black food coloring to create a “shadow ghost” effect, though the natural white is pretty classic for Halloween.
- Gluten-Free & Dairy-Free: This recipe is naturally gluten-free and dairy-free (as long as you use dairy-free chocolate chips). It’s a fantastic option for friends with dietary restrictions. Just double-check your chocolate chip labels to be safe.
- Different Shapes: If you don’t want ghost pops, you can pipe the meringue into simple kisses, small circles for “flying saucers,” or even little pumpkins by adding a touch of orange food coloring. The piping technique is the same, just change the shape!
- Flavored Meringues: Swap the vanilla for almond extract (use ½ teaspoon as it is stronger) or lemon extract for a bright, citrusy ghost. You can also zest a lemon or orange into the sugar before whipping for a more intense flavor.
- Make-Ahead Note for Busy Weeknights: You can prepare the meringue mixture and keep it in the piping bag in the refrigerator for up to an hour before baking. This is a lifesaver if you are juggling dinner and a Halloween activity. Just let the bag sit at room temperature for 5 minutes before piping.
Serving & Storage Suggestions
These ghost meringue cookie pops are best served with a little bit of theatrical flair. Here is how to make them the star of your Halloween spread, and how to keep them fresh for days.
- Serving Temperature: Serve them at room temperature. The texture is perfect—crisp on the outside, soft on the inside. They are fantastic on their own or as part of a Halloween dessert platter.
- Presentation Ideas: Stick the ghost pops into a small pumpkin or a vase filled with white beans or rice to make them stand upright. It creates a spooky, adorable centerpiece. You can also arrange them on a platter with some “dirt” (crushed chocolate cookies) for a graveyard effect.
- Complementary Dishes: These pair beautifully with a warm cup of hot chocolate (white hot chocolate is extra fun), a glass of cold milk, or a scoop of vanilla ice cream. For a grown-up twist, serve them alongside a dark coffee or a glass of bourbon.
- Storage Instructions: Store the cooled ghosts in an airtight container at room temperature. They will stay fresh for up to 5 days. Do not refrigerate them—the moisture will make them sticky and ruin the texture.
- Freezing: You can freeze the baked, cooled ghosts in a single layer in a freezer-safe bag for up to 3 months. Thaw them at room temperature for 10 minutes before serving. The texture will be slightly softer, but they are still delicious.
Flavor Development: Honestly, these are best the day they are made. The outside is perfectly crisp, and the inside is marshmallowy. They are still great the next day, but they will lose a bit of their initial crunch. That is why I always recommend making them right before you plan to serve them!
Nutritional Information & Benefits
Let’s be honest—these are a treat, not a health food. But compared to a lot of Halloween candy, they are a surprisingly light and guilt-free option. Here is a quick look at what you are getting.
- Estimated Nutritional Values (per ghost pop, without stick): Calories: 45, Fat: 0g, Carbohydrates: 10g, Sugar: 9g, Protein: 1g. These are estimates and will vary based on your exact ingredients.
- Health Benefits: The main ingredient is egg whites, which are a great source of lean protein. This means you get a little bit of staying power from these cookies, unlike pure sugar candy. They are also naturally fat-free and cholesterol-free.
- Dietary Considerations: This recipe is naturally gluten-free, dairy-free (with dairy-free chips), and nut-free. It is a fantastic option for school parties where allergies are a concern, as long as you check your ingredient labels.
- Potential Allergens: Eggs are the primary allergen here. Make sure to inform anyone with an egg allergy before they indulge. The chocolate chips may also contain traces of milk or soy, depending on the brand.
My Personal Wellness Perspective: I love that these cookies let you have a fun, festive treat without the heavy feeling you get from a lot of Halloween desserts. They are light, airy, and feel a little bit more “homemade” and thoughtful than a candy bar. It’s a way to celebrate without overdoing it, which is a win in my book.
Conclusion
These quick ghost meringue cookie pops are more than just a Halloween recipe—they are a little moment of joy in a busy week. They prove that you don’t need a ton of time, fancy ingredients, or a perfect kitchen to create something truly special. All you need is a few egg whites, some sugar, and a little bit of late-night creativity (or a Tuesday afternoon, honestly).
I love this recipe because it is forgiving, fast, and always makes people smile. I have made them for my son’s classroom party, for a last-minute Halloween gathering, and just for myself on a quiet night when I wanted to make something cute. They never fail to lift my spirits.
Now it’s your turn! I would love to see how your ghost pops turn out. Did you add any fun variations? Did your kids help with the piping? Share your creations and tag me—I can’t wait to see your spooky, adorable results. Happy haunting, and happy baking!
Frequently Asked Questions
Can I use a different type of sugar?
Granulated white sugar is the best for this recipe because it dissolves easily and creates a stable meringue. Powdered sugar can be used in a pinch, but it contains cornstarch, which can make the meringue slightly less crisp and more prone to weeping. I recommend sticking with granulated for the best results.
Why did my meringue collapse?
This usually happens for one of three reasons: the bowl or whisk had a trace of grease, the egg whites were under-whipped, or the sugar was added too quickly. Make sure your equipment is spotless, whip the eggs to stiff peaks, and add the sugar slowly. If your meringue collapses, it is usually a sign that one of these steps was missed.
Can I make these without a piping bag?
Absolutely! A sturdy zip-top bag with a small corner snipped off works perfectly. You can also use a spoon to drop small dollops of meringue onto the baking sheet and then shape them gently with the back of the spoon. They won’t look as precisely ghost-shaped, but they will still be delicious and cute.
How do I know when the meringues are fully baked?
The meringues are done when they are firm to the touch and easily peel off the parchment paper. They should feel dry on the outside, not sticky. If you tap one gently, it should sound hollow. The baking time of 25-30 minutes at 200°F is usually perfect, but ovens vary, so check them at the 25-minute mark.
Can I add food coloring to make colorful ghosts?
Yes! Gel food coloring is best because it won’t add extra liquid to the meringue. Add a tiny drop or two to the meringue after it has reached stiff peaks, and gently fold it in with a spatula until the color is even. Be careful not to overmix, or you will deflate the meringue. A little color goes a long way!
Pin This Recipe!
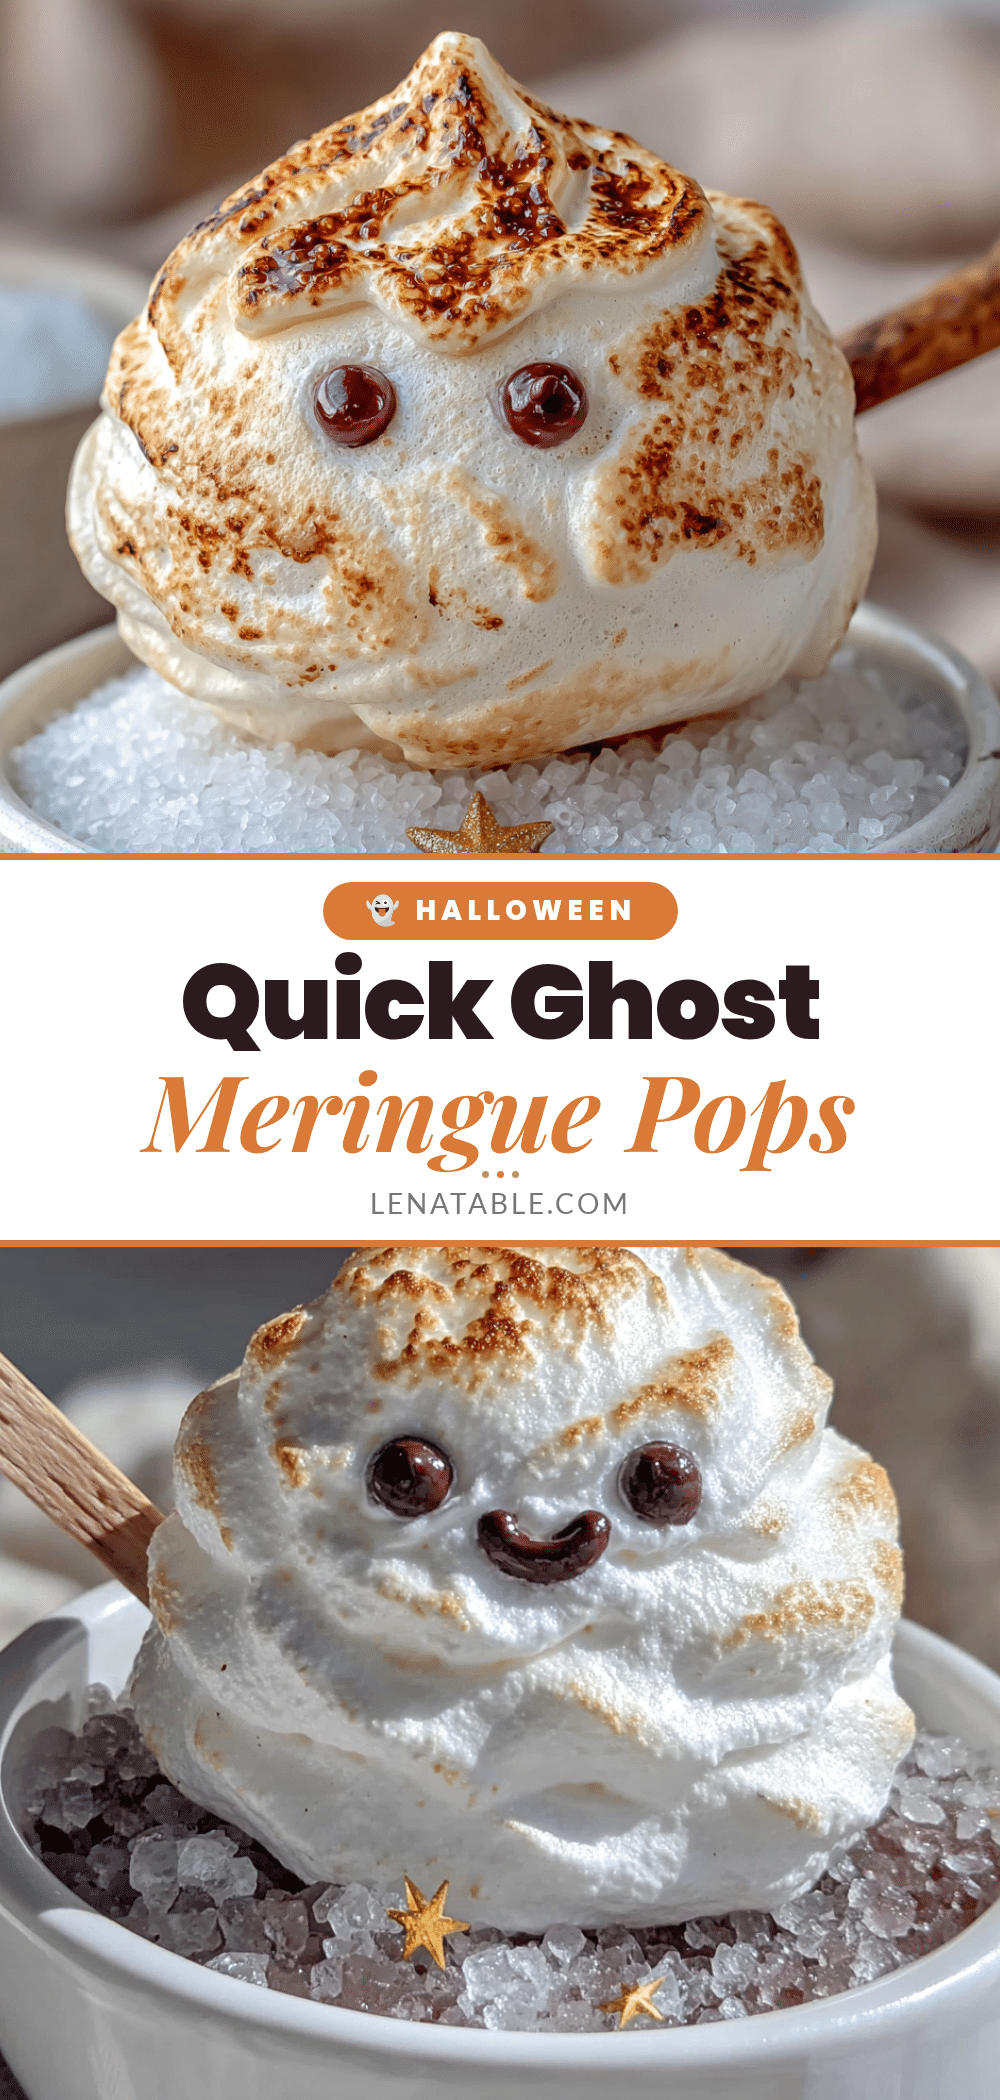
Perfect Ghost Meringue Cookie Pops: Easy 30-Minute Recipe
Quick and easy ghost-shaped meringue cookie pops made with simple ingredients in about 30 minutes. Perfect for Halloween parties or a fun last-minute treat.
- Prep Time: 10 minutes
- Cook Time: 25-30 minutes
- Total Time: 35-40 minutes
- Yield: 6-8 servings 1x
- Category: Dessert
- Cuisine: American
Ingredients
- 3 large egg whites (room temperature)
- ¾ cup granulated sugar (150 grams)
- 1 teaspoon vanilla extract
- ⅛ teaspoon salt
- ¼ cup mini chocolate chips
- 6–8 lollipop sticks (optional)
Instructions
- Preheat oven to 350°F (175°C). Line a large baking sheet with parchment paper. If using lollipop sticks, lay them out on the parchment, spacing about 2 inches apart.
- In a clean, dry mixing bowl, beat egg whites on medium speed until frothy and bubbly, about 30 seconds.
- Add salt and vanilla extract, mixing on medium speed.
- Gradually add sugar, one tablespoon at a time, waiting about 15 seconds between each addition, while mixing on medium-high speed.
- Increase speed to high and whip for 3-5 minutes until stiff, glossy peaks form. The mixture should look like thick, shiny shaving cream and feel smooth when rubbed between fingers.
- Transfer meringue to a piping bag fitted with a round tip (or a zip-top bag with a corner snipped off).
- Pipe ghosts onto the parchment: squeeze out a round base about 1.5 inches wide, then lift the bag straight up while reducing pressure to create a tall, pointy peak. If using sticks, pipe the base over the top of the stick.
- Immediately press two mini chocolate chips into each ghost for eyes. Work quickly as the meringue sets fast.
- Place baking sheet in the oven and immediately reduce temperature to 200°F (90°C). Bake for 25-30 minutes until firm to the touch and easily peel off the parchment.
- Cool completely on the baking sheet for at least 10 minutes before serving or storing.
Notes
Ensure bowl and whisk are completely clean and dry to prevent meringue from failing. Avoid making on humid days. For best results, pipe all ghosts first, then add chocolate chip eyes. Store in an airtight container at room temperature for up to 5 days; do not refrigerate.
Nutrition
- Serving Size: 1 ghost pop
- Calories: 45
- Sugar: 9
- Sodium: 25
- Carbohydrates: 10
- Protein: 1
Keywords: ghost meringue cookies, Halloween cookies, meringue pops, easy meringue, quick Halloween treat


