Love this? Save it for later!
Share the inspiration with your friends
The Halloween potluck was in twelve hours and I’d completely forgotten. Everyone else would be bringing those elaborate, Pinterest-perfect treats—you know the ones. The cake pops shaped like eyeballs, the graveyard dirt cups with gummy worms crawling out. I had a bag of pretzel rods, some almond slivers, and a jar of green candy melts that had been sitting in my pantry since last year’s failed attempt at making grass for a spring cake. Honestly, I almost just bought a bag of chips on the way. But that panicky feeling, the one where you know you have to bring something homemade or face the judgment of the PTA moms, kicked in. I grabbed the pretzels, melted the candy, and started sticking almond slivers on the ends. I wasn’t trying to be clever. I was just trying not to show up empty-handed.
The first few looked ridiculous. The almond nails were too big, the candy was too lumpy, and I was pretty sure I’d just created snack food that would haunt someone’s nightmares. But somewhere around the tenth pretzel, something clicked. I figured out how to pipe a knuckle line. I found the perfect spot for the almond nail. And by the time I had a full tray of these things, I actually laughed out loud. They looked like a bunch of creepy, bony fingers reaching up from the grave. The best part? I made the whole batch in under twenty minutes. At the party, they disappeared faster than anything else. People couldn’t stop picking them up, pretending to scream, and then crunching down. There’s something about a snack that’s both spooky and salty-sweet that just works. Maybe you’ve been there, scrambling for a last-minute contribution that actually steals the show. These witch finger pretzels are that recipe.
Why You’ll Love This Recipe
Let me tell you why this is the Halloween snack you didn’t know you needed. I’ve tested this recipe at three different gatherings now, and it’s never let me down. It’s the kind of thing that makes you look like a creative genius without actually requiring any real skill.
- Ridiculously Quick: From start to finish, you’re looking at about 20 minutes of active time. That’s it. No baking, no chilling, no complicated steps. Perfect for that “oh no, the party is tonight” panic.
- Simple Ingredients: You need four things. Four. Pretzel rods, green candy melts, sliced almonds, and a little bit of piping gel or royal icing for the “blood.” You probably already have the almonds in your pantry.
- Perfect for Halloween Parties: These are the ultimate conversation starter. Guests will pick one up, show it to their friend, and take a picture before they even take a bite. They’re spooky, but not too gross for the kids.
- Crowd-Pleaser for All Ages: Kids love the creepy factor. Adults love the nostalgic sweet-and-salty combo. Everyone loves that they’re not overly sweet like most Halloween candy.
- Unbelievably Easy to Customize: You can make them extra witchy with different colored “nails” or add a little edible glitter for a magical twist. The base recipe is foolproof, so you can play around.
What makes these different from every other Halloween pretzel recipe? It’s the texture. The snap of the pretzel, the creamy sweetness of the candy coating, and the crunch of the almond all hit at once. It’s not just a dipped pretzel. It’s a miniature experience. And honestly, it’s the kind of snack that makes you close your eyes after the first bite. Salty, sweet, and just the right amount of creepy.
What Ingredients You Will Need
This recipe uses simple, pantry-friendly ingredients to deliver maximum Halloween impact with minimum fuss. You don’t need a specialty baking store for any of this—just a quick trip to the grocery store will do.
- Pretzel Rods (1 standard bag, about 12-16 rods): These are the “fingers.” Look for thick, sturdy rods that won’t break easily when you’re dipping them. I prefer the Snyder’s of Hanover brand because they’re consistently straight and long, which makes them look more like actual witch fingers. Avoid the thin, brittle sticks—they’ll snap when you try to dip them.
- Green Candy Melts (1 cup, about 6 ounces): This is what gives the fingers their sickly, witchy color. You can use Wilton brand candy melts in “Leaf Green” or any green melting wafers. If you can’t find green, white chocolate with green food coloring works perfectly—just use gel food coloring so you don’t mess up the consistency. Pro tip: add a tiny drop of yellow food coloring to your green melts for a more realistic, swampy undertone.
- Sliced Almonds (about 24-32 slivers): These become the witch’s fingernails. You want the sliced almonds, not the whole ones or the slivered ones. The flat, oval shape is perfect for mimicking a creepy nail. I’ve tried this with whole almonds and it just looks like a giant toe. Stick with the slices. Toast them lightly in a dry pan for 2 minutes if you want a deeper flavor and a slightly darker nail color.
- Red Piping Gel or Royal Icing (1 small tube): This is for the “blood” at the cuticle line. You can find piping gel in the baking aisle, usually near the cake decorating supplies. If you can’t find it, a tiny dab of strawberry jam or even a drop of red food coloring mixed with corn syrup will work. Don’t use liquid red food coloring on its own—it will run and make a mess.
- Coconut Oil or Vegetable Shortening (1 teaspoon, optional): Adding a tiny bit of coconut oil to your candy melts helps them thin out to the perfect dipping consistency. Without it, the coating can be too thick and clumpy. It’s not strictly necessary, but it makes the process much smoother.
That’s it. Four main ingredients and one optional helper. The beauty of this recipe is that it’s more about the assembly than the ingredients themselves. You don’t need fancy extracts, special flours, or any of that. Just grab your pretzels, your candy, and your almonds, and you’re already halfway there.
Equipment Needed
You don’t need a professional pastry kit for these, but a few specific tools will make your life a lot easier. Here’s what I use every time.
- Microwave-Safe Bowl (1 medium): For melting the candy. A glass measuring cup works best because the spout makes pouring and dipping easier. I use a Pyrex 2-cup measure.
- Baking Sheet (1 standard): Lined with parchment paper or a silicone mat. This is where your finished pretzels will set. The silicone mat is worth the investment—nothing sticks to it.
- Small Piping Bag or Zip-Top Bag: For adding the knuckle lines and the “blood” detail. A zip-top bag with the tiniest corner snipped off works perfectly. Don’t use a big piping tip—you want a very fine line.
- Toothpicks (a few): For positioning the almond nails and cleaning up any messy edges. Also great for popping any air bubbles in the candy coating.
- Fork or Dipping Tool: For holding the pretzel while you dip it. A regular dinner fork works, but a dedicated dipping fork with a looped handle is even better. I’ve also used a pair of chopsticks in a pinch—they give you more control.
If you don’t have a piping bag, don’t worry. A simple sandwich bag with a tiny hole cut in the corner works just as well. I’ve made these in a friend’s kitchen with nothing but a butter knife and a coffee mug, and they still turned out great. The key is just having the parchment paper—without it, the candy will stick to your pan and you’ll be peeling off witch fingers instead of serving them.
Preparation Method
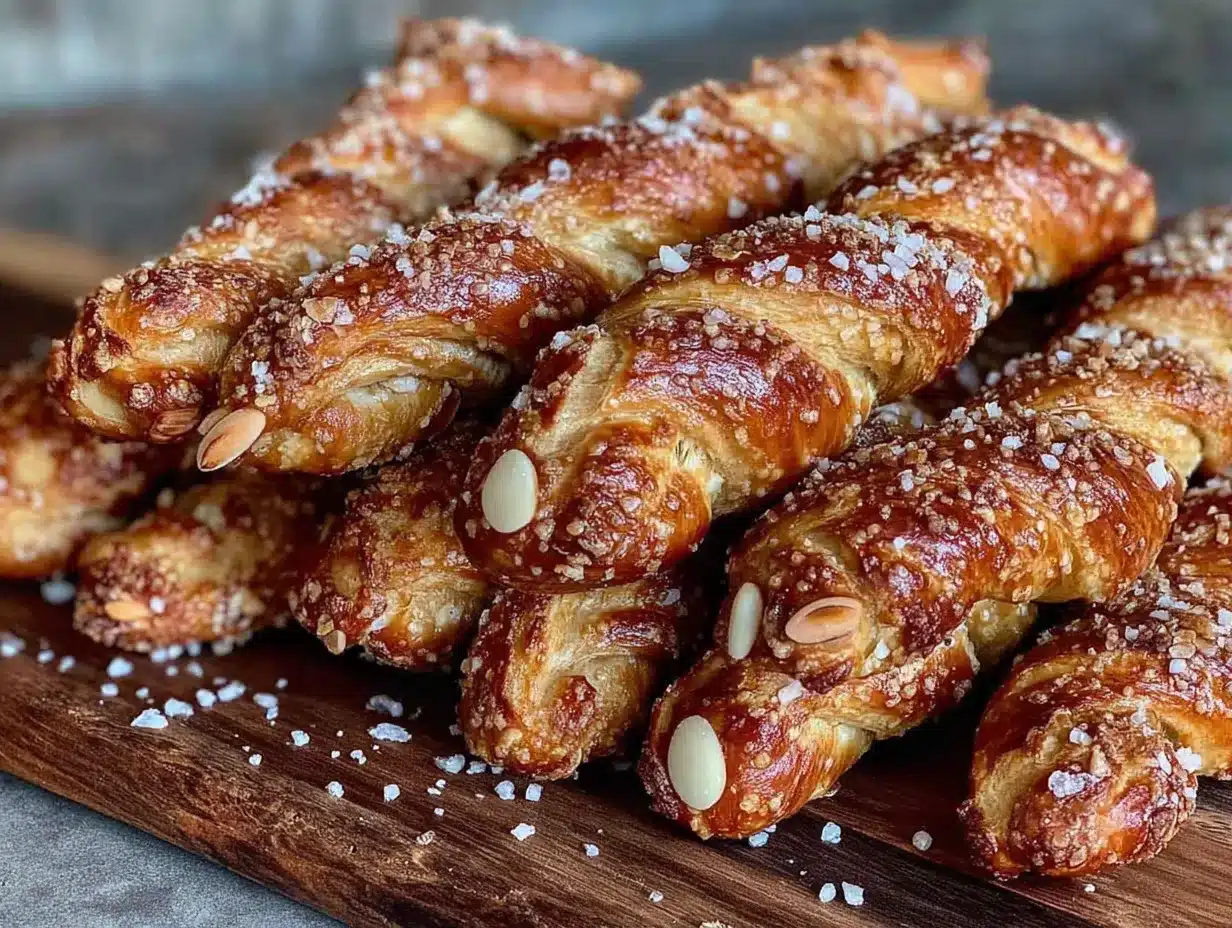
Alright, let’s make some spooky fingers. This process is straightforward, but a few little tricks make the difference between “that looks cool” and “that looks disturbingly realistic.”
- Prep Your Workspace: Line your baking sheet with parchment paper or a silicone mat. Arrange your pretzel rods, sliced almonds, and red piping gel so everything is within reach. Trust me, once you start dipping, you don’t want to be hunting for an almond.
- Melt the Candy Coating: Place your green candy melts in a microwave-safe bowl. Microwave in 30-second intervals at 50% power, stirring thoroughly between each interval. It usually takes about 1.5 to 2 minutes total. If the mixture is too thick, stir in 1 teaspoon of coconut oil or vegetable shortening. The consistency should be smooth and runny—like warm honey. If it’s lumpy, you overheated it. Start over with fresh melts.
- Dip the Pretzels: Hold a pretzel rod by one end and dip it into the melted candy, rotating slowly to coat it completely. Leave about 1 inch of the pretzel undipped at the top—this will be the “wrist” area. Let the excess candy drip back into the bowl for a few seconds. You want a thin, even coating, not a thick, gloppy one.
- Place on Baking Sheet: Transfer the coated pretzel to your parchment-lined sheet. Gently tap the pretzel on the sheet to help the candy settle into a smooth layer. Repeat with the remaining pretzels, working in batches of 4-5 at a time so the candy doesn’t set before you add the details.
- Add the Fingernails: While the candy is still wet, press a sliced almond onto the tip of the pretzel. The pointed end of the almond should face outward, like a fingernail. Press gently—you want it to stick, not sink into the candy. If the candy has started to set, dip the back of the almond into the melted candy first to act as glue.
- Create the Knuckle Lines: Using a toothpick or the tip of a small knife, gently drag two or three horizontal lines across the pretzel to create the illusion of knuckles. Don’t press too hard—you just want to part the candy coating, not scrape it off. Space the lines unevenly for a more realistic look.
- Add the “Blood” Detail: Once all the pretzels have their nails and knuckle lines, let them set for about 5 minutes. Then, using your piping bag or zip-top bag with a tiny hole, pipe a small dot of red piping gel at the base of each almond nail. This looks like a bloody cuticle. A little goes a long way—less is more here.
- Let Them Set Completely: Allow the pretzels to sit at room temperature for about 15-20 minutes, or until the candy coating is completely firm. Don’t rush this step. If you try to move them too early, the coating will crack and smudge.
- Serve or Store: Arrange the finished witch fingers on a platter, pointing in different directions for maximum creepiness. They’re ready to serve immediately.
One thing I learned the hard way: don’t overcrowd your baking sheet. Give each pretzel a little space so they don’t touch each other while setting. I once had a batch where two pretzels fused together, and I ended up with a weird, double-fingered monster. Which, honestly, was kind of cool, but not what I was going for.
Cooking Tips & Techniques
I’ve made these witch finger pretzels about a dozen times now, and I’ve picked up a few tricks that make the process smoother and the results spookier. Let me share what I’ve learned.
The Temperature Trap: Candy melts are temperamental. If you overheat them, they seize up into a thick, grainy paste that’s impossible to dip. Always use low power in the microwave and stir frequently. If your candy does seize, don’t try to fix it with more heat. Add a teaspoon of coconut oil and stir vigorously—it sometimes saves the batch. If not, just start over. It’s cheaper to waste a few ounces of candy than to serve lumpy fingers.
The Almond Angle: The angle of your almond nail makes a huge difference in the realism. If you place it perfectly straight, it looks like a robot finger. Tilt it slightly to one side, and suddenly it looks like a real, slightly crooked witch nail. I always angle mine about 10 degrees off-center. Also, don’t use the whole almond slice. Break it in half lengthwise—the thinner nail looks much more realistic than a chunky one.
The Knuckle Conundrum: I used to make my knuckle lines too deep, and the pretzel would snap in half when I tried to pick it up. The trick is to barely graze the surface. You’re not carving into the pretzel—you’re just parting the candy coating. Think of it like drawing on a foggy window. A light touch is everything.
The Batch Strategy: Don’t dip all your pretzels at once and then try to add the details. Work in small batches of 4-5 pretzels. Dip them, place them on the sheet, add the nails and knuckle lines, and then move on to the next batch. If you try to do all the dipping first, the candy will set before you can add the details, and your almonds won’t stick.
The Blood Balance: That red piping gel is potent. A tiny dot at the base of the nail is plenty. If you add too much, it looks like a crime scene, not a Halloween snack. I made this mistake once and ended up with pretzels that looked like they’d been in a horror movie. Some people might like that, but for a family-friendly party, keep it subtle.
One of my biggest failures? I once tried to speed up the setting process by putting the pretzels in the refrigerator. The candy coating developed a white, streaky bloom from the moisture. They still tasted fine, but they looked dusty and unappetizing. Room temperature is the way to go.
Variations & Adaptations
Once you’ve mastered the basic witch finger, the possibilities are endless. Here are a few variations I’ve tried and loved.
The Zombie Finger: Skip the green candy melts and use white or ivory-colored melts instead. Add a few drops of gray or brown food coloring to give them a rotting, undead look. Use whole almonds for the nails and make the knuckle lines deeper and more jagged. These are less witchy and more “walking dead.”
The Gluten-Free Version: This one is easy. Just swap the regular pretzel rods for gluten-free pretzel rods. Most major brands now offer a gluten-free option. The rest of the ingredients—candy melts, almonds, piping gel—are naturally gluten-free. Just double-check the labels on your candy melts to be sure.
The Vampire Twist: Use dark chocolate candy melts instead of green. The dark chocolate gives them a gothic, vampire vibe. Instead of almond nails, use white chocolate chips or white candy melts piped into a nail shape. The contrast of dark chocolate and white “nails” is striking. Add a drop of red piping gel at the tip of the nail for a “blood drip” effect.
The Extra-Crunchy Version: Before dipping your pretzels, crush some freeze-dried raspberries or strawberries into a fine powder. After you dip the pretzel in the green candy, immediately roll it in the red powder. It gives the fingers a textured, bloody, scabby look that’s surprisingly realistic. Plus, it adds a tart, fruity flavor that balances the sweetness.
The Mummy Finger: After the green candy sets, drizzle white candy melts in uneven, crisscrossing lines over the pretzel to look like mummy wrappings. Leave the nail and a small gap at the “wrist” exposed. Add two tiny dots of black icing for eyes near the top. These are a little more work, but they’re a huge hit with kids.
I once made a batch of these for a friend’s Halloween party and accidentally used white chocolate instead of candy melts. They tasted amazing, but the coating was much softer and never fully set. They turned into a sticky, delicious mess. So, stick with the candy melts for a firm, snappy coating that travels well.
Serving & Storage Suggestions
These witch finger pretzels are at their best when they look their creepiest. Presentation is half the fun.
Serving Temperature: Serve them at room temperature. The candy coating is firm and snappy, and the pretzel inside is perfectly crunchy. If they’re too cold, the coating can be brittle and the flavor is muted. Take them out of storage about 15 minutes before serving.
Presentation Ideas: Arrange the pretzels on a black platter or a dark wooden board. Point them in different directions, like a cluster of hands reaching up from the ground. You can also stand them upright in a small vase or a mason jar filled with black beans or crushed Oreo “dirt.” For extra drama, place a fake spider or some dry ice nearby (just be careful with the dry ice).
What to Serve Alongside: These pair beautifully with other Halloween snacks. Serve them next to a bowl of popcorn “eyeballs” (popcorn balls with candy eyes), a plate of ghost meringues, or a pitcher of blood-red punch. The salty-sweet flavor of the pretzels is a great counterpoint to sugary treats. For a more savory option, put out a bowl of warm queso or a spicy cheese dip—the contrast of hot and cold, savory and sweet, is fantastic.
Storage Instructions: Store the pretzels in an airtight container at room temperature for up to 5 days. Do not refrigerate them—the moisture will ruin the candy coating. Layer them between sheets of parchment paper to prevent them from sticking together. If you’re stacking them, make sure the candy is fully set before you put the lid on.
Freezing Instructions: You can freeze these for up to 2 months. Place them in a single layer on a baking sheet and freeze until solid, about 1 hour. Then transfer them to a freezer-safe bag or container, separating layers with parchment paper. Thaw at room temperature for about 30 minutes before serving. The texture remains surprisingly good.
Flavor Development: These are best within the first 2-3 days. After that, the pretzel starts to absorb moisture from the candy coating and loses its crunch. They’ll still taste fine, but the texture won’t be as satisfying. So, make them as close to your party as possible.
Nutritional Information & Benefits
Let’s be honest—these are a treat, not a health food. But that doesn’t mean they’re completely devoid of redeeming qualities. Here’s a rough breakdown per pretzel rod (based on a standard recipe yield of 12 pretzels).
- Calories: Approximately 180-220 per pretzel
- Fat: 8-10g (mostly from the candy coating and almonds)
- Carbohydrates: 25-30g
- Sugar: 15-18g
- Protein: 3-4g
- Sodium: 300-400mg
Health Highlights: On the plus side, the almonds provide a small dose of healthy fats, vitamin E, and magnesium. Almonds are also a good source of protein, which helps balance out the sugar rush a little. The pretzel itself offers some complex carbohydrates for energy—though, let’s be real, that’s not why you’re eating these.
Dietary Considerations: This recipe is egg-free and dairy-free if you use dairy-free candy melts. It’s also nut-free if you skip the almond nails and use a different decorative element (like a sunflower seed or a small candy corn). Always check the labels on your candy melts for potential allergens. Some brands process their products in facilities that also handle nuts and dairy.
Potential Allergens: Pretzels contain wheat (gluten). Candy melts may contain dairy and soy. Almonds are tree nuts. If you’re serving these at a party with guests who have allergies, make a separate batch with allergen-free alternatives and label them clearly.
My personal take? These are a once-a-year treat. They’re meant to be fun and festive, not a daily snack. Enjoy them, share them, and don’t stress about the numbers. Halloween is about indulgence, and these fit the bill perfectly.
Conclusion
These spooky witch finger pretzels are the perfect example of a recipe that’s greater than the sum of its parts. Four simple ingredients, twenty minutes of your time, and you’ve got a Halloween snack that looks like it took hours. They’re creepy, they’re delicious, and they’re guaranteed to be the first thing to disappear from the snack table.
What I love most about this recipe is how forgiving it is. You don’t need to be a pastry chef. You don’t need special tools. You just need a little patience and a sense of humor. The first few might look a bit wonky, but that’s part of the charm. Real witch fingers wouldn’t be perfectly uniform anyway, right?
I’d love to see how yours turn out. Did you try a different color? Add extra decorations? Make a mummy version? Drop a comment below and share your creation. And if you’re looking for more Halloween treats, check out our Halloween pumpkin patch brownies for another easy crowd-pleaser. Happy Halloween, and happy snacking!
Frequently Asked Questions
Can I make these witch finger pretzels ahead of time?
Absolutely. You can make them up to 5 days in advance. Store them in an airtight container at room temperature, layered between parchment paper. Just don’t refrigerate them, or the candy coating will develop a white bloom.
What if I can’t find green candy melts?
No problem. Use white chocolate chips or white candy melts and add green gel food coloring. Start with a tiny drop and add more until you reach the desired shade. Gel coloring works better than liquid because it doesn’t thin out the chocolate.
My candy melts are too thick. What should I do?
Stir in 1 teaspoon of coconut oil or vegetable shortening. This will thin the mixture to a perfect dipping consistency. Do not add water, milk, or butter—these will cause the candy to seize and become unusable.
Can I use regular pretzel sticks instead of pretzel rods?
You can, but they won’t look as realistic. Pretzel sticks are thinner and shorter, so they look more like tiny fingers. They also break more easily when dipping. If you use sticks, reduce the dipping time and handle them gently.
How do I prevent the almond nails from falling off?
Make sure the candy coating is still wet when you press the almond into place. If the candy has started to set, dip the back of the almond into the melted candy first to create a glue bond. Press gently and hold for 5 seconds.
Pin This Recipe!
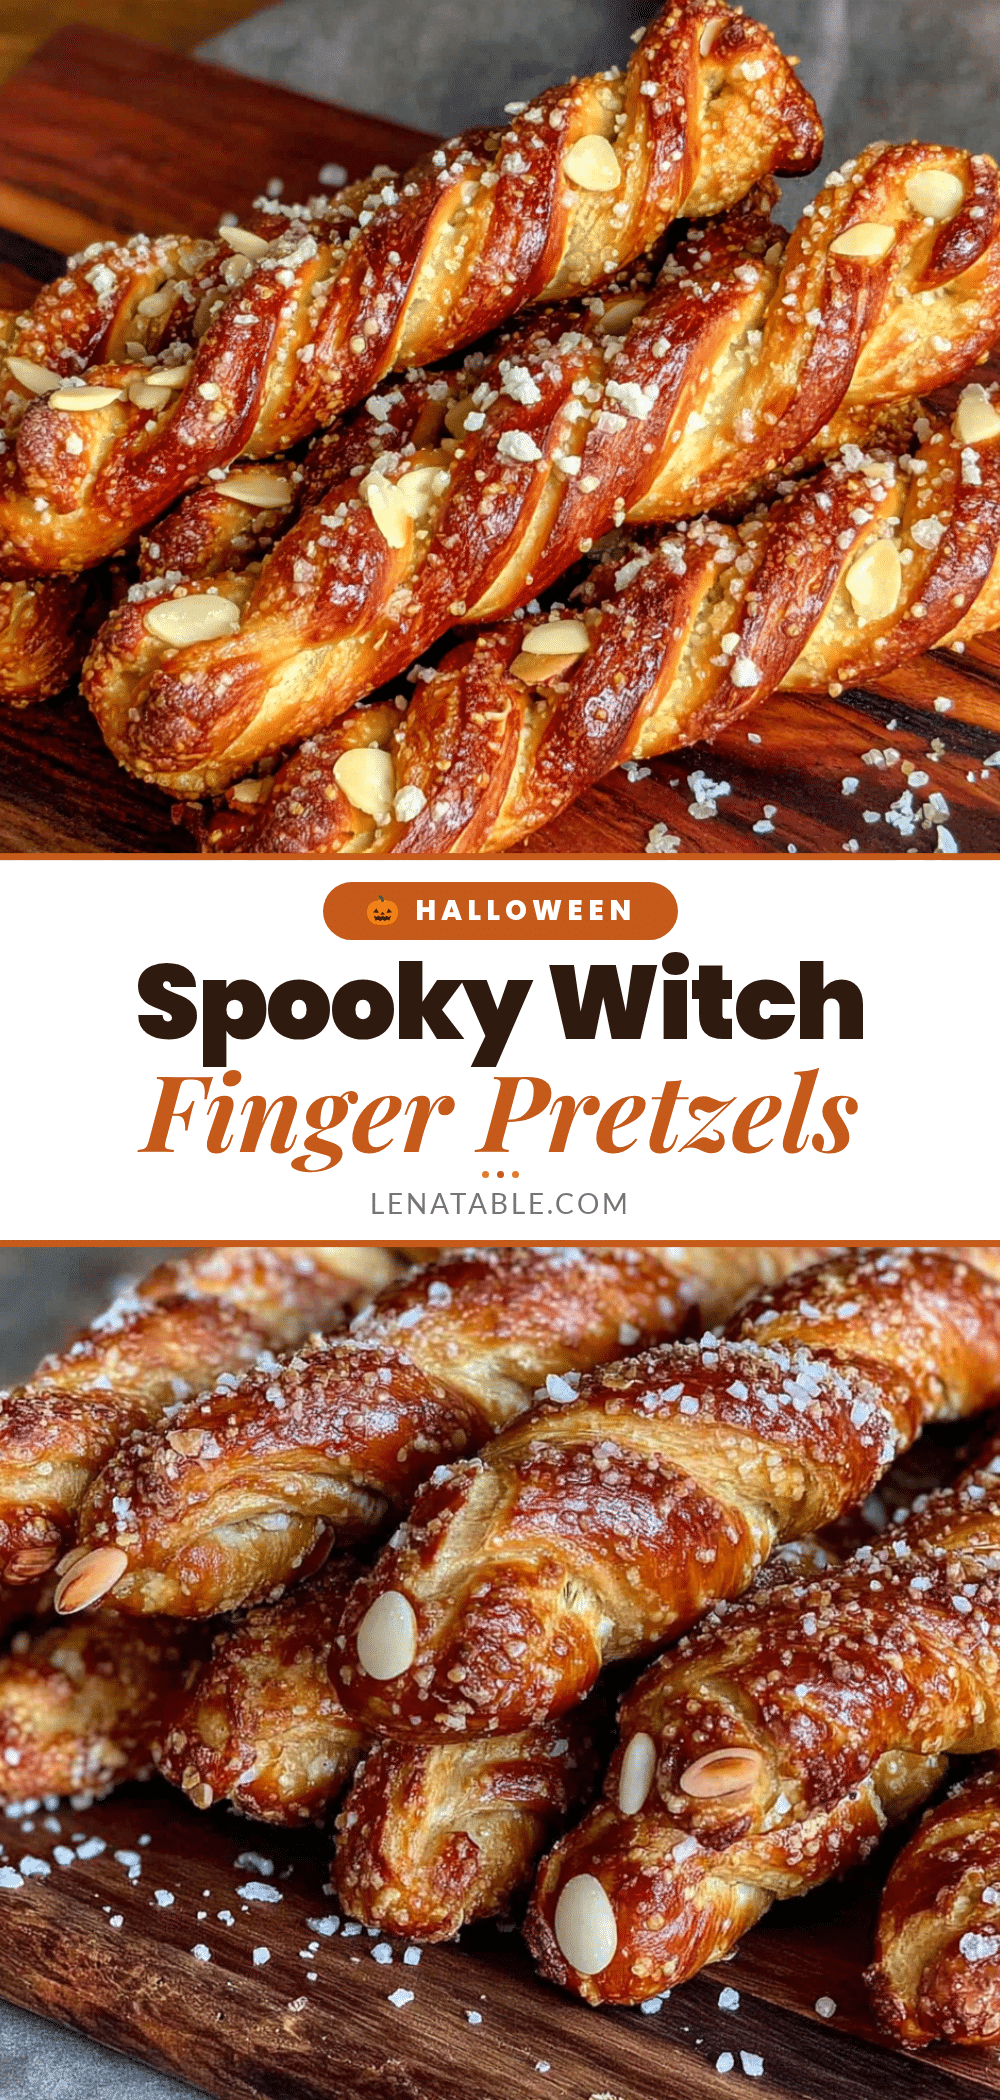
Spooky Witch Finger Pretzels: Easy Halloween Snack

These spooky witch finger pretzels are a quick and easy Halloween snack made with pretzel rods, green candy melts, and almond slivers. They look creepy but taste deliciously salty-sweet, perfect for parties and guaranteed to be a crowd-pleaser.
- Prep Time: 20 minutes
- Cook Time: 0 minutes
- Total Time: 20 minutes
- Yield: 12 servings 1x
- Category: Snack
- Cuisine: American
Ingredients
- 1 standard bag pretzel rods (about 12–16 rods)
- 1 cup green candy melts (about 6 ounces)
- 24–32 sliced almonds
- 1 small tube red piping gel or royal icing
- 1 teaspoon coconut oil or vegetable shortening (optional)
Instructions
- Prep Your Workspace: Line your baking sheet with parchment paper or a silicone mat. Arrange your pretzel rods, sliced almonds, and red piping gel so everything is within reach.
- Melt the Candy Coating: Place your green candy melts in a microwave-safe bowl. Microwave in 30-second intervals at 50% power, stirring thoroughly between each interval. It usually takes about 1.5 to 2 minutes total. If the mixture is too thick, stir in 1 teaspoon of coconut oil or vegetable shortening. The consistency should be smooth and runny—like warm honey.
- Dip the Pretzels: Hold a pretzel rod by one end and dip it into the melted candy, rotating slowly to coat it completely. Leave about 1 inch of the pretzel undipped at the top—this will be the ‘wrist’ area. Let the excess candy drip back into the bowl for a few seconds.
- Place on Baking Sheet: Transfer the coated pretzel to your parchment-lined sheet. Gently tap the pretzel on the sheet to help the candy settle into a smooth layer. Repeat with the remaining pretzels, working in batches of 4-5 at a time so the candy doesn’t set before you add the details.
- Add the Fingernails: While the candy is still wet, press a sliced almond onto the tip of the pretzel. The pointed end of the almond should face outward, like a fingernail. Press gently—you want it to stick, not sink into the candy. If the candy has started to set, dip the back of the almond into the melted candy first to act as glue.
- Create the Knuckle Lines: Using a toothpick or the tip of a small knife, gently drag two or three horizontal lines across the pretzel to create the illusion of knuckles. Don’t press too hard—you just want to part the candy coating, not scrape it off. Space the lines unevenly for a more realistic look.
- Add the ‘Blood’ Detail: Once all the pretzels have their nails and knuckle lines, let them set for about 5 minutes. Then, using your piping bag or zip-top bag with a tiny hole, pipe a small dot of red piping gel at the base of each almond nail. This looks like a bloody cuticle.
- Let Them Set Completely: Allow the pretzels to sit at room temperature for about 15-20 minutes, or until the candy coating is completely firm.
- Serve or Store: Arrange the finished witch fingers on a platter, pointing in different directions for maximum creepiness. They’re ready to serve immediately.
Notes
Work in small batches of 4-5 pretzels to prevent the candy from setting before adding details. Do not refrigerate the pretzels, as moisture will cause the candy coating to bloom. For a more realistic look, angle the almond nails slightly off-center.
Nutrition
- Serving Size: 1 pretzel rod
- Calories: 200
- Sugar: 17
- Sodium: 350
- Fat: 9
- Saturated Fat: 4
- Carbohydrates: 28
- Fiber: 1
- Protein: 4
Keywords: Halloween snack, witch finger pretzels, easy Halloween treat, spooky pretzels, no-bake Halloween snack