Love this? Save it for later!
Share the inspiration with your friends
I was standing in the baking aisle of my local grocery store last October, staring at a display of black food coloring, when a little girl tugged on her mom’s sleeve and pointed at a bag of candy eyes. “Can we make the spooky cookies again?” she whispered. And just like that, I was transported back to my own childhood—specifically to my Aunt Carol’s tiny kitchen, where she’d let me press silver dragées into freshly iced sugar cookies shaped like bats and cats. She wasn’t a fancy baker, not by any stretch. Her icing always had tiny air bubbles, and half the time the cookies would spread into lopsided blobs. But those black cat cookies? They were perfect. I can still smell the vanilla and powdered sugar hanging in the air, mixed with the faint scent of her coffee.
I tried recreating them after she moved to Florida, and let me tell you—my first batch looked less like cats and more like sad, melted blobs. I mean, honestly, it was a disaster. The icing was too runny, the cookies spread into weird shapes, and my cat, Mochi, sat on the counter judging me. But I kept at it, because that’s what you do when a recipe holds a memory you don’t want to lose. Maybe you’ve been there—chasing a taste or a smell from your past, trying to capture something that feels just out of reach.
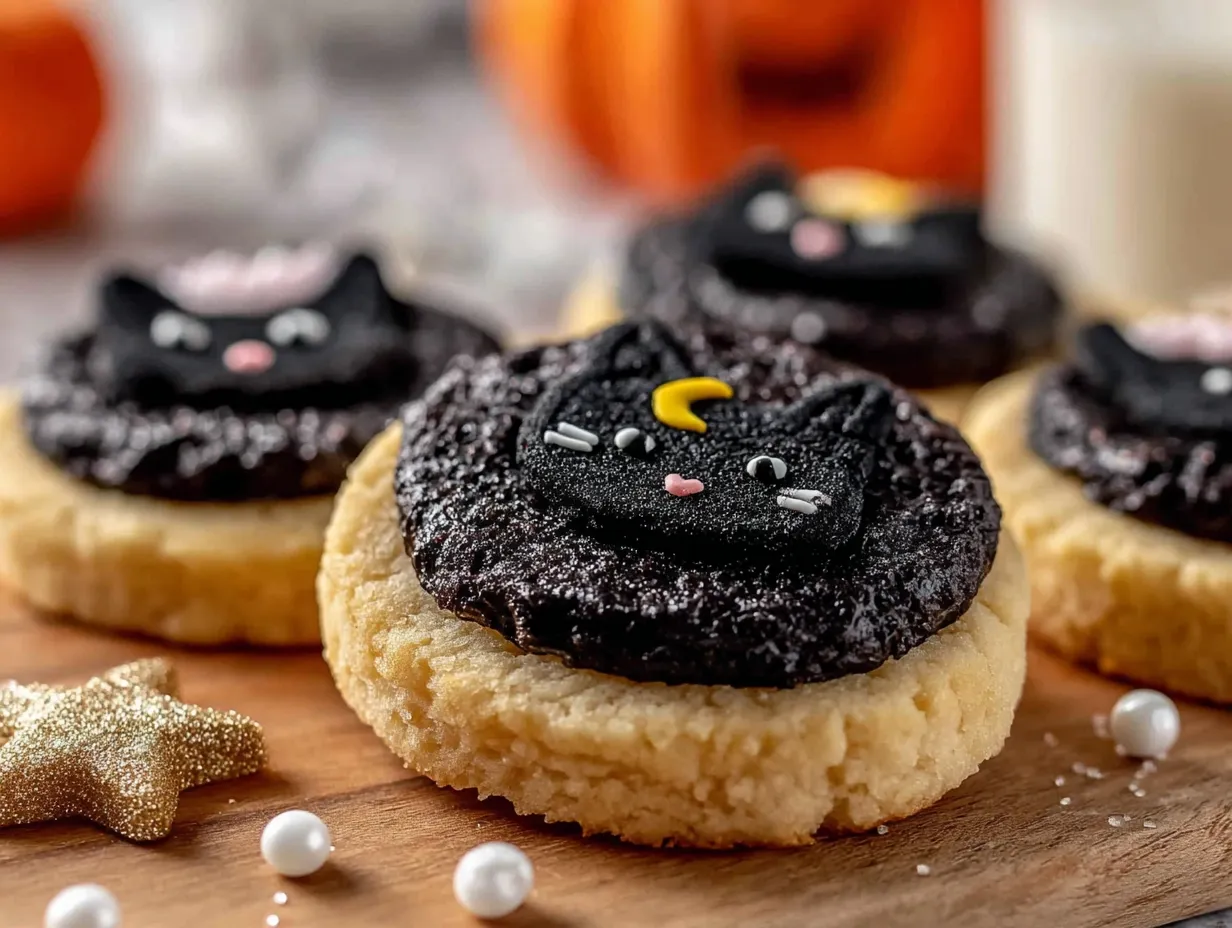
These adorable black cat sugar cookies are the result of many late-night baking sessions, a few ruined batches, and one very patient cat. They’re my attempt to hold onto that feeling of standing on a step stool in Aunt Carol’s kitchen, covered in flour, making something that felt magical. And you know what? They actually came out cute this time. Like, really cute.
Why You’ll Love This Recipe
Let’s be real—there are a million sugar cookie recipes out there. But these black cat cookies? They’re different. I’ve tested this dough six times to get the perfect balance of firm edges and soft centers, and the icing consistency took another three tries. So trust me when I say this version works.
- Easy to Decorate: You don’t need piping bags or fancy tips. A simple squeeze bottle or even a ziplock bag with the corner snipped off works beautifully.
- No Spreading: This dough holds its shape like a champ. Your cats will actually look like cats, not abstract art.
- Kid-Friendly: My neighbor’s kids decorated an entire batch and only made a moderate mess. The candy eyes make it foolproof.
- Perfect for Halloween: Whether it’s a classroom party, a spooky movie night, or just because you love black cats (I have two), these cookies fit right in.
- Make-Ahead Dough: The dough freezes beautifully, so you can prep weeks in advance. Because October gets busy, am I right?
These aren’t just cute—they’re the kind of cookies that make people stop and say, “Wait, you made those?” And the best part? They taste as good as they look. Buttery, slightly crisp on the edges, soft in the middle, with just the right amount of sweetness. I’ve brought them to three different gatherings this fall, and they disappeared every single time.
What Ingredients You Will Need
This recipe uses simple, pantry-friendly ingredients to create cookies that are both sturdy enough for decorating and tender enough to enjoy. The key is using the right fat and flour ratio so your cat shapes stay crisp.
For the Sugar Cookies
- Unsalted butter, softened: 1 cup (2 sticks, 226g). I use Kerrygold for the rich flavor, but any good-quality butter works. Let it sit out for at least 30 minutes—cold butter makes the dough crumbly.
- Granulated sugar: 1 cup (200g). Regular white sugar gives the cookies that classic sweetness and helps them brown just slightly on the edges.
- Large egg: 1, room temperature. Crack it into a small bowl first in case you get shell fragments. Trust me on this.
- Vanilla extract: 2 teaspoons. Pure vanilla makes a difference here. I splurge on Nielsen-Massey, but store-brand works fine too.
- All-purpose flour: 2 ½ cups (312g). Spoon and level it—don’t scoop straight from the bag or you’ll end up with dense cookies.
- Baking powder: ½ teaspoon. Just enough to give them a tiny lift without puffing up the shapes.
- Salt: ¼ teaspoon. Balances the sweetness and enhances the butter flavor.
For the Royal Icing
- Powdered sugar: 2 cups (240g), sifted. Clumps are the enemy of smooth icing. Sift it, even if you’re in a hurry.
- Meringue powder: 1 ½ tablespoons. This gives the icing that firm, glossy finish that doesn’t smudge. You can find it in the baking aisle or online.
- Warm water: 3-4 tablespoons. Add slowly—you can always add more, but you can’t take it out.
- Black gel food coloring: 1 teaspoon (or more, depending on brand). Americolor Super Black is my go-to. Liquid coloring will thin the icing too much.
- Candy eyes: 24-36 pieces (depending on how many cookies you make). The little white-and-black ones work best. Wilton makes good ones.
Ingredient Tip: For the blackest icing, let it sit for 10-15 minutes after coloring. The color deepens as it rests. I learned this after my first batch came out looking charcoal gray. Not cute.
Equipment Needed
- Cat-shaped cookie cutter: About 3 inches wide. I found mine on Amazon for $8, but craft stores carry them seasonally.
- Baking sheets: Two large, rimmed sheets. Light-colored metal works best—dark pans can over-brown the bottoms.
- Parchment paper: Or silicone baking mats. Non-negotiable for easy cleanup and even baking.
- Rolling pin: With ¼-inch thickness rings if you have them. Consistent thickness = consistent baking.
- Electric mixer: Hand or stand mixer works. I’ve made the dough by hand before, and my arm was sore for two days.
- Squeeze bottles: Small ones with fine tips for the icing. I use the ones from Wilton, but any brand works.
- Cooling rack: Wire rack for letting cookies cool completely before decorating.
- Small offset spatula: Optional, but helpful for smoothing icing.
Preparation Method
- Cream the butter and sugar: In a large bowl, beat the softened butter and granulated sugar together on medium speed for 2-3 minutes until light and fluffy. Scrape down the sides halfway through. It should look pale and feel soft when you touch it.
- Add the egg and vanilla: Beat in the egg and vanilla extract on low speed until just combined. Don’t overmix here—you don’t want to incorporate too much air.
- Combine dry ingredients: In a separate bowl, whisk together the flour, baking powder, and salt. Add half to the butter mixture, mixing on low until just combined. Add the rest and mix until a soft dough forms. It will look crumbly at first, then come together.
- Chill the dough: Divide the dough in half, flatten into discs, wrap in plastic wrap, and refrigerate for at least 1 hour. This is crucial—warm dough will spread and your cats will look like pancakes. I’ve made that mistake twice.
- Preheat and prep: Preheat your oven to 350°F (175°C). Line two baking sheets with parchment paper.
- Roll and cut: On a lightly floured surface, roll one disc of dough to ¼-inch thickness. Cut out cat shapes and place them 1 inch apart on the prepared sheets. Reroll scraps once—after that, the dough gets tough.
- Bake: Bake for 8-10 minutes, rotating the pans halfway through. The edges should be just barely golden. They’ll look slightly underdone in the center—that’s perfect. Let them cool on the baking sheet for 5 minutes, then transfer to a wire rack to cool completely. This takes about 20-30 minutes.
- Make the icing: In a medium bowl, whisk together the powdered sugar and meringue powder. Add 3 tablespoons of warm water and stir until smooth. It should be thick but flow slowly off a spoon. Add more water a teaspoon at a time if needed. Stir in the black gel food coloring until you reach your desired darkness. Let it sit for 10 minutes to deepen.
- Decorate: Transfer the icing to a squeeze bottle or ziplock bag with a tiny corner snipped off. Outline each cat cookie, then fill in the center. Use a toothpick to spread the icing into corners. While the icing is still wet, press two candy eyes into place. Let the cookies set at room temperature for 2-3 hours, or overnight for best results.
Cooking Tips & Techniques
I’ve learned a few things the hard way so you don’t have to. First, don’t skip the chilling step. I know it’s tempting to rush, but warm dough is the enemy of cute cat shapes. One time I was in a hurry and skipped it—my cats came out looking like misshapen potatoes. Not my finest baking moment.
For the blackest icing, patience is key. The color will look grayish at first, but give it 10-15 minutes and it darkens beautifully. If you’re still not happy, add more gel coloring a drop at a time. And here’s a trick I picked up from a professional baker: use a hair dryer on low heat to smooth out air bubbles in the icing. Just hold it a few inches away and wave it gently.
When placing the candy eyes, work in batches of 3-4 cookies at a time. If the icing starts to form a skin, the eyes won’t stick properly. I usually decorate 4 cookies, add eyes, then move to the next batch. It keeps everything looking fresh.
If you’re making these with kids, expect some creative interpretations. My nephew’s cats ended up with three eyes and no tail, and honestly, they were my favorite ones. Imperfection is part of the charm.
Variations & Adaptations
- Gluten-Free Version: Substitute the all-purpose flour with a 1:1 gluten-free baking flour blend. I’ve used Bob’s Red Mill with good results. Add ¼ teaspoon xanthan gum if your blend doesn’t include it.
- Vegan Option: Use vegan butter sticks (not spreadable) and a flax egg (1 tablespoon ground flaxseed + 3 tablespoons water, let sit for 5 minutes). The texture will be slightly less tender but still delicious.
- Flavor Twists: Add ½ teaspoon of almond extract along with the vanilla for a subtle nutty flavor. Or try lemon zest for a bright contrast to the dark icing. My personal favorite is adding ¼ teaspoon of cinnamon—it gives the cookies a warm, cozy vibe that’s perfect for fall.
- Different Shapes: Don’t have a cat cutter? Use a bat, pumpkin, or even a ghost. The black icing works with any Halloween shape. I’ve also made these as simple circles with cat faces drawn on—cute and easier for little hands.
- Spooky Sparkles: While the icing is still wet, sprinkle edible glitter or silver dragées over the cookies. It adds a magical touch that kids (and adults) love.
Serving & Storage Suggestions
These cookies are best served at room temperature, which is how they’ll be after the icing sets. Arrange them on a platter with some orange and purple candies for a festive Halloween spread. They pair perfectly with hot apple cider, pumpkin spice lattes, or a glass of cold milk.
For storage, place the decorated cookies in a single layer in an airtight container, separating layers with parchment paper. They’ll stay fresh for up to 5 days at room temperature. Don’t refrigerate them—the moisture can make the icing sticky and the cookies soft.
You can freeze the undecorated cookies for up to 3 months. Just bake, cool completely, and freeze in a single layer before transferring to a freezer bag. When you’re ready to decorate, thaw them at room temperature for about 30 minutes. The icing can also be made ahead and stored in an airtight container in the fridge for up to 2 weeks. Just stir it well before using—it might separate a bit.
The flavors actually deepen after a day or two. I’ve noticed the butter and vanilla become more pronounced, making these cookies even better on day two. If you can resist eating them all immediately, that is.
Nutritional Information & Benefits
Per cookie (based on 24 cookies): approximately 145 calories, 6g fat, 21g carbohydrates, 1g protein, 12g sugar. These are a treat, not a health food, and that’s okay. Halloween is about indulgence and fun.
That said, using real butter and vanilla means you’re getting some natural nutrients. Butter provides vitamin A and healthy fats, and eggs add protein. The powdered sugar? Well, it makes the cookies pretty. Everything in moderation, right?
If you’re watching your sugar intake, you can reduce the sugar in the cookie dough by ¼ cup without affecting the texture too much. The icing is harder to adjust, but you could use a sugar-free powdered sugar alternative. Just note that the texture might be slightly different.
These cookies are not gluten-free, vegan, or dairy-free in their standard form, but I’ve included adaptations above. Always check your ingredients for potential allergens if you’re serving a crowd.
Conclusion
These adorable black cat sugar cookies are more than just a Halloween treat—they’re a little piece of nostalgia that you can share with the people you love. Whether you’re making them for a party, a bake sale, or just because your cat demanded it (mine certainly did), they’re guaranteed to bring smiles. And honestly, the process is half the fun. Getting flour on your nose, licking the beaters, watching the black icing come together—it’s all part of the magic.
I’d love to see your creations! Tag me when you make these, or leave a comment below with your own decorating ideas. Did your cats come out perfect or hilariously lopsided? Both are valid and wonderful. Happy Halloween, and happy baking!
Frequently Asked Questions
Can I use store-bought icing instead of making royal icing?
You can, but it won’t set as firmly. Store-bought icing stays soft and can smudge when stacked. If you’re in a pinch, mix powdered sugar with a little milk until thick, then color it black. It won’t be as glossy, but it’ll work for a casual batch.
Why did my cookies spread in the oven?
Most likely the dough wasn’t chilled enough. Make sure you refrigerate it for at least 1 hour. Also, check that your butter wasn’t too soft—it should be softened but still cool to the touch. If your kitchen is warm, pop the cut-out cookies in the fridge for 10 minutes before baking.
How do I get the icing perfectly black?
Use gel food coloring, not liquid. Start with 1 teaspoon, stir well, and let it sit for 10 minutes. The color deepens as it rests. If it’s still not dark enough, add more gel in tiny increments. Americolor Super Black is my favorite brand for true black.
Can I freeze the decorated cookies?
I don’t recommend it. The royal icing can crack or become sticky when thawed. Instead, freeze the undecorated baked cookies, then thaw and decorate when you’re ready. They’ll look and taste much better.
How far in advance can I make these?
You can make the dough up to 3 days ahead and keep it in the fridge. Bake the cookies up to a week before you need them and store undecorated in an airtight container. Decorate 1-2 days before serving for the freshest look. The icing needs 2-3 hours to set completely, so plan accordingly.
Pin This Recipe!

Adorable Black Cat Sugar Cookies: Easy Halloween Treats

These adorable black cat sugar cookies are buttery, slightly crisp on the edges, and soft in the middle, decorated with glossy black royal icing and candy eyes. Perfect for Halloween parties, bake sales, or a fun family activity.
- Prep Time: 30 minutes
- Cook Time: 10 minutes
- Total Time: 1 hour 40 minutes (includes 1 hour chilling and 2-3 hours setting time)
- Yield: 24 servings 1x
- Category: Dessert
- Cuisine: American
Ingredients
- 1 cup (2 sticks, 226g) unsalted butter, softened
- 1 cup (200g) granulated sugar
- 1 large egg, room temperature
- 2 teaspoons vanilla extract
- 2 ½ cups (312g) all-purpose flour
- ½ teaspoon baking powder
- ¼ teaspoon salt
- 2 cups (240g) powdered sugar, sifted
- 1 ½ tablespoons meringue powder
- 3–4 tablespoons warm water
- 1 teaspoon black gel food coloring (or more as needed)
- 24–36 candy eyes
Instructions
- Cream the butter and sugar: In a large bowl, beat the softened butter and granulated sugar together on medium speed for 2-3 minutes until light and fluffy. Scrape down the sides halfway through.
- Add the egg and vanilla: Beat in the egg and vanilla extract on low speed until just combined. Do not overmix.
- Combine dry ingredients: In a separate bowl, whisk together the flour, baking powder, and salt. Add half to the butter mixture, mixing on low until just combined. Add the rest and mix until a soft dough forms.
- Chill the dough: Divide the dough in half, flatten into discs, wrap in plastic wrap, and refrigerate for at least 1 hour.
- Preheat and prep: Preheat your oven to 350°F (175°C). Line two baking sheets with parchment paper.
- Roll and cut: On a lightly floured surface, roll one disc of dough to ¼-inch thickness. Cut out cat shapes and place them 1 inch apart on the prepared sheets. Reroll scraps once.
- Bake: Bake for 8-10 minutes, rotating the pans halfway through. The edges should be just barely golden. Let them cool on the baking sheet for 5 minutes, then transfer to a wire rack to cool completely (about 20-30 minutes).
- Make the icing: In a medium bowl, whisk together the powdered sugar and meringue powder. Add 3 tablespoons of warm water and stir until smooth. It should be thick but flow slowly off a spoon. Add more water a teaspoon at a time if needed. Stir in the black gel food coloring until you reach your desired darkness. Let it sit for 10 minutes to deepen.
- Decorate: Transfer the icing to a squeeze bottle or ziplock bag with a tiny corner snipped off. Outline each cat cookie, then fill in the center. Use a toothpick to spread the icing into corners. While the icing is still wet, press two candy eyes into place. Let the cookies set at room temperature for 2-3 hours, or overnight for best results.
Notes
Don’t skip chilling the dough—warm dough will spread and lose shape. For the blackest icing, let it sit for 10-15 minutes after coloring; the color deepens. When placing candy eyes, work in batches of 3-4 cookies at a time to ensure the icing is still wet. The undecorated cookies can be frozen for up to 3 months. Decorated cookies keep in an airtight container at room temperature for up to 5 days.
Nutrition
- Serving Size: 1 cookie
- Calories: 145
- Sugar: 12
- Sodium: 45
- Fat: 6
- Saturated Fat: 3.5
- Carbohydrates: 21
- Protein: 1
Keywords: black cat sugar cookies, Halloween cookies, sugar cookies, royal icing, easy Halloween treats, cat cookies


