Love this? Save it for later!
Share the inspiration with your friends
It was 11:47 PM on a random Tuesday in October, and I had an absurd craving for cheesecake that just wouldn’t quit. You know that feeling? When your brain decides it needs something rich and creamy and you’re not going to sleep until you get it? Yeah, that was me. Standing in my kitchen in pajama pants, staring into the fridge like it owed me something.
I didn’t have the usual graham crackers for a crust. I didn’t have the patience for a water bath or a slow-baking situation that would keep me up until 2 AM. But I did have a bag of pecans from a weekend farmers market run, a block of cream cheese, and this wild idea that maybe — just maybe — I could rush the whole process without ruining it. So I grabbed my food processor, toasted those pecans until my tiny apartment smelled like autumn in a jar, and just went for it.
Honestly, I burned my finger on the pan handle because I was half-asleep, and I definitely forgot to grease one corner. But when I pulled those bars out of the oven at 12:34 AM, something clicked. The pecan crust was buttery and salty. The filling was tangy and smooth. And the whole thing came together in less time than it takes to watch a sitcom. I stood there eating a slightly lopsided bar straight from the pan, and I knew — this was the version I’d be making every fall from now on.
These are the kind of recipes that happen when you stop overthinking and just trust your instincts. Maybe you’ve been there, standing in your own kitchen at a ridiculous hour, wanting something homemade but not wanting to wait. These Quick Fall Harvest Cheesecake Bars with Pecan Crust are for those nights. And honestly? They might be even better than the fancy version.
Why You’ll Love This Recipe
Let me tell you why these cheesecake bars have become my go-to fall dessert, and why I think they’ll become yours too.
- Quick & Easy : These bars go from your kitchen to your table in about 45 minutes total, with only 15 minutes of hands-on prep. No water bath. No complicated techniques. Just straightforward baking that actually works on a weeknight.
- Simple Ingredients : You probably have most of these in your pantry right now. Pecans, cream cheese, sugar, eggs, butter — nothing weird or hard to find. I buy my pecans in bulk during fall because they keep well in the freezer, but a small bag from the store works just fine.
- Perfect for Fall Gatherings : These bars are ideal for Thanksgiving dessert tables, Friendsgiving parties, or just a cozy Tuesday when you need something sweet. They travel well, slice cleanly, and look impressive without requiring any decorating skills.
- Crowd-Pleaser : I’ve brought these to three different gatherings this season, and every single time, someone asks for the recipe. Kids love the sweetness, adults appreciate the sophisticated pecan flavor, and everyone goes back for seconds.
- Unbelievably Delicious : The combination of the toasty, buttery pecan crust with the smooth, creamy cheesecake filling is honestly next-level. The texture contrast alone is worth making these — that crunchy bite followed by the velvety cream cheese? Pure comfort.
What makes these different from every other cheesecake bar recipe out there is the crust. Most recipes use graham crackers or shortbread, but toasting the pecans first and grinding them fresh gives this deep, nutty flavor that you just can’t get from a box. It’s not just another version — it’s the best version. The kind that makes you close your eyes after the first bite and forget about the long day you had.
What Ingredients You Will Need
This recipe uses simple, wholesome ingredients to deliver bold flavor and satisfying texture without the fuss. Most of these are pantry staples, especially if you do any fall baking.
For the Pecan Crust
- 1 ½ cups pecan halves (toasted lightly for maximum flavor)
- ¼ cup granulated sugar
- ¼ cup packed light brown sugar (adds moisture and depth)
- ½ cup unsalted butter, melted (I use Land O’Lakes for consistent results)
- ¼ teaspoon salt (don’t skip this — it balances the sweetness)
- ½ teaspoon vanilla extract
- 1 cup all-purpose flour
For the Cheesecake Filling
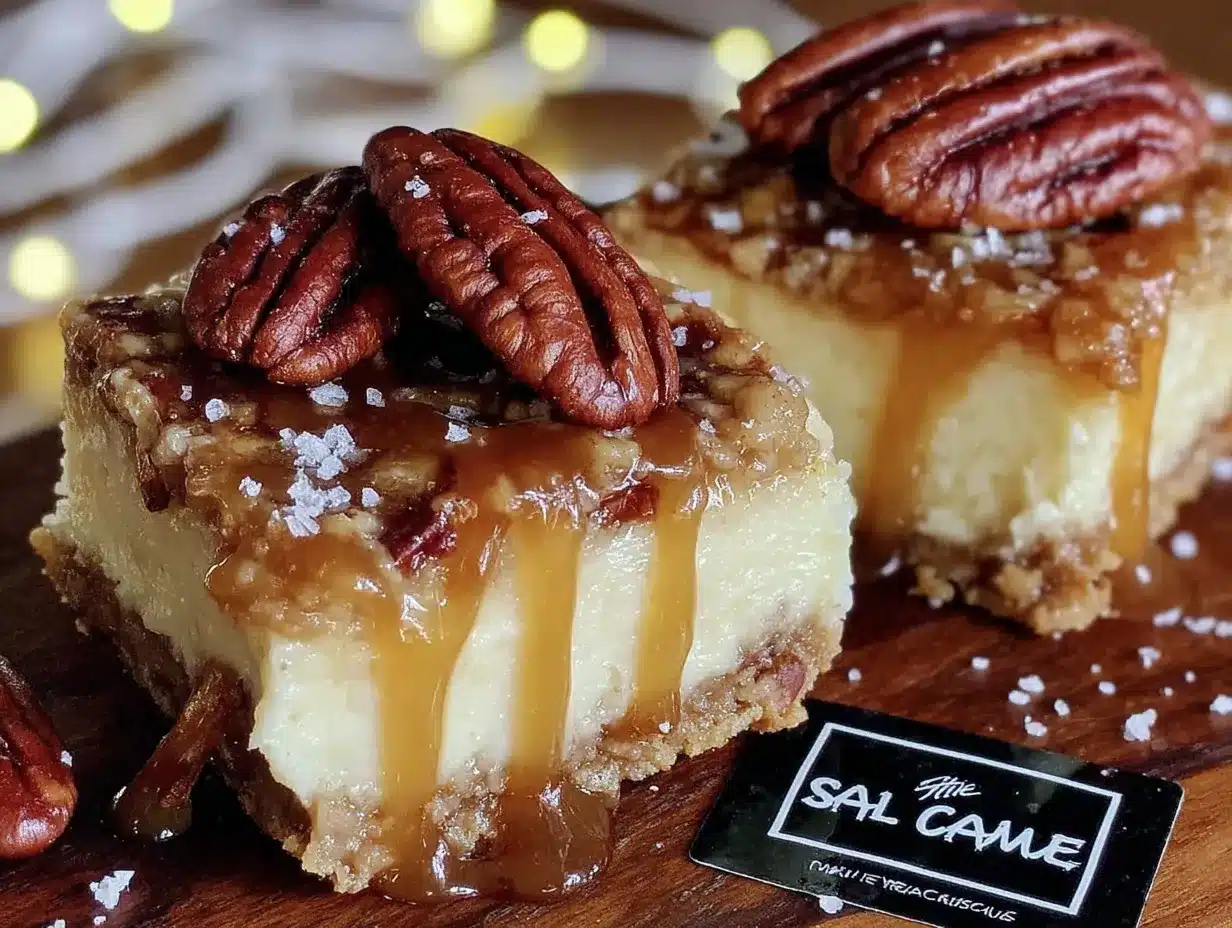
- 16 ounces cream cheese, softened to room temperature (Philadelphia is my go-to for the smoothest texture)
- ½ cup granulated sugar
- 2 large eggs, room temperature
- 1 teaspoon vanilla extract
- ¼ cup sour cream (adds tanginess and makes the filling extra creamy)
- 2 tablespoons all-purpose flour (helps stabilize the filling so it doesn’t crack)
For the Harvest Swirl (Optional but Recommended)
- ⅓ cup canned pumpkin puree (not pumpkin pie filling)
- 1 tablespoon brown sugar
- ½ teaspoon pumpkin pie spice
Ingredient Tips: For the pecan crust, I recommend toasting the pecans in a dry skillet over medium heat for about 3-4 minutes until they smell fragrant. Watch them carefully — they burn fast. If you’re short on time, you can skip toasting, but the flavor really deepens with that step. For the cream cheese, let it sit on the counter for at least 30 minutes before starting. Cold cream cheese makes lumpy filling, and nobody wants that.
Substitution Guidance: If you need a gluten-free option, swap the all-purpose flour in both the crust and filling with a 1:1 gluten-free baking flour blend. For a dairy-free version, use vegan cream cheese and coconut oil instead of butter — though the texture will be slightly different. You can also leave out the pumpkin swirl entirely and these are still amazing; it’s just a fun seasonal touch.
Equipment Needed
You don’t need a fancy kitchen to make these bars, which is part of why I love this recipe so much.
- 9×9 inch baking pan (an 8×8 works too, but bars will be slightly thicker and need an extra 2-3 minutes of baking time)
- Food processor or blender for grinding the pecans into a crust (a sturdy ziploc bag and a rolling pin works in a pinch, but your arm will get tired)
- Electric hand mixer or stand mixer for the cheesecake filling (you can whisk by hand, but it takes elbow grease and patience)
- Mixing bowls — one medium, one large
- Parchment paper (absolute lifesaver for lifting the bars out cleanly — I learned this the hard way after a sticky situation)
- Measuring cups and spoons
- Spatula for scraping every last bit of filling
If you don’t have a food processor, you can buy pre-ground pecan meal or finely chop the pecans by hand. It takes longer, and the texture won’t be as uniform, but it still works. My grandmother used to chop pecans with a knife for her pies, and hers always turned out fine. Just aim for a sandy consistency.
Preparation Method
Let me walk you through this step by step. I’ve made these bars about a dozen times now, so I’ve figured out all the little tricks that make the process smooth and the results perfect.
- Preheat your oven to 350°F (175°C). Line your 9×9 baking pan with parchment paper, leaving some overhang on two opposite sides. This creates handles that let you lift the entire block of cheesecake bars out later. Trust me on this — it makes slicing so much easier.
- Toast the pecans. Spread the pecan halves on a baking sheet and toast them in the preheated oven for 5-7 minutes, until they smell nutty and look slightly darker. Set them aside to cool for about 5 minutes. Don’t skip this step — raw pecans in the crust taste flat and kind of bitter. Toasting brings out their natural oils and sweetness.
- Make the crust. In your food processor, pulse the cooled toasted pecans with both sugars until the pecans are finely ground — about the texture of coarse sand. Add the melted butter, salt, vanilla extract, and flour. Pulse again until the mixture comes together and looks like wet sand. It should hold together when you pinch it between your fingers.
- Press the crust into the pan. Transfer the crust mixture to your prepared pan. Press it down firmly and evenly using the bottom of a measuring cup or a flat glass. Make sure you get the edges — I use my knuckles to push it into the corners. Bake the crust for 12 minutes, then set it aside to cool slightly while you make the filling.
- Prepare the cheesecake filling. In a large mixing bowl, beat the softened cream cheese with an electric mixer on medium speed until it’s smooth and creamy — about 2 minutes. Scrape down the sides of the bowl with a spatula. Add the sugar and beat for another minute until well combined.
- Add the eggs one at a time. Beat in the first egg on low speed until just incorporated, then add the second egg. Overmixing at this stage adds too much air, which can cause cracks later. Add the vanilla extract, sour cream, and the 2 tablespoons of flour. Mix on low until everything is smooth — about 30 seconds. Scrape the bowl again to make sure there are no lumps hiding at the bottom.
- Make the harvest swirl (if using). In a small bowl, whisk together the pumpkin puree, brown sugar, and pumpkin pie spice until smooth. Set aside.
- Assemble the bars. Pour the cheesecake filling over the pre-baked crust and spread it evenly with a spatula. If you’re adding the pumpkin swirl, drop small spoonfuls of the pumpkin mixture randomly over the top of the filling. Use a butter knife or a toothpick to gently swirl it into the cheesecake — just a few figure-eight motions, nothing too thorough. You want pockets of pumpkin flavor, not a fully blended mixture.
- Bake. Place the pan in the preheated oven and bake for 28-32 minutes. The edges should look set and slightly puffed, but the center should still jiggle just a little when you gently shake the pan. That slight jiggle is the sign of a perfectly creamy cheesecake — overbaking makes it dry and crumbly.
- Cool completely. Let the bars cool on a wire rack for about 30 minutes at room temperature. Then transfer the pan to the refrigerator and chill for at least 3 hours, preferably overnight. I know waiting is the hardest part, but this step is non-negotiable. Warm cheesecake is a mess — cold cheesecake slices like a dream.
- Slice and serve. Once fully chilled, use the parchment paper handles to lift the entire block out of the pan. Place it on a cutting board and use a sharp knife to slice into 9 even squares (3 rows by 3 rows). For clean cuts, wipe the knife clean between each slice with a damp paper towel.
Cooking Tips & Techniques
I’ve made my fair share of cheesecake mistakes over the years, and I want you to avoid them. Here are the things I wish someone had told me earlier.
The room temperature rule is real. I used to think it was one of those fussy baking rules you could ignore. Then I made a batch where the cream cheese was still cold, and my filling looked like cottage cheese. Lumpy, bumpy, sad. Let your cream cheese, eggs, and sour cream sit out for at least 30 minutes before you start. It makes a world of difference in the smoothness of your filling.
Don’t overmix the filling. This was my biggest learning curve. When you beat too much air into the cheesecake batter, it expands in the oven and then collapses, creating cracks on the surface. Mix on low speed, and stop as soon as everything comes together. A few small lumps are fine — they’ll smooth out during baking.
The water bath shortcut. Traditional cheesecake recipes call for a water bath to prevent cracking, but honestly, for these bars, I skip it. The bars are thin enough that they bake evenly without one. Plus, dealing with a water bath on a weeknight is the opposite of quick. If you’re worried about cracks, just remember that a little pumpkin swirl or a drizzle of caramel sauce hides any imperfections beautifully.
Timing is everything. Here’s how I multitask with this recipe: While the pecans are toasting in the oven, I measure out the dry ingredients. While the crust is baking, I soften the cream cheese in the microwave for about 15 seconds if it’s still cold. While the filling is being mixed, the crust is cooling. The whole active prep time is about 15 minutes, but with smart overlapping, you can have these in the oven in under 20 minutes total.
The chill is not optional. I know, I know — you want to eat them right away. But warm cheesecake bars are soft, messy, and the flavors haven’t melded yet. After 3 hours in the fridge, the texture firms up perfectly and the pecan flavor really comes through. Overnight is even better. Plan ahead and make these the day before you need them.
Variations & Adaptations
One of the best things about this recipe is how flexible it is. Here are some variations I’ve tried and loved.
Gluten-Free Version: Swap the all-purpose flour in both the crust and filling with a 1:1 gluten-free baking blend. I’ve tested this with Bob’s Red Mill brand, and it works beautifully. The crust will be slightly more crumbly, so press it firmly and let it cool completely before cutting.
Maple Pecan Twist: Add 2 tablespoons of pure maple syrup to the crust mixture instead of the vanilla extract. Drizzle a little extra maple syrup over the top before serving. The maple and pecan combination is basically fall in a bite — I made this version for a Friendsgiving and it disappeared in minutes.
Chocolate Harvest Bars: Melt ¼ cup of semi-sweet chocolate chips and drizzle it over the crust before adding the cheesecake filling. The chocolate pairs surprisingly well with the pecan and pumpkin flavors. My kids beg for this version every year.
No-Pumpkin Version: Leave out the pumpkin swirl entirely and add 1 teaspoon of lemon zest to the cheesecake filling instead. The citrus brightens up the richness and lets the pecan crust shine. This is actually my husband’s favorite version — he’s not a pumpkin person, and these bars convert him every time.
Vegan Adaptation: Use vegan cream cheese (I like Miyoko’s), a flax egg (1 tablespoon ground flaxseed mixed with 3 tablespoons water per egg), and coconut oil instead of butter. The texture is slightly less firm, but the flavor is still fantastic. Chill them for at least 4 hours for the best sliceability.
Serving & Storage Suggestions
These bars are wonderful at room temperature or straight from the fridge — both ways have their charms.
Serving Temperature: I prefer them chilled for clean slicing, but let them sit out for about 10 minutes before serving if you want a softer, creamier texture. For a fancy presentation, dust the tops with a little powdered sugar or drizzle with caramel sauce. A dollop of whipped cream never hurts either.
What to Serve With Them: These bars pair beautifully with a cup of hot apple cider or a spiced chai latte. If you’re serving them for dessert after a fall dinner, try them alongside a scoop of vanilla bean ice cream. For a brunch spread, they’re great with fresh fruit on the side — sliced apples or pears work especially well.
Storage Instructions: Store leftover bars in an airtight container in the refrigerator for up to 5 days. Place a sheet of wax paper between layers if you’re stacking them — they’re sturdy enough to stack without sticking, but the wax paper adds a layer of protection.
Freezing Tips: These bars freeze beautifully for up to 3 months. Slice them first, then wrap each bar individually in plastic wrap and place them in a freezer-safe bag or container. When you’re ready to enjoy one, just let it thaw in the refrigerator overnight or at room temperature for about 30 minutes. I always keep a few in my freezer for unexpected guests or late-night cravings.
How Flavors Develop: Honestly, these bars taste even better on day two. The pecan crust absorbs a little moisture from the filling, making it softer but still crunchy. The pumpkin and spice flavors meld together more deeply. If you can resist eating them all on day one, you’re in for a treat on day two.
Nutritional Information & Benefits
Let’s be real — these are a treat, not a health food. But that doesn’t mean they can’t have some redeeming qualities.
| Nutrient | Per Bar (1 of 9) |
|---|---|
| Calories | 385 |
| Total Fat | 26g |
| Saturated Fat | 12g |
| Cholesterol | 95mg |
| Sodium | 210mg |
| Total Carbohydrates | 33g |
| Dietary Fiber | 2g |
| Sugars | 24g |
| Protein | 6g |
Health Highlights: Pecans are actually a great source of healthy monounsaturated fats, fiber, and antioxidants. They contain magnesium, which supports bone health, and thiamine, which helps your body convert food into energy. The pumpkin puree (if you include the swirl) adds vitamin A and beta-carotene. The cream cheese provides calcium and protein, though it’s also the main source of saturated fat in this recipe.
Dietary Considerations: This recipe contains dairy, eggs, gluten, and tree nuts (pecans). For a gluten-free version, use a 1:1 gluten-free flour blend. For a dairy-free version, use vegan cream cheese and coconut oil. This recipe is not suitable for nut-free diets due to the pecan crust.
My Personal Take: I believe in balance. These bars are a special occasion dessert, not an everyday snack. But when you do indulge, doing it with real ingredients — butter, cream cheese, fresh pecans — feels so much better than grabbing something processed. One bar satisfies that sweet craving completely, and I never feel the need to go back for a third.
Frequently Asked Questions
Can I make these cheesecake bars ahead of time?
Absolutely. In fact, I recommend it. These bars need at least 3 hours to chill in the fridge, but making them a day ahead is even better. The flavors meld together overnight, and the texture becomes perfectly creamy. Just cover them tightly with plastic wrap once they’re fully cooled and chilled.
Can I use pre-ground pecans instead of whole pecans?
Yes, you can use pre-ground pecan meal or pecan flour. However, the texture might be slightly finer and less crunchy than freshly ground pecans. If using pre-ground, skip the toasting step (since they’re already processed) and mix them directly with the other crust ingredients. You’ll need about 1 ½ cups of pecan meal.
Why did my cheesecake filling crack?
Cracks usually happen from overmixing the filling or overbaking. When you beat too much air into the batter, it expands in the oven and then collapses, causing cracks. To avoid this, mix on low speed and stop as soon as the ingredients come together. Also, take the bars out when the center still jiggles slightly — that residual heat finishes the cooking without drying it out.
Can I use a different nut for the crust?
Definitely. Walnuts, almonds, or even a mix of pecans and walnuts work great. If you’re using walnuts, I recommend toasting them first as well. The flavor will be different — less sweet and more earthy — but still delicious. You can also use a combination of pecans and graham cracker crumbs for a hybrid crust.
How do I get clean slices?
The key is patience and a sharp knife. First, make sure the bars are fully chilled — at least 3 hours in the fridge. Use a long, sharp knife and wipe it clean with a damp paper towel between each slice. Run the knife under hot water before slicing for even cleaner cuts. And always slice when the bars are cold, not at room temperature.
Conclusion
These Quick Fall Harvest Cheesecake Bars with Pecan Crust have become my signature fall dessert, and I think they’ll become yours too. They’re everything I want in a seasonal treat — warm, nutty flavors from the pecan crust, creamy tanginess from the cheesecake, and that little hint of pumpkin spice that just screams autumn. And the best part? They come together in under an hour, with minimal fuss and maximum payoff.
I love that this recipe doesn’t demand perfection. Maybe your swirl isn’t Instagram-worthy, or maybe you skip the pumpkin altogether. That’s fine. The beauty of these bars is that they’re forgiving. They’re meant to be shared with people you love, on a busy Tuesday night or a relaxed weekend afternoon. They’re comfort food that actually fits into your real life.
So go ahead — give these a try. Make them for your next fall gathering, or make them just because it’s Tuesday and you deserve something good. And when you do, come back and tell me how they turned out. Did you add the pumpkin swirl? Try a different nut? Drizzle them with caramel? I’d love to hear your version. Leave a comment below or tag me in your photos — nothing makes my day like seeing these bars in your kitchen.
Happy baking, friends. Here’s to quick desserts that taste like you spent all day in the kitchen.
Pin This Recipe!
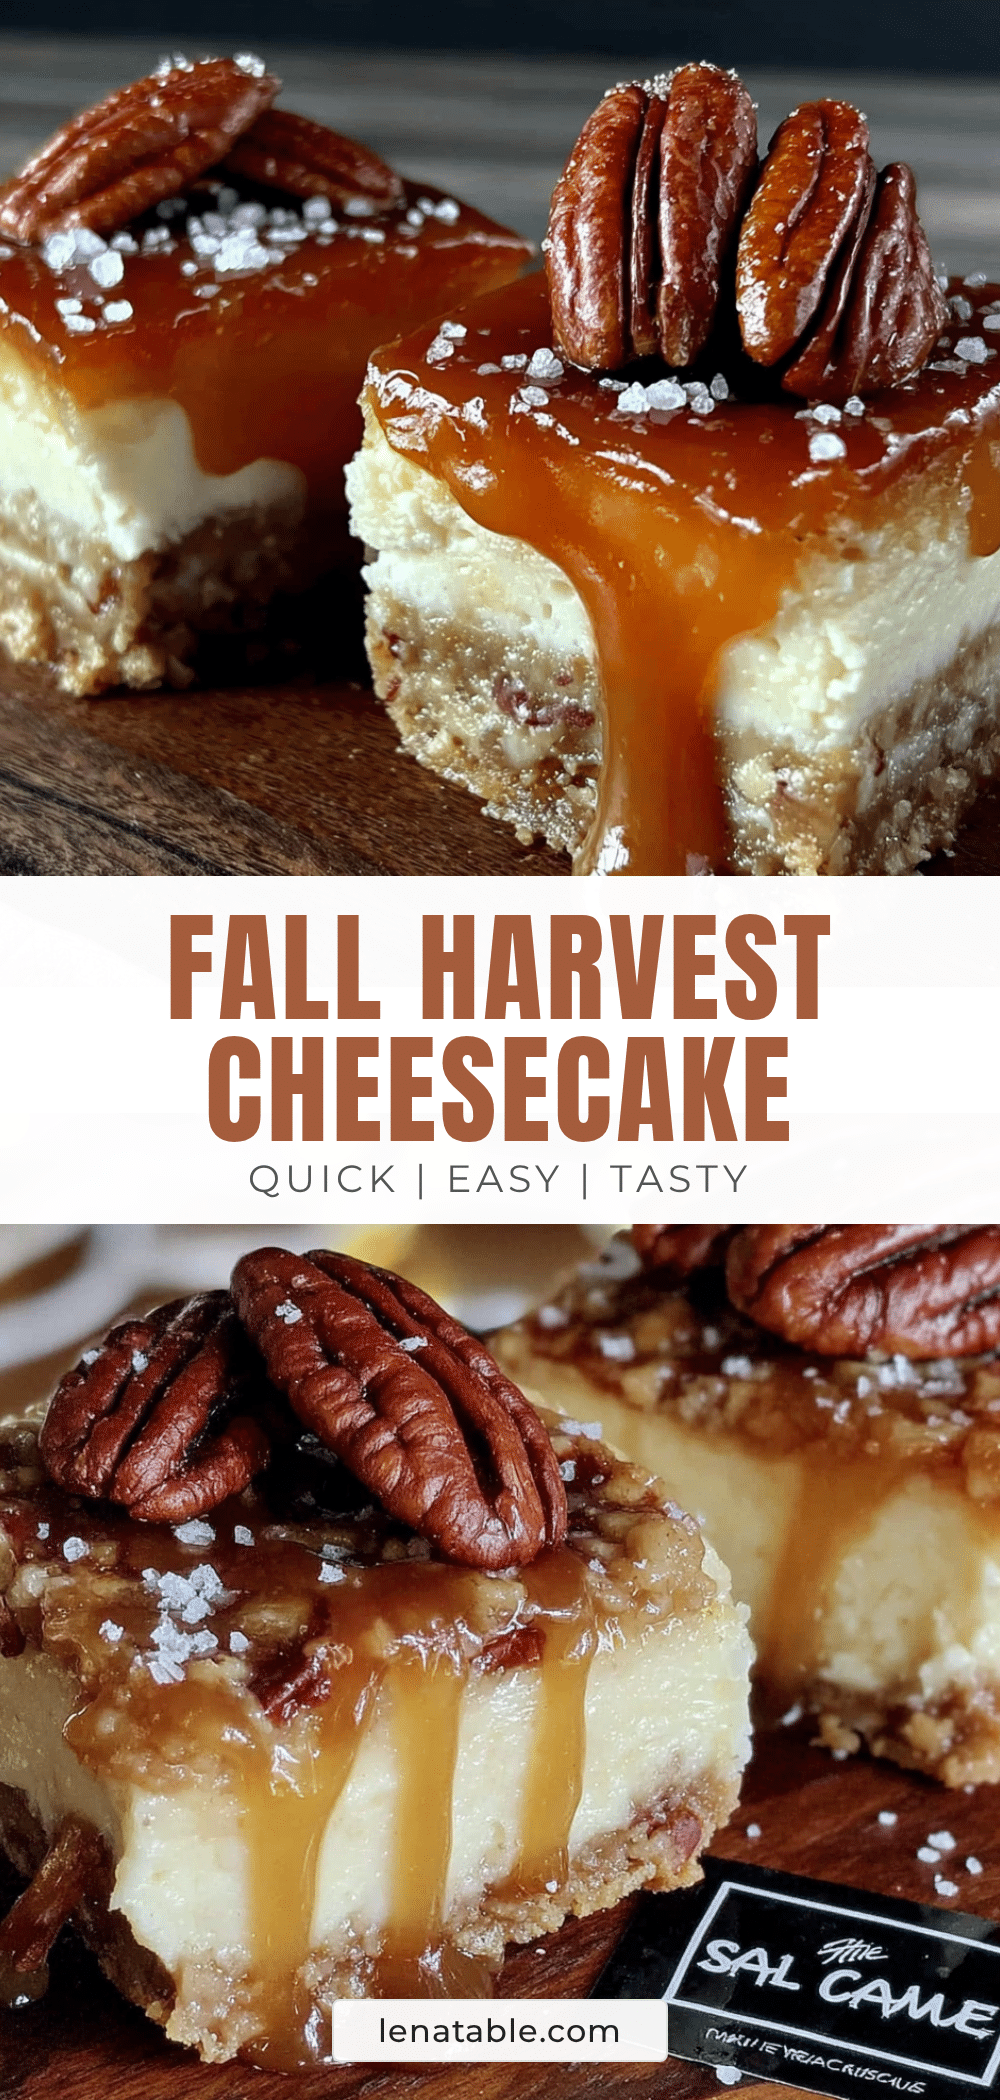
Best Easy Quick Fall Harvest Cheesecake Bars
These Quick Fall Harvest Cheesecake Bars with a buttery pecan crust are the perfect weeknight dessert. Ready in about 45 minutes with minimal fuss, they feature a creamy cheesecake filling and an optional pumpkin swirl for a taste of autumn.
- Prep Time: 15 minutes
- Cook Time: 30 minutes
- Total Time: 45 minutes
- Yield: 9 servings 1x
- Category: Dessert
- Cuisine: American
Ingredients
- 1 ½ cups pecan halves (toasted)
- ¼ cup granulated sugar
- ¼ cup packed light brown sugar
- ½ cup unsalted butter, melted
- ¼ teaspoon salt
- ½ teaspoon vanilla extract
- 1 cup all-purpose flour
- 16 ounces cream cheese, softened to room temperature
- ½ cup granulated sugar
- 2 large eggs, room temperature
- 1 teaspoon vanilla extract
- ¼ cup sour cream
- 2 tablespoons all-purpose flour
- ⅓ cup canned pumpkin puree (not pumpkin pie filling)
- 1 tablespoon brown sugar
- ½ teaspoon pumpkin pie spice
Instructions
- Preheat your oven to 350°F (175°C). Line a 9×9 baking pan with parchment paper, leaving overhang on two opposite sides.
- Spread pecan halves on a baking sheet and toast in the preheated oven for 5-7 minutes until fragrant. Set aside to cool for 5 minutes.
- In a food processor, pulse the cooled toasted pecans with both sugars until finely ground (coarse sand texture). Add melted butter, salt, vanilla extract, and flour. Pulse until the mixture comes together like wet sand.
- Press the crust mixture firmly and evenly into the prepared pan using the bottom of a measuring cup. Bake for 12 minutes, then set aside to cool slightly.
- In a large mixing bowl, beat the softened cream cheese with an electric mixer on medium speed until smooth (about 2 minutes). Scrape down the sides. Add ½ cup granulated sugar and beat for another minute.
- Add eggs one at a time, beating on low speed until just incorporated. Add vanilla extract, sour cream, and 2 tablespoons flour. Mix on low until smooth (about 30 seconds). Scrape the bowl.
- In a small bowl, whisk together pumpkin puree, 1 tablespoon brown sugar, and pumpkin pie spice until smooth.
- Pour the cheesecake filling over the pre-baked crust and spread evenly. Drop small spoonfuls of the pumpkin mixture randomly on top. Use a butter knife or toothpick to gently swirl into the cheesecake.
- Bake for 28-32 minutes. The edges should look set and slightly puffed, but the center should still jiggle slightly when shaken.
- Cool on a wire rack for 30 minutes at room temperature. Then refrigerate for at least 3 hours, preferably overnight.
- Once fully chilled, use the parchment paper handles to lift the block out of the pan. Slice into 9 even squares using a sharp knife, wiping the knife clean between slices.
Notes
For best results, ensure cream cheese, eggs, and sour cream are at room temperature. Do not overmix the filling to prevent cracks. The bars need at least 3 hours of chilling time for clean slicing. For gluten-free, use a 1:1 gluten-free flour blend. For dairy-free, use vegan cream cheese and coconut oil. Bars can be frozen for up to 3 months.
Nutrition
- Serving Size: 1 bar
- Calories: 385
- Sugar: 24
- Sodium: 210
- Fat: 26
- Saturated Fat: 12
- Carbohydrates: 33
- Fiber: 2
- Protein: 6
Keywords: cheesecake bars, fall dessert, pecan crust, pumpkin swirl, quick cheesecake, harvest bars, easy dessert


