Love this? Save it for later!
Share the inspiration with your friends
My friend Jen asked why I couldn’t just brown the butter first, then mix it into the oat topping. I started to explain why that wouldn’t work — that the butter would seize up, that the texture would be all wrong against the apples. Then I stopped. Honestly, I had no good reason. I’d just always done it the other way, melting cold butter into the flour mixture with my fingers until it felt right. Jen was visiting from out of town, standing in my kitchen on a rainy Saturday afternoon, and she’d offered to help peel apples for a dessert I was testing for a dinner party that night. I was feeling confident, maybe a little too confident, about my method. But something about her simple question — so straightforward, so unbothered by the culinary rules I’d internalized — made me pause. I shrugged, grabbed my smallest saucepan, and let her be right.
The smell that filled my kitchen was the first clue I’d been wrong for years. Brown butter has this nutty, almost caramel-like aroma that regular melted butter just can’t touch. It turned the oat streusel into something else entirely — deeper, toastier, with little crispy bits that tasted like the best part of a butter cookie. The apples, tossed with cinnamon and a touch of lemon, softened into this jammy, syrupy filling that bubbled up around the edges of the baking dish. I pulled it out of the oven, and Jen just looked at me with this little smile. “Told you,” she said. I mean, she was right. That brown butter apple crisp became the star of the dinner party. People went back for seconds, then thirds, scraping the last bits of streusel from the pan. I’ve made it a dozen times since, and every time I take that first whiff of browning butter, I think about how sometimes the best lessons come from letting someone else take the lead. Maybe you’ve been there — that moment when a beginner’s instinct turns out to be exactly what your recipe needed.
Why You’ll Love This Recipe
This isn’t just another apple crisp. The brown butter in the oat streusel adds a layer of richness that makes it taste like you spent hours in the kitchen, when really it comes together in about 15 minutes of active work. I’ve tested this recipe at least seven times now, tweaking the ratios until the topping stayed perfectly crunchy and the apples held their shape without turning to mush. It’s the kind of dessert that makes you look like a hero at a potluck or holiday dinner, but it’s simple enough for a random Tuesday night craving.
- Quick & Easy: You only need about 15 minutes of hands-on time. The oven does the rest.
- Simple Ingredients: Apples, oats, butter, flour, sugar, cinnamon — stuff you probably already have.
- Perfect for Gatherings: This recipe scales beautifully for dinner parties, Thanksgiving, or casual get-togethers.
- Crowd-Pleaser: I’ve served it to kids, grandparents, and picky eaters. Empty bowls every time.
- Unbelievably Delicious: The brown butter streusel is next-level. It’s crunchy, nutty, and slightly sweet in a way that regular crisp toppings just aren’t.
What makes this version different is the technique. Browning the butter before mixing it into the streusel changes the entire flavor profile. It’s not just a gimmick — it genuinely transforms the dish. Plus, I’ve dialed in the apple-to-topping ratio so you get that perfect bite every time, not a sad, soggy top layer. This is the crisp you make when you want to impress people without breaking a sweat. It’s comfort food that feels special, and honestly, it’s the kind of dessert that makes you close your eyes after the first bite.
What Ingredients You Will Need
This recipe uses simple, wholesome ingredients to deliver big flavor. Most of these are pantry staples, which makes it perfect for last-minute hosting. Here’s what you’ll need and why each one matters.
For the Apple Filling
- 6 cups apples, peeled, cored, and sliced (about 6 medium apples): I recommend a mix of Granny Smith and Honeycrisp. The tartness of Granny Smith balances the sweetness, while Honeycrisp holds its shape beautifully. Fuji or Braeburn also work well.
- 1/3 cup granulated sugar: Just enough to sweeten the apples without making them syrupy.
- 2 tablespoons all-purpose flour: This thickens the juices as the apples bake, giving you that perfect jammy consistency.
- 1 teaspoon ground cinnamon: The classic warm spice that makes apple desserts taste like home.
- 1/4 teaspoon ground nutmeg: Optional, but I love the subtle warmth it adds. Freshly grated is best.
- 1 tablespoon lemon juice: A squeeze of fresh lemon brightens the filling and prevents the apples from browning too much.
- 1 teaspoon vanilla extract: Adds depth and rounds out the flavors.
For the Brown Butter Oat Streusel
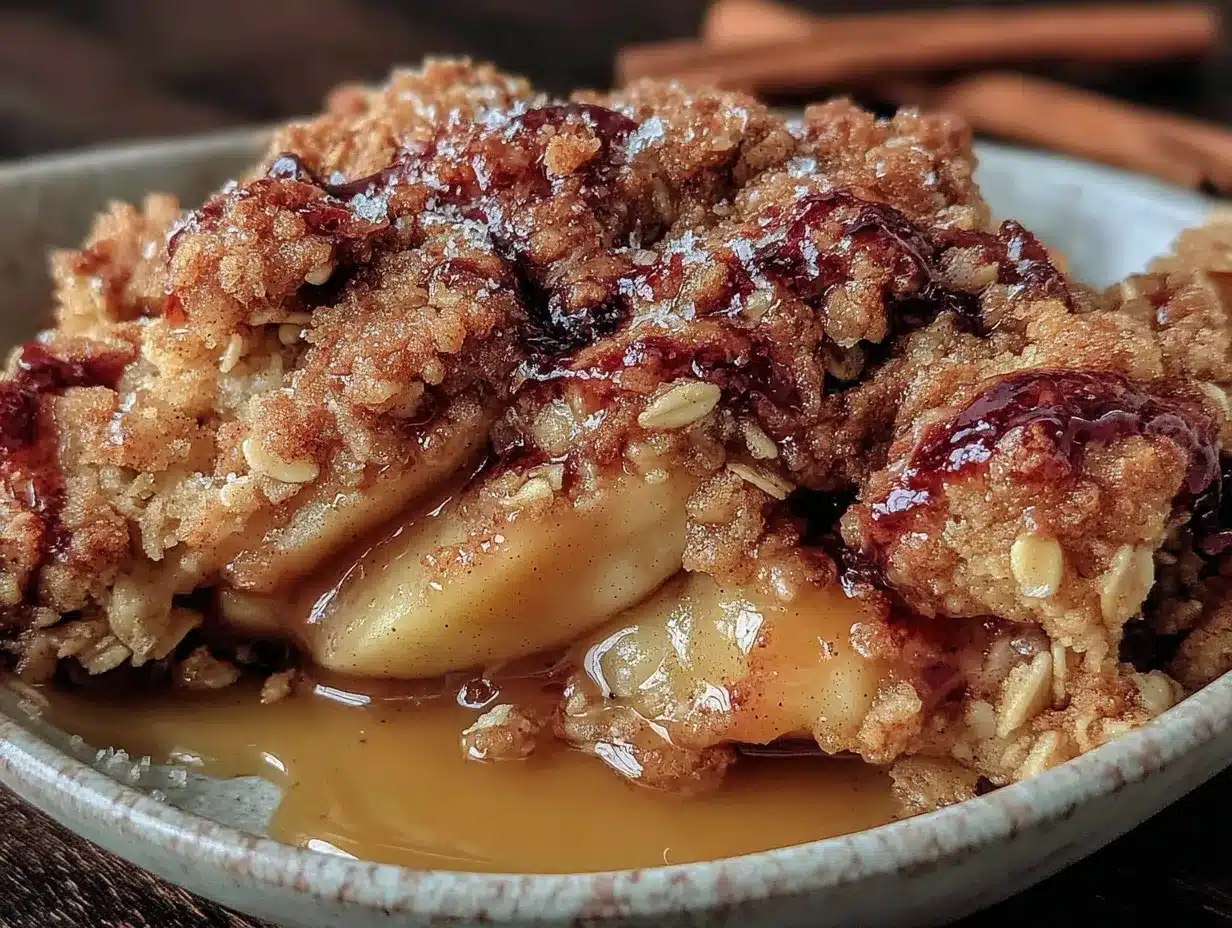
- 1/2 cup unsalted butter: This is the star. Use good quality butter — I prefer Kerrygold or Plugrà for their rich flavor.
- 3/4 cup old-fashioned rolled oats: Not quick oats! Old-fashioned oats give the streusel that hearty, crunchy texture. Quick oats will turn mushy.
- 1/2 cup all-purpose flour: Provides structure to the streusel.
- 1/2 cup packed light brown sugar: Adds moisture and a deeper, molasses-like sweetness that pairs perfectly with brown butter.
- 1/4 teaspoon salt: Don’t skip this — it balances the sweetness and makes the brown butter flavor pop.
- 1/2 teaspoon ground cinnamon: A little extra warmth in the topping.
- 1/4 cup chopped pecans or walnuts (optional): Adds nice crunch. I often toss them in for texture.
Substitution Tips: For a gluten-free version, use a 1:1 gluten-free flour blend and certified gluten-free oats. To make it dairy-free, substitute the butter with a high-quality vegan butter — just note that browning may not work the same, so you can skip that step and use melted vegan butter instead. If you don’t have brown sugar, you can use coconut sugar, though the flavor will be slightly less rich.
Equipment Needed
You don’t need fancy tools for this recipe, which is part of its charm. Here’s what you’ll need:
- 9×13-inch baking dish: This size works perfectly for a crowd. You can also use an 8×8 dish for a smaller batch, but you’ll need to adjust the baking time slightly.
- Small saucepan: For browning the butter. A light-colored pan helps you see when the butter turns amber.
- Large mixing bowls: One for the apple filling, one for the streusel.
- Sharp knife and cutting board: For peeling and slicing the apples.
- Wooden spoon or spatula: For stirring the butter as it browns.
- Measuring cups and spoons: Accuracy matters, especially for the streusel.
- Whisk: Optional, but helpful for mixing the dry ingredients.
If you don’t have a 9×13 dish, a cast iron skillet works beautifully — it holds heat well and gives you nice crispy edges. I’ve also used individual ramekins for a fancier presentation at dinner parties. Just reduce the baking time to about 20-25 minutes. And a quick tip: if your saucepan is dark, use a light-colored spatula to check the butter’s color. Trust me, I’ve burned more than one batch of butter because I couldn’t see it properly.
Preparation Method
Let’s get to it. This recipe moves quickly, so I like to have everything prepped and measured before I start. Here’s the step-by-step.
- Preheat your oven to 350°F (175°C). Position the rack in the center of the oven. While it heats, get your apples ready.
- Peel, core, and slice your apples. Aim for slices about 1/4-inch thick. Too thin, and they’ll turn to mush. Too thick, and they won’t soften enough. I usually do this while listening to a podcast — it’s meditative. Toss the sliced apples in a large bowl with the lemon juice to prevent browning.
- Make the apple filling. To the bowl of apples, add the granulated sugar, 2 tablespoons flour, cinnamon, nutmeg, and vanilla extract. Stir gently until every slice is coated. Set aside while you make the streusel.
- Brown the butter. Place the 1/2 cup unsalted butter in a small saucepan over medium heat. Let it melt completely, then swirl the pan occasionally. After a few minutes, it’ll start to foam and crackle. Watch closely — you’re looking for the milk solids at the bottom to turn a golden amber color and smell nutty. This usually takes about 5-7 minutes. The second it smells like toasted hazelnuts, remove it from the heat. Pour it into a heatproof bowl immediately to stop the cooking. Don’t walk away — burned butter happens fast!
- Make the streusel. In a medium bowl, whisk together the rolled oats, 1/2 cup flour, brown sugar, salt, and cinnamon. Pour the warm brown butter over the dry ingredients. Stir with a fork until everything is moistened and clumps form. If you’re using nuts, fold them in now. The mixture should look crumbly, not wet. If it seems too dry, add a tablespoon of melted regular butter.
- Assemble the crisp. Pour the apple filling into your 9×13 baking dish and spread it into an even layer. Sprinkle the streusel evenly over the top. Don’t press it down — you want those clumps to stay loose so they get crispy. Some apples should peek through.
- Bake. Place the dish on a baking sheet to catch any drips. Bake for 40-45 minutes, until the filling is bubbly around the edges and the topping is deep golden brown. If the topping browns too quickly, tent loosely with foil for the last 10 minutes.
- Cool slightly before serving. Let the crisp rest for at least 10-15 minutes. This lets the filling set up so it’s not runny. It will still be warm, which is exactly how you want it.
Sensory cue: When it’s done, the kitchen will smell like a cozy fall day — nutty butter, sweet cinnamon, and baked apples. The topping should be firm to the touch and the juices should be bubbling thickly around the edges. If you see liquid pooling, give it a few more minutes.
Cooking Tips & Techniques
I’ve made this recipe enough times to know where things can go sideways. Here’s what I’ve learned, often the hard way.
Don’t rush the brown butter. I once tried to speed things up by cranking the heat. Big mistake. The butter burned in about 90 seconds, and I had to start over. Keep the heat at medium, and watch it like a hawk. The color change happens fast once it starts. Swirl the pan constantly so the milk solids brown evenly.
Use a mix of apple varieties. All Granny Smith will be too tart. All Honeycrisp can get too sweet and soft. The blend gives you the best of both worlds — tartness, sweetness, and texture. I’ve also used Pink Lady and Jonagold with great results.
Don’t overmix the streusel. You want clumps, not a uniform dough. Overmixing makes the topping dense and bready instead of light and crunchy. Use a fork and stop as soon as everything looks like wet sand with some bigger chunks.
Let it rest. I know it’s tempting to dig in right away, but the crisp needs that 10-15 minute rest. One time I served it immediately, and the filling ran all over the plate like soup. The texture was still good, but it wasn’t as pretty. Patience pays off here.
Scale for a crowd. For a big dinner party, I double the recipe and use a 9×13 dish. It feeds 12-15 people easily. Just add 5-10 minutes to the baking time. If you’re making it ahead, assemble the crisp, cover it, and refrigerate for up to 24 hours. Bake straight from the fridge, adding 10 minutes to the time.
Variations & Adaptations
This recipe is flexible, and I’ve tried a few twists that turned out surprisingly well.
- Gluten-Free Version: Swap the all-purpose flour with a 1:1 gluten-free blend and use certified gluten-free oats. I’ve tested this with Bob’s Red Mill, and it works perfectly. The texture is slightly more crumbly, but just as delicious.
- Vegan Option: Use a high-quality vegan butter for the streusel. Note that vegan butter doesn’t brown the same way, so skip the browning step and just melt it. The topping will still be good, just not as deeply nutty. Use coconut sugar instead of brown sugar for a refined-sugar-free option.
- Seasonal Fruit Swap: In summer, replace half the apples with fresh peaches or nectarines. In fall, add a cup of fresh cranberries for a tart pop. I once made a pear-apple version with Bosc pears, and it was incredible — just reduce the sugar slightly since pears are sweeter.
- Spice It Up: Add a pinch of cardamom or ginger to the filling for a warming twist. I’ve also added a tablespoon of bourbon to the apple mixture for a grown-up version that’s perfect for holiday parties.
- Individual Servings: Divide the filling and streusel among 6-8 ramekins. Bake for 20-25 minutes. They’re adorable for dinner parties and everyone gets their own crispy edges.
One of my favorite variations came from a friend who added a handful of dried cherries to the filling. The tartness against the sweet, nutty streusel was amazing. I’ve been doing it ever since.
Serving & Storage Suggestions
This crisp is best served warm, straight from the oven. I like to let it rest for 15 minutes, then scoop it into bowls with a generous dollop of vanilla ice cream or a drizzle of heavy cream. The contrast between the hot, jammy apples and the cold, creamy ice cream is pure magic. For a dinner party, I set up a little topping bar with ice cream, whipped cream, and a sprinkle of cinnamon — guests love customizing their own bowls.
What to serve alongside: This crisp pairs beautifully with a cup of coffee or a glass of dessert wine like a late-harvest Riesling. For a full fall menu, serve it after a hearty meal like roasted chicken or a creamy butternut squash soup. It’s also wonderful with a slice of sharp cheddar cheese on the side — trust me, the salty-sweet combo is incredible.
Storage: Cover the baking dish tightly with foil or plastic wrap and store in the refrigerator for up to 4 days. The topping will lose some of its crunch, but the flavor only gets better. To reheat, pop individual portions in the microwave for 30-45 seconds, or warm the whole dish in a 350°F oven for 10-15 minutes. If you want to revive the streusel’s crunch, sprinkle a little extra brown sugar on top before reheating.
Freezer instructions: You can freeze the unbaked crisp for up to 3 months. Assemble it in a freezer-safe dish, wrap tightly in plastic wrap and foil, and freeze. Bake directly from frozen, adding 15-20 minutes to the baking time. Baked crisp also freezes well — just thaw overnight in the fridge and reheat in the oven.
One note: the flavors actually deepen after a day in the fridge. I’ve been known to make this a day ahead on purpose, just so the leftovers are even better. The apples get more syrupy, and the brown butter flavor really settles in.
Nutritional Information & Benefits
Here’s an approximate nutritional breakdown per serving (based on 12 servings):
- Calories: 320
- Fat: 14g
- Carbohydrates: 48g
- Fiber: 4g
- Sugar: 30g
- Protein: 3g
Apples are a great source of fiber and vitamin C, and oats provide heart-healthy beta-glucan. The brown butter adds some vitamin A and healthy fats. While this isn’t a low-calorie dessert, it’s made with whole ingredients — no artificial flavors or preservatives. If you’re watching your sugar intake, you can reduce the granulated sugar in the filling to 1/4 cup without sacrificing too much sweetness. For a lower-carb option, try using a sugar substitute like monk fruit sweetener in the filling, though the streusel works best with real brown sugar for texture.
This recipe is vegetarian and can be made gluten-free or vegan with the substitutions mentioned above. It contains dairy and gluten in its standard form, and nuts if you add them. I love that I can serve this to a crowd and feel good about what’s on the plate — it’s dessert, but it’s dessert made with care.
Conclusion
This brown butter apple crisp has become my go-to for every gathering, from casual potlucks to Thanksgiving dinner. It’s the dessert that people ask for by name now — “Are you bringing that apple thing with the crunchy top?” The brown butter makes it special, but the real magic is how simple it is. You don’t need to be a pastry chef to pull this off. You just need good apples, a little patience with the butter, and the willingness to try something new — even if it means letting a friend prove you wrong.
I hope you make this for your next dinner party or family dinner. I hope you serve it warm with a scoop of vanilla ice cream and watch everyone’s faces light up. And if you come up with your own twist — maybe a different fruit, a new spice, or a topping tweak — I’d love to hear about it. Drop a comment below and share your version. Honestly, some of the best recipes come from happy accidents and kitchen experiments. That’s how this one was born, after all.
Happy baking, friends. Your table is about to get a whole lot cozier.
Frequently Asked Questions
Can I make this apple crisp ahead of time?
Yes! You can assemble the crisp up to 24 hours in advance. Cover it tightly and refrigerate. When you’re ready to bake, add about 10 minutes to the baking time. The streusel might not be quite as crispy, but the flavor will be just as good.
What are the best apples for apple crisp?
A mix of tart and sweet apples works best. I recommend Granny Smith and Honeycrisp, but Fuji, Braeburn, or Pink Lady are also great. Avoid Red Delicious — they get too soft and mealy.
Why is my streusel soggy?
Soggy streusel usually means the butter was too warm when you mixed it, or you pressed it down too firmly into the dish. Make sure your brown butter has cooled slightly before mixing, and sprinkle the streusel loosely over the apples. Also, don’t skip the rest time after baking — it helps the filling set.
Can I freeze leftover apple crisp?
Absolutely. Let the crisp cool completely, then wrap it tightly in plastic wrap and foil. Freeze for up to 3 months. Thaw overnight in the fridge and reheat in a 350°F oven for 15-20 minutes. The topping won’t be as crunchy, but it’ll still be delicious.
How do I know when the brown butter is done?
Watch for the butter to turn a golden amber color and smell nutty and toasty. It will foam and crackle as it cooks. The moment it smells like toasted hazelnuts, remove it from the heat. If you see dark brown specks, it’s burned — start over. A light-colored saucepan helps you see the color change clearly.
Pin This Recipe!
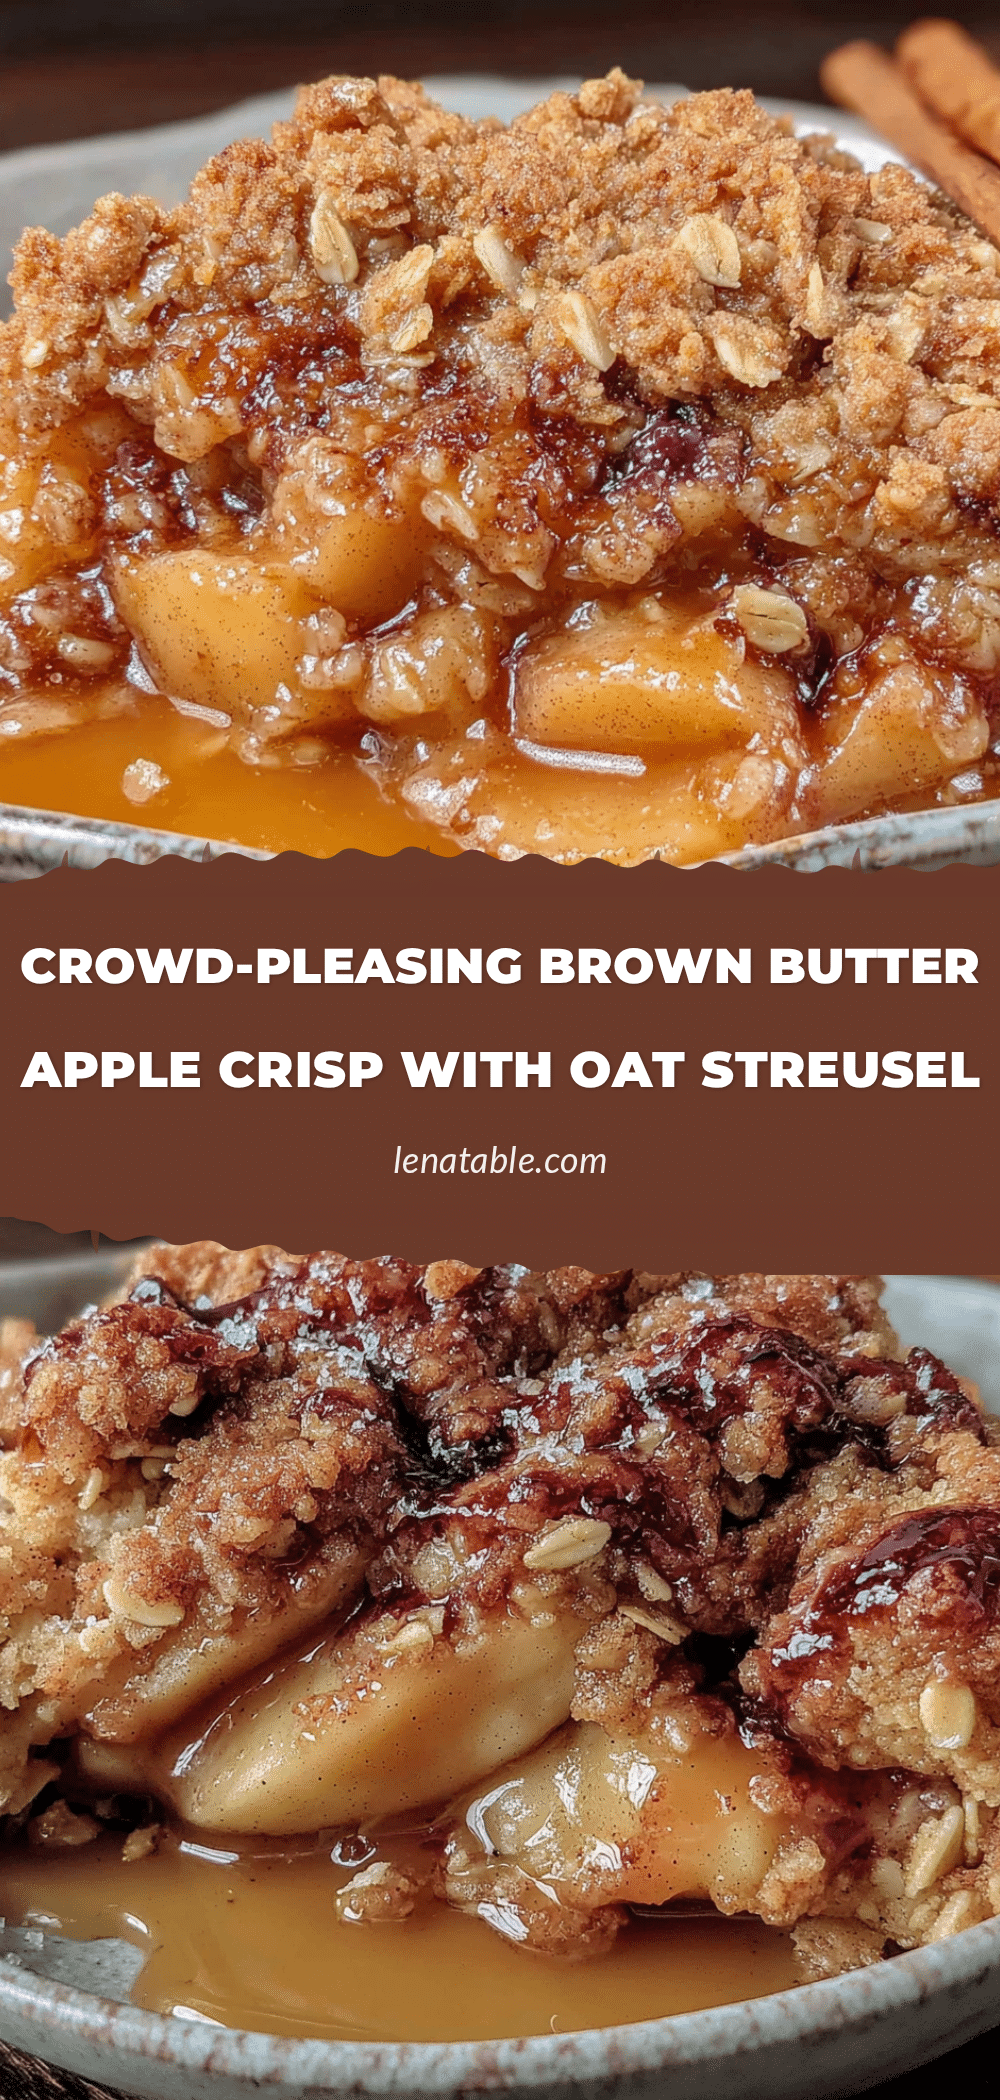
Best Homemade Brown Butter Apple Crisp Recipe

This brown butter apple crisp features a nutty, crunchy oat streusel topping over jammy cinnamon-spiced apples. It’s a simple yet impressive dessert that comes together in about 15 minutes of active work and is perfect for gatherings.
- Prep Time: 15 minutes
- Cook Time: 45 minutes
- Total Time: 1 hour
- Yield: 12 servings 1x
- Category: Dessert
- Cuisine: American
Ingredients
- 6 cups apples, peeled, cored, and sliced (about 6 medium apples, mix of Granny Smith and Honeycrisp)
- 1/3 cup granulated sugar
- 2 tablespoons all-purpose flour
- 1 teaspoon ground cinnamon
- 1/4 teaspoon ground nutmeg (optional)
- 1 tablespoon lemon juice
- 1 teaspoon vanilla extract
- 1/2 cup unsalted butter
- 3/4 cup old-fashioned rolled oats
- 1/2 cup all-purpose flour
- 1/2 cup packed light brown sugar
- 1/4 teaspoon salt
- 1/2 teaspoon ground cinnamon
- 1/4 cup chopped pecans or walnuts (optional)
Instructions
- Preheat your oven to 350°F (175°C). Position the rack in the center of the oven.
- Peel, core, and slice your apples into 1/4-inch thick slices. Toss the sliced apples in a large bowl with the lemon juice to prevent browning.
- To the bowl of apples, add the granulated sugar, 2 tablespoons flour, cinnamon, nutmeg, and vanilla extract. Stir gently until every slice is coated. Set aside.
- Place the 1/2 cup unsalted butter in a small saucepan over medium heat. Let it melt completely, then swirl the pan occasionally. After a few minutes, it will start to foam and crackle. Watch closely until the milk solids at the bottom turn a golden amber color and smell nutty (about 5-7 minutes). Remove from heat immediately and pour into a heatproof bowl to stop cooking.
- In a medium bowl, whisk together the rolled oats, 1/2 cup flour, brown sugar, salt, and cinnamon. Pour the warm brown butter over the dry ingredients. Stir with a fork until everything is moistened and clumps form. If using nuts, fold them in now.
- Pour the apple filling into a 9×13-inch baking dish and spread into an even layer. Sprinkle the streusel evenly over the top. Do not press it down.
- Place the dish on a baking sheet to catch any drips. Bake for 40-45 minutes, until the filling is bubbly around the edges and the topping is deep golden brown. If the topping browns too quickly, tent loosely with foil for the last 10 minutes.
- Let the crisp rest for at least 10-15 minutes before serving.
Notes
For a gluten-free version, use a 1:1 gluten-free flour blend and certified gluten-free oats. For a dairy-free version, substitute butter with high-quality vegan butter (browning may not work, so skip that step). Let the crisp rest for 10-15 minutes after baking to allow the filling to set. The flavors deepen after a day in the fridge.
Nutrition
- Serving Size: 1 serving
- Calories: 320
- Sugar: 30
- Sodium: 150
- Fat: 14
- Saturated Fat: 8
- Carbohydrates: 48
- Fiber: 4
- Protein: 3
Keywords: apple crisp, brown butter, oat streusel, fall dessert, easy apple dessert


