Love this? Save it for later!
Share the inspiration with your friends
It was 11:47 PM on a random Wednesday in October, and I had that itch. You know the one—where your brain decides it needs something warm, spiced, and slathered in cream cheese frosting, but your kitchen is holding out on you. I had a can of pumpkin puree leftover from a project I’d abandoned earlier that week, a stick of butter I was supposed to save for Sunday pancakes, and a block of cream cheese that was dangerously close to its expiration date. Not exactly the makings of a masterpiece. But I was too tired to overthink it, and honestly? That’s usually when the best stuff happens.
I’d been scrolling through my phone, looking at all these fussy pumpkin bar recipes that called for three different types of sugar and a trip to the store for something called “cake enhancer.” No thanks. I wanted something that tasted like fall, but without the heavy, dense feeling you get from most pumpkin desserts. So I grabbed that butter, threw it in a pan, and let it brown while I dug through my spice drawer. The smell alone—nutty, warm, almost caramel-like—was enough to wake up my neighbor’s dog, who started scratching at my door. Sorry, Barry.
The whole thing came together in about forty-five minutes, including the frosting. I forgot to line my pan with parchment—classic late-night move—so I had to run a knife around the edges while muttering things I won’t repeat here. But when I finally pulled those bars out of the oven, golden and fragrant, and let that cream cheese frosting melt into the warm cracks? I knew I had something. I’ve made them at least a dozen times since that night, and every single time, I think about Barry scratching at the door and how sometimes the best recipes come from just making do with what you’ve got.
Why You’ll Love This Recipe
Let me tell you why these brown butter pumpkin bars are about to become your new fall obsession. I’ve tested this recipe more times than I care to admit—through burnt batches, overly-spiced disasters, and one particularly sad attempt where I forgot the sugar entirely. This version? It’s the one. The one that actually works every single time.
- Quick & Easy: From start to frosting, you’re looking at about an hour. That’s less time than it takes to watch a single episode of your favorite show, and the payoff is way better.
- Simple Ingredients: I bet you have most of this stuff in your pantry right now. Pumpkin puree, flour, sugar, eggs, butter, and spices. No weird specialty items that you’ll use once and forget about.
- Perfect for Fall Gatherings: Bring these to a potluck, a Thanksgiving dinner, or just your Tuesday night couch session. They’re not too fancy to feel pretentious, but they’re special enough to impress.
- Crowd-Pleaser: I’ve served these to kids, adults, and that one friend who claims they “don’t really like pumpkin.” Every single person went back for seconds. Every. Single. One.
- Unbelievably Delicious: The brown butter is the secret weapon here. It adds this deep, nutty flavor that regular melted butter just can’t touch. Paired with the warm pumpkin spices and that tangy cream cheese frosting? It’s next-level comfort food.
What makes this recipe different from all the other pumpkin bar recipes out there is the technique. Browning the butter might seem like an extra step, but honestly? It takes five minutes and it transforms the entire dish. The bars come out tender, moist, and perfectly spiced, with a texture that’s more cake-like than dense. And the frosting? It’s not too sweet—just creamy enough to balance the warm spices without overwhelming them.
This is the kind of recipe that makes you close your eyes after the first bite. It’s comfort food reimagined—healthier in spirit, faster to make, but with all the soul-soothing satisfaction you’re craving. Perfect for impressing guests without breaking a sweat, or turning a simple fall evening into something memorable.
What Ingredients You Will Need
This recipe uses simple, wholesome ingredients to deliver bold flavor and satisfying texture without the fuss. Most of these are pantry staples, which means you can whip up a batch whenever the craving hits without a special trip to the store.
For the Pumpkin Bars
- Unsalted butter, ½ cup (1 stick) – We’re browning this, so unsalted is key to controlling the salt level. I prefer Kerrygold for its rich flavor, but any good-quality butter works.
- All-purpose flour, 1 ½ cups (180g) – Spoon and level for accuracy. Too much flour makes the bars dry.
- Baking powder, 1 teaspoon – Helps the bars rise and stay tender.
- Baking soda, ½ teaspoon – Works with the pumpkin’s acidity for the perfect texture.
- Salt, ½ teaspoon – Balances the sweetness and enhances the spices.
- Ground cinnamon, 2 teaspoons – The backbone of the spice blend. Use a fresh jar for the best flavor.
- Ground nutmeg, ½ teaspoon – Adds warmth. Freshly grated is amazing if you have it.
- Ground ginger, ½ teaspoon – Gives a little kick. Don’t skip it.
- Ground cloves, ¼ teaspoon – A little goes a long way. Adds that classic pumpkin pie depth.
- Pumpkin puree, 1 cup (about 240g) – Not pumpkin pie filling! Make sure you grab the 100% pure pumpkin. Libby’s is my go-to brand.
- Granulated sugar, ¾ cup (150g) – Sweetens the bars without making them heavy.
- Light brown sugar, ½ cup (100g), packed – Adds moisture and a subtle molasses flavor that pairs beautifully with the brown butter.
- Large eggs, 2, room temperature – Room temperature eggs blend more evenly into the batter. If you forgot to take them out, place them in a bowl of warm water for 5 minutes.
- Vanilla extract, 1 teaspoon – Pure vanilla, not imitation, for the best flavor.
- Vegetable oil, ¼ cup (60ml) – Keeps the bars incredibly moist. You can substitute melted coconut oil if you prefer.
For the Cream Cheese Frosting
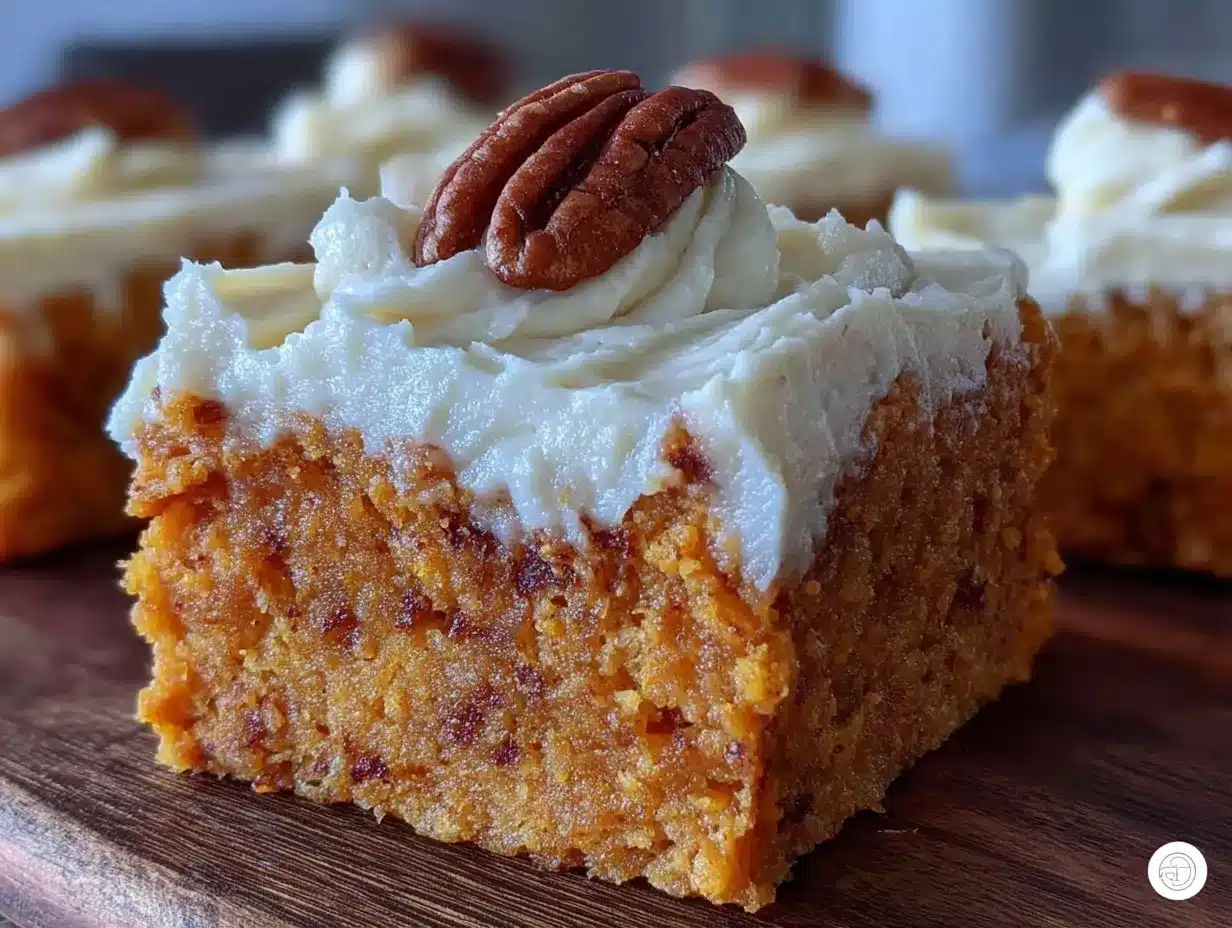
- Cream cheese, 8 oz (226g), softened – Full-fat is best for a rich, creamy frosting. Let it sit on the counter for at least 30 minutes.
- Unsalted butter, ¼ cup (½ stick), softened – Adds structure and creaminess to the frosting.
- Powdered sugar, 2 cups (240g) – Sift it if you want a super smooth frosting, but honestly, I rarely do and it turns out fine.
- Vanilla extract, 1 teaspoon – Enhances the overall flavor.
- Milk or heavy cream, 1-2 tablespoons – Adjusts the consistency. Start with 1 tablespoon and add more if needed.
Equipment Needed
You don’t need a professional bakery setup for these bars, but a few key tools will make your life a lot easier. Here’s what I use every time:
- 9×13-inch baking pan – This is the perfect size for these bars. If you only have an 8×8 pan, the bars will be much thicker and you’ll need to increase the baking time by about 10 minutes.
- Parchment paper – I cannot stress this enough. Line your pan with parchment paper, leaving some overhang on the sides. It makes lifting the bars out so much easier. Learn from my parchment-less mistake that first night.
- Light-colored saucepan – This is important for browning the butter. A dark pan makes it hard to see the color change, and you’ll end up with burnt butter instead of brown butter. Trust me, I’ve done it.
- Mixing bowls – You’ll need at least two: one for dry ingredients and one for wet. I use glass or stainless steel.
- Whisk – For combining the dry ingredients and smoothing out the batter.
- Rubber spatula – For scraping every last bit of that brown butter into the bowl. Waste not, want not.
- Electric hand mixer or stand mixer – For the frosting. You can do it by hand with a wooden spoon, but your arm will thank you for using a mixer.
- Cooling rack – Lets the bars cool evenly so the frosting doesn’t just melt into a puddle.
- Offset spatula – Not essential, but it makes spreading the frosting look effortless. A butter knife works too.
Preparation Method
Alright, let’s get to it. This is the part where the magic happens. Follow these steps, and you’ll have a pan of the most incredible pumpkin bars you’ve ever tasted.
- Brown the butter. Place the ½ cup of unsalted butter in your light-colored saucepan over medium heat. Stir it occasionally with a rubber spatula or whisk. The butter will melt, then start to foam, and then—this is the fun part—the milk solids at the bottom will begin to turn golden brown. You’ll smell it before you see it: a nutty, toasty aroma that’s absolutely intoxicating. Once the butter turns a deep amber color and you see brown specks floating around, take it off the heat immediately. Pour it into a heat-safe bowl to stop the cooking process. Let it cool for about 10 minutes while you prep the other ingredients. (Pro tip: Don’t walk away from the pan. Brown butter can go from perfect to burnt in about 30 seconds.)
- Preheat and prep. Preheat your oven to 350°F (175°C). Line your 9×13-inch baking pan with parchment paper, leaving a couple inches of overhang on the long sides. This will be your handle for lifting the bars out later.
- Mix the dry ingredients. In a medium bowl, whisk together the all-purpose flour, baking powder, baking soda, salt, cinnamon, nutmeg, ginger, and cloves. Set this aside. Give it a good whisk to make sure the spices are evenly distributed—nobody wants a bite that’s all clove.
- Combine the wet ingredients. In a large bowl, whisk together the pumpkin puree, granulated sugar, and packed brown sugar until smooth. Add the room temperature eggs one at a time, whisking well after each addition. Stir in the vanilla extract and the vegetable oil. Then, pour in the cooled brown butter (make sure it’s not hot, or you’ll scramble the eggs). Whisk until everything is combined and looks glossy and beautiful.
- Fold in the dry ingredients. Add the dry ingredient mixture to the wet ingredients. Use a rubber spatula to fold everything together gently. Mix just until you don’t see any more streaks of flour—overmixing will make the bars tough, and we don’t want that. The batter will be thick and smell incredible.
- Bake the bars. Pour the batter into your prepared pan and spread it into an even layer with your spatula. Bake for 22-28 minutes, or until a toothpick inserted into the center comes out clean or with just a few moist crumbs. The edges should be lightly golden and pulling away from the parchment slightly. Mine usually take about 25 minutes, but ovens vary, so start checking at 22 minutes.
- Cool completely. Let the bars cool in the pan on a wire rack for about 15 minutes. Then, using the parchment overhang, lift the entire slab of pumpkin bars out of the pan and transfer it to the wire rack to cool completely. This is crucial—if you put the frosting on while the bars are still warm, it will turn into a melty mess. I speak from rushed, impatient experience.
- Make the frosting. While the bars are cooling, make the cream cheese frosting. In a large bowl (or the bowl of a stand mixer), beat the softened cream cheese and softened butter together on medium speed until smooth and creamy, about 2 minutes. There should be no lumps. Add the powdered sugar, one cup at a time, beating on low speed at first to avoid a sugar cloud, then increasing to medium. Add the vanilla extract and 1 tablespoon of milk or heavy cream. Beat for another minute until the frosting is light, fluffy, and spreadable. If it’s too thick, add another tablespoon of milk. If it’s too thin, add a little more powdered sugar.
- Frost and slice. Once the bars are completely cool, spread the cream cheese frosting evenly over the top using an offset spatula or a butter knife. For clean slices, chill the frosted bars in the refrigerator for about 20 minutes before cutting. Use a sharp knife and wipe it clean between cuts for those picture-perfect edges.
Cooking Tips & Techniques
After making these bars more times than I can count, I’ve picked up a few tricks that make the process smoother and the results more consistent. Here’s what I wish I’d known from the start:
Don’t rush the brown butter. I know it’s tempting to crank up the heat to speed things up, but medium heat is your friend. High heat will burn the butter before the milk solids have a chance to toast properly. You want that deep amber color and nutty aroma—not a blackened, bitter mess. If you see black specks, you’ve gone too far. Start over. It’s worth it.
Room temperature ingredients matter. I used to think this was just chef-y nonsense, but it’s not. Cold eggs and cold cream cheese don’t blend smoothly. They create lumps in the batter and the frosting. Take the eggs and cream cheese out of the fridge at least 30 minutes before you start. If you’re in a hurry, place the eggs in a bowl of warm water for 5 minutes and microwave the cream cheese in 10-second bursts (but be careful—you want it soft, not melted).
Check your pumpkin puree. Before you measure it out, give the can a good stir. Pumpkin puree tends to separate in the can, with watery liquid on top and thicker puree at the bottom. If you don’t stir it, your bars might end up too wet or too dry. A quick whisk in the can solves this problem.
The toothpick test is your best friend. But here’s the thing—you want the toothpick to come out with a few moist crumbs, not completely dry. Overbaked pumpkin bars are dry and crumbly. The edges might look done before the center is set. If the top is browning too fast but the center is still jiggly, tent the pan loosely with aluminum foil for the last 5 minutes of baking.
Patience with the cooling process. I get it. You want to eat these immediately. But frosting warm bars is a recipe for disaster. The frosting will slide right off, or worse, melt into a greasy puddle. Let the bars cool completely on the wire rack—about 1 to 2 hours. If you’re in a real hurry, pop them in the fridge for 30 minutes once they’re cool to the touch.
Variations & Adaptations
One of the best things about this recipe is how flexible it is. Here are some variations I’ve tried and loved:
Gluten-Free Version: Substitute the all-purpose flour with a 1:1 gluten-free baking flour blend. I’ve had great results with Bob’s Red Mill 1-to-1 Baking Flour. The texture is slightly more tender, but the flavor is spot on. No one will know the difference.
Dairy-Free Adaptation: Use vegan butter for both the bars and the frosting. For the cream cheese frosting, use a dairy-free cream cheese alternative like Miyoko’s or Kite Hill. The texture might be a bit softer, so chill the frosted bars for at least an hour before slicing. I tested this for a friend with a dairy allergy, and she said they were “better than the real thing.” High praise.
Spice It Up: If you like a bolder spice profile, add ¼ teaspoon of cardamom or allspice to the flour mixture. I did this on a whim one Sunday morning, and it added this lovely, almost floral warmth that paired beautifully with the brown butter. You could also swap the cinnamon for pumpkin pie spice if that’s what you have on hand.
Add Some Crunch: Sprinkle ½ cup of chopped pecans or walnuts over the frosting while it’s still soft. The nutty crunch complements the brown butter flavor perfectly. I’ve also tried it with toasted pepitas (pumpkin seeds) for a double-pumpkin vibe, and it was fantastic.
Make It a Layer Cake: Double the recipe and bake it in two 9-inch round cake pans. Stack the layers with frosting in between, and you’ve got a stunning fall birthday cake. I did this for my mom’s birthday last November, and she cried. Happy tears, I promise.
Serving & Storage Suggestions
These bars are delicious at room temperature, but I personally love them chilled. Something about the cold, creamy frosting against the soft, spiced bar just hits different. Here’s how to serve and store them:
Serving Temperature: Pull the bars out of the fridge about 10 minutes before serving to take the chill off. If you’re serving them at a party or potluck, they’re perfectly fine sitting out for a couple of hours. Just don’t leave them in direct sunlight or near a warm oven.
Presentation Ideas: Cut the bars into 12 or 24 squares, depending on how generous you want to be. For a pretty presentation, arrange them on a rustic wooden board or a white platter. Dust them with a little extra cinnamon or a pinch of flaky sea salt right before serving—the salt really makes the flavors pop.
Pairings: These bars are fantastic with a hot cup of coffee, a chai latte, or a glass of cold milk. For a boozy option, try them with a spiced rum cocktail or a pumpkin ale. I’ve also been known to crumble one over a bowl of vanilla ice cream for an impromptu dessert sundae.
Storage Instructions: Store the frosted bars in an airtight container in the refrigerator for up to 5 days. The flavors actually develop and meld together after a day or two, so they might taste even better on day two. If you’re storing them for longer, you can freeze them.
Freezing Tips: To freeze, place the unfrosted bars in a single layer in a freezer-safe container or wrap them tightly in plastic wrap and then aluminum foil. They’ll keep for up to 3 months. When you’re ready to enjoy them, thaw them in the refrigerator overnight, then make the frosting fresh. Alternatively, you can freeze the frosted bars on a baking sheet until solid, then wrap them individually. Thaw in the fridge for a few hours before serving.
Reheating: If you like your bars warm (I won’t judge), you can microwave a single bar for about 15 seconds. The frosting will get a little soft and melty, which is honestly delightful. Just don’t overdo it, or you’ll end up with a puddle.
Nutritional Information & Benefits
I’m not a nutritionist, but I do pay attention to what goes into my body. These bars are a treat, no doubt about it, but they’re made with real, whole ingredients that offer some surprising benefits. Here’s the breakdown per bar (assuming 24 servings):
| Nutrient | Amount per Bar |
|---|---|
| Calories | ~210 |
| Total Fat | 11g |
| Saturated Fat | 6g |
| Cholesterol | 40mg |
| Sodium | 150mg |
| Total Carbohydrates | 26g |
| Dietary Fiber | 1g |
| Sugars | 18g |
| Protein | 3g |
| Vitamin A | 45% DV |
Health Highlights: Pumpkin is packed with vitamin A, which is great for your eyes and immune system. It’s also a good source of fiber, which helps with digestion and keeps you feeling full. The brown butter adds healthy fats (in moderation, of course) that help your body absorb the fat-soluble vitamins in the pumpkin. And the spices—cinnamon, ginger, nutmeg, cloves—are all anti-inflammatory powerhouses. So yes, these are still a dessert, but they’re a dessert that’s doing a little something good for you.
Dietary Considerations: This recipe contains gluten, dairy, and eggs. For a gluten-free version, see the variations section above. For a dairy-free version, use vegan butter and dairy-free cream cheese. I haven’t tested an egg-free version, but a flax egg might work in a pinch.
FAQs
Can I use pumpkin pie filling instead of pumpkin puree?
No, please don’t. Pumpkin pie filling is pre-sweetened and spiced, which will throw off the sugar and spice balance in this recipe. Stick with 100% pure pumpkin puree. Your bars will thank you.
Why did my brown butter burn?
This usually happens when the heat is too high or you walk away from the pan. Brown butter goes from perfect to burnt very quickly. Use medium heat, stir constantly, and watch for that amber color and nutty smell. If you see black specks, it’s burnt—start over.
Can I make these bars ahead of time?
Absolutely. You can bake the bars up to 2 days in advance and store them unfrosted in the fridge. Make the frosting and frost them the day you plan to serve them. Or, you can fully assemble them and refrigerate for up to 24 hours before serving.
My bars turned out dry. What went wrong?
Overbaking is the most common culprit. Check your bars at 22 minutes and use the toothpick test. If the toothpick comes out clean, they’re done. Also, make sure you’re measuring your flour correctly—spoon it into the measuring cup and level it off, don’t scoop directly from the bag.
Can I skip the brown butter step?
You can, but honestly, why would you? Brown butter adds a depth of flavor that regular melted butter just can’t match. It takes less than 10 minutes and it’s what makes these bars truly special. If you’re in a huge rush, you can use melted butter, but the bars won’t have that same nutty, caramel-like magic.
Conclusion
These brown butter pumpkin bars with cream cheese frosting are more than just a recipe—they’re a moment. A warm, spiced, creamy moment that tastes like everything good about fall. Whether you’re making them for a holiday gathering, a cozy night in, or just because you had a late-night craving (no judgment here), they deliver every single time.
I love this recipe because it’s forgiving, adaptable, and absolutely delicious. It’s the kind of thing you make once and then find yourself thinking about for weeks. The brown butter does the heavy lifting, the pumpkin keeps everything moist and tender, and that cream cheese frosting? It’s the perfect finishing touch—tangy, sweet, and impossibly creamy.
So go ahead and give these a try. Customize them to your heart’s content—add nuts, swap the spices, make them gluten-free. The recipe is yours now. And when you take that first bite and close your eyes? That’s the moment it all clicks. I’d love to hear how they turn out for you. Drop a comment below, share a photo, or tell me about your own late-night kitchen adventures. Happy baking!
Pin This Recipe!
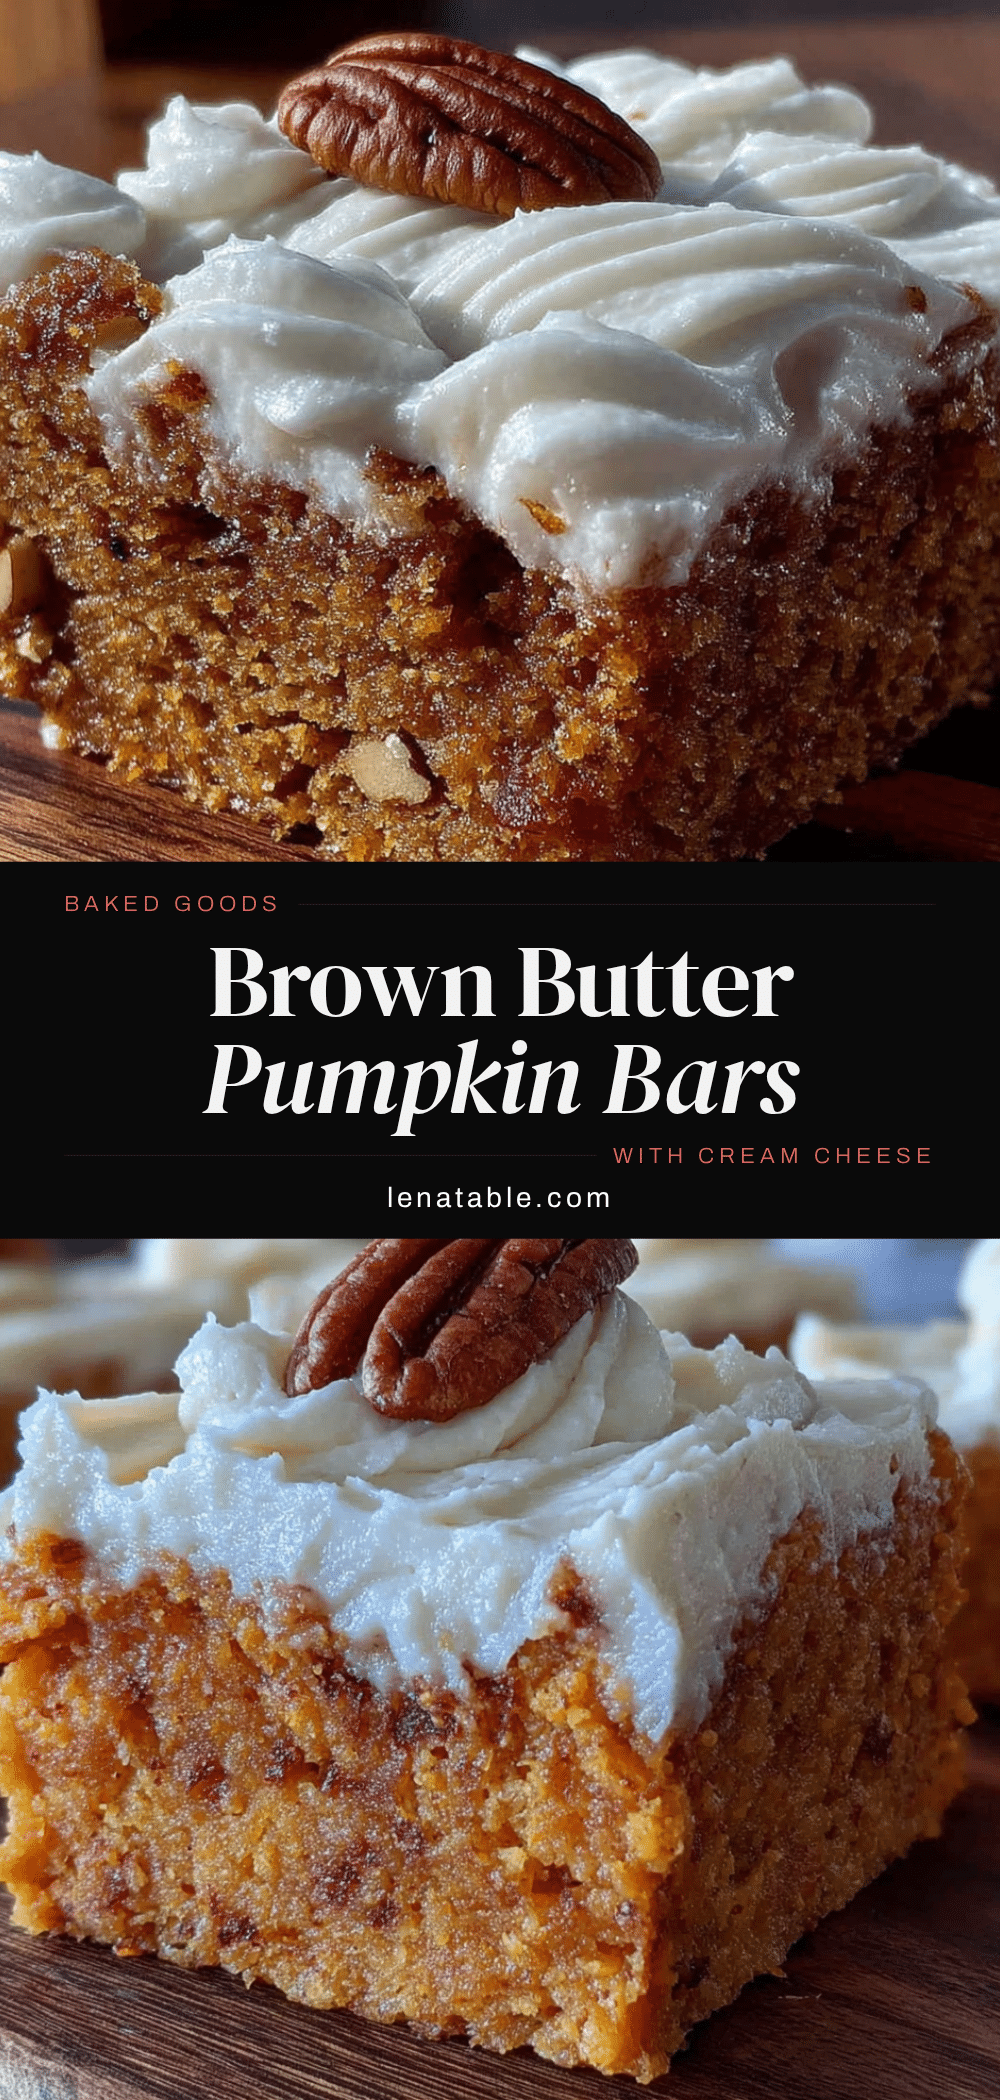
Brown Butter Pumpkin Bars with Cream Cheese Frosting
These brown butter pumpkin bars are tender, moist, and perfectly spiced, topped with a tangy cream cheese frosting. They come together in about an hour with simple pantry ingredients, making them the perfect fall dessert for any occasion.
- Prep Time: 15 minutes
- Cook Time: 25 minutes
- Total Time: 1 hour
- Yield: 24 servings
- Category: Dessert
- Cuisine: American
Ingredients
- Unsalted butter, ½ cup (1 stick)
- All-purpose flour, 1 ½ cups (180g)
- Baking powder, 1 teaspoon
- Baking soda, ½ teaspoon
- Salt, ½ teaspoon
- Ground cinnamon, 2 teaspoons
- Ground nutmeg, ½ teaspoon
- Ground ginger, ½ teaspoon
- Ground cloves, ¼ teaspoon
- Pumpkin puree, 1 cup (about 240g)
- Granulated sugar, ¾ cup (150g)
- Light brown sugar, ½ cup (100g), packed
- Large eggs, 2, room temperature
- Vanilla extract, 1 teaspoon
- Vegetable oil, ¼ cup (60ml)
- Cream cheese, 8 oz (226g), softened
- Unsalted butter, ¼ cup (½ stick), softened
- Powdered sugar, 2 cups (240g)
- Vanilla extract, 1 teaspoon
- Milk or heavy cream, 1-2 tablespoons
Instructions
- Brown the butter. Place the ½ cup of unsalted butter in a light-colored saucepan over medium heat. Stir occasionally until the butter melts, foams, and the milk solids turn golden brown. Remove from heat immediately and pour into a heat-safe bowl. Let cool for about 10 minutes.
- Preheat oven to 350°F (175°C). Line a 9×13-inch baking pan with parchment paper, leaving overhang on the long sides.
- In a medium bowl, whisk together flour, baking powder, baking soda, salt, cinnamon, nutmeg, ginger, and cloves. Set aside.
- In a large bowl, whisk together pumpkin puree, granulated sugar, and brown sugar until smooth. Add eggs one at a time, whisking well after each. Stir in vanilla extract, vegetable oil, and cooled brown butter until combined.
- Add dry ingredients to wet ingredients. Fold gently with a rubber spatula until just combined—do not overmix.
- Pour batter into prepared pan and spread evenly. Bake for 22-28 minutes, until a toothpick inserted in the center comes out clean or with a few moist crumbs. Cool in pan on a wire rack for 15 minutes, then lift out and cool completely.
- While bars cool, make frosting: Beat softened cream cheese and butter together until smooth. Add powdered sugar one cup at a time, beating on low then medium. Add vanilla and 1 tablespoon milk or cream; beat until fluffy. Adjust consistency with more milk or sugar if needed.
- Once bars are completely cool, spread frosting evenly over top. Chill for 20 minutes before slicing for clean edges.
Notes
Don’t rush the brown butter—use medium heat and watch carefully. Room temperature ingredients blend better. Let bars cool completely before frosting to avoid a melty mess. For clean slices, chill frosted bars for 20 minutes before cutting.
Nutrition
- Serving Size: 1 bar
- Calories: 210
- Sugar: 18
- Sodium: 150
- Fat: 11
- Saturated Fat: 6
- Carbohydrates: 26
- Fiber: 1
- Protein: 3
Keywords: pumpkin bars, brown butter, cream cheese frosting, fall dessert, pumpkin dessert, easy pumpkin bars


