Love this? Save it for later!
Share the inspiration with your friends
Introduction
“You know that moment when you open a dusty old recipe box and find something scribbled on a crumpled index card? That’s exactly what happened to me last summer at a local flea market. Tucked between some faded postcards and a chipped teacup was a handwritten recipe titled Grandma’s Seven-Layer Magic Cookie Bars. I wasn’t expecting much, honestly—just another sweet bar recipe. But as soon as I made them that weekend, the whole house smelled like a cozy café, and every bite took me back to those lazy Sunday afternoons when dessert was the star of the table.
Funny thing is, I forgot to buy one key ingredient the first time I made these bars—sweetened condensed milk—and had to improvise with a quick mix of cream and sugar. The result? Surprisingly delicious, but nothing beats the original magic. This recipe has since become my go-to for potlucks, weeknight treats, and whenever I need a nostalgic pick-me-up. Maybe you’ve been there too—the craving for something familiar, rich, and just a little bit special.
Let me tell you, these bars aren’t just any dessert. They have layers of toasted coconut, crunchy nuts, gooey chocolate, and that perfect buttery crust that holds it all together. It’s like a little slice of grandma’s kitchen, no matter where you are.
Why You’ll Love This Recipe
After testing countless versions, I can say this recipe truly stands out. Here’s why it’s a keeper:
- Quick & Easy: Ready in about 40 minutes, including baking—ideal for busy days or last-minute dessert plans.
- Simple Ingredients: Uses pantry staples like sweetened condensed milk, shredded coconut, and chocolate chips—you probably have them on hand already.
- Perfect for Gatherings: Whether it’s a family picnic or a casual potluck, these bars disappear fast.
- Crowd-Pleaser: The mix of textures and flavors appeals to kids and adults alike—no leftovers here.
- Unbelievably Delicious: The balance of sweet, nutty, and buttery notes makes it impossible to eat just one piece.
This isn’t your run-of-the-mill cookie bar. The magic is in the layering—the way each ingredient melds during baking to create that signature chewy yet crunchy texture. Plus, swapping in my favorite Ghirardelli chocolate chips for the usual semi-sweet ones adds a richer depth that’s hard to beat. Honestly, I never thought such a simple recipe could feel so indulgent without hours in the kitchen.
It’s comfort food at its best—easy to make, filled with familiar flavors, and perfect for bringing people together. If you want a dessert that sparks smiles and nostalgia, this is it.
What Ingredients You Will Need
This recipe uses straightforward, wholesome ingredients to deliver that classic seven-layer magic cookie bar flavor. Most are pantry staples, but quality makes a difference, so I’ll share my favorites and tips along the way.
- For the Crust:
- 1 1/2 cups graham cracker crumbs (about 10 full sheets, crushed finely)
- 6 tablespoons unsalted butter, melted (I prefer Plugrá for its rich flavor)
- 2 tablespoons granulated sugar (balances the buttery crust)
- The Layers:
- 1 can (14 ounces / 396 grams) sweetened condensed milk (the key to gooey magic)
- 1 1/2 cups sweetened shredded coconut (toasted for extra flavor, optional but recommended)
- 1 cup chopped walnuts or pecans (toasted for crunch and aroma)
- 1 cup semi-sweet or bittersweet chocolate chips (I use Ghirardelli for that silky melt)
- 1 cup butterscotch chips (optional, for a little extra sweetness and color contrast)
Ingredient Notes: You can swap the nuts for almonds or skip them for a nut-free version. If you want a dairy-free option, try coconut milk condensed milk alternatives, though the texture will differ slightly.
Equipment Needed
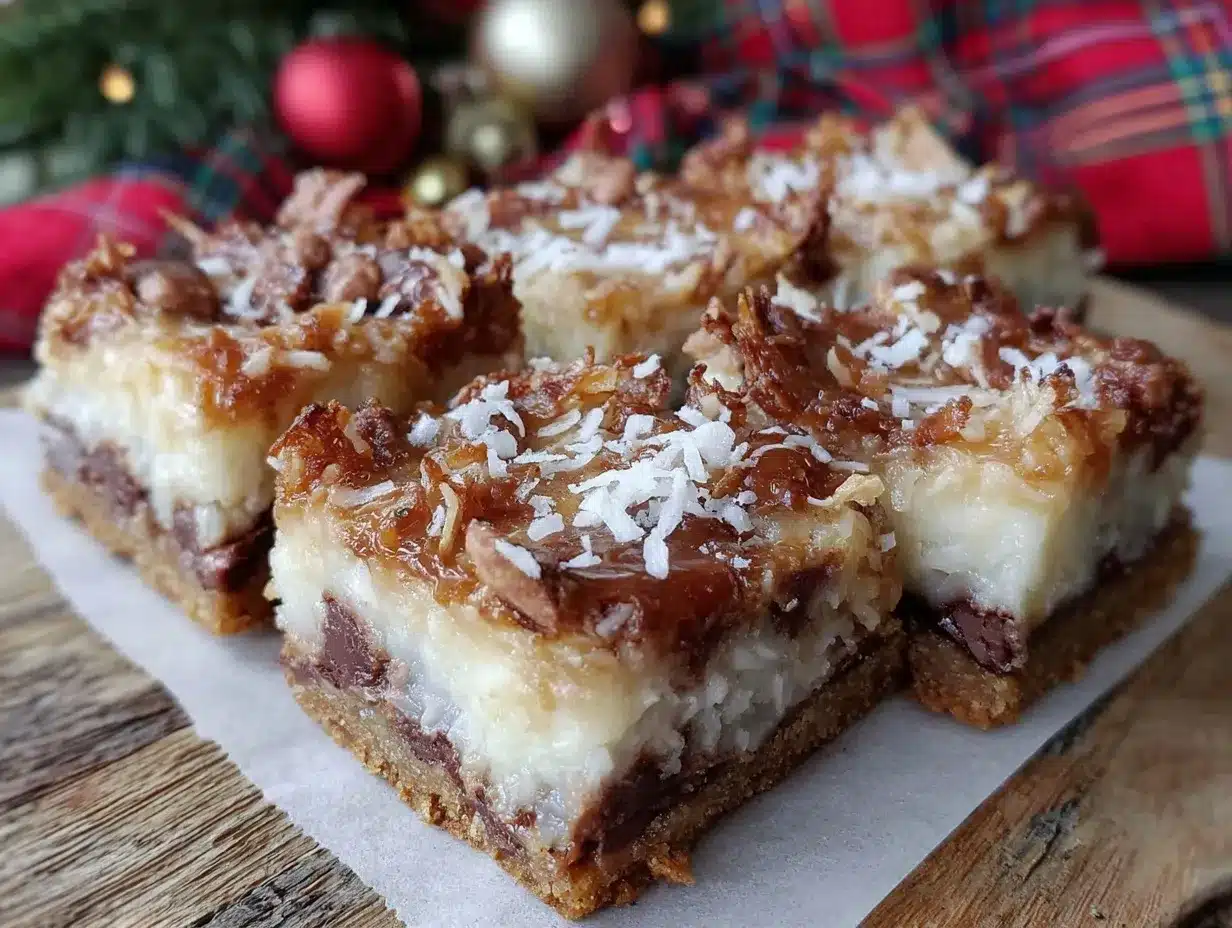
- 9×13-inch (23×33 cm) baking pan – I find glass pans give even browning but feel free to use metal.
- Mixing bowls – at least two for combining crust and layering ingredients separately.
- Measuring cups and spoons – precise measurements make a difference here.
- Spatula or wooden spoon – for mixing and spreading the crust evenly.
- Food processor or rolling pin – to crush graham crackers finely.
- Oven mitts – safety first!
In a pinch, you can crush the graham crackers by placing them in a zip-lock bag and rolling over with a heavy pan. No fancy equipment required here, which is part of why I love this recipe so much—it’s accessible for everyone.
Preparation Method
- Preheat your oven to 350°F (175°C). This gets everything ready for that perfect golden crust.
- Prepare the crust: In a medium bowl, combine 1 1/2 cups graham cracker crumbs, 6 tablespoons melted unsalted butter, and 2 tablespoons granulated sugar. Mix well until the crumbs are evenly coated and look like wet sand.
- Press the crust mixture firmly into the bottom of your 9×13-inch pan. Use the back of a spoon or a flat-bottomed glass to get an even layer. This helps the crust hold together nicely.
- Bake the crust for 8 minutes, until it starts to set and turn golden. This step is crucial to avoid a soggy bottom later.
- While the crust bakes, toast the coconut and nuts: Spread 1 1/2 cups shredded coconut and 1 cup chopped nuts on a baking sheet. Toast in the oven for about 5 minutes, watching closely so they don’t burn. This brings out amazing flavor and crunch.
- Layer the bars: Once the crust is baked, remove from oven. Immediately pour the entire can of sweetened condensed milk evenly over the crust. It may seem like a lot, but it’s what creates that gooey magic.
- Sprinkle the toasted coconut evenly over the condensed milk, followed by the toasted nuts.
- Add 1 cup chocolate chips and 1 cup butterscotch chips (if using) as the final layer. Press down lightly so they stick into the condensed milk layer.
- Bake the assembled bars for 25-30 minutes, or until the top is bubbly and golden brown. You want the edges to pull away slightly from the pan.
- Cool completely on a wire rack before cutting into squares. This step is tough to wait for—I get it! But it helps the bars set perfectly.
Pro Tip: If your bars seem too soft after cooling, pop them in the fridge for 30 minutes before slicing. I learned this after a few messy first tries!
Cooking Tips & Techniques
Making these magic cookie bars is pretty straightforward, but a few tricks can save you from common pitfalls.
- Don’t skip toasting: Toasting the coconut and nuts separately enhances flavor and crunch. Untoasted, they can taste a bit flat.
- Press the crust firmly: Use a flat object to pack the crust tightly. A loose crust will crumble when you cut the bars.
- Watch your baking time: Overbaking dries out the bars; underbaking makes them too gooey. Look for bubbly edges and a golden top.
- Use room temperature butter: It mixes better with the crumbs, creating a consistent crust texture.
- Let the bars cool completely: This helps them firm up and slice cleanly. I remember trying to cut them warm and ended up with a gooey mess all over my counter!
Honestly, getting these right is about patience and attention. The first time I made them, I was distracted by a phone call and left the bars in too long—lesson learned. Now I set multiple timers and keep a close eye.
Variations & Adaptations
This recipe is a classic, but there’s room to make it your own.
- Nut-Free Version: Simply omit the nuts and replace with extra coconut or add chopped dried fruits like cranberries or cherries.
- Chocolate Lovers: Swap butterscotch chips for white chocolate chips or add a drizzle of melted dark chocolate after baking.
- Seasonal Twist: During fall, sprinkle in some cinnamon or pumpkin pie spice to the crust for a cozy flavor.
- Healthier Swap: Use coconut oil instead of butter and opt for dark chocolate chips with higher cacao content for less sugar.
- Gluten-Free: Use gluten-free graham crackers or crushed gluten-free cereal for the crust.
One time, I tried adding a layer of raspberry jam between the crust and condensed milk—it was a fun surprise! Feel free to experiment and find what hits your sweet spot.
Serving & Storage Suggestions
These bars are fantastic served at room temperature or slightly chilled. If you want a warm treat, pop a piece in the microwave for 10 seconds to get that melty chocolate hit.
They pair beautifully with a scoop of vanilla ice cream or a cup of strong coffee—perfect for a cozy afternoon snack. At our last family gathering, these bars were the centerpiece alongside my crispy garlic chicken dinner, and the combo was a hit.
To store, keep bars in an airtight container at room temperature for up to 3 days. For longer storage, refrigerate up to a week or freeze for up to 3 months. When freezing, wrap tightly in plastic wrap and foil to prevent freezer burn.
Flavors actually deepen after resting, so these bars often taste even better the next day—if you can resist!
Nutritional Information & Benefits
Per serving (1 bar, assuming 24 servings): approximately 210 calories, 12g fat, 25g carbohydrates, 2g protein.
While these bars are definitely a treat, they provide some nutritional perks. The walnuts add heart-healthy omega-3 fatty acids and protein, while the coconut offers fiber and some minerals. Using real unsalted butter and quality chocolate chips means you’re working with recognizable ingredients rather than artificial additives.
For those watching gluten or dairy, simple substitutions make these bars accessible without losing their signature taste and texture. I appreciate having a delicious dessert option that’s flexible like that.
Conclusion
Classic Grandma’s Seven-Layer Magic Cookie Bars are more than just a dessert—they’re a sweet memory, a quick fix, and a guaranteed crowd-pleaser all rolled into one. I keep coming back to this recipe because it’s easy, comforting, and endlessly adaptable.
Whether you stick to the original or put your own spin on it, these bars bring that warm, nostalgic feeling to any table. I hope you enjoy making them as much as I do—and don’t be surprised if they become your go-to dessert too.
When you try this recipe, I’d love to hear how it turns out—drop a comment or share your variations. Happy baking!
FAQs
Can I make these bars ahead of time?
Yes! They store well at room temperature or in the fridge for several days, and you can freeze them for longer storage.
What if I don’t have graham crackers?
You can substitute with digestive biscuits, vanilla wafers, or even crushed pretzels for a salty twist.
How do I prevent the bars from being too gooey?
Make sure to bake them until the edges are bubbly and golden, and allow them to cool completely before slicing.
Can I use different types of nuts?
Absolutely! Pecans, almonds, or even hazelnuts work great. Just toast them lightly for best flavor.
Is there a vegan version of this recipe?
Yes, try using vegan butter, dairy-free sweetened condensed milk alternatives, and dairy-free chocolate chips. Texture and flavor may vary slightly but still delicious.
Pin This Recipe!
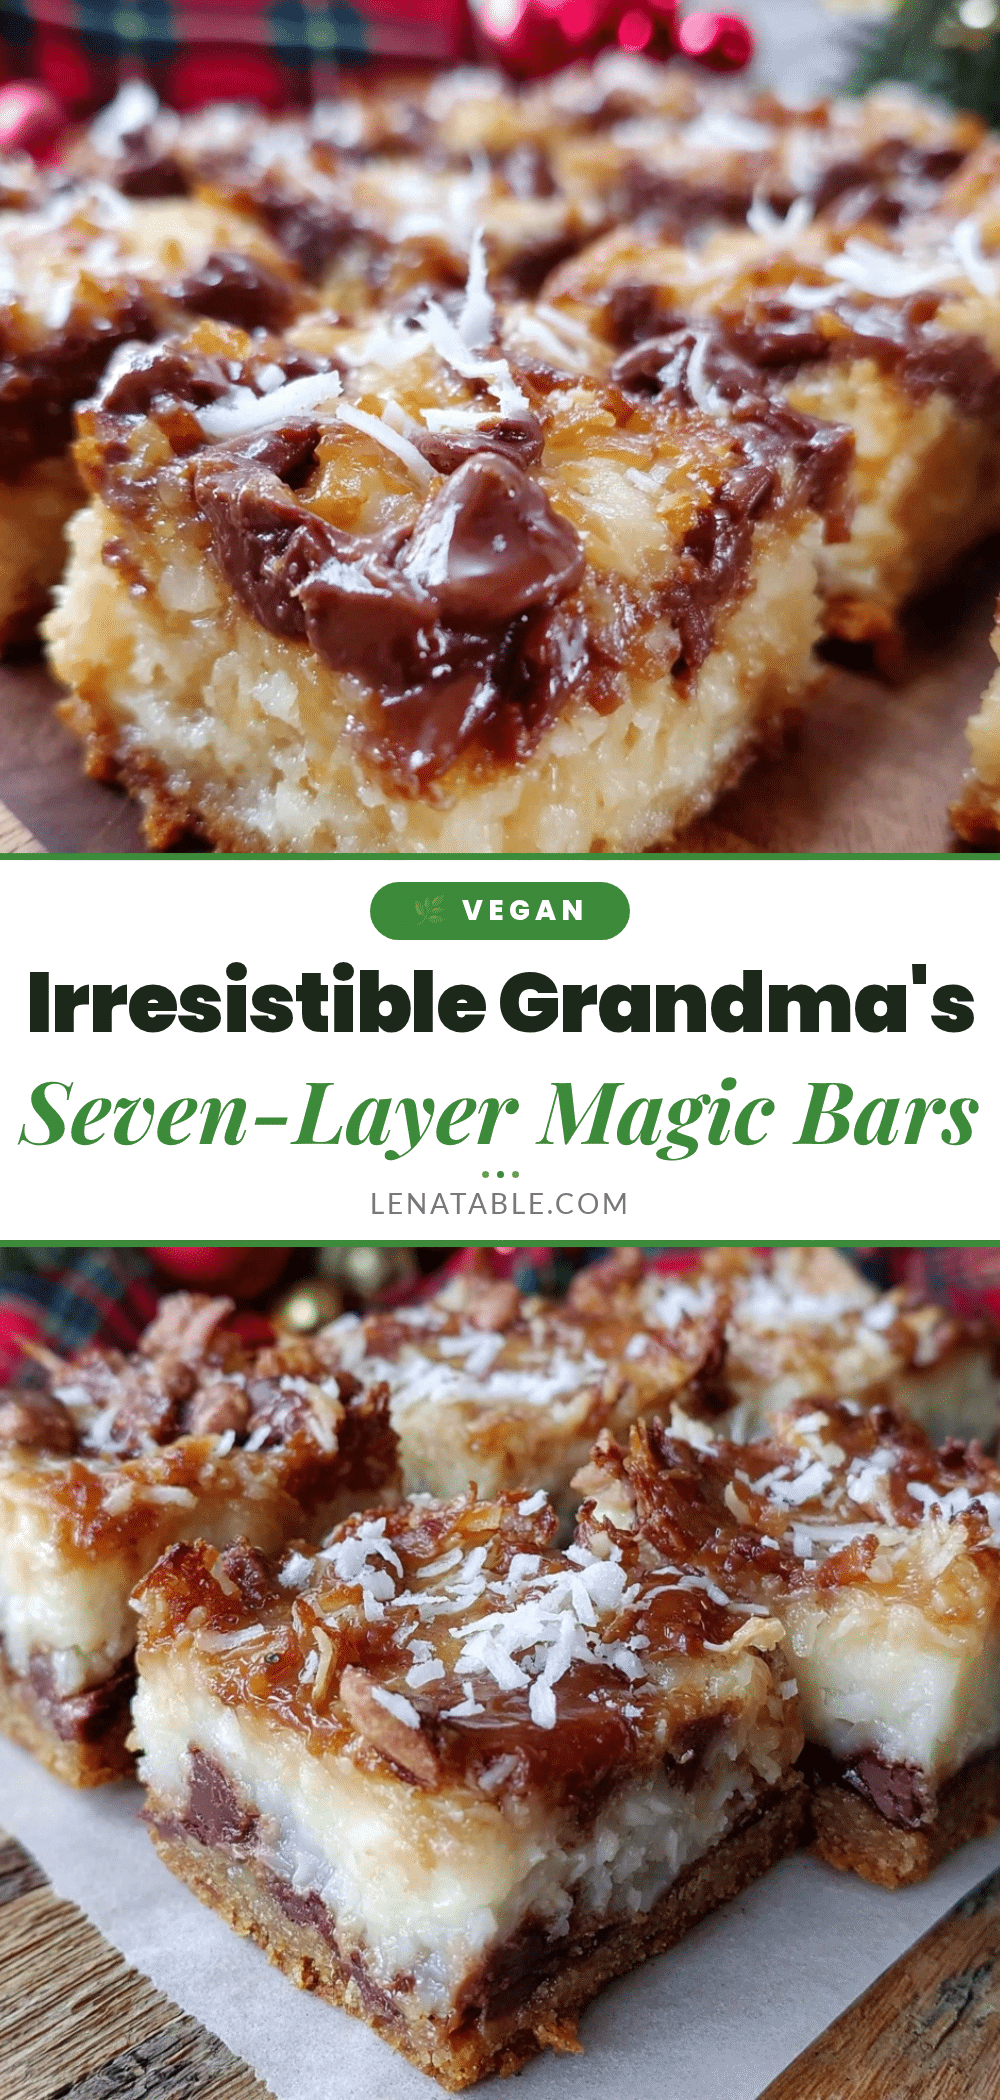
Classic Grandma’s Seven-Layer Magic Cookie Bars
A nostalgic and easy-to-make dessert bar featuring layers of toasted coconut, crunchy nuts, gooey sweetened condensed milk, and chocolate chips on a buttery graham cracker crust.
- Prep Time: 15 minutes
- Cook Time: 33 minutes
- Total Time: 48 minutes
- Yield: 24 servings 1x
- Category: Dessert
- Cuisine: American
Ingredients
- 1 1/2 cups graham cracker crumbs (about 10 full sheets, crushed finely)
- 6 tablespoons unsalted butter, melted
- 2 tablespoons granulated sugar
- 1 can (14 ounces) sweetened condensed milk
- 1 1/2 cups sweetened shredded coconut (toasted, optional but recommended)
- 1 cup chopped walnuts or pecans (toasted)
- 1 cup semi-sweet or bittersweet chocolate chips
- 1 cup butterscotch chips (optional)
Instructions
- Preheat your oven to 350°F (175°C).
- In a medium bowl, combine graham cracker crumbs, melted unsalted butter, and granulated sugar. Mix well until crumbs are evenly coated and look like wet sand.
- Press the crust mixture firmly into the bottom of a 9×13-inch baking pan using the back of a spoon or flat-bottomed glass for an even layer.
- Bake the crust for 8 minutes until it starts to set and turn golden.
- While the crust bakes, spread shredded coconut and chopped nuts on a baking sheet and toast in the oven for about 5 minutes, watching closely to avoid burning.
- Remove the crust from the oven and immediately pour the entire can of sweetened condensed milk evenly over the crust.
- Sprinkle the toasted coconut evenly over the condensed milk, followed by the toasted nuts.
- Add chocolate chips and butterscotch chips (if using) as the final layer and press down lightly so they stick into the condensed milk layer.
- Bake the assembled bars for 25-30 minutes or until the top is bubbly and golden brown and edges pull away slightly from the pan.
- Cool completely on a wire rack before cutting into squares.
Notes
Toast the coconut and nuts separately to enhance flavor and crunch. Press the crust firmly to avoid crumbling. Bake until bubbly and golden to prevent gooey bars. Cool completely before slicing. For firmer bars, refrigerate for 30 minutes before cutting.
Nutrition
- Serving Size: 1 bar (assuming 24 b
- Calories: 210
- Fat: 12
- Carbohydrates: 25
- Protein: 2
Keywords: seven-layer bars, magic cookie bars, dessert bars, easy dessert, nostalgic dessert, chocolate chip bars, coconut bars, walnut bars


