Love this? Save it for later!
Share the inspiration with your friends
My niece asked why I couldn’t just crush the cookies in the bag instead of dirtying a bowl. I started to explain why that wouldn’t work — then stopped. Honestly, I had no good reason. I just assumed you always did it the “proper” way in a bowl with a rolling pin. So, on a chilly October afternoon, with the smell of cinnamon in the air and a bag of Oreos in her hand, we tried her method. It was a total mess at first, with a few crumbs escaping, but it worked perfectly. And honestly, it was way faster. That moment of being wrong turned into the best part of our afternoon.
That little rebellion against kitchen rules is exactly how this recipe was born. We were already planning a cozy movie night, and she wanted something that felt spooky but not scary. Something warm and comforting. I was thinking about a classic dirt pudding, but she wanted to call it a “graveyard.” So, we went with it. We layered the chocolate pudding, crushed the cookies her way, and added some gummy worms and little tombstones. It was the most fun I’ve ever had making a dessert. Maybe you’ve been there — when you let go of the “right” way to do something and just enjoy the process. That’s what these cozy graveyard dirt pudding cups are all about.
This recipe has become a fall tradition for us. It’s not just about the chocolate and the crunch. It’s about sitting on the couch, wrapped in a blanket, with a silly dessert that makes everyone smile. It’s the kind of treat that makes a cold, rainy day feel special. I mean, what’s not to love about a dessert that looks like a tiny graveyard but tastes like pure comfort? Let me tell you, when you dig into that creamy, crunchy, chocolatey goodness, you won’t be thinking about Halloween. You’ll just be thinking about how good it feels to be cozy.
Why You’ll Love This Recipe
These cozy graveyard dirt pudding cups are more than just a Halloween dessert. They are a complete experience. I have made these for spooky movie nights, fall potlucks, and even just a random Tuesday when we needed a pick-me-up. They never fail to bring a smile to everyone’s face. The best part? They are incredibly simple to make, so you can spend less time in the kitchen and more time enjoying the fun.
- Quick & Easy: This recipe comes together in under 20 minutes. It is perfect for busy weeknights or last-minute Halloween parties. You don’t need any fancy equipment or baking skills.
- Simple Ingredients: You probably already have most of the ingredients in your pantry. No need for a special trip to the grocery store. It’s all about using basic items to create something magical.
- Perfect for a Cozy Night In: These are great for a Halloween movie marathon, a cozy fall evening, or a fun family activity. They are the ultimate comfort food for the spooky season.
- Crowd-Pleaser: Both kids and adults go crazy for these. The combination of creamy pudding and crunchy cookie “dirt” is absolutely irresistible. I have never had a single leftover.
- Unbelievably Delicious: The texture and flavor combo is next-level comfort food. The rich, creamy pudding paired with the sweet, crunchy Oreos is a classic for a reason. It is pure, simple, soul-soothing satisfaction.
What makes this version different from the rest? It is the attention to the cozy factor. We are not just throwing pudding in a cup. We are building a tiny, comforting world. The “dirt” is perfectly textured, the pudding is extra creamy, and the little decorations make it feel special. It is comfort food reimagined for a spooky night. It is the kind of dessert that makes you close your eyes after the first bite. It is perfect for impressing guests without stress, or turning a simple evening into something memorable.
What Ingredients You Will Need
This recipe uses simple, wholesome ingredients to deliver a rich, creamy, and satisfying treat. You will be surprised how such basic items can create something so fun and delicious. Here is everything you need to make your own cozy graveyard dirt pudding cups.
- Chocolate Pudding Mix: (Two 3.9-ounce boxes) I prefer the cook-and-serve style for a richer, more authentic flavor, but instant pudding works great for a faster option. Jell-O brand is a reliable choice for consistent texture.
- Whole Milk: (4 cups) Whole milk gives the pudding a wonderfully creamy and decadent texture. You can use 2% or even oat milk in a pinch, but the pudding will be slightly less rich.
- Oreo Cookies: (One 14.3-ounce package) These are the star of the show for the “dirt.” Regular Oreos are perfect. Do not use double-stuff, as the filling makes the “dirt” clumpy and less like soil.
- Butter: (2 tablespoons, unsalted) This is an optional but highly recommended addition to the pudding. It adds a beautiful shine and a velvety richness that takes the pudding to the next level.
- Vanilla Extract: (1 teaspoon) A splash of good vanilla extract enhances the chocolate flavor and adds a warm, aromatic depth to the pudding.
- Gummy Worms: (1 cup) These are for the “graveyard” effect. They add a fun, chewy texture and a pop of color. You can also use gummy spiders or other creepy-crawly candies.
- Chocolate Sandwich Cookies: (For tombstones) You will need a few extra whole cookies to decorate the tops. You can also use Milano cookies or even small graham crackers.
- Optional Toppings: Whipped cream, chocolate shavings, or a sprinkle of cinnamon for an extra cozy touch.
Equipment Needed
You don’t need a lot of fancy equipment for this recipe. It is all about simplicity and fun. Here is what you will need to get started.
- Medium Saucepan: For cooking the pudding on the stovetop. A heavy-bottomed saucepan is best for even heating and to prevent scorching.
- Whisk: A good whisk is essential for a smooth, lump-free pudding. A silicone whisk is gentle on your pans.
- Mixing Bowls: You will need one for the pudding and another for crushing the cookies. I like using glass bowls for easy cleanup.
- Ziploc Bag or Rolling Pin: For crushing the Oreos. My niece’s method of crushing them in the bag is my new favorite. It is less messy and way more fun. You can also use a rolling pin if you prefer a more traditional approach.
- Six Small Cups or Glasses: Clear cups are best so you can see the beautiful layers. Small mason jars, tumblers, or even disposable plastic cups work perfectly.
- Measuring Cups and Spoons: For accurate measurements of the milk, butter, and vanilla.
Preparation Method
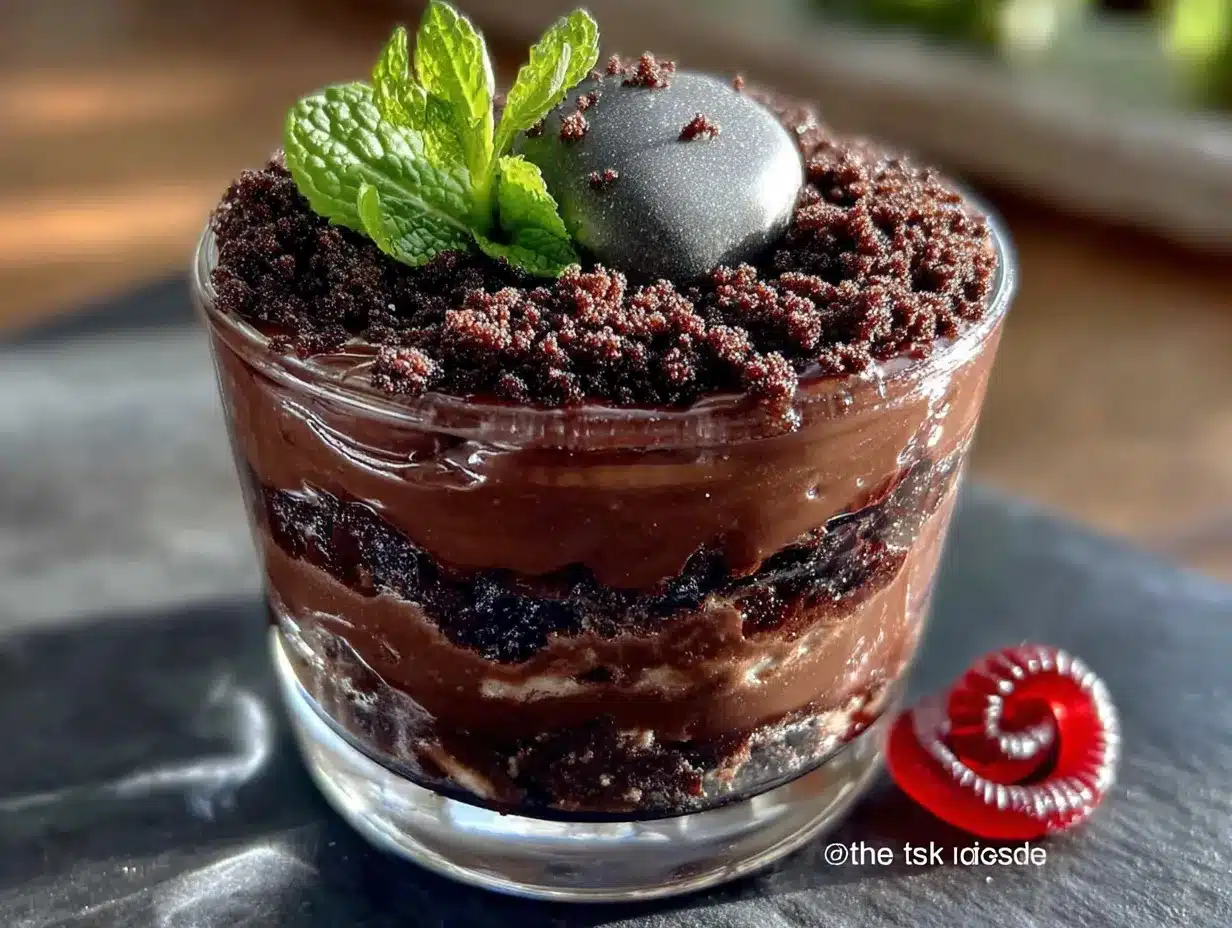
Making these cozy graveyard dirt pudding cups is a breeze. Follow these simple steps, and you will have a spooky, delicious treat in no time. The key is to be patient with the pudding and have fun with the decorating.
- Make the Pudding: In your medium saucepan, whisk together the two boxes of chocolate pudding mix and the 4 cups of whole milk. Make sure there are no dry lumps of powder. Place the saucepan over medium heat and cook, stirring constantly with your whisk. This is important to prevent the bottom from burning. The mixture will start to thicken after about 5-7 minutes. You will know it is ready when it comes to a gentle boil and is thick enough to coat the back of a spoon.
- Finish the Pudding: Once the pudding has thickened, remove it from the heat immediately. Stir in the 2 tablespoons of butter and the 1 teaspoon of vanilla extract. Keep stirring until the butter is completely melted and the pudding is smooth and shiny. This step adds a beautiful richness and a professional touch.
- Cool the Pudding: Pour the hot pudding into a large mixing bowl. Let it cool at room temperature for about 15 minutes, stirring occasionally to prevent a skin from forming. This helps it cool down faster. If you are in a hurry, you can place the bowl in an ice bath, but be careful not to splash water into the pudding.
- Crush the Oreos: While the pudding is cooling, it is time to make the “dirt.” Place all the Oreos (cream filling and all) into a large Ziploc bag. Seal the bag, removing as much air as possible. Now, the fun part! Use your hands, a rolling pin, or a small pan to crush the cookies into fine crumbs. You want a mix of fine “soil” and a few slightly larger pieces for texture. My niece’s method of just squeezing the bag works great!
- Layer the Cups: Get your six clear cups ready. Start by spooning a generous layer of the crushed Oreos into the bottom of each cup. This is your “dirt” base. Next, spoon or pour the cooled chocolate pudding over the cookie layer, filling the cup about halfway. Tap the cup gently on the counter to settle the pudding and remove any air bubbles.
- Add the “Worms”: Now for the spooky part! Press a couple of gummy worms into the pudding layer. You can have them crawling out of the “dirt” or just peeking out from the side. This is where you can get creative. Add a few more worms to the next layer of cookie crumbs for a real “infestation” effect.
- Finish the Layers: Add another layer of the crushed Oreos on top of the pudding and worms. This should cover the pudding completely. You want a nice, thick layer of “dirt” on top.
- Decorate the Graveyard: This is the best part. To make your tombstones, take a few whole Oreos and use a small knife to scrape off some of the cream to look like a carved stone. You can also write “RIP” on them with a toothpick dipped in a little bit of melted chocolate. Gently press the “tombstone” cookie into the top layer of “dirt.” Add a few more gummy worms crawling out of the top for the full graveyard effect.
- Chill and Serve: Place the finished cups in the refrigerator for at least 30 minutes to allow the pudding to set completely. This also helps the flavors meld together. Serve them cold for the best texture and taste. They are perfect for a cozy movie night!
Cooking Tips & Techniques
Over the years, I have learned a few tricks to make these cozy graveyard dirt pudding cups absolutely perfect. I have also made plenty of mistakes, so you don’t have to. Here are my best tips for success.
- The Pudding Consistency: The biggest mistake people make is not cooking the pudding long enough. It should be thick enough to coat the back of a spoon. If it is too thin, your cups will be soupy. Be patient and keep stirring. If you accidentally make it too thick, you can whisk in a splash of milk to thin it out.
- No Lumpy Pudding: The secret to smooth pudding is to whisk the powder and milk together before you turn on the heat. Get all the lumps out first. Then, stir constantly as it heats. If you do get a few lumps, don’t panic. You can use an immersion blender to smooth it out after it has cooked.
- Perfect Oreo “Dirt”: For the best texture, do not crush the Oreos into a fine powder. You want a mix of textures. Some fine crumbs, some small chunks. This mimics real dirt and gives a wonderful crunch. Crushing them in a bag gives you the most control over the texture.
- Preventing a Skin: Nobody likes a skin on their pudding. To prevent it, press a piece of plastic wrap directly onto the surface of the hot pudding as it cools. This creates a seal and stops a skin from forming. I learned this the hard way after ruining a batch of pudding for a party.
- Make-Ahead Magic: These cups are perfect for making a day ahead. In fact, they taste even better the next day as the flavors meld together. Just wait to add the tombstones and any delicate decorations until right before serving to keep them looking fresh.
Variations & Adaptations
One of the best things about this recipe is how easy it is to change up. You can make it your own based on what you have in your pantry or what your family loves. Here are a few of my favorite variations.
- Peanut Butter Dirt: For a richer, more decadent version, add a layer of peanut butter between the pudding and the cookie crumbs. You can also use peanut butter cookies instead of Oreos for the “dirt.” This is a huge hit with peanut butter lovers. I tried this once on a whim, and it was gone in minutes.
- Spooky Spider Cups: Instead of a graveyard theme, make it a spider theme. Use chocolate pudding and top with crushed Oreos. Place a large chocolate spider ring on top, or make your own spiders using a large marshmallow and pretzel sticks for legs. It is a fun and creepy alternative.
- Pumpkin Spice Pudding: For a fall twist, swap out one box of chocolate pudding for a box of pumpkin spice pudding. The combination of chocolate and pumpkin is surprisingly delicious. Top with a sprinkle of cinnamon and a few candy pumpkins. This is perfect for a cozy autumn evening.
- Gluten-Free Option: This recipe is naturally gluten-free if you use gluten-free chocolate sandwich cookies. There are many great gluten-free Oreo alternatives on the market now. Everything else in the recipe is naturally gluten-free. Just double-check your pudding mix to be sure.
- Vegan Adaptation: To make this vegan, use a high-quality vegan chocolate pudding mix or make your own from scratch with coconut milk. Use a vegan butter substitute and ensure your cookies are vegan. There are many delicious vegan Oreo options available. The result is just as creamy and delicious.
Serving & Storage Suggestions
These cozy graveyard dirt pudding cups are best served cold, straight from the refrigerator. The contrast between the cold, creamy pudding and the crunchy “dirt” is what makes them so satisfying. Here is how to serve and store them for the best experience.
For serving, I love to bring them out on a tray, still chilled. The clear cups show off the beautiful layers of chocolate and cookie crumbs. You can serve them as is, or add a dollop of whipped cream on top for an extra indulgent touch. They pair perfectly with a warm cup of apple cider or a hot chocolate. The combination of cold and warm is just heavenly. These are also fantastic for a Halloween party. They are easy to grab and eat, and they look incredibly impressive on a dessert table.
For storage, these cups are very forgiving. Keep them covered in the refrigerator for up to 3 days. The pudding will stay creamy, and the cookie “dirt” will stay crunchy for the first day or two. After that, the crumbs might start to soften a bit, but they will still be delicious. I do not recommend freezing these cups. The texture of the pudding will become grainy and watery when thawed. If you are making them ahead, you can prepare the pudding and crush the cookies separately. Store them in the fridge and pantry, then assemble the cups a few hours before serving. This ensures the “dirt” stays perfectly crunchy.
Nutritional Information & Benefits
While these cozy graveyard dirt pudding cups are a treat, they do offer a few surprising benefits. It is all about balance, and this dessert is perfect for a special occasion. Here is a general overview of what you can expect per serving (one cup).
Estimated Nutritional Values (per serving):
- Calories: 380-450
- Fat: 18-22g
- Carbohydrates: 50-60g
- Protein: 6-8g
- Sugar: 35-45g
The milk in the pudding provides a good source of calcium and vitamin D, which are essential for bone health. The cocoa in the chocolate pudding is rich in antioxidants, which can help fight inflammation. The Oreos, while a treat, do provide a quick source of energy. From a wellness perspective, this is a dessert that brings people together. The joy of making and sharing it is good for the soul. It is a reminder that it is okay to have fun with your food and enjoy a little bit of sweetness. Just be mindful of portion sizes, and you can enjoy this treat without any guilt.
Conclusion
So, there you have it. A simple, fun, and incredibly delicious way to make a cozy, spooky treat. These cozy graveyard dirt pudding cups are more than just a Halloween dessert. They are a little moment of joy. They are a way to slow down, get a little messy, and share a laugh with the people you love. I hope you give my niece’s method a try and crush those cookies right in the bag. It makes the whole process so much more fun.
I love this recipe because it reminds me that the best things in life don’t have to be perfect. They just have to be made with a little bit of love and a whole lot of fun. So, go ahead and customize it! Add more worms, make bigger tombstones, or even use a different flavor of pudding. Make it your own. I would love to hear how your graveyard turns out. Please leave a comment below and share your spooky creations with me. Until next time, stay cozy and keep making delicious memories!
Frequently Asked Questions
Can I use instant pudding instead of cook-and-serve?
Absolutely! Instant pudding is a great time-saver. Just follow the instructions on the box for a quick-set pudding. The texture will be slightly different, but it will still be delicious and creamy. I have used both, and they both work perfectly for this recipe.
How far in advance can I make these cups?
You can make these cups up to 2 days in advance. The flavors will actually meld together and become even better. Just wait to add the tombstones and any delicate decorations until right before serving. This keeps them looking fresh and the “dirt” crunchy.
Can I use a different type of cookie for the “dirt”?
Yes, you can get very creative with the “dirt.” Chocolate wafer cookies, gluten-free chocolate cookies, or even crushed graham crackers work wonderfully. Each type of cookie will give the “dirt” a slightly different flavor and texture. I have used chocolate wafers before, and they make a very fine, rich “soil.”
My pudding turned out lumpy. What did I do wrong?
Lumpy pudding usually happens when you don’t whisk the powder and milk together thoroughly before heating. Make sure there are no dry lumps of powder at the start. If you still get lumps, don’t worry. You can use an immersion blender or a fine-mesh strainer to smooth it out after it has cooked.
Can I make this recipe dairy-free?
Yes, this recipe is very easy to make dairy-free. Use a dairy-free milk alternative like oat milk, almond milk, or coconut milk. You will also need a dairy-free butter substitute. Most pudding mixes are naturally dairy-free, but always check the label to be sure. The result will be just as creamy and delicious.
Pin This Recipe!
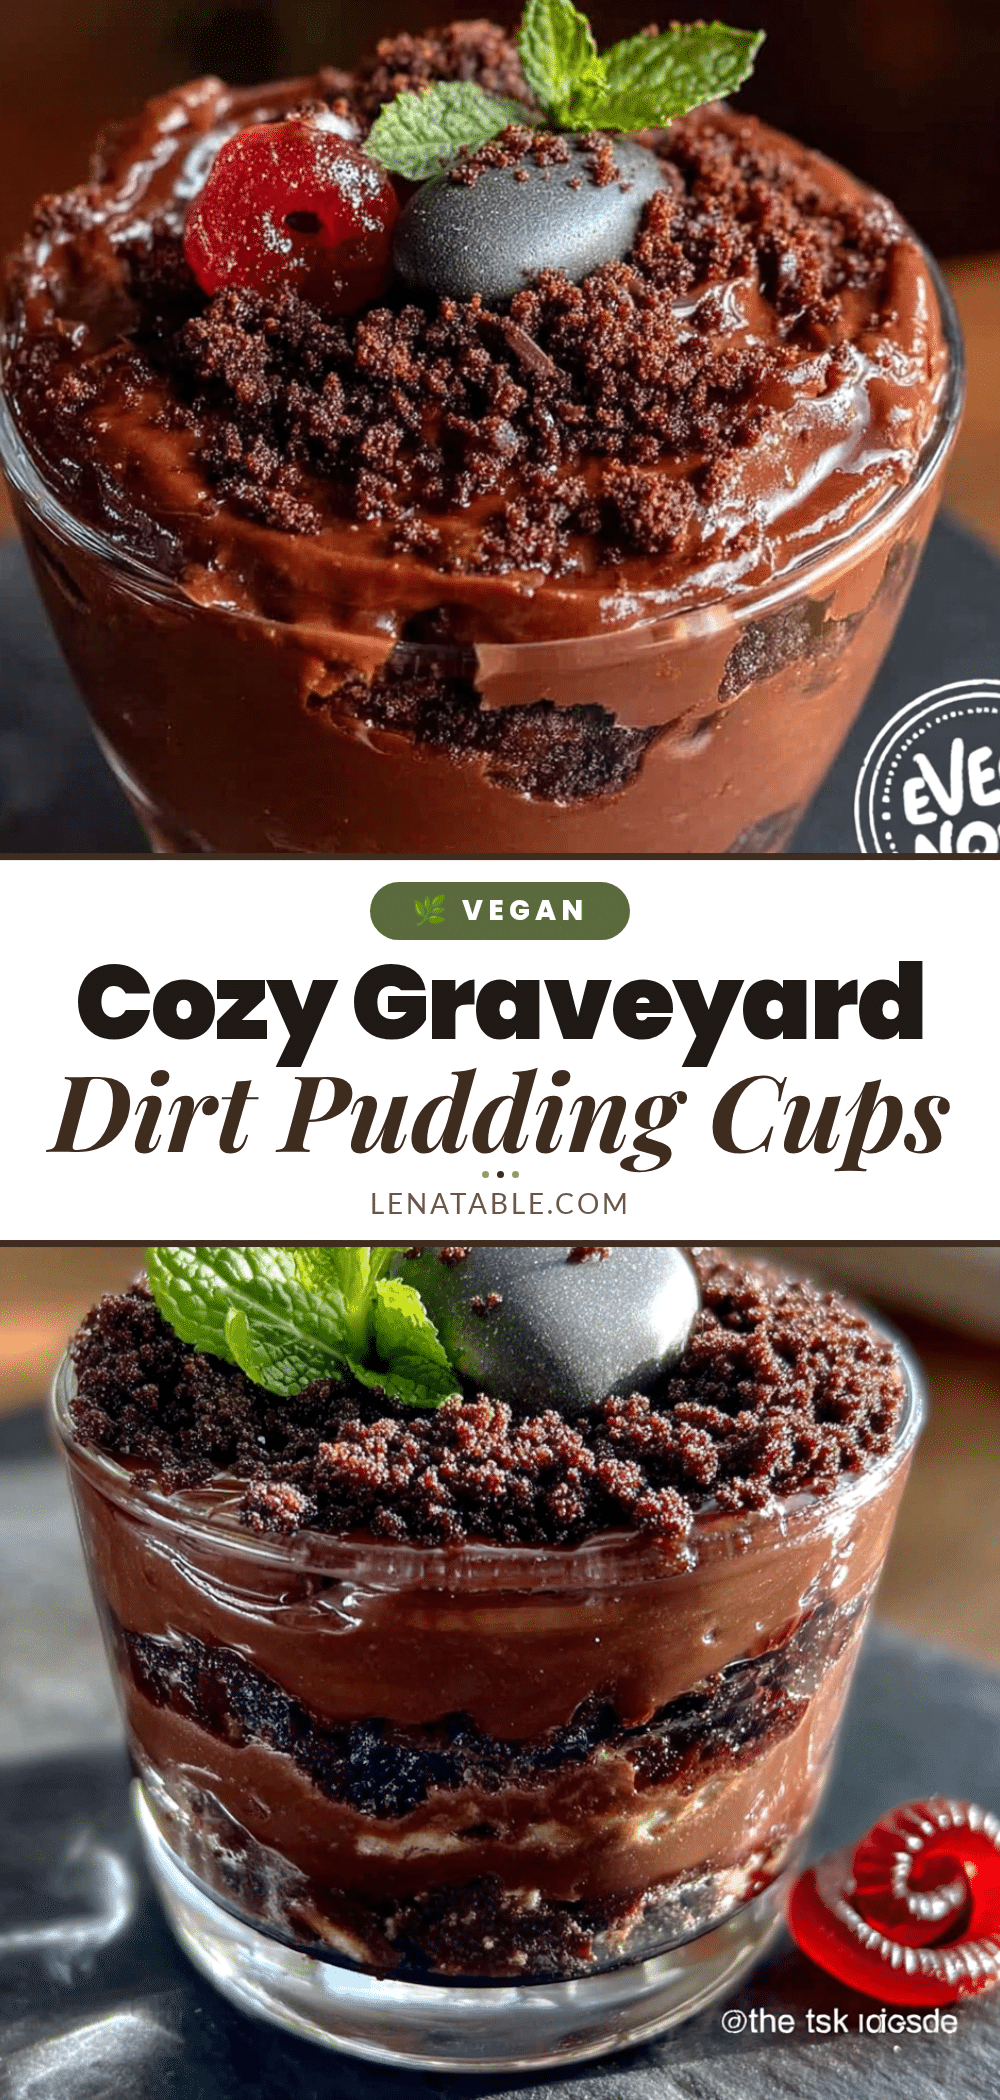
Cozy Graveyard Dirt Pudding Cups: Easy Halloween Dessert

These cozy graveyard dirt pudding cups are a fun and easy Halloween dessert. Layers of creamy chocolate pudding and crunchy Oreo ‘dirt’ are topped with gummy worms and cookie tombstones for a spooky yet comforting treat.
- Prep Time: 15 minutes
- Cook Time: 10 minutes
- Total Time: 25 minutes
- Yield: 6 servings 1x
- Category: Dessert
- Cuisine: American
Ingredients
- 2 (3.9-ounce) boxes chocolate pudding mix (cook-and-serve or instant)
- 4 cups whole milk
- 1 (14.3-ounce) package Oreo cookies (regular, not double-stuff)
- 2 tablespoons unsalted butter (optional)
- 1 teaspoon vanilla extract
- 1 cup gummy worms
- Extra whole chocolate sandwich cookies for tombstones
- Optional: whipped cream, chocolate shavings, cinnamon
Instructions
- In a medium saucepan, whisk together the pudding mix and milk until no dry lumps remain. Place over medium heat and cook, stirring constantly, until the mixture thickens and comes to a gentle boil (about 5-7 minutes).
- Remove from heat and stir in the butter and vanilla extract until smooth and shiny.
- Pour the pudding into a large bowl and let cool at room temperature for about 15 minutes, stirring occasionally to prevent a skin from forming.
- While the pudding cools, place all Oreos in a large Ziploc bag, seal, and crush into fine crumbs with a rolling pin or your hands.
- Layer the bottom of six clear cups with crushed Oreos. Spoon or pour the cooled pudding over the cookie layer, filling each cup about halfway. Tap gently to settle.
- Press a few gummy worms into the pudding layer. Add another layer of crushed Oreos on top.
- For tombstones, scrape some cream off a few whole Oreos to look like carved stone. Optionally write ‘RIP’ with melted chocolate. Press the tombstones into the top ‘dirt’ layer and add more gummy worms.
- Refrigerate for at least 30 minutes before serving. Serve cold.
Notes
For best texture, do not crush Oreos into a fine powder; leave some small chunks. To prevent a skin on the pudding, press plastic wrap directly onto the surface while cooling. These cups can be made up to 2 days in advance; add tombstones just before serving.
Nutrition
- Serving Size: 1 cup
- Calories: 415
- Sugar: 40
- Sodium: 480
- Fat: 20
- Saturated Fat: 8
- Carbohydrates: 55
- Fiber: 2
- Protein: 7
Keywords: Halloween dessert, dirt pudding, graveyard cups, chocolate pudding, Oreo dirt, easy dessert, spooky treat, cozy dessert


