Love this? Save it for later!
Share the inspiration with your friends
It was 10:47 PM on a rain-soaked Tuesday in October, and I had a fierce, almost irrational craving for something warm, spiced, and utterly autumnal. I wanted a bakery-style scone — that perfect crumbly-crust-meets-tender-inside situation — but I didn’t have a crowd to feed, and honestly, I didn’t have the energy for a full batch. I had half a can of pumpkin puree left over from a dinner I’d made three days prior, a stick of butter that was soft enough to be dangerous, and a stubborn idea: what if I could make just four perfect scones? Not a dozen, not eight, but exactly four. Enough for me, maybe my husband if he wandered downstairs, and a little leftover for breakfast. I grabbed my mixing bowl, and let me tell you, the late-night kitchen experiment that followed was one of those rare, glorious moments where impulsiveness pays off in spades.
These cozy small-batch pumpkin scones with maple glaze aren’t just a scaled-down recipe — they’re a deliberate act of self-care. There’s something almost sacred about making a tiny batch of something beautiful, just for the sake of it. Maybe you’ve been there, standing in your kitchen at an unreasonable hour, wanting the ritual of baking without the pressure of having to share it all. This recipe is for those quiet moments. It’s for the Tuesday nights when you need a little warmth, the Sunday mornings when you want a treat without a mountain of leftovers, or the afternoon when you just want to smell cinnamon and nutmeg filling your house without committing to a full baking marathon.
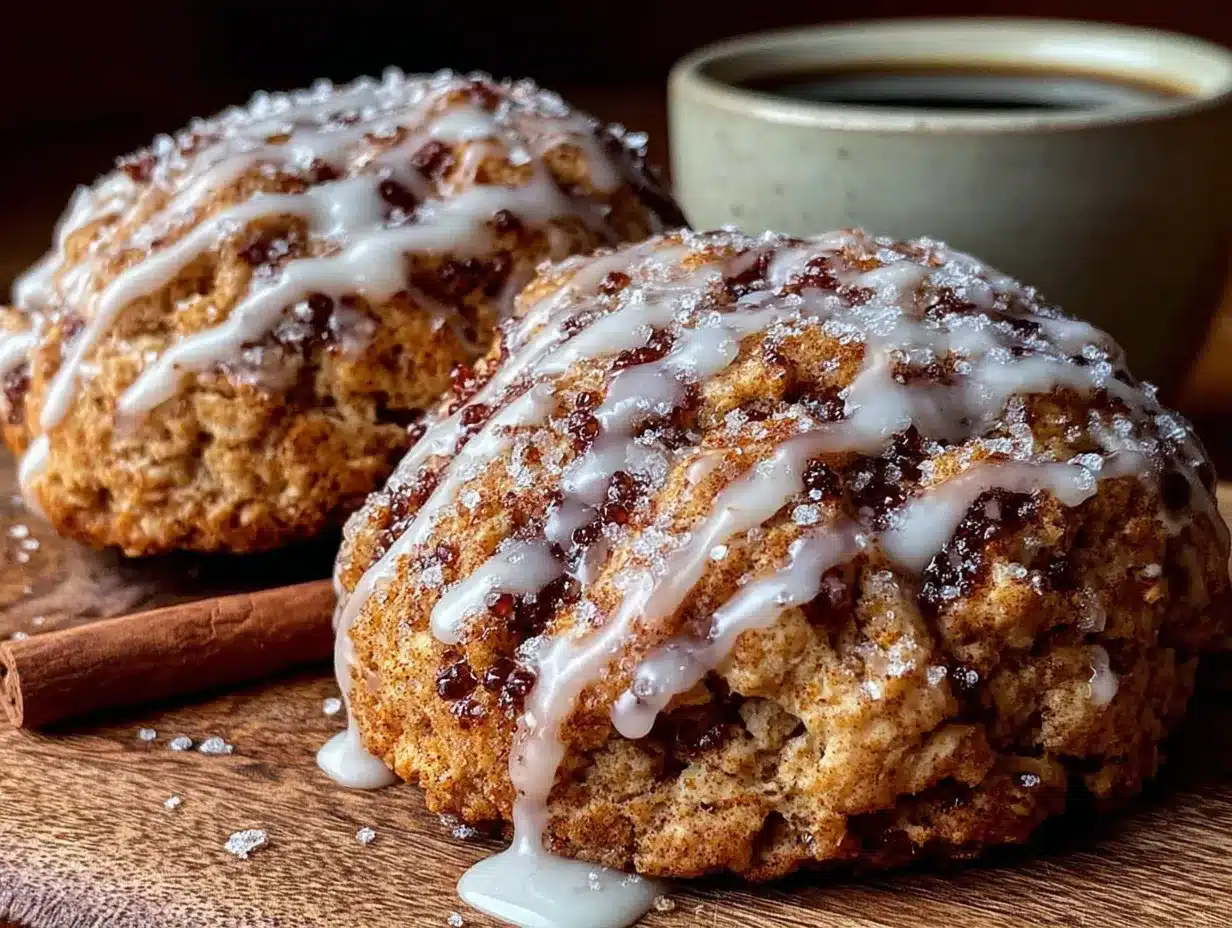
The scones themselves are everything you want from a fall pastry — golden-brown on the outside, impossibly tender on the inside, with that signature craggy top that catches every bit of the maple glaze. I almost gave up when I cracked my favorite ceramic bowl pulling it out of the cabinet (it was a gift from my sister, and I still haven’t forgiven myself). But the scones? They turned out so good that I forgot about the bowl entirely. The maple glaze is the real star here — it soaks into the warm scones just enough to make each bite a little sticky, a little sweet, and completely unforgettable. This is the recipe that made me realize that small-batch baking isn’t just practical — it’s a whole mood.
Why You’ll Love This Recipe
Let’s be real — most scone recipes assume you’re feeding a small army or prepping for a bake sale. This one understands that sometimes you just want enough for yourself and maybe one other person. These cozy small-batch pumpkin scones with maple glaze are designed for real life, not fantasy-land hosting scenarios. Here’s why they’ll become your go-to fall recipe:
- Quick & Easy: From start to finish, you’re looking at about 35 minutes. That’s faster than deciding what to order for delivery and way more satisfying.
- Simple Ingredients: No hunting down obscure baking supplies. You probably have most of these in your pantry right now — flour, sugar, butter, pumpkin puree, and basic spices.
- Perfect for Cozy Evenings: This is the recipe you make when you want to curl up with a book and a hot drink. It’s small enough to feel intimate but special enough to feel like a treat.
- Crowd-Pleaser (Even in Small Batches): I’ve made these for my neighbor Carol and her husband, and they texted me the next day asking for the recipe. Four scones disappear fast when they’re this good.
- Unbelievably Delicious: The texture is next-level — flaky edges, soft centers, and that maple glaze that seeps into every nook and cranny. Honestly, it’s comfort food in pastry form.
What makes these scones different from the rest? It’s the technique. I use a method where you freeze the butter and grate it into the flour, which creates those perfect flaky layers without overworking the dough. And the glaze? It’s not just maple extract — it’s real maple syrup mixed with a touch of heavy cream for richness. This isn’t another generic pumpkin scone recipe; it’s the version I developed after eight failed attempts (yes, eight) to get the texture just right. I tested it with different fat ratios, various chilling times, and multiple glaze consistencies until I landed on this perfect formula.
These scones are the kind that make you close your eyes after the first bite. They’re cozy mornings reimagined — faster, easier, but with the same soul-soothing satisfaction of a bakery treat. Perfect for impressing a guest without breaking a sweat, or turning a quiet afternoon into something memorable.
What Ingredients You Will Need
This recipe uses simple, wholesome ingredients to deliver bold fall flavor and that perfect scone texture without any fuss. Most of these are pantry staples, but I’ve included notes on what to look for and how to swap things if needed.
For the Scones:
- All-purpose flour, 1 cup (120g) — I prefer King Arthur Flour for consistent results, but any brand works. Spoon and level it into your measuring cup for accuracy.
- Granulated sugar, 2 tablespoons (25g) — Just enough for sweetness without overpowering the pumpkin.
- Baking powder, 1 teaspoon — Make sure it’s fresh! Old baking powder is the #1 reason scones don’t rise properly.
- Pumpkin pie spice, 1 teaspoon — You can use store-bought or make your own with ½ tsp cinnamon, ¼ tsp nutmeg, ⅛ tsp ginger, and a pinch of cloves.
- Salt, ¼ teaspoon — Balances the sweetness and enhances the spices.
- Unsalted butter, 3 tablespoons (42g), frozen — This is the secret to flaky scones. Freeze it for at least 30 minutes before grating.
- Pumpkin puree, ¼ cup (60g) — Not pumpkin pie filling! Make sure you grab 100% pure pumpkin. Libby’s is my go-to brand.
- Heavy cream, 2 tablespoons (30ml) — Adds richness and tenderness. You can substitute whole milk in a pinch, but the scones won’t be as flaky.
- Vanilla extract, ½ teaspoon — Pure vanilla, not imitation, for the best flavor.
- Egg yolk, 1 large — The yolk adds richness without making the dough too wet. Save the white for an egg wash if you want extra-golden tops.
For the Maple Glaze:
- Powdered sugar, ½ cup (60g) — Sift it first to avoid lumps in your glaze.
- Pure maple syrup, 1 tablespoon (15ml) — Please use the real stuff, not pancake syrup. It makes a huge difference in flavor.
- Heavy cream, 1 tablespoon (15ml) — For a creamy, pourable consistency. You can adjust with more cream or sugar to get the right thickness.
- Maple extract, ¼ teaspoon (optional) — If you want an extra punch of maple flavor, this is your secret weapon. I add it when I’m feeling extra indulgent.
One quick note on the pumpkin puree — I’ve tested this with both canned and homemade, and canned actually works better here because it has a consistent moisture content. Homemade pumpkin puree can be more watery, which throws off the dough texture. If you’re using homemade, strain it through a cheesecloth or paper towel for about 15 minutes to remove excess liquid.
For the butter, don’t skip the freezing step. I know it sounds fussy, but grating frozen butter into the flour is what gives these scones their tender, flaky layers. I learned this trick from a pastry chef friend, and it’s been a game-changer for my scone game.
Equipment Needed
You don’t need a fancy bakery setup for these cozy small-batch pumpkin scones with maple glaze. Here’s what you’ll actually use:
- Mixing bowls: One medium bowl for dry ingredients, one small bowl for wet ingredients. I use glass bowls because they don’t retain odors.
- Box grater: For grating the frozen butter. A microplane works too, but a standard box grater is faster.
- Pastry cutter or fork: To cut the butter into the flour. I’ve used both, and honestly, a fork works fine if you don’t have a pastry cutter.
- Baking sheet: A small half-sheet pan works perfectly. Line it with parchment paper for easy cleanup.
- Bench scraper or sharp knife: For cutting the scone dough into wedges. A bench scraper gives cleaner edges.
- Whisk: For mixing the glaze until smooth. A fork works in a pinch, but a whisk is easier.
- Cooling rack: Essential for letting the glaze set properly. If you don’t have one, you can use the parchment paper on your counter.
- Measuring spoons and cups: Accurate measurements matter in baking. I use stainless steel ones that don’t warp.
If you don’t have a box grater, you can cube the frozen butter with a sharp knife and then use your fingertips to rub it into the flour. It takes a little longer, but it works. I’ve done it that way when my grater was in the dishwasher, and the scones still turned out great.
One tip: keep your baking sheet in the fridge while you prepare the dough. A cold pan helps the scones hold their shape and rise evenly. I learned this after a batch spread out like pancakes on a warm sheet.
Preparation Method
Let’s make these cozy small-batch pumpkin scones with maple glaze. I’ve broken everything down step by step, with all the little details that make a difference.
- Preheat and prep: Preheat your oven to 400°F (200°C). Line a small baking sheet with parchment paper and pop it in the fridge to chill while you work. This step keeps the butter cold, which is crucial for flaky scones.
- Grate the frozen butter: Take your 3 tablespoons of frozen butter and grate it on the large holes of a box grater. Work quickly — you don’t want the butter to soften. Place the grated butter back in the freezer while you measure the dry ingredients.
- Mix dry ingredients: In a medium bowl, whisk together 1 cup (120g) all-purpose flour, 2 tablespoons (25g) sugar, 1 teaspoon baking powder, 1 teaspoon pumpkin pie spice, and ¼ teaspoon salt. Make sure the baking powder is evenly distributed — I whisk for a good 15 seconds to be thorough.
- Cut in the butter: Add the grated frozen butter to the flour mixture. Use a pastry cutter or fork to toss the butter pieces with the flour until they’re coated. You want the mixture to look like coarse meal with some pea-sized butter pieces remaining. Don’t overwork it — those butter bits are what create flaky layers.
- Combine wet ingredients: In a small bowl, whisk together ¼ cup (60g) pumpkin puree, 2 tablespoons (30ml) heavy cream, ½ teaspoon vanilla extract, and 1 large egg yolk. Mix until smooth and well combined.
- Bring it together: Make a well in the center of the dry ingredients. Pour the wet mixture into the well. Use a fork to stir gently, just until the dough starts coming together. It will look shaggy and a little dry — that’s exactly what you want. If it seems too dry to hold together, add ½ teaspoon more cream at a time until it just barely comes together.
- Shape the dough: Turn the dough out onto a lightly floured surface. Gently bring it together with your hands, being careful not to overwork it. Pat it into a circle about ¾ inch thick and 5 inches across. Don’t use a rolling pin — your hands give you better control and prevent overworking.
- Cut the scones: Using a sharp knife or bench scraper, cut the circle into 4 equal wedges, like you’re cutting a pizza. Transfer the wedges to your chilled baking sheet, spacing them about 2 inches apart. They won’t spread much, so don’t worry about crowding.
- Chill again: Pop the baking sheet into the freezer for 10 minutes. This is non-negotiable — it firms up the butter and ensures the scones rise tall instead of spreading flat. Use this time to clean up your workspace.
- Bake: Bake the chilled scones for 14-16 minutes, until the edges are golden brown and the tops are set. The centers should feel firm to the touch but not hard. Your kitchen will smell like a fall candle factory — in the best way.
- Cool slightly: Let the scones cool on the baking sheet for 5 minutes, then transfer them to a cooling rack. Don’t skip this — the residual heat helps the glaze soak in perfectly.
- Make the maple glaze: While the scones cool, whisk together ½ cup (60g) powdered sugar, 1 tablespoon (15ml) pure maple syrup, 1 tablespoon (15ml) heavy cream, and ¼ teaspoon maple extract (if using). Whisk until smooth and pourable. If it’s too thick, add another teaspoon of cream. Too thin? Add a tablespoon more powdered sugar.
- Glaze the scones: Drizzle the glaze generously over the warm scones. I like to use a spoon and let it cascade naturally over the tops and down the sides. The warmth of the scones helps the glaze set into a beautiful, slightly crackly shell.
- Let the glaze set: Allow the glazed scones to rest for 5-10 minutes before serving. This gives the glaze time to set just enough so it doesn’t slide off, but it’s still soft and luscious.
A note on the dough: it will be stickier than a typical scone dough because of the pumpkin puree. Don’t be tempted to add more flour — that will make the scones tough. Instead, use a bench scraper to help shape it, and dust your hands lightly with flour if needed.
Cooking Tips & Techniques
After making these cozy small-batch pumpkin scones with maple glaze more times than I care to count, I’ve collected some hard-won wisdom. Here’s what I wish someone had told me when I started:
Keep everything cold. I cannot overstate this. Cold butter is the single most important factor in flaky scones. If your kitchen is warm, chill your bowl and flour for 10 minutes before starting. I once made these on a hot August day (yes, I make pumpkin scones year-round, judge me), and the butter melted before I got the dough in the oven. The scones were flat and greasy. Learn from my mistake.
Don’t overmix the dough. This is the most common mistake home bakers make. Mix just until the flour is incorporated — you should still see streaks of butter and flour. Overmixing develops gluten, which makes scones tough and rubbery. I’m talking from experience here; my first few batches were more like hockey pucks than pastries.
Use a light hand when shaping. Pat the dough gently into a circle. Don’t knead it, don’t press it firmly, and definitely don’t roll it with a rolling pin. Think of it like you’re handling a baby bird — gentle and quick.
Chill the shaped scones. That 10-minute freezer rest isn’t optional. It firms up the butter so the scones rise tall and develop those beautiful craggy tops. I’ve skipped this step when I was in a hurry, and the scones spread out into flat, sad triangles.
Watch the bake time carefully. Ovens vary wildly. Start checking at 14 minutes — the edges should be golden brown, and the bottoms should be lightly browned when you lift one with a spatula. If they’re pale on the bottom, give them another minute or two.
Glaze while warm. This is the key to that perfect glaze situation where it soaks slightly into the scone but still forms a glossy shell. If you wait until they’re completely cool, the glaze just sits on top. Too hot, and it slides right off. Aim for “pleasantly warm to the touch” — about 5 minutes out of the oven.
Double the recipe if you want more. These scones are designed for small batches, but they scale beautifully. Just double all ingredients and bake for the same amount of time. I’ve done this for brunch gatherings, and they disappear every time.
Variations & Adaptations
One of the best things about these cozy small-batch pumpkin scones with maple glaze is how adaptable they are. Here are some ways I’ve customized them over the years:
Dairy-Free Version: Substitute the butter with cold coconut oil or vegan butter (I like Miyoko’s for baking). Use full-fat coconut cream instead of heavy cream. The texture will be slightly different — a bit more tender and less flaky — but still delicious. My friend Sarah, who’s dairy-free, said these were “the best scones I’ve had in years.”
Gluten-Free Adaptation: Swap the all-purpose flour with a 1:1 gluten-free baking flour blend that contains xanthan gum. I’ve tested this with King Arthur’s Measure for Measure flour, and it worked beautifully. The dough will be a bit more fragile, so handle it gently and chill it for an extra 5 minutes before baking.
Spice Variations: Play with the spice blend. Sometimes I add ¼ teaspoon of cardamom for a floral note, or a pinch of black pepper for warmth. In December, I swap the pumpkin pie spice for chai spice blend — it’s amazing with the maple glaze.
Add-In Options: Fold in ¼ cup of toasted pecans, dried cranberries, or white chocolate chips after you’ve cut in the butter. I made a batch with crystallized ginger pieces once, and the spicy-sweet combo was incredible. Just don’t add more than ¼ cup, or the dough won’t hold together.
Savory-Sweet Twist: Reduce the sugar to 1 tablespoon and add ¼ teaspoon of flaky sea salt on top before baking. The salt balances the sweet maple glaze beautifully. I serve these alongside a cheese board, and they’re always the first thing to go.
Air Fryer Method: If you don’t want to heat up your oven, these work great in an air fryer. Cook at 325°F (165°C) for 10-12 minutes, checking at the 8-minute mark. The tops won’t get as golden, but the texture is still spot-on.
My personal favorite variation? I add 2 tablespoons of finely chopped candied pecans to the dough and top the glazed scones with a few more. It adds a lovely crunch that contrasts with the soft, tender interior. I discovered this by accident when I was trying to use up leftover pecans from holiday baking, and now I can’t go back.
Serving & Storage Suggestions
These cozy small-batch pumpkin scones with maple glaze are best enjoyed warm, when the glaze is still slightly soft and the interior is tender. Here’s how to serve and store them:
Serving Temperature: Serve them warm or at room temperature. If they’ve cooled completely, pop them in a 300°F (150°C) oven for 3-4 minutes to re-warm. The microwave works too, but it can make the glaze sticky — I’d only use it if you’re in a serious hurry.
Presentation Ideas: Arrange the scones on a small wooden board or a pretty plate. Dust with a little extra cinnamon or drizzle with additional maple syrup for a rustic look. I like to serve them with a small bowl of warm maple syrup on the side for dipping — it’s extra indulgent but so worth it.
Perfect Pairings: These scones are made for cozy drinks. A hot chai latte, a pumpkin spice latte (homemade, of course), or a simple cup of Earl Grey tea are all excellent choices. For a weekend brunch, serve them alongside scrambled eggs and fresh fruit for a balanced meal. They also pair beautifully with a glass of cold milk — the contrast of warm scone and cold milk is pure comfort.
Storage Instructions: Store leftover scones in an airtight container at room temperature for up to 2 days. If you live in a humid climate, add a paper towel to the container to absorb excess moisture — I learned this the hard way when my scones got soggy on a rainy day.
Freezing Instructions: These scones freeze beautifully. Freeze the unglazed, baked scones in a single layer on a baking sheet, then transfer them to a freezer bag. They’ll keep for up to 3 months. To serve, thaw at room temperature, then reheat in a 350°F (175°C) oven for 5 minutes and glaze while warm. You can also freeze the unbaked scones — just shape them, freeze on a sheet pan, then transfer to a freezer bag. Bake from frozen, adding 2-3 minutes to the bake time.
Flavor Development: Here’s a little secret — these scones actually taste better the next day. The flavors meld together overnight, and the texture becomes even more tender. I often make them in the evening for the next morning’s breakfast. Just wait to glaze them until right before serving.
Nutritional Information & Benefits
Let’s talk about what’s actually in these cozy small-batch pumpkin scones with maple glaze. While they’re definitely a treat, there are some surprising benefits to the ingredients:
| Nutritional Component | Per Scone (approx.) |
|---|---|
| Calories | 285 |
| Total Fat | 13g |
| Saturated Fat | 8g |
| Cholesterol | 65mg |
| Sodium | 220mg |
| Total Carbohydrates | 38g |
| Dietary Fiber | 1g |
| Sugars | 18g |
| Protein | 4g |
| Vitamin A | 45% DV |
| Iron | 6% DV |
Health Benefits: Pumpkin is packed with vitamin A (in the form of beta-carotene), which supports eye health and immune function. It’s also a good source of fiber, which helps with digestion and keeps you feeling full. The maple syrup contains antioxidants and minerals like zinc and manganese — though let’s be honest, we’re eating these for the taste, not the health benefits.
Dietary Considerations: This recipe is vegetarian and can be made dairy-free with the substitutions mentioned earlier. It’s not vegan due to the egg yolk and butter, but I’ve seen vegan versions that use flax eggs and coconut oil. The scones contain gluten, dairy, and eggs, so they’re not suitable for those with allergies to those ingredients.
My Perspective: I believe in balance. These scones are a treat, not an everyday breakfast. But they’re made with real ingredients — no preservatives, no artificial flavors, no weird additives. When I eat one, I savor it slowly, and that mindfulness makes it feel like an act of self-care rather than indulgence. Life’s too short to skip the maple glaze, you know?
Conclusion
These cozy small-batch pumpkin scones with maple glaze have become my signature fall recipe, and I think they’ll become yours too. They’re proof that you don’t need a crowd, a fancy kitchen, or hours of time to create something truly special. Just four perfect scones, a simple maple glaze, and the quiet satisfaction of making something beautiful for yourself.
I love that this recipe meets you where you are — whether you’re a seasoned baker or someone who’s never made a scone before. It’s forgiving, it’s adaptable, and it delivers every single time. The first time I made them, I was skeptical about the small batch concept. But now? I honestly prefer it. There’s no pressure, no waste, and the joy of finishing every last crumb.
I’d love to hear how these turn out for you. Did you try a variation? Add something unexpected? Make a mess of your kitchen at 11 PM like I did? Drop a comment below and let me know — I read every single one, and I genuinely love hearing about your baking adventures. And if you share a photo on Pinterest or Instagram, tag me so I can see your beautiful scones. Happy baking, friend — may your butter be cold and your glaze be generous.
Frequently Asked Questions
Can I use pumpkin pie filling instead of pumpkin puree?
No, please don’t. Pumpkin pie filling is pre-sweetened and spiced, which will throw off the sugar and spice balance in this recipe. Stick with 100% pure pumpkin puree for the best results.
Why did my scones turn out dry?
This usually happens from overmixing the dough or overbaking. Mix just until the ingredients come together, and start checking your scones at the 14-minute mark. Also, make sure you’re measuring your flour correctly — spoon it into the measuring cup and level it off, don’t scoop directly from the bag.
Can I make the dough ahead of time?
Absolutely. You can shape the scones, place them on a baking sheet, cover with plastic wrap, and refrigerate for up to 24 hours before baking. You can also freeze the unbaked scones for up to 3 months — just bake from frozen, adding 2-3 minutes to the bake time.
How do I get the glaze to set properly?
The key is the consistency of your glaze. It should be thick enough to coat the back of a spoon but still pourable. If it’s too thin, add more powdered sugar. If it’s too thick, add a tiny bit more cream. Also, make sure your scones are warm but not hot when you glaze them — too hot and the glaze will slide right off.
Can I double this recipe?
Yes! This recipe scales perfectly. Just double all the ingredients and bake for the same amount of time. You’ll get 8 scones instead of 4. I’ve done this for brunch parties and holiday mornings, and they always get devoured.
Pin This Recipe!

Cozy Small-Batch Pumpkin Scones with Maple Glaze: Easy Fall Recipe

These cozy small-batch pumpkin scones with maple glaze are a deliberate act of self-care, perfect for quiet moments when you want a warm, spiced treat without a crowd. With a golden-brown exterior and tender interior, they’re topped with a rich maple glaze that soaks in for a sticky, sweet finish.
- Prep Time: 15 minutes
- Cook Time: 16 minutes
- Total Time: 35 minutes
- Yield: 4 servings 1x
- Category: Dessert
- Cuisine: American
Ingredients
- 1 cup (120g) all-purpose flour
- 2 tablespoons (25g) granulated sugar
- 1 teaspoon baking powder
- 1 teaspoon pumpkin pie spice
- ¼ teaspoon salt
- 3 tablespoons (42g) unsalted butter, frozen
- ¼ cup (60g) pumpkin puree
- 2 tablespoons (30ml) heavy cream
- ½ teaspoon vanilla extract
- 1 large egg yolk
- ½ cup (60g) powdered sugar
- 1 tablespoon (15ml) pure maple syrup
- 1 tablespoon (15ml) heavy cream
- ¼ teaspoon maple extract (optional)
Instructions
- Preheat oven to 400°F (200°C). Line a small baking sheet with parchment paper and chill in the fridge.
- Grate frozen butter on the large holes of a box grater. Place grated butter back in the freezer.
- In a medium bowl, whisk together flour, sugar, baking powder, pumpkin pie spice, and salt.
- Add grated frozen butter to flour mixture. Use a pastry cutter or fork to toss until mixture resembles coarse meal with some pea-sized butter pieces.
- In a small bowl, whisk together pumpkin puree, heavy cream, vanilla extract, and egg yolk until smooth.
- Make a well in the dry ingredients. Pour wet mixture into the well and stir gently with a fork until dough just comes together (shaggy and slightly dry).
- Turn dough out onto a lightly floured surface. Gently bring together with hands and pat into a circle about ¾ inch thick and 5 inches across.
- Cut the circle into 4 equal wedges. Transfer wedges to chilled baking sheet, spacing 2 inches apart.
- Freeze the baking sheet for 10 minutes.
- Bake chilled scones for 14-16 minutes, until edges are golden brown and tops are set.
- Let scones cool on baking sheet for 5 minutes, then transfer to a cooling rack.
- While scones cool, whisk together powdered sugar, maple syrup, heavy cream, and maple extract (if using) until smooth and pourable.
- Drizzle glaze generously over warm scones.
- Let glazed scones rest for 5-10 minutes before serving.
Notes
Keep butter and dough cold for flaky scones. Do not overmix. Glaze while scones are warm for best absorption. Scones can be frozen unglazed for up to 3 months.
Nutrition
- Serving Size: 1 scone
- Calories: 285
- Sugar: 18
- Sodium: 220
- Fat: 13
- Saturated Fat: 8
- Carbohydrates: 38
- Fiber: 1
- Protein: 4
Keywords: pumpkin scones, small batch, maple glaze, fall recipe, easy scones, cozy baking


