Love this? Save it for later!
Share the inspiration with your friends
It was 10:47 PM on a random Wednesday in October, and I had a desperate need to make a pumpkin pie. Not the kind of need that comes from a holiday obligation or a dinner party request—the kind that creeps up on you when the house is finally quiet and the air has that specific autumn chill. I didn’t have a pre-made pie crust in the fridge, and honestly, I wasn’t about to wrestle with flour and butter at that hour. But I had a box of gingersnaps from a recent Target run and a can of pumpkin that had been staring at me from the pantry for weeks. So I grabbed my food processor, crossed my fingers, and hoped for the best.
I mean, let me tell you, I was skeptical. No-bake pumpkin pie always sounded like a compromise to me—like the sad cousin of the real thing. But that night, with my kitchen lit only by the stove light and a podcast playing softly in the background, I threw caution to the wind. I crushed those gingersnaps into crumbs, melted some butter, and pressed it all into a pie dish with my fingers. The filling came together in one bowl—cream cheese, pumpkin, spices, a little whipped cream—and I poured it in, hoping it would set.
I shoved it in the fridge and went to bed, not entirely convinced I hadn’t just made a glorified pudding. But the next morning? Oh, wow. The texture was silky and firm, the gingersnap crust was perfectly spiced and crunchy, and it tasted like all the best parts of fall without turning on the oven. Maybe you’ve been there—wanting something homemade but not wanting to deal with the fuss. This creamy no-bake pumpkin pie with gingersnap crust became my go-to that night, and honestly, I haven’t looked back since. It’s the kind of recipe that proves you don’t need a lot of time or a hot oven to make something truly special.
Why You’ll Love This Recipe
Let me be real with you—I’ve tested this creamy no-bake pumpkin pie with gingersnap crust at least six times to get it just right. I brought it to a Friendsgiving, served it at a casual dinner party, and even made it for my picky cousin who “doesn’t like pumpkin desserts.” She asked for seconds. That’s when I knew this one was special.
- No Oven Required: Perfect for when your oven is occupied with a turkey or you just don’t want to heat up the kitchen. This pie sets completely in the fridge.
- Simple Ingredients: You probably already have most of these in your pantry—canned pumpkin, cream cheese, spices, and store-bought gingersnaps. No fancy grocery store runs needed.
- Make-Ahead Friendly: This pie actually gets better after a day in the fridge. The flavors meld together beautifully, making it perfect for holiday prep.
- Crowd-Pleaser: It’s creamy but not heavy, spiced but not overwhelming, and that gingersnap crust adds a little crunch that everyone loves.
- Unbelievably Delicious: The texture is silky and mousse-like, not at all gloopy or dense. It’s the kind of dessert that makes you close your eyes after the first bite.
What makes this recipe different from the rest? It’s the combination of cream cheese and stabilized whipped cream that gives the filling structure without needing gelatin or eggs. Plus, the gingersnap crust isn’t just a vessel—it’s a flavor powerhouse that complements the pumpkin perfectly. This isn’t another version of no-bake pumpkin pie; it’s the best version. Trust me on this.
What Ingredients You Will Need
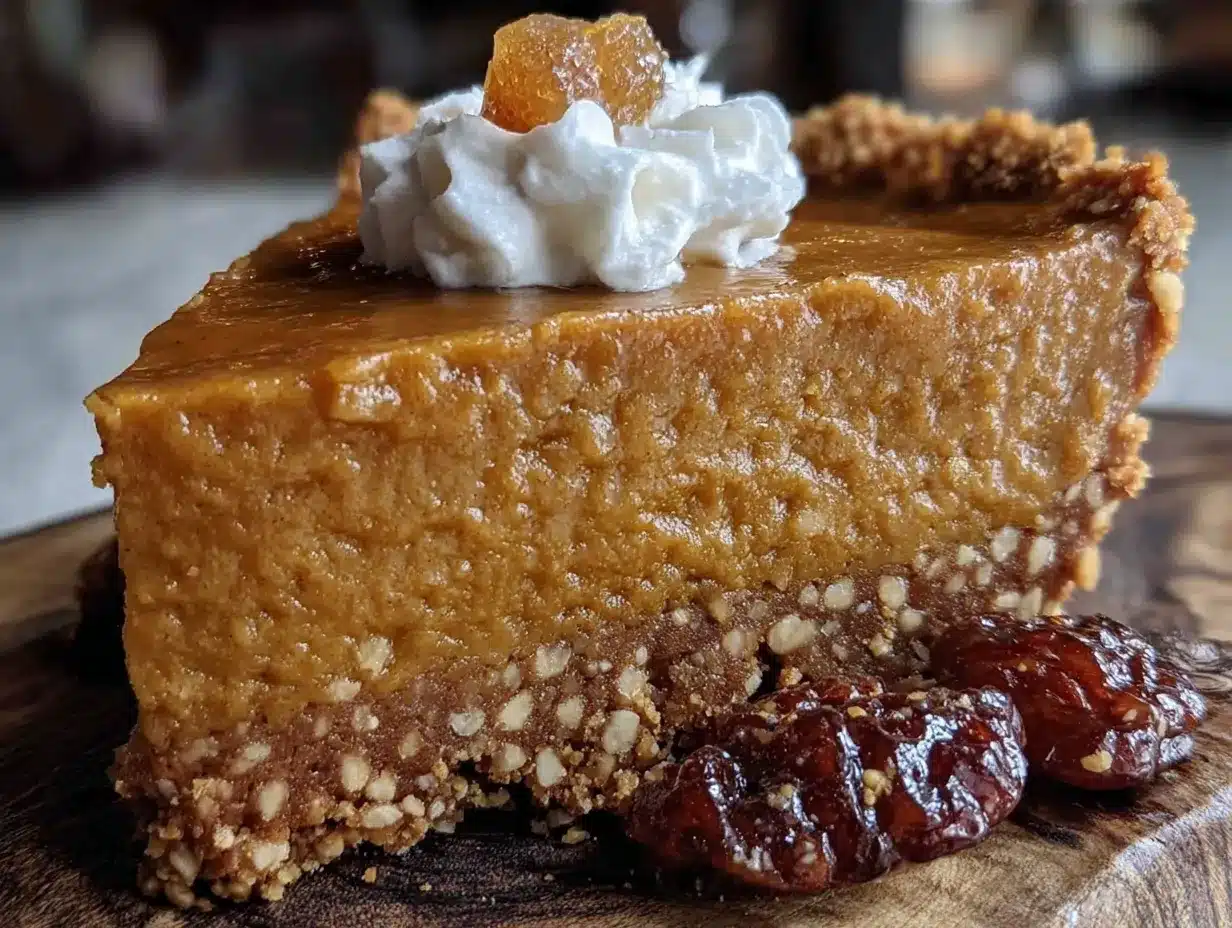
This creamy no-bake pumpkin pie with gingersnap crust uses simple, wholesome ingredients to deliver bold flavor and satisfying texture without the fuss. Most of these are pantry staples or easy to find at any grocery store.
For the Gingersnap Crust
- 2 cups (about 200g) gingersnap cookie crumbs – I prefer Anna’s Ginger Thins or Mi-Del for a gluten-free option. You can also use store-brand gingersnaps; just make sure they’re crunchy, not soft.
- 6 tablespoons (85g) unsalted butter, melted – Use salted butter if that’s all you have, just reduce any added salt elsewhere. (adds richness and helps the crust hold together)
- 2 tablespoons (25g) granulated sugar – Optional but recommended if your gingersnaps aren’t very sweet. (balances the spice)
For the Pumpkin Filling
- 8 ounces (226g) cream cheese, softened to room temperature – Full-fat is best for texture, but Neufchâtel (lower fat) works well too. Let it sit out for at least 30 minutes.
- 1 cup (240ml) heavy whipping cream, cold – You’ll whip this yourself. Don’t use cool whip here; the texture won’t be as stable. (use dairy-free coconut cream if needed)
- 1 cup (245g) canned pumpkin puree – Not pumpkin pie filling! Make sure it’s 100% pure pumpkin. Libby’s is my go-to brand.
- ¾ cup (150g) packed light brown sugar – Dark brown sugar works too for a deeper molasses flavor. (adds moisture and depth)
- 1 teaspoon vanilla extract – Pure vanilla extract is worth the splurge here.
- 1 ½ teaspoons pumpkin pie spice – Or make your own: ½ tsp cinnamon, ¼ tsp ginger, ¼ tsp nutmeg, ⅛ tsp cloves, ⅛ tsp allspice.
- ½ teaspoon ground cinnamon – For extra warmth. I love Simply Organic brand.
- ¼ teaspoon salt – Enhances all the flavors and balances the sweetness.
For Garnish (Optional but Recommended)
- Whipped cream – Homemade or store-bought.
- Crushed gingersnaps – For sprinkling on top.
- Caramel sauce – A drizzle takes it over the top.
Equipment Needed
You don’t need a lot of fancy tools for this creamy no-bake pumpkin pie with gingersnap crust, which is part of why I love it. Here’s what you’ll need:
- Food processor or rolling pin – For crushing the gingersnaps. A food processor makes it effortless, but a zip-top bag and a rolling pin work just fine. I’ve done both, and honestly, the bag method is oddly satisfying—just be careful not to tear the bag!
- 9-inch pie dish – Glass or ceramic works best. I use a deep-dish glass pie plate for extra filling.
- Electric mixer – Hand mixer or stand mixer with the whisk attachment. You need this to whip the cream and beat the cream cheese until smooth. A whisk and strong arm work in a pinch, but it takes forever.
- Large mixing bowls – At least two: one for the crust mixture and one for the filling.
- Measuring cups and spoons – For accuracy. Baking is a science, even when it’s no-bake.
- Rubber spatula – For scraping every last bit of filling into the crust. Don’t waste any!
- Plastic wrap – To cover the pie while it chills.
If you don’t have a food processor, no worries. Place the gingersnaps in a sturdy zip-top bag, seal it, and crush them with a rolling pin or even a heavy skillet. It’s a little messy but totally doable. For the mixer, even a cheap hand mixer from the grocery store will work—I used one from Target for years.
Preparation Method
Let’s get to the fun part. This creamy no-bake pumpkin pie with gingersnap crust comes together in about 20 minutes of active work, plus at least 4 hours of chilling. Trust me, the wait is worth it.
Step 1: Make the Gingersnap Crust
Place the gingersnap cookies in your food processor and pulse until they turn into fine crumbs. You should have about 2 cups. If you’re using the bag method, crush them until no large pieces remain—some texture is fine, but you want mostly fine crumbs. Transfer the crumbs to a medium bowl. Pour in the melted butter and sugar (if using), and stir with a fork until the mixture looks like wet sand and holds together when pressed. It should feel like damp beach sand.
Pour the mixture into your 9-inch pie dish. Press it firmly and evenly into the bottom and up the sides. I use the bottom of a measuring cup to get it really compact—this prevents the crust from crumbling when you slice the pie later. Place the crust in the refrigerator to firm up while you make the filling, about 15 minutes.
Step 2: Whip the Cream
In a large mixing bowl, pour the cold heavy whipping cream. Using your electric mixer with the whisk attachment, beat the cream on medium-high speed until stiff peaks form. This takes about 3-4 minutes. You’ll know it’s ready when you lift the beaters and the cream stands up straight without drooping. Be careful not to over-whip, or you’ll end up with butter. Set the whipped cream aside in the refrigerator while you prepare the rest of the filling.
Step 3: Make the Pumpkin Base
In another large bowl, beat the softened cream cheese with the electric mixer (no need to clean the beaters) on medium speed until smooth and creamy, about 2 minutes. Scrape down the sides of the bowl with your spatula. Add the pumpkin puree, brown sugar, vanilla extract, pumpkin pie spice, cinnamon, and salt. Beat on medium speed until everything is well combined and smooth, about 1-2 minutes. The mixture should be thick and fragrant—take a moment to smell it; it’s the essence of fall.
Step 4: Fold Everything Together
Now comes the delicate part. Remove the whipped cream from the fridge. Using a rubber spatula, gently fold about one-third of the whipped cream into the pumpkin mixture. This lightens the batter and makes it easier to incorporate the rest. Add the remaining whipped cream and fold gently until no white streaks remain. Be patient here—you don’t want to deflate all that air you whipped into the cream. The final mixture should be light, airy, and a beautiful pale orange color.
Step 5: Assemble the Pie
Remove the crust from the refrigerator. Spoon the pumpkin filling into the prepared crust, spreading it evenly with your spatula. Give the pie dish a few gentle taps on the counter to release any air bubbles. Smooth the top as best you can—it doesn’t have to be perfect, but a nice surface makes for prettier slices later.
Step 6: Chill and Set
Cover the pie loosely with plastic wrap and refrigerate for at least 4 hours, but preferably overnight. The longer it chills, the cleaner your slices will be. I know it’s tempting to dig in early, but trust me—the texture needs this time to set properly. If you’re in a rush, 4 hours is the absolute minimum. For best results, give it 6-8 hours or overnight.
Step 7: Garnish and Serve
When you’re ready to serve, remove the pie from the fridge. If you want, top with a layer of whipped cream, a sprinkle of crushed gingersnaps, and a drizzle of caramel sauce. Use a sharp knife to slice, wiping the blade clean between cuts for neat pieces. Serve cold straight from the fridge.
Cooking Tips & Techniques
Over the course of testing this creamy no-bake pumpkin pie with gingersnap crust, I made my fair share of mistakes. Here’s what I learned so you don’t have to repeat them.
Don’t skip softening the cream cheese. I made this mistake once—used cold cream cheese straight from the fridge—and ended up with lumpy filling no matter how long I beat it. Let it sit on the counter for at least 30 minutes, or microwave it in 10-second bursts until it’s soft but not warm.
Whip the cream to stiff peaks, not soft peaks. Soft peaks will deflate when you fold them into the pumpkin mixture, leaving you with a dense, flat pie. Stiff peaks give the filling structure and that mousse-like texture. If you’re unsure, err on the side of over-whipping (but stop before it turns grainy).
Press the crust firmly. A loose crust will crumble when you try to serve the pie. Use the bottom of a glass or measuring cup to really pack it down. I also like to chill the crust for a full 30 minutes before adding the filling—it helps it hold together better.
Let the pie chill overnight if possible. I know, I said this already, but it’s that important. The filling needs time to set completely. I once served it after only 3 hours, and the slices were a bit messy. Overnight chilling gives you those clean, beautiful slices that impress everyone.
Use a wet knife for clean slices. Run your knife under hot water, wipe it dry, then slice. The heat helps the knife glide through the cold filling without sticking. Wipe the blade clean between each cut.
Variations & Adaptations
One of the best things about this creamy no-bake pumpkin pie with gingersnap crust is how adaptable it is. Here are some variations I’ve tried and loved:
Gluten-Free Version: Use gluten-free gingersnap cookies for the crust. Mi-Del makes a great gluten-free gingersnap that works perfectly. The rest of the ingredients are naturally gluten-free, so this is an easy swap.
Dairy-Free Version: Substitute the cream cheese with a dairy-free cream cheese alternative (like Kite Hill or Tofutti). For the whipped cream, use full-fat coconut cream—chill a can of coconut milk overnight, scoop out the solid top, and whip it with a little powdered sugar. It’s not exactly the same, but it’s delicious in its own right.
Spiced-Up Version: Add a pinch of cayenne pepper or black pepper to the filling for a warm, unexpected kick. I tried this once for a dinner party, and people couldn’t stop talking about the “secret ingredient.” It doesn’t make the pie spicy—just more complex.
Chocolate Twist: Melt 4 ounces of dark chocolate and drizzle it into the filling before folding in the whipped cream. Swirl it gently for a marbled effect. The chocolate pairs beautifully with the gingersnap crust.
Individual Servings: Instead of a pie dish, use small mason jars or ramekins. Layer the crust and filling for cute, portable desserts. This is perfect for parties or if you want portion control (ha, good luck with that).
Serving & Storage Suggestions
This creamy no-bake pumpkin pie with gingersnap crust is best served cold, straight from the refrigerator. I like to take it out about 10 minutes before serving to take the chill off slightly, but it should still be firm.
For presentation, I top it with a generous swirl of whipped cream, a sprinkle of crushed gingersnaps, and a drizzle of caramel sauce. A few fresh cranberries or a cinnamon stick on top make it look extra festive for the holidays. It pairs beautifully with a cup of hot coffee or spiced chai—honestly, it’s the perfect fall dessert pairing.
Storage Instructions: Cover the pie tightly with plastic wrap or aluminum foil and store it in the refrigerator for up to 5 days. The flavors actually deepen over time, so day 2 or 3 is often the best. I don’t recommend freezing this pie—the texture of the cream cheese and whipped cream can become grainy when thawed.
Reheating? Don’t. This is a no-bake pie meant to be served cold. If you want a warm dessert, make a traditional baked pumpkin pie. That said, if you accidentally leave it out for an hour, it’s still safe to eat—just pop it back in the fridge to firm up.
Nutritional Information & Benefits
While this creamy no-bake pumpkin pie with gingersnap crust is definitely a treat, it does have some redeeming qualities. Pumpkin is packed with vitamin A (great for eye health) and fiber, while the spices—cinnamon, ginger, nutmeg—have anti-inflammatory properties. The cream cheese and heavy cream add calcium and protein, though they’re also the main sources of fat and calories.
| Nutrient | Per Slice (1/8 of pie) |
|---|---|
| Calories | ~380 |
| Total Fat | 26g |
| Saturated Fat | 15g |
| Carbohydrates | 34g |
| Sugar | 24g |
| Protein | 5g |
| Vitamin A | 180% DV |
| Calcium | 8% DV |
This recipe is vegetarian and can easily be made gluten-free or dairy-free with the substitutions mentioned above. It does contain dairy, gluten (unless modified), and nuts (if you add the optional caramel sauce). If you’re watching your sugar intake, you can reduce the brown sugar to ½ cup, but the filling will be slightly less stable.
Conclusion
Honestly, this creamy no-bake pumpkin pie with gingersnap crust has become my go-to fall dessert for a reason. It’s ridiculously easy to make, requires no oven time, and tastes like you spent hours in the kitchen. The combination of the spicy, crunchy gingersnap crust and the silky, spiced pumpkin filling is just perfect—it’s comfort food at its finest, without any of the stress.
I love that you can make it ahead of time for holidays, or whip it up on a random Wednesday night when a craving hits (trust me, I’ve been there). It’s forgiving, adaptable, and always gets rave reviews. Whether you’re a seasoned baker or someone who’s never made a pie from scratch, this recipe is for you.
So go ahead—give it a try! I’d love to hear how it turns out. Leave a comment below and let me know if you made any fun variations, or tag me in your photos on social media. Happy fall baking, friends—or should I say, happy fall no-baking!
Frequently Asked Questions
Can I use a store-bought graham cracker crust instead of making a gingersnap crust?
You can, but honestly, the gingersnap crust is what makes this pie special. The spicy, molasses flavor of the gingersnaps complements the pumpkin filling perfectly. If you’re in a pinch, a graham cracker crust will work, but you’ll miss out on that extra layer of flavor.
Do I have to use heavy cream, or can I use Cool Whip?
I strongly recommend using real heavy cream and whipping it yourself. Cool Whip has stabilizers that can make the filling feel a bit artificial and less creamy. Plus, homemade whipped cream gives you that light, airy texture that makes this pie so luxurious. If you must use Cool Whip, thaw it completely and fold it in gently.
Can I make this pie vegan?
Yes! Use a dairy-free cream cheese alternative (like Kite Hill or Tofutti), and substitute the heavy cream with full-fat coconut cream. For the crust, make sure your gingersnaps are vegan—most are, but check the label. The rest of the ingredients are plant-based. The texture will be slightly different, but it’s still delicious.
Why is my pie filling runny?
This usually happens for one of three reasons: (1) the cream cheese wasn’t fully softened, leaving lumps that didn’t set properly; (2) the whipped cream wasn’t whipped to stiff peaks, so it deflated; or (3) the pie didn’t chill long enough. Make sure to follow the steps carefully and give it at least 4 hours in the fridge, preferably overnight.
Can I freeze this pie for later?
I don’t recommend freezing this pie. The cream cheese and whipped cream base can become grainy and watery when thawed, ruining the silky texture. If you need to make it ahead, it keeps well in the refrigerator for up to 5 days. For longer storage, freeze the crust separately (without filling) for up to 3 months, then make the filling fresh when you’re ready.
Pin This Recipe!
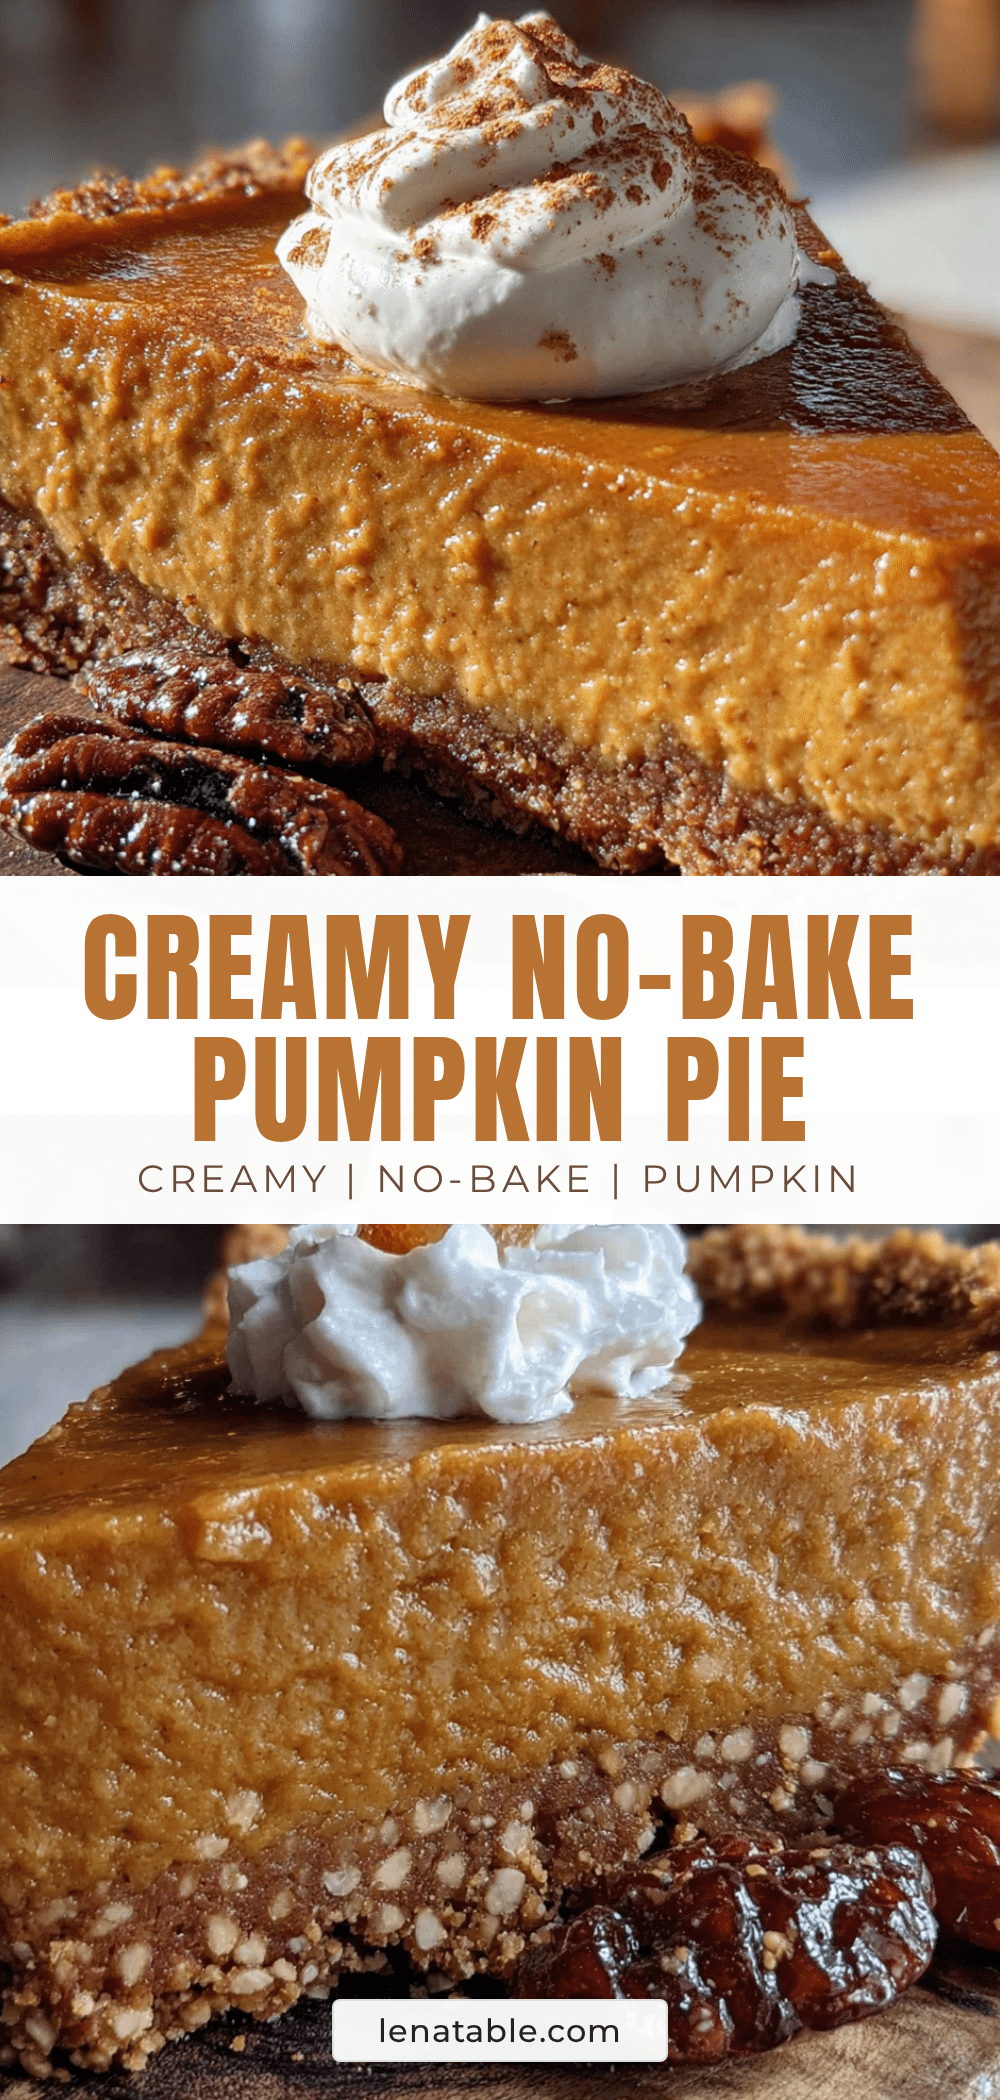
Creamy No-Bake Pumpkin Pie with Gingersnap Crust
A silky, no-bake pumpkin pie with a spicy gingersnap crust that sets perfectly in the fridge. It’s easy to make, requires no oven, and tastes like all the best parts of fall.
- Prep Time: 20 minutes
- Cook Time: 0 minutes
- Total Time: 4 hours 20 minutes (includes chilling)
- Yield: 8 servings 1x
- Category: Dessert
- Cuisine: American
Ingredients
- 2 cups (about 200g) gingersnap cookie crumbs
- 6 tablespoons (85g) unsalted butter, melted
- 2 tablespoons (25g) granulated sugar (optional)
- 8 ounces (226g) cream cheese, softened to room temperature
- 1 cup (240ml) heavy whipping cream, cold
- 1 cup (245g) canned pumpkin puree (not pumpkin pie filling)
- 3/4 cup (150g) packed light brown sugar
- 1 teaspoon vanilla extract
- 1 1/2 teaspoons pumpkin pie spice
- 1/2 teaspoon ground cinnamon
- 1/4 teaspoon salt
- Whipped cream, for garnish (optional)
- Crushed gingersnaps, for garnish (optional)
- Caramel sauce, for garnish (optional)
Instructions
- Make the crust: Place gingersnap cookies in a food processor and pulse into fine crumbs. Transfer to a medium bowl, add melted butter and sugar (if using), and stir until mixture resembles wet sand. Press firmly into the bottom and up the sides of a 9-inch pie dish. Refrigerate for 15 minutes while you make the filling.
- Whip the cream: In a large bowl, beat cold heavy whipping cream with an electric mixer on medium-high speed until stiff peaks form, about 3-4 minutes. Set aside in the refrigerator.
- Make the pumpkin base: In another large bowl, beat softened cream cheese on medium speed until smooth, about 2 minutes. Add pumpkin puree, brown sugar, vanilla extract, pumpkin pie spice, cinnamon, and salt. Beat until well combined and smooth, about 1-2 minutes.
- Fold together: Gently fold about one-third of the whipped cream into the pumpkin mixture to lighten it. Add the remaining whipped cream and fold gently until no white streaks remain. The mixture should be light, airy, and pale orange.
- Assemble the pie: Remove crust from the refrigerator. Spoon the pumpkin filling into the crust, spreading evenly. Tap the pie dish gently on the counter to release air bubbles. Smooth the top.
- Chill: Cover loosely with plastic wrap and refrigerate for at least 4 hours, preferably overnight, until set.
- Garnish and serve: Before serving, top with whipped cream, crushed gingersnaps, and caramel sauce if desired. Slice with a sharp knife, wiping the blade clean between cuts. Serve cold.
Notes
For best results, chill the pie overnight. Use a wet knife for clean slices. The pie can be stored in the refrigerator for up to 5 days. Do not freeze.
Nutrition
- Serving Size: 1 slice (1/8 of pie)
- Calories: 380
- Sugar: 24
- Sodium: 320
- Fat: 26
- Saturated Fat: 15
- Carbohydrates: 34
- Fiber: 2
- Protein: 5
Keywords: no-bake pumpkin pie, gingersnap crust, pumpkin dessert, fall dessert, easy pumpkin pie, no oven pumpkin pie


