Love this? Save it for later!
Share the inspiration with your friends
It was 10:47 PM on a random Thursday in October, and I was supposed to be meal-prepping for the week. Instead, I found myself staring at a bag of slivered almonds and a stick of butter, muttering about how boring regular sugar cookies are. The Halloween party was in two days, and I had promised my friend Jenna I’d bring something “properly disturbing.” No pressure, right?
I didn’t have a recipe for witch finger cookies, but I had this weird idea that just wouldn’t let go. What if the cookies actually looked like real fingers? I mean, really real — with knuckles, wrinkles, and creepy almond nails. I grabbed my rolling pin and a paring knife, and honestly, I felt a little unhinged standing there at midnight, shaping dough into gnarled fingers. My kitchen looked like a crime scene of flour and almond slivers.
Maybe you’ve been there — that moment when a silly idea turns into an obsession, and you can’t go to bed until you’ve seen it through. These creepy witch finger cookies with almond nails became my Halloween signature that night. They’re weird, they’re wonderful, and they get the best reactions at any party. People scream, then they laugh, then they eat three of them. Let me tell you, that’s the kind of recipe magic you can’t plan for.
Why You’ll Love This Recipe
After making these cookies for five different Halloween parties (and one very confused book club meeting), I can tell you exactly why they work so well. I’ve tested the dough consistency, the almond placement technique, and the perfect baking time so you don’t have to.
- Spookily Simple : The dough comes together in under 15 minutes, and the shaping part is actually fun. You don’t need any fancy cutters or molds — just your hands and a bit of imagination.
- Everyday Ingredients : Butter, sugar, flour, eggs, and almonds. That’s it. No weird gelatin or specialty baking supplies required.
- Perfect for Halloween : These are the life of any costume party, trunk-or-treat event, or spooky movie night. Kids and adults both lose their minds over them.
- Surprisingly Delicious : Here’s the thing — they’re not just a gimmick. These are genuinely good shortbread-style cookies with a lovely almond flavor from the extract and the nut topping.
- Make-Ahead Friendly : You can shape them a day ahead and bake them fresh. Or freeze them for up to a month. Total lifesaver for busy holiday prep.
What makes these different from other witch finger recipes you’ll find online is the texture. I spent three batches getting the dough just right — not too crumbly, not too soft. They need to hold their shape during baking while still being tender when you bite into them. These cookies make people do a double-take, which is honestly the best part of any Halloween treat.
What Ingredients You Will Need
This recipe uses simple, pantry-friendly ingredients to create cookies that look disturbingly realistic. The key is using the right kind of almonds and getting the flavor balance just right.
For the Cookie Dough
- 1 cup unsalted butter, softened to room temperature (I prefer Kerrygold for the rich flavor, but any good butter works)
- 1 cup powdered sugar, sifted (this gives the cookies a melt-in-your-mouth texture compared to granulated sugar)
- 1 large egg, room temperature
- 1 teaspoon vanilla extract
- 1/2 teaspoon almond extract (don’t skip this — it’s what makes them taste like authentic witch fingers)
- 2 1/2 cups all-purpose flour, spooned and leveled
- 1/2 teaspoon salt
- Red food coloring (gel works best, about 1/2 teaspoon for that creepy bloody look around the nail bed)
For the Fingernails
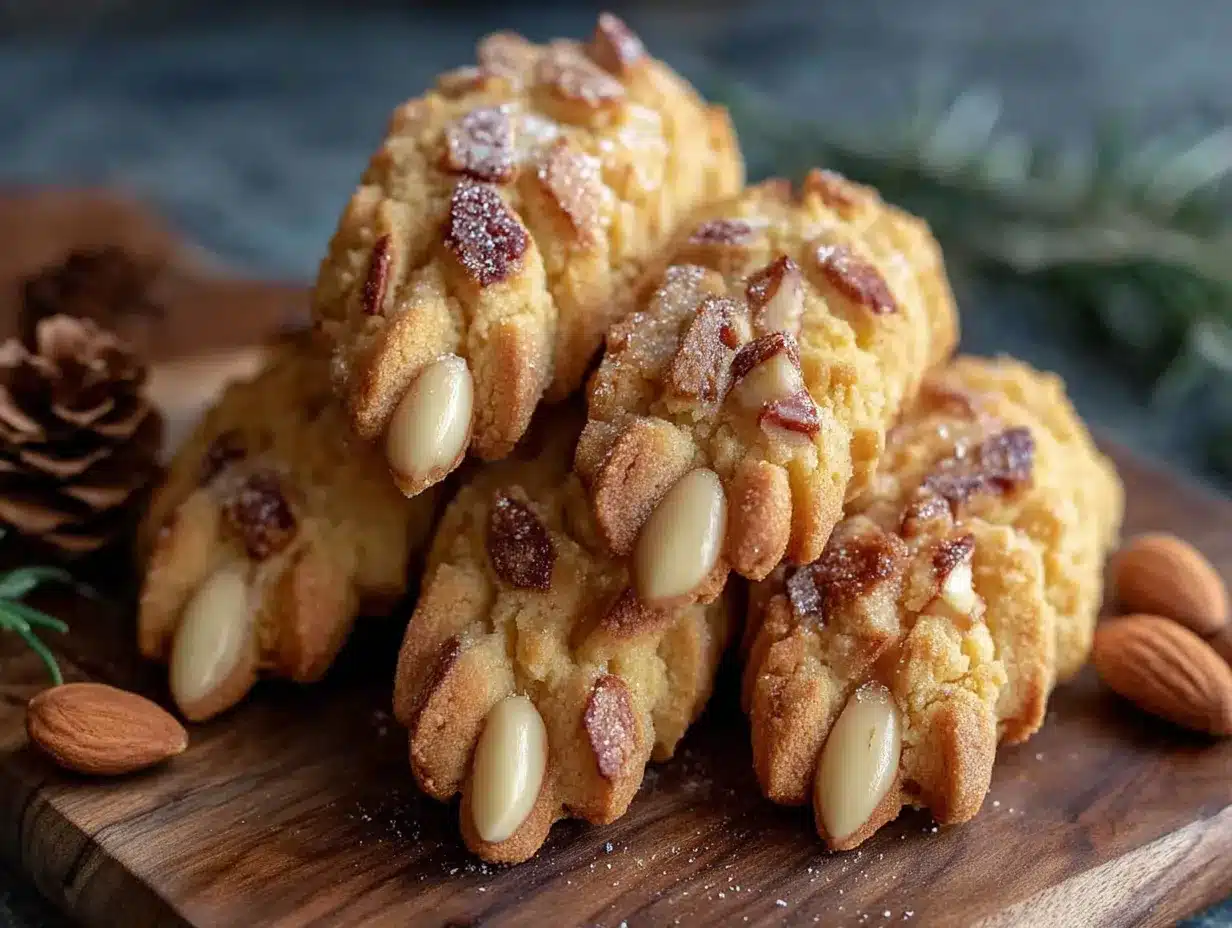
- About 24 whole blanched almonds (the slivered ones are too small — you want the whole almond shape for realistic nails)
- 2 tablespoons strawberry or raspberry jam (for the “blood” effect around the nail bed — I like Bonne Maman for the deep red color)
Ingredient Tips from My Kitchen
I learned the hard way that almond extract is non-negotiable here. My first batch without it tasted like plain sugar cookies, and the whole effect fell flat. The almond extract gives that subtle marzipan flavor that makes people think, “Wait, is this actually a finger?”
For the almonds, look for whole blanched almonds in the baking aisle. The blanched ones have the skin removed, which gives them that pale, fleshy nail color. If you can only find raw almonds with skins, you can blanch them yourself by boiling them for 30 seconds and slipping the skins off. I’ve done both, and honestly, the pre-blanched ones save so much time.
The red food coloring is optional, but I promise it takes these from “cute Halloween cookies” to “genuinely unsettling.” Just a tiny dab around where the almond meets the dough creates that bruised, bloody nail bed effect. My niece refused to eat one until she saw me bite into it, and then she ate four.
Equipment Needed
You don’t need much for these creepy cookies, which is part of why I love making them. Here’s what you’ll want on hand:
- Stand mixer or hand mixer — Creaming the butter and sugar properly is crucial. I’ve made these with a hand mixer when my KitchenAid was in the shop, and it worked fine, just took a bit longer.
- Baking sheets — Two large ones, lined with parchment paper or silicone baking mats. The silicone mats help the cookies keep their shape better than parchment, in my experience.
- Paring knife — For scoring the knuckle lines and wrinkles. A butter knife works in a pinch, but the paring knife gives you more control for those realistic creases.
- Small offset spatula — Helpful for transferring the shaped cookies to the baking sheet without distorting them. Not essential, but nice to have.
- Pastry brush — For brushing on the jam “blood.” A clean paintbrush works too, just make sure it’s never been used for actual painting.
- Cooling rack — Wire rack for cooling the cookies completely before serving.
If you’re on a budget, skip the offset spatula and use a thin metal spatula from your kitchen drawer. The pastry brush can be replaced with the back of a spoon. The most important thing is having a good sharp knife for the details.
Preparation Method
Let me walk you through this step by step. I’ve made these cookies probably fifty times now, so I know exactly where things can go wrong and how to fix them.
- Cream the butter and sugar — In your mixer bowl, beat the softened butter and powdered sugar together on medium speed until light and fluffy, about 3 minutes. Scrape down the sides halfway through. You want it to look pale and airy, not dense.
- Add the wet ingredients — Beat in the egg, vanilla extract, and almond extract until combined. The mixture might look a little curdled at this point, but don’t panic — that’s normal. Add the red food coloring now if you’re using it, and mix until the color is evenly distributed. I use about 1/2 teaspoon of gel coloring for a subtle pinkish tint that makes the cookies look more flesh-like.
- Mix in the dry ingredients — In a separate bowl, whisk together the flour and salt. Gradually add this to the wet mixture, mixing on low speed until just combined. Stop when you no longer see streaks of flour. Overmixing will make the cookies tough, and nobody wants a tough witch finger.
- Chill the dough — Wrap the dough in plastic wrap and refrigerate for at least 30 minutes. This is non-negotiable. I once tried to skip this step because I was in a hurry, and the cookies spread into blobby messes that looked more like toes than fingers. Chilled dough holds its shape during baking.
- Preheat your oven — Set it to 325°F (165°C). Line your baking sheets with parchment paper or silicone mats.
- Shape the fingers — Take about 1 tablespoon of dough and roll it into a log shape about 3 inches long. Gently taper one end to look like a fingertip and make the other end slightly thicker, like where the finger would attach to the hand. Place it on the prepared baking sheet. Don’t worry if they’re not all identical — real fingers aren’t either, and the variation makes them more convincing.
- Create the knuckles and wrinkles — Use the back of a paring knife to gently press lines across the finger at the knuckle points. You want 2-3 lines per finger. Also press some diagonal lines to mimic the natural creases of skin. Be gentle — you want indentations, not cuts through the dough.
- Add the almond nails — Press a whole blanched almond firmly onto the tapered end of each finger. Push it in about 1/4 inch so it looks like it’s embedded in the flesh. The pointed end of the almond should point outward, away from the finger.
- Create the nail bed effect — Using a small brush or your fingertip, dab a tiny amount of strawberry or raspberry jam around the base of the almond, where it meets the dough. This creates that creepy “just ripped out” look. A little goes a long way — you want it to look like dried blood, not a jam sandwich.
- Bake the cookies — Bake for 12-15 minutes, or until the cookies are just set and the edges are very lightly golden. The bottoms should be pale, not brown. Overbaking will make them too hard and ruin the tender texture.
- Cool completely — Let the cookies cool on the baking sheet for 5 minutes, then transfer them to a wire rack to cool completely. The jam will darken as it cools, which actually makes it look more realistic.
One thing I learned the hard way: don’t overwork the dough when you’re shaping the fingers. If the dough gets too warm from your hands, the cookies will spread in the oven. If you notice the dough getting sticky, pop it back in the fridge for 10 minutes before continuing.
Cooking Tips & Techniques
I’ve made every mistake in the book with these cookies, so let me save you some trouble. Here’s what I’ve learned after years of perfecting this recipe.
The dough temperature trick — Your hands are warm, and that warmth can make the dough greasy and hard to work with. I keep a bowl of ice water nearby and dip my hands in it between shaping each cookie. It sounds weird, but it keeps the dough firm and the cookies looking sharp.
Make them look gnarly — The most realistic witch fingers aren’t perfect. Press a little harder on one side of the almond nail to make it look crooked. Add an extra knuckle crease on one finger but not another. Real fingers have scars, wrinkles, and imperfections. I once accidentally squished one finger while transferring it to the baking sheet, and it ended up looking the most realistic of all.
Watch the bake time like a hawk — Every oven runs differently. My old oven would overbrown these in 11 minutes, while my current one needs the full 15. Start checking at 10 minutes and look for the edges to barely start turning golden. The cookies will continue to firm up as they cool, so pull them out when they still look slightly underdone.
Double up on the jam — After the cookies come out of the oven and have cooled for about 5 minutes, I like to add a tiny second dab of jam around the nail bed. The heat from the cookies melts it slightly, giving it that fresh, glossy blood look. It’s a small detail, but it makes a huge difference in the creepiness factor.
Variations & Adaptations
Over the years, I’ve experimented with different versions of these cookies. Here are some of my favorites.
Gluten-Free Witch Fingers — Substitute the all-purpose flour with a 1:1 gluten-free baking flour blend. I’ve used Bob’s Red Mill with great success. The dough will be slightly more delicate, so chill it for an extra 15 minutes before shaping.
Vegan Version — Use vegan butter sticks (not the spreadable kind) and replace the egg with a flax egg (1 tablespoon ground flaxseed mixed with 3 tablespoons water, let sit for 5 minutes). The texture won’t be quite as tender, but they still look fantastic and taste great.
Different Nail Colors — Instead of almonds, try using pistachios for green nails (perfect for zombie fingers) or macadamia nuts for a paler, more sickly look. I made a batch with dyed white chocolate “nails” for a glamorous witch look, and they were a hit at a costume party.
Chocolate Witch Fingers — Replace 1/4 cup of the flour with cocoa powder for chocolate fingers. Use dark chocolate almonds or white chocolate “nails” for contrast. These taste like chocolate shortbread and are dangerously addictive.
Spiced Version — Add 1 teaspoon of pumpkin pie spice or cinnamon to the dough for a fall-flavored witch finger. The warm spices pair beautifully with the almond extract and make these perfect for Thanksgiving-themed parties.
Serving & Storage Suggestions
These cookies are best served at room temperature, arranged on a platter in a way that maximizes their creepiness. I like to scatter them loosely, as if someone dropped a handful of severed fingers on the plate. For extra effect, arrange them pointing in different directions — it makes people do a double-take before they reach for one.
They pair wonderfully with a glass of cold milk, a hot cup of spiced cider, or — for adult gatherings — a dark stout beer or a bloody mary. The sweetness of the cookies balances the bitterness of the stout beautifully.
Storage Instructions:
- Room temperature — Store in an airtight container for up to 5 days. Layer them with wax paper between each layer to prevent the almond nails from breaking off.
- Refrigerator — They’ll keep for up to 2 weeks in the fridge. Bring them to room temperature before serving for the best texture.
- Freezer — You can freeze the unbaked shaped cookies for up to 3 months. Place them on a baking sheet in the freezer until solid, then transfer to a freezer bag. Bake directly from frozen, adding 2-3 minutes to the baking time.
One thing I’ve noticed: these cookies actually taste better on the second day. The almond flavor deepens and the texture softens slightly. So don’t stress about making them the day before your party — they’ll be even better.
Nutritional Information & Benefits
Let’s be real — these are cookies, not health food. But here’s what you’re looking at per cookie (based on 24 cookies):
- Calories: Approximately 165
- Fat: 9g
- Carbohydrates: 19g
- Protein: 3g
- Sugar: 8g
The almonds actually bring some nutritional value to the table — they’re a good source of vitamin E, healthy monounsaturated fats, and magnesium. The butter provides vitamin A, and the eggs add a bit of protein. Is it a health food? Absolutely not. But for a Halloween treat, they’re not the worst option out there.
If you’re watching your sugar intake, you can reduce the powdered sugar to 3/4 cup without significantly affecting the texture. I’ve done this, and the cookies are slightly less sweet but still plenty delicious. The almond extract does a lot of heavy lifting in the flavor department.
For those with nut allergies, obviously skip the almonds entirely. You can use a small piece of dried apricot or a candy corn for the nail effect instead. The cookies won’t look quite as realistic, but they’ll still be fun and tasty.
Conclusion
These creepy witch finger cookies with almond nails have become my most-requested Halloween recipe, and I honestly never get tired of making them. There’s something deeply satisfying about watching people’s faces go from “ew, what is that?” to “oh my god, these are amazing” in the span of one bite. They’re proof that Halloween treats can be both terrifying and delicious.
I hope you’ll try making these for your next spooky gathering. Don’t be afraid to get creative with the shapes and details — the more imperfect and gnarly they look, the better. And if you come up with a variation I haven’t tried, please leave a comment below and tell me about it. I’m always looking for new ways to make these cookies even weirder.
Go ahead, make some witch fingers. Your Halloween party guests will thank you — after they stop screaming, that is.
Frequently Asked Questions
Can I make these cookies ahead of time?
Absolutely! You can shape the cookies and refrigerate them on the baking sheet for up to 24 hours before baking. Just cover them loosely with plastic wrap. You can also freeze the unbaked cookies for up to 3 months — bake them straight from frozen, adding a few extra minutes to the bake time.
Why did my cookies spread out and lose their finger shape?
This usually happens when the dough isn’t chilled enough before baking, or if your butter was too soft when you started. Make sure you chill the dough for at least 30 minutes after mixing, and if your hands are warm while shaping, dip them in cold water periodically. If the dough starts to feel greasy, pop it back in the fridge for 10 minutes.
Can I use something other than almonds for the nails?
Yes! Pistachios make great green nails for zombie fingers. Macadamia nuts give a pale, sickly look. You can also use candy corn, white chocolate chips, or even small pieces of dried fruit. Just make sure whatever you use is firmly pressed into the dough so it doesn’t fall off during baking.
How do I get the jam “blood” to look realistic?
Use a thick jam like strawberry or raspberry — the seeds add to the realistic effect. Apply it with a small brush or even a toothpick, focusing on the area where the almond meets the dough. Less is more. You can add a second dab after baking for a glossy, fresh look. The jam will darken as it cools, which actually makes it look more like dried blood.
Can I make these cookies without almond extract?
You can, but they won’t have that authentic marzipan flavor that makes them so distinctive. If you don’t have almond extract, substitute with an additional 1/2 teaspoon of vanilla extract. The cookies will still taste good — just more like regular shortbread with almond toppings.
Pin This Recipe!
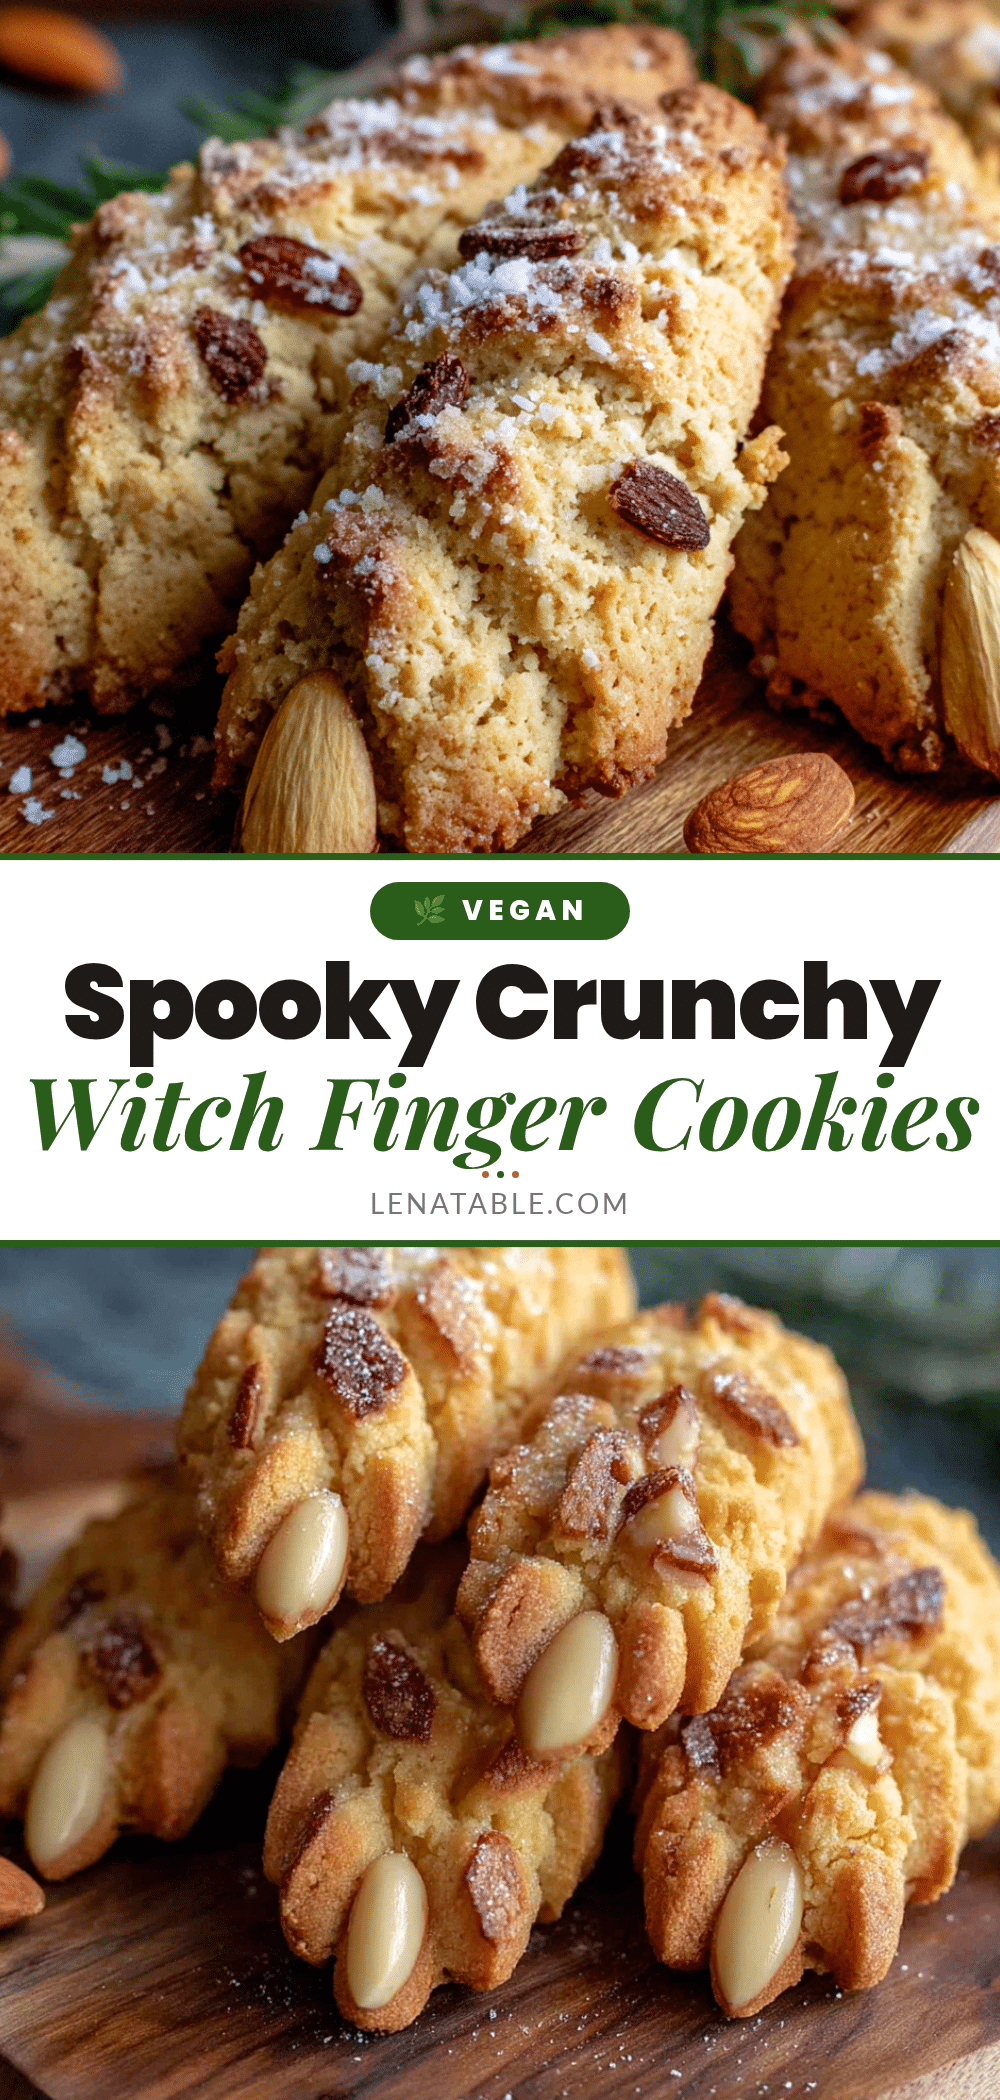
Creepy Witch Finger Cookies with Almond Nails

These disturbingly realistic witch finger cookies with almond nails are the life of any Halloween party. Made with simple ingredients, they’re delicious shortbread-style cookies that get the best reactions—people scream, then laugh, then eat three.
- Prep Time: 15 minutes
- Cook Time: 15 minutes
- Total Time: 1 hour (including 30 minutes chilling)
- Yield: 24 cookies 1x
- Category: Dessert
- Cuisine: American
Ingredients
- 1 cup unsalted butter, softened to room temperature
- 1 cup powdered sugar, sifted
- 1 large egg, room temperature
- 1 teaspoon vanilla extract
- 1/2 teaspoon almond extract
- 2 1/2 cups all-purpose flour, spooned and leveled
- 1/2 teaspoon salt
- Red food coloring (gel works best, about 1/2 teaspoon)
- About 24 whole blanched almonds
- 2 tablespoons strawberry or raspberry jam
Instructions
- Cream the butter and sugar: In your mixer bowl, beat the softened butter and powdered sugar together on medium speed until light and fluffy, about 3 minutes. Scrape down the sides halfway through.
- Add the wet ingredients: Beat in the egg, vanilla extract, and almond extract until combined. Add the red food coloring now if using, and mix until the color is evenly distributed.
- Mix in the dry ingredients: In a separate bowl, whisk together the flour and salt. Gradually add this to the wet mixture, mixing on low speed until just combined. Stop when you no longer see streaks of flour.
- Chill the dough: Wrap the dough in plastic wrap and refrigerate for at least 30 minutes.
- Preheat your oven to 325°F (165°C). Line your baking sheets with parchment paper or silicone mats.
- Shape the fingers: Take about 1 tablespoon of dough and roll it into a log shape about 3 inches long. Gently taper one end to look like a fingertip and make the other end slightly thicker. Place on the prepared baking sheet.
- Create the knuckles and wrinkles: Use the back of a paring knife to gently press lines across the finger at the knuckle points (2-3 lines per finger). Also press some diagonal lines to mimic natural skin creases.
- Add the almond nails: Press a whole blanched almond firmly onto the tapered end of each finger, pushing it in about 1/4 inch. The pointed end of the almond should point outward.
- Create the nail bed effect: Using a small brush or your fingertip, dab a tiny amount of strawberry or raspberry jam around the base of the almond where it meets the dough.
- Bake the cookies: Bake for 12-15 minutes, or until the cookies are just set and the edges are very lightly golden.
- Cool completely: Let the cookies cool on the baking sheet for 5 minutes, then transfer them to a wire rack to cool completely.
Notes
Chill the dough for at least 30 minutes to prevent spreading. Keep a bowl of ice water nearby to dip hands in between shaping to keep dough firm. For extra realism, add a tiny second dab of jam around the nail bed after baking for a glossy ‘fresh blood’ look. Cookies taste even better on the second day as the almond flavor deepens.
Nutrition
- Serving Size: 1 cookie
- Calories: 165
- Sugar: 8
- Sodium: 75
- Fat: 9
- Saturated Fat: 5
- Carbohydrates: 19
- Fiber: 1
- Protein: 3
Keywords: Halloween cookies, witch finger cookies, almond cookies, shortbread cookies, spooky treats, Halloween dessert, creepy cookies, almond nail cookies


