Love this? Save it for later!
Share the inspiration with your friends
This was supposed to be a slow-roasted chicken situation. I had the whole Sunday mapped out—low heat, a heavy pot, the kind of cooking that fills your house with that cozy, all-day aroma. But then my oven decided to throw a tantrum. The temperature knob just spun and spun, refusing to land on anything close to 300°F. I stood there, staring at it, holding a tray of seasoned chicken thighs that were already rubbed down with garlic and herbs. My plan was gone, and I was out of time.
Honestly, I almost gave up and ordered takeout. But then I looked at the air fryer sitting on my counter, this appliance I mostly use for reheating leftover fries. I thought, “Well, it gets hot fast. Let’s see what happens.” I tossed the thighs in, set the timer, and braced for the worst. I figured I’d end up with dry, sad chicken and a story to tell.
What came out of that machine was nothing like I expected. The skin was this incredible, shatteringly crisp golden brown. The meat underneath was so juicy it practically fell off the bone. I stood there in my kitchen, eating one right off the tray, completely stunned. I mean, I’d made a mistake with the oven, grabbed the wrong appliance out of frustration, and somehow stumbled onto the best chicken thighs of my life. Let me tell you, that moment changed my whole week. Now, I don’t even bother with the oven for chicken thighs anymore. The air fryer does it better, faster, and with way less fuss. If you’ve been on the fence about using your air fryer for something beyond frozen snacks, this is your sign.
Why You’ll Love This Recipe
Let’s be real for a second. We all want dinner that tastes like you spent hours in the kitchen, but nobody has time for that on a Tuesday night. These crispy air fryer chicken thighs deliver that exact feeling, minus the stress. Here’s why this recipe has become a non-negotiable staple in my kitchen:
- Quick & Easy: From fridge to plate in under 30 minutes. No marinating overnight, no complicated steps. Just a quick rub and you’re golden.
- Simple Ingredients: You probably have garlic, oil, and some dried herbs in your pantry right now. No fancy grocery store trips required.
- Perfect for Busy Weeknights: This is the kind of meal that saves you when you’re tired, hungry, and out of ideas. It pairs with almost any side you have on hand.
- Crowd-Pleaser: I’ve served these to picky kids, skeptical in-laws, and friends who swear they don’t like dark meat. Every single person went back for seconds.
- Unbelievably Delicious: The texture is what gets everyone. That crackly, crispy skin with the tender, juicy meat underneath? It’s next-level comfort food.
What makes this version different from other air fryer chicken recipes is the technique. I tested this about six times before I got it just right. It’s not just about the rub—it’s about how you prep the skin and arrange the thighs in the basket. No flipping halfway through, no messy breading. Just pure, crispy perfection that tastes like you know what you’re doing, even if you’re just learning.
This recipe is comfort food reimagined. Healthier than deep-frying, faster than roasting, but with the same soul-soothing satisfaction. It’s the kind of meal that makes you close your eyes after the first bite and forget about the chaos of your day.
What Ingredients You Will Need
This recipe uses simple, wholesome ingredients to deliver bold flavor and satisfying texture without the fuss. Most of these are pantry staples, which is exactly what you want when dinner needs to happen fast.
For the Garlic Herb Rub
- 4 bone-in, skin-on chicken thighs (about 1.5 to 2 pounds total) — The skin is key here. It crisps up beautifully in the air fryer and keeps the meat moist. You can use boneless thighs, but the cooking time will be shorter and you’ll lose some of that crispy skin magic.
- 2 tablespoons olive oil — Helps the rub stick and encourages browning. Avocado oil works great too if you have it.
- 4 cloves garlic, minced — Fresh garlic is non-negotiable here. The jarred stuff just doesn’t have the same punch. I like to use a microplane for super fine garlic that melts into the oil.
- 1 teaspoon dried thyme — Adds that earthy, slightly floral note that pairs so well with chicken.
- 1 teaspoon dried rosemary — Crush it between your fingers before adding to release the oils. It smells incredible.
- 1 teaspoon smoked paprika — This is my secret weapon. It adds color and a subtle smoky depth that makes the chicken taste like it came off a grill.
- 1 teaspoon garlic powder — Double garlic? Yes, always. The powder helps create a nice crust.
- ½ teaspoon onion powder — Rounds out the savory flavors.
- ½ teaspoon salt — I use kosher salt. It distributes better and isn’t as harsh as table salt.
- ½ teaspoon black pepper — Freshly ground if you can manage it.
- ¼ teaspoon cayenne pepper (optional) — Adds a tiny kick without making it spicy. Leave it out if you’re sensitive to heat.
Ingredient Selection Tips
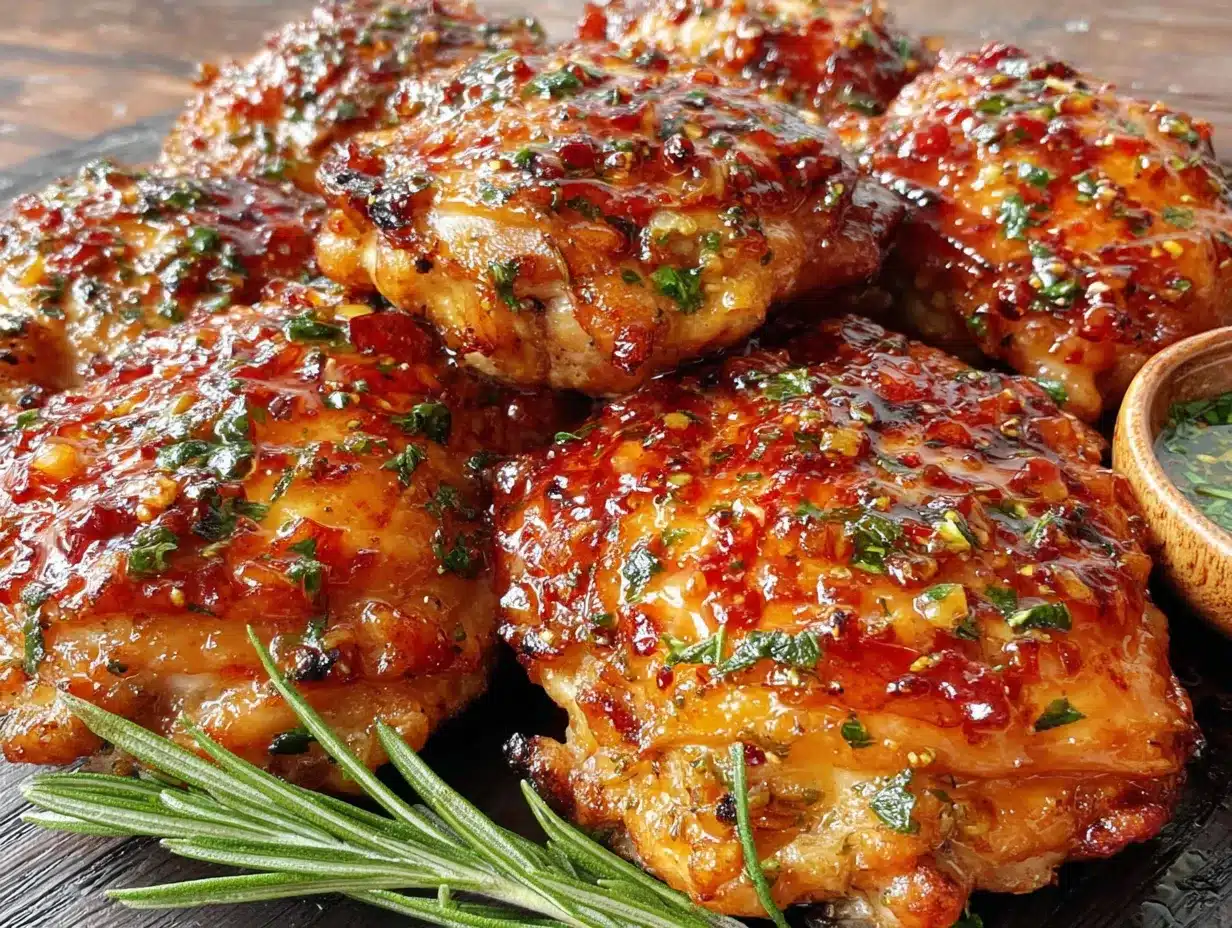
I recommend using chicken thighs from a brand you trust. I’ve had good luck with Bell & Evans and Mary’s Free Range Chicken. The quality of the bird really does matter here since the flavor is so straightforward. Look for thighs that are roughly the same size so they cook evenly. If some are much larger than others, they’ll finish at different times.
For the herbs, dried works perfectly in this rub. Fresh herbs are lovely, but they can burn in the air fryer at high temperatures. Dried herbs hold up better and concentrate their flavor. If you absolutely want to use fresh, double the amount and add them halfway through cooking.
Equipment Needed
You don’t need a professional kitchen to make this recipe work. Here’s what I use:
- Air fryer — Any basket-style air fryer works. I use a 6-quart Cosori, which fits four large thighs comfortably. If yours is smaller, cook in batches. Overcrowding is the enemy of crispiness.
- Small mixing bowl — For combining the rub ingredients.
- Paper towels — The most important tool you didn’t think about. Patting the chicken dry is non-negotiable.
- Tongs — For handling the chicken without burning your fingers.
- Instant-read thermometer — I cannot stress this enough. Guessing doneness is how you end up with dry chicken. A good thermometer takes the guesswork out.
- Cutting board and knife — For mincing garlic and any last-minute herb chopping.
If you don’t have an air fryer, you can make this in a convection oven at 400°F. The cooking time will be about 5-7 minutes longer, and you’ll want to use a wire rack set inside a baking sheet to get air circulating underneath. I’ve done it both ways, and the air fryer version is definitely crispier, but the oven version is still really good.
Preparation Method
Okay, let’s get cooking. This is straightforward, but there are a few small moves that make a big difference.
- Prep the chicken (5 minutes). Take the chicken thighs out of the fridge and pat them completely dry with paper towels. I mean really dry—get into all the nooks and crannies. Moisture is the enemy of crispy skin. Let them sit on the counter while you make the rub to take the chill off. Room temperature chicken cooks more evenly.
- Make the garlic herb rub (3 minutes). In a small bowl, combine the minced garlic, olive oil, dried thyme, dried rosemary, smoked paprika, garlic powder, onion powder, salt, black pepper, and cayenne if using. Stir it into a paste. The smell at this point is ridiculous—in a good way. Set it aside for a minute to let the flavors meld.
- Season the chicken (3 minutes). Using your hands (yes, get in there), rub the garlic herb mixture all over each chicken thigh. Make sure you get some under the skin too. Gently lift the skin with your fingers and smear a little rub directly onto the meat. This is the move that makes the flavor penetrate deep. Don’t be shy with it.
- Preheat the air fryer (3 minutes). Set your air fryer to 380°F (193°C) and let it preheat for about 3 minutes. Some air fryers don’t require preheating, but I find it helps the skin start crisping immediately. If your model doesn’t have a preheat function, just run it empty for a few minutes.
- Arrange the thighs in the basket (2 minutes). Place the seasoned chicken thighs skin-side down in the air fryer basket. This is important—starting skin-side down lets the fat render and the skin get super crispy. Leave a little space between each thigh. If they’re touching, they won’t crisp evenly. I can usually fit four large thighs in a 6-quart basket. If you need to cook more, do it in two batches.
- Cook the first side (12 minutes). Air fry at 380°F for 12 minutes. Don’t open the basket during this time. Let the air fryer do its thing. You’ll start to smell the garlic and herbs after about 5 minutes, and that’s when you know it’s working.
- Flip and finish (8-10 minutes). Using tongs, carefully flip the thighs so they’re skin-side up. Continue air frying at 380°F for another 8 to 10 minutes. The skin should be deep golden brown and crispy. If you want it even crispier, give it an extra 2 minutes. Keep an eye on it so the garlic doesn’t burn.
- Check the temperature (1 minute). This is the most important step. Insert an instant-read thermometer into the thickest part of a thigh, avoiding the bone. You’re looking for 165°F (74°C). If it’s not quite there, cook in 2-minute increments until it hits the mark. Don’t skip this—visual cues can be misleading with dark meat.
- Rest before serving (5 minutes). Remove the chicken from the air fryer and let it rest on a plate or cutting board for 5 minutes. I know it’s hard to wait, but this lets the juices redistribute. Cut into one too early and all that goodness runs out onto the board.
Cooking Tips & Techniques
I’ve made this recipe about a dozen times now, and I’ve learned a few things the hard way. Let me save you some trouble.
Don’t overcrowd the basket. This is the number one mistake people make with air fryers. If the thighs are touching or overlapping, they’ll steam instead of crisp. You’ll end up with soggy skin and unevenly cooked meat. Cook in batches if you have to. It’s worth the extra few minutes.
Pat the skin dry. I mentioned this in the instructions, but it bears repeating. Wet skin won’t crisp. Use paper towels and really press them into the skin. If you have time, you can even leave the uncovered chicken in the fridge for an hour to dry out the skin further. That’s a pro-level move.
Start skin-side down. This was a game-changer for me. Most recipes tell you to start skin-side up, but I found the skin gets much crispier when it’s pressed against the hot basket surface. The direct heat renders the fat faster and creates that crackly texture we’re after.
Use an instant-read thermometer. I used to poke at chicken and guess if it was done. Sometimes I was right, sometimes I was serving dry meat. A good thermometer costs about $15 and takes all the anxiety out of cooking chicken. Trust the number, not the timer.
Let it rest. I know you’re hungry. I’ve been there, standing over the counter, ready to tear into a thigh the second it comes out. But those 5 minutes of resting make a real difference. The juices settle, the skin stays crisp, and the meat is more tender. It’s a small sacrifice for a much better result.
One time, I forgot to pat the chicken dry and ended up with pale, rubbery skin. It was still edible, but it wasn’t the crispy masterpiece I was after. That mistake taught me more than any successful batch ever did. Now I’m obsessive about drying the chicken, and it shows in every bite.
Variations & Adaptations
This recipe is a great base, but I love playing around with different flavors. Here are a few variations I’ve tried and loved:
- Lemon Herb Version: Add the zest of one lemon to the rub and replace the dried rosemary with a teaspoon of dried oregano. Squeeze a little lemon juice over the finished chicken for brightness. It’s perfect for spring and summer meals.
- Spicy Honey Glaze: After cooking, brush the thighs with a mixture of 2 tablespoons honey and ½ teaspoon cayenne pepper. The sweet heat combo is incredible. Just be careful—the sugar in the honey can burn if you put it on too early. Glaze after cooking only.
- BBQ Style: Skip the dried herbs and use a store-bought or homemade BBQ rub instead. After cooking, brush with your favorite BBQ sauce and air fry for another 2 minutes to set the glaze. This is my go-to for game day gatherings.
- Dairy-Free Adaptation: This recipe is naturally dairy-free, so no changes needed. Just double-check that your paprika and garlic powder don’t contain any anti-caking agents with dairy.
- Boneless Thighs: If you’re using boneless, skin-on thighs, reduce the cooking time to 10 minutes skin-side down and 6-8 minutes skin-side up. Boneless cooks faster, so keep an eye on the temperature.
I once tried a version with fresh basil and sun-dried tomatoes mixed into the rub. It was good, but the basil burned in the air fryer and turned bitter. Stick with dried herbs for the rub and save fresh herbs for garnish. Learn from my mistakes.
Serving & Storage Suggestions
These crispy air fryer chicken thighs are incredibly versatile. Here’s how I like to serve them and keep them for later.
Serving: Serve the chicken hot, straight from the air fryer. The skin is at its crispiest right after cooking. I like to arrange the thighs on a platter and sprinkle them with a little flaky sea salt and fresh chopped parsley for color. They pair beautifully with simple sides like roasted vegetables, a crisp green salad, or mashed potatoes. For a low-carb option, serve with cauliflower rice or roasted broccoli. The juices from the chicken double as a light sauce—just spoon them over the top.
Storage: Leftover chicken thighs keep well in the refrigerator for up to 4 days. Store them in an airtight container. The skin will lose its crispiness in the fridge, but don’t worry—you can bring it back.
Reheating: The air fryer is the best way to reheat these. Preheat to 350°F and air fry for 3-4 minutes until the skin crisps up again. The microwave will make the skin soggy, so avoid it if you can. If you’re meal prepping, I recommend storing the chicken without any sauce and reheating in the air fryer for best results.
Freezing: Cooked chicken thighs freeze well for up to 3 months. Let them cool completely, then wrap each thigh individually in plastic wrap and place in a freezer bag. To reheat, thaw in the refrigerator overnight and then air fry at 350°F for 5-6 minutes.
The flavors actually deepen a bit overnight. I sometimes make an extra batch just for leftovers because the next-day chicken is almost better in some ways—the garlic and herbs have more time to meld.
Nutritional Information & Benefits
Here’s the approximate nutritional breakdown for one serving (one chicken thigh with skin):
- Calories: 310
- Protein: 28g
- Fat: 22g
- Carbohydrates: 2g
- Fiber: 0g
- Sugar: 0g
Chicken thighs are a fantastic source of protein, iron, and B vitamins. The skin contains healthy fats that help your body absorb fat-soluble vitamins. Compared to deep-fried chicken, this air fryer version uses significantly less oil—just two tablespoons for the entire batch. That’s a huge reduction in calories and unhealthy fats without sacrificing flavor or texture.
This recipe is naturally gluten-free, low-carb, and keto-friendly. It’s also whole30-compliant if you use a compliant oil. The only potential allergen is the chicken itself, so if you’re serving someone with a poultry allergy, this isn’t the dish for them.
I love that I can serve this to my family knowing it’s a balanced meal. The protein keeps everyone full, the healthy fats satisfy cravings, and the lack of processed ingredients means I feel good about what we’re eating. It’s the kind of recipe that fits into a healthy lifestyle without feeling like a compromise.
Conclusion
These crispy air fryer chicken thighs with garlic herb rub are proof that the best recipes often come from happy accidents. What started as a kitchen failure turned into my most-requested dinner. The combination of crackly skin, juicy meat, and bold garlic herb flavor is hard to beat, especially when it comes together in under 30 minutes.
I hope you give this recipe a try, even if you’re new to air frying. Don’t be afraid to customize the rub to your taste—add more garlic, swap the herbs, turn up the heat. Cooking is supposed to be flexible. Make it your own.
If you make these, I’d love to hear how they turn out. Drop a comment below and let me know if you added any twists or if they disappeared as fast as they do in my house. And if you’re looking for another easy weeknight dinner, you might enjoy my crispy garlic chicken or these air fryer vegetable medley for a complete meal.
Happy cooking, friend. You’ve got this.
Frequently Asked Questions
Can I use boneless, skinless chicken thighs for this recipe?
You can, but the result will be different. Boneless, skinless thighs cook faster (about 15 minutes total at 380°F) and won’t have that crispy skin. They’ll still be juicy and flavorful, just not as crunchy. If you’re watching calories or prefer white meat, it’s a solid option.
Do I need to preheat the air fryer?
I recommend it. Preheating for 3 minutes helps the skin start crisping immediately. If your air fryer doesn’t have a preheat setting, just run it empty for a few minutes before adding the chicken. It makes a noticeable difference in the final texture.
Can I use frozen chicken thighs?
I don’t recommend it. Frozen chicken releases a lot of water as it thaws, which steams the skin and prevents crisping. If you’re in a pinch, thaw the thighs completely in the refrigerator and pat them very dry before seasoning. The cooking time will be about the same.
How do I keep the chicken from sticking to the air fryer basket?
Make sure you use enough oil in the rub and that the basket is clean. If you’re worried about sticking, you can spray the basket with a little cooking spray before adding the chicken. I’ve never had a problem with sticking as long as the skin is well-oiled.
Can I make this recipe ahead of time?
Yes, but the skin is best fresh. You can season the chicken up to 24 hours in advance and keep it covered in the refrigerator. Let it come to room temperature for 15 minutes before air frying. For meal prep, cook the chicken, let it cool, and reheat in the air fryer for best results.
Pin This Recipe!

Crispy Air Fryer Chicken Thighs with Garlic Herb Rub

These crispy air fryer chicken thighs with garlic herb rub are proof that the best recipes often come from happy accidents. What started as a kitchen failure turned into my most-requested dinner, with crackly skin, juicy meat, and bold garlic herb flavor in under 30 minutes.
- Prep Time: 10 minutes
- Cook Time: 20 minutes
- Total Time: 30 minutes
- Yield: 4 servings 1x
- Category: Main Course
- Cuisine: American
Ingredients
- 4 bone-in, skin-on chicken thighs (about 1.5 to 2 pounds total)
- 2 tablespoons olive oil
- 4 cloves garlic, minced
- 1 teaspoon dried thyme
- 1 teaspoon dried rosemary
- 1 teaspoon smoked paprika
- 1 teaspoon garlic powder
- ½ teaspoon onion powder
- ½ teaspoon salt
- ½ teaspoon black pepper
- ¼ teaspoon cayenne pepper (optional)
Instructions
- Prep the chicken (5 minutes). Take the chicken thighs out of the fridge and pat them completely dry with paper towels. Let them sit on the counter while you make the rub to take the chill off.
- Make the garlic herb rub (3 minutes). In a small bowl, combine the minced garlic, olive oil, dried thyme, dried rosemary, smoked paprika, garlic powder, onion powder, salt, black pepper, and cayenne if using. Stir it into a paste.
- Season the chicken (3 minutes). Using your hands, rub the garlic herb mixture all over each chicken thigh. Make sure you get some under the skin too.
- Preheat the air fryer (3 minutes). Set your air fryer to 380°F (193°C) and let it preheat for about 3 minutes.
- Arrange the thighs in the basket (2 minutes). Place the seasoned chicken thighs skin-side down in the air fryer basket, leaving a little space between each thigh.
- Cook the first side (12 minutes). Air fry at 380°F for 12 minutes. Don’t open the basket during this time.
- Flip and finish (8-10 minutes). Using tongs, carefully flip the thighs so they’re skin-side up. Continue air frying at 380°F for another 8 to 10 minutes until deep golden brown and crispy.
- Check the temperature (1 minute). Insert an instant-read thermometer into the thickest part of a thigh, avoiding the bone. You’re looking for 165°F (74°C).
- Rest before serving (5 minutes). Remove the chicken from the air fryer and let it rest on a plate or cutting board for 5 minutes.
Notes
Don’t overcrowd the basket. Pat the skin dry thoroughly. Start skin-side down for maximum crispiness. Use an instant-read thermometer to ensure doneness. Let the chicken rest for 5 minutes before serving. For boneless thighs, reduce cooking time to 10 minutes skin-side down and 6-8 minutes skin-side up.
Nutrition
- Serving Size: 1 chicken thigh
- Calories: 310
- Sodium: 450
- Fat: 22
- Saturated Fat: 6
- Carbohydrates: 2
- Protein: 28
Keywords: air fryer chicken thighs, crispy chicken thighs, garlic herb chicken, easy weeknight dinner, gluten-free chicken, keto chicken


